set SRC1=toes.png
set SRC2=bp_src2.png

%IMG7%magick ^
  toes.png ^
  -negate -flip -flop ^
  %SRC2%
Images can be blended by making Laplacian pyramids, blending these to make a third, and collapsing it.
Feathering, which uses a gradient to modulate alpha in order to blend images, is a quick but crude technique that blends data of all frequencies by the same spatial amount. It either cuts large-scale features into distracting seams, or creates ghosting of small-scale features. We can reduce both these problems by blending Laplacian pyramids.
The technique is also called multi-resolution splining.
This page builds on material in:
Scripts on this page assume that the version of ImageMagick in %IM7DEV% has been built with various process modules. See Process modules.
References:
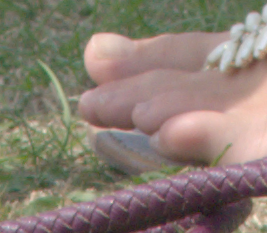
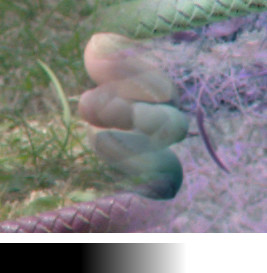
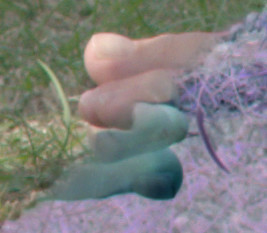
Take two images of the same size.
set SRC1=toes.png |
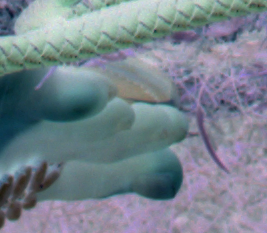
|
set SRC2=bp_src2.png %IMG7%magick ^ toes.png ^ -negate -flip -flop ^ %SRC2% |
|
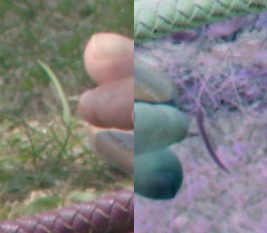
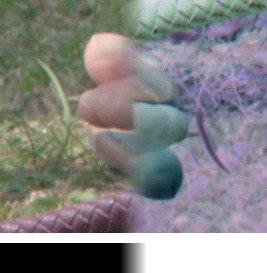
Suppose we want to blend the left half of image A with the right half of image B.
Hard cut:
%IMG7%magick ^ %SRC1% ^ %SRC2% ^ -crop 2x1@ +repage ^ -delete 1-2 ^ +append +repage ^ bp_hard.png |
|
The cut is sharp. It is the sharpest feature in the image. It is distracting.
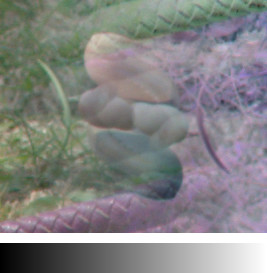
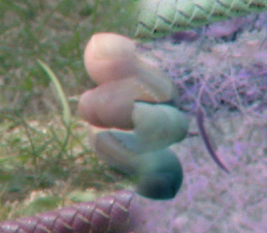
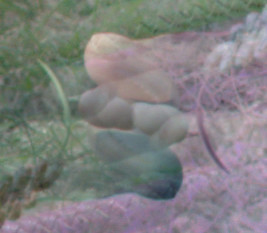
Alpha blend:
%IMG7%magick ^
  %SRC1% ^
  %SRC2% ^
  ( -clone 0 ^
    -sparse-color bilinear ^
      "0,0,Black %%[fx:w-1],0,White" ^
    +write mpr:GRAD ^
  ) ^
  -alpha off ^
  -composite ^
  -size 10x10 xc:White ^
  ( mpr:GRAD ^
    -crop x30+0+0 +repage ) ^
  -append +repage ^
  bp_alph1.png
|
|
%IMG7%magick ^
  %SRC1% ^
  %SRC2% ^
  ( -clone 0 ^
    -sparse-color bilinear ^
      "0,0,Black %%[fx:w-1],0,White" ^
    -level 30%%,70%% ^
    +write mpr:GRAD ^
  ) ^
  -alpha off ^
  -composite ^
  -size 10x10 xc:White ^
  ( mpr:GRAD ^
    -crop x30+0+0 +repage ) ^
  -append +repage ^
  bp_alph2.png
|
|
%IMG7%magick ^
  %SRC1% ^
  %SRC2% ^
  ( -clone 0 ^
    -sparse-color bilinear ^
      "0,0,Black %%[fx:w-1],0,White" ^
    -level 45%%,55%% ^
    +write mpr:GRAD ^
  ) ^
  -alpha off ^
  -composite ^
  -size 10x10 xc:White ^
  ( mpr:GRAD ^
    -crop x30+0+0 +repage ) ^
  -append +repage ^
  bp_alph3.png
|
|
The images are superimposed across the width of the blend. This causes ghosting, where we see detail from one image bleeding through to the other.
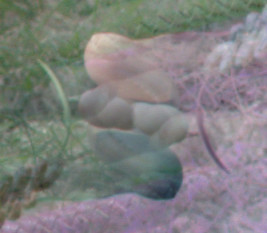
From each image, we make a Laplacian pyramid. Then we make a third pyramid, where each grid in this new pyramid is the left half of the corresponding grid in the first pyramid, appended to the right half of the grid in the second pyramid. Then we collapse this third pyramid.
set pyPREFIX=bp_blr_

call %PICTBAT%mkLapPyr %SRC1% bp_pyr1.tiff
call %PICTBAT%mkLapPyr %SRC2% bp_pyr2.tiff

set FILE_LIST=

for /L %%i in (0,1,%mklpNUM_OCTAVES%) do (

  %IMG7%magick ^
    bp_pyr1.tiff[%%i] ^
    bp_pyr2.tiff[%%i] ^
    -crop 2x1@ +repage ^
    -delete 1-2 ^
    +append +repage ^
    -strip ^
    blr_out_%%i.tiff

  set FILE_LIST=!FILE_LIST! blr_out_%%i.tiff
)

%IMG7%magick %FILE_LIST% bp_pyr3.tiff

if ERRORLEVEL 1 goto :error

sed -e 's/bp_pyr2/bp_pyr3/g' %pyPREFIX%mklp_recon.scr >blr_recon.scr

%IMG7%magick -script blr_recon.scr

if "%mklpRECON_FILE%"=="" goto :error

%IMG7%magick %mklpRECON_FILE% toes_inv.png
|
|
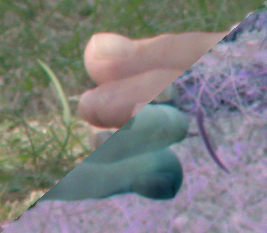
If we want a diagonal blend, or any other shape, we can make a black and white mask.
set spCORNERS=^
0,0,Black,^
%%[fx:w-1],0,gray(50%%),^
0,%%[fx:h-1],gray(50%%),^
%%[fx:w-1],%%[fx:h-1],White

%IMG7%magick ^
  %SRC1% ^
  -sparse-color bilinear ^
    "%spCORNERS%" ^
  bp_diag_msk.png
|

|
As before, we can use this mask for an alpha blend:
%IMG7%magick ^ %SRC1% ^ %SRC2% ^ bp_diag_msk.png ^ -alpha off ^ -composite ^ bp_diag1.png |
|
%IMG7%magick ^
  %SRC1% ^
  %SRC2% ^
  ( bp_diag_msk.png ^
    -level 45%%,55%% ^
  ) ^
  -alpha off ^
  -composite ^
  bp_diag2.png
|
|
%IMG7%magick ^
  %SRC1% ^
  %SRC2% ^
  ( bp_diag_msk.png ^
    -threshold 50%% ^
  ) ^
  -alpha off ^
  -composite ^
  bp_diag3.png
|
|
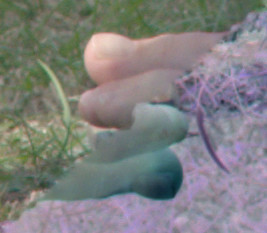
Threshold the mask:
%IMG7%magick ^ bp_diag_msk.png ^ -threshold 50%% ^ bp_diag_msk_th.png |

|
We can blend the two Laplacian pyramids using this thresholded mask. Of course, the mask is larger than most grids in the pyramid so we can't use it directly. Instead, we make a Gaussian pyramid and use each Gaussian grid as a mask for compositing the Laplacian grids into a third Laplacian, which we then collapse to reconstruct an image.
call %PICTBAT%mkGausPyr bp_diag_msk_th.png bp_msk.tiff

set FILE_LIST=

for /L %%i in (0,1,%mklpNUM_OCTAVES%) do (

  %IMG7%magick ^
    bp_pyr1.tiff[%%i] ^
    bp_pyr2.tiff[%%i] ^
    bp_msk.tiff[%%i] ^
    -alpha off -composite ^
    blr_out_d_%%i.tiff

  set FILE_LIST=!FILE_LIST! blr_out_d_%%i.tiff
)

%IMG7%magick %FILE_LIST% bp_pyr3.tiff

%IMG7%magick -script blr_recon.scr

if "%mklpRECON_FILE%"=="" goto :error

%IMG7%magick %mklpRECON_FILE% bp_diag_inv.png
|
|
The result is a smooth blend with no ghosting.
We can do the same trick with a Gaussian of the un-thresholded mask, but the result is the same as the alpha blend of the two opaque images using the gradient mask, without any use of pyramids:
call %PICTBAT%mkGausPyr bp_diag_msk.png bp_msk.tiff

set FILE_LIST=

for /L %%i in (0,1,%mklpNUM_OCTAVES%) do (

  %IMG7%magick ^
    bp_pyr1.tiff[%%i] ^
    bp_pyr2.tiff[%%i] ^
    bp_msk.tiff[%%i] ^
    -alpha off -composite ^
    blr_out_d_%%i.tiff

  set FILE_LIST=!FILE_LIST! blr_out_d_%%i.tiff
)

%IMG7%magick %FILE_LIST% bp_pyr3.tiff

%IMG7%magick -script blr_recon.scr

if "%mklpRECON_FILE%"=="" goto :error

%IMG7%magick %mklpRECON_FILE% bp_diag_inv2.png
|
|
As usual, the scripts above could be modified to create a command or script that runs magick just once overall instead of once per octave.
Instead of using a Gaussian pyramid generated from a mask, we can do a minimum-error boundary cut (MEBC) of each pair of grids of the Laplacian pyramids. See Dark paths: boundary cut.
Here is the simple MEBC of an ordinary pair of images (not pyramids):
%IM7DEV%magick ^
  %SRC1% ^
  %SRC2% ^
  ( -clone 0-1 ^
    -compose Difference -composite ^
    -process 'darkestmeander m 0 a' ^
    +write bp_dp.png ^
    -fill White ^
    -draw 'color 0,0 floodfill' ^
    -negate ^
    +write bp_dp_msk.png ^
  ) ^
  -compose Over -composite ^
  bp_me1.png
|


|
The boundary is obvious. I find this jagged boundary more distracting than the straight version, even if the two sides of the boundary are a better match.
Here we apply MEBC to each grid of the two Laplacian pyramids, creating a third, which we collapse. Each grid has its own MEBC.
set FILE_LIST=

for /L %%i in (0,1,%mklpNUM_OCTAVES%) do (

  %IM7DEV%magick ^
    bp_pyr1.tiff[%%i] ^
    bp_pyr2.tiff[%%i] ^
    ^( -clone 0-1 ^
       -compose Difference -composite ^
       -process 'darkestmeander m 0 a' ^
       -fill White ^
       -draw 'color 0,0 floodfill' ^
       -negate ^
    ^) ^
    -alpha off ^
    -compose Over -composite ^
    -depth 16 ^
    blr_out_mebc_%%i.tiff

  set FILE_LIST=!FILE_LIST! blr_out_mebc_%%i.tiff
)

%IM7DEV%magick %FILE_LIST% bp_pyr3.tiff

%IMG7%magick -script blr_recon.scr

if "%mklpRECON_FILE%"=="" goto :error

%IMG7%magick %mklpRECON_FILE% bp_mebc.png
|

|
The effect is virtually seamless, with less ghosting than the equivalent alpha-blend version. For some images, ghosting is virtually eliminated. For example:
set FILE_LIST=

for /L %%i in (0,1,%mklpNUM_OCTAVES%) do (

  %IM7DEV%magick ^
    bp_pyr1.tiff[%%i] ^
    bp_pyr2.tiff[%%i] ^
    ^( -clone 0-1 ^
       -compose Difference -composite ^
       -process 'darkestmeander m 0 a' ^
       -fill White ^
       -draw 'color 0,0 floodfill' ^
    ^) ^
    -alpha off ^
    -compose Over -composite ^
    -depth 16 ^
    blr_out_mebc_%%i.tiff

  set FILE_LIST=!FILE_LIST! blr_out_mebc_%%i.tiff
)

%IMG7%magick %FILE_LIST% bp_pyr3.tiff

%IMG7%magick -script blr_recon.scr

if "%mklpRECON_FILE%"=="" goto :error

%IMG7%magick %mklpRECON_FILE% bp_mebc2.png
|

|
There is very slight visible ghosting (a nearly horizontal boundary near the centre).
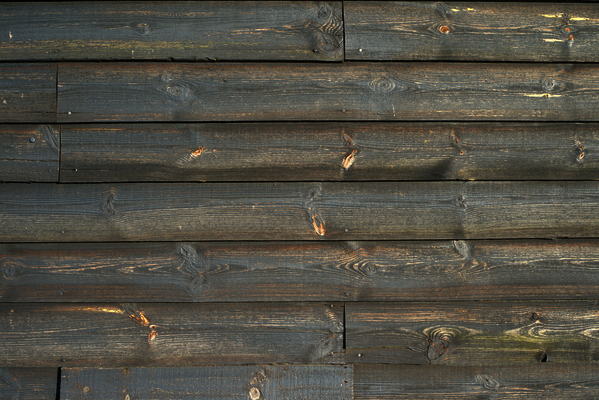
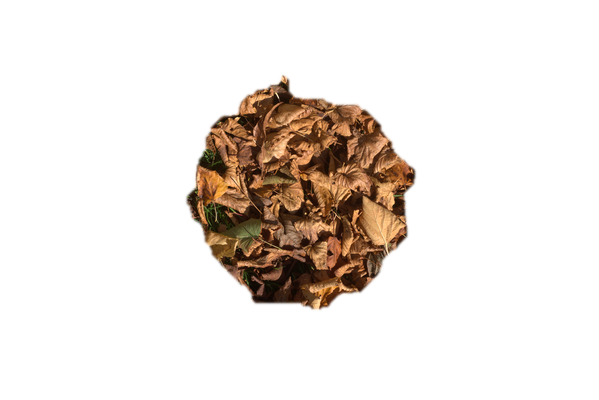
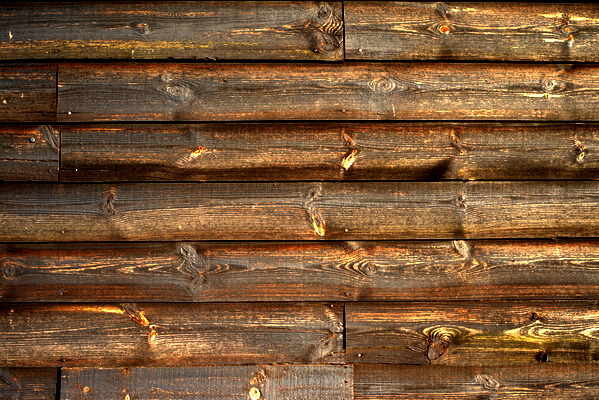
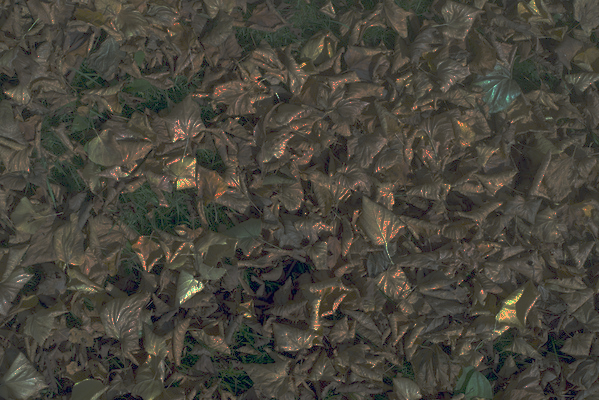
Suppose we have these two images:
set WALL=dpr_darker_wall.png |
|
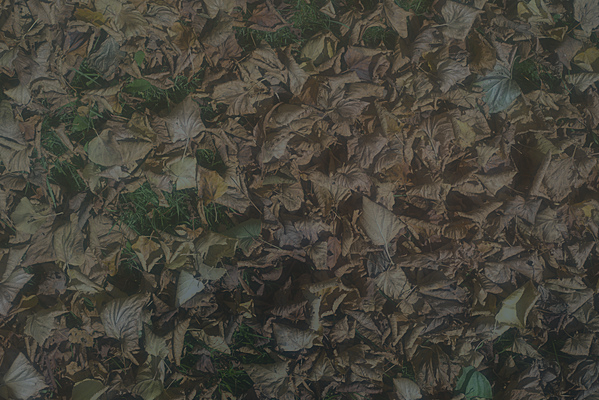
%IMG7%magick ^ dpt_lvs_sm.jpg ^ dps_lvs_msk.png ^ -alpha off ^ -compose CopyOpacity -composite ^ -background Black -alpha background ^ bp_lvs.png set LVS=bp_lvs.png |
|
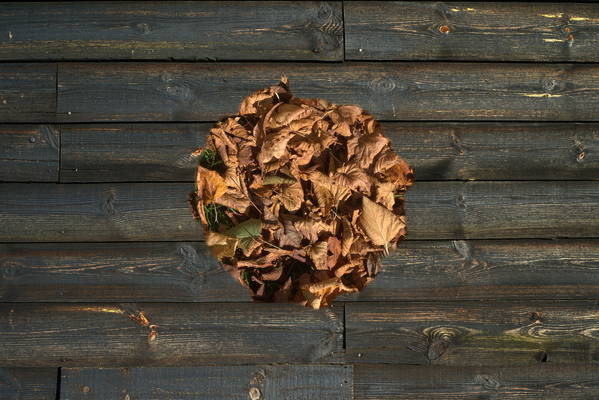
We can composite the leaves over the wall. First in the obvious way, then by corresponding pyramid layers with the script proc2LapPyr.bat. The fourth parameter to the script must be a valid IM process that takes two images and returns one image. Here, we use "-composite".
Throughout the following, we use mkpKEEP_ALPHA_RES. See Laplacian pyramids with transparency.
set mkpKEEP_ALPHA_RES=1
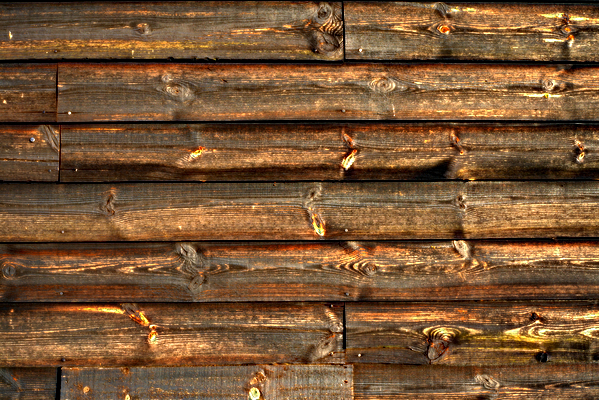
%IMG7%magick ^ %WALL% ^ %LVS% ^ -composite ^ bp_wall_lvs.png |

|
call %PICTBAT%proc2LapPyr ^
  %WALL% ^
  %LVS% ^
  . "-composite" ^
  bp_lpo.png
Low frequencies (colours) have mingled between the images.
|
|
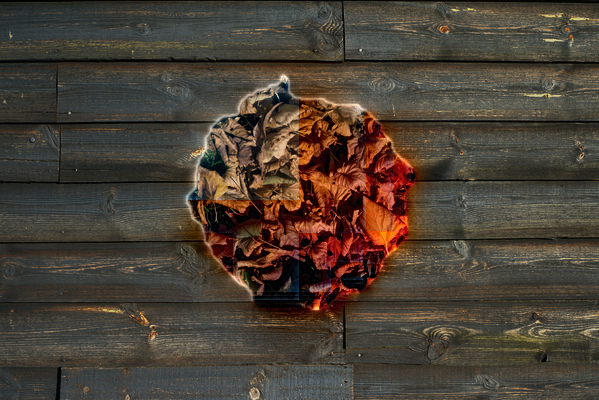
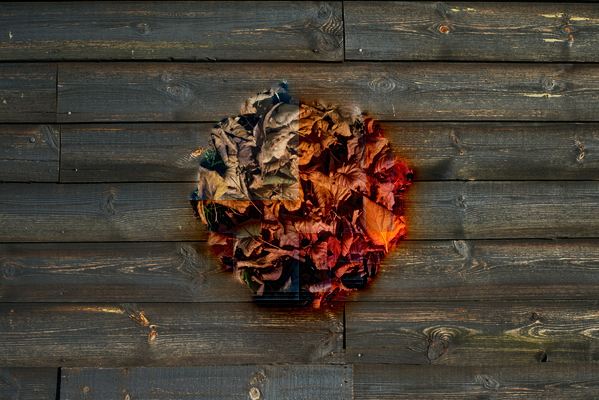
With a suitable mask, we can transition the effect.
|
Make a mask for the transition. call %PICTBAT%featherEdge ^ dps_lvs_msk.png 75 75 bp_fe.png %IMG7%magick ^ bp_fe.png ^ -solarize 50%% ^ -evaluate Multiply 2 ^ -sigmoidal-contrast 5,50%% ^ bp_fe.png |

|
|
Apply the transition mask. %IMG7%magick ^ bp_wall_lvs.png ^ bp_lpo.png ^ bp_fe.png ^ -composite ^ bp_lpo2.png |
|
The colour flattening occurs in both directions, so the wall becomes somewhat leaf-coloured and the leaves become somewhat wall-coloured. Can we hold one constant, so only the other changes? The wall is fully opaque; the leaves are somewhat transparent, in all levels of the pyramid. We can change the alpha channel by any process that doesn't change alpha=0 or alpha=100%, so fully transparent leaf pixels and fully opaque leaf and wall pixels remain as they are.
call %PICTBAT%proc2LapPyr ^
  %WALL% ^
  %LVS% ^
  . ^
  "-channel A -evaluate Pow 0.1 +channel -composite" ^
  bp_lpo3.png
Power <1 increases all alpha values except alpha=0 and alpha=100%.
|

|
call %PICTBAT%proc2LapPyr ^
  %WALL% ^
  %LVS% ^
  . ^
  "-channel A -evaluate Pow 10 +channel -composite" ^
  bp_lpo4.png
Power >1 decreases all alpha values except alpha=0 and alpha=100%.
|
|
As before, a transition mask could be used to control the placement of the effect.
In these last few examples, I have repeatedly used proc2LapPyr.bat on the same input images, which repeatedly makes the same pyramids. Applications that need multiple processing of pyramids could be more economical.
Compositing Laplacian layers will tend to colour-match the result. We can do this explicitly, for example by the Gain and bias technique. Adjusting the brightness and contrast (gain and bias) of the leaves to match the wall, or the wall to match the leaves, looks like this:
call %PICTBAT%imgGainBias ^ dpt_lvs_sm.jpg ^ %WALL% ^ bp_gb1.png |

|
call %PICTBAT%imgGainBias ^ %WALL% ^ dpt_lvs_sm.jpg ^ bp_gb2.png |
|
Alternatively, we can build Laplacian pyramids from the images, adjust the gain and bias of the grids, and collapse the result. We do this with a script matchLapGainBias.bat.
call %PICTBAT%matchLapGainBias ^ dpt_lvs_sm.jpg ^ %WALL% ^ . ^ bp_lgb1.png |
|
call %PICTBAT%matchLapGainBias ^ %WALL% ^ dpt_lvs_sm.jpg ^ . ^ bp_lgb2.png |
|
Adjusting the gain and bias via pyramids (instead of with the simple images) has slightly decreased contrast in the first result, and increased contrast in the second. It exagerates the effect slightly.
Another technique for colour-matching is shown in Process modules: matching histograms. Simple histogram-matching of the leaves to match the wall, or the wall to match the leaves, looks like this:
call %PICTBAT%matchHisto ^ dpt_lvs_sm.jpg ^ %WALL% ^ bp_mh1.png |
|
call %PICTBAT%matchHisto ^ %WALL% ^ dpt_lvs_sm.jpg ^ bp_mh2.png |

|
Compared to the gain-and-bias technique, both results have higher contrast.
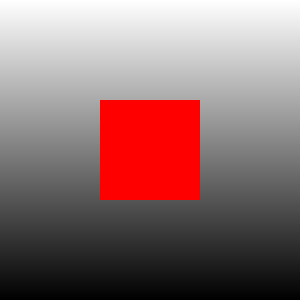
The effects can perhaps be seen more clearly with simpler examples. We create a 300x300 image for a background, and another image 100x100 extended with transparency to 300x300 for a foreground. We composite the foreground over the background in the conventional way, then via Laplacian pyramids. We show both the outputs. On some outputs, we draw a blue square showing the original boundary of the foreground.
Throughout, we use:
set mkpKEEP_ALPHA_RES=1

set BOUNDARY=-stroke Blue -fill None -draw "stroke-dasharray 10 rectangle 100,100 199,199"

set pyGRAPHIC=1
%IMG7%magick ^
  -size 300x300 xc:#7f807f ^
  bp_s1a.png

%IMG7%magick ^
  -size 100x100 xc:#f00 ^
  -gravity Center ^
  -background None -extent 300x300 ^
  bp_s1b.png

%IMG7%magick ^
  bp_s1a.png bp_s1b.png ^
  -composite ^
  bp_s1c.png

call %PICTBAT%proc2LapPyr ^
  bp_s1a.png bp_s1b.png ^
  . "-composite" ^
  bp_s1d.png
The result is an almost uniform colour. |

|
%IMG7%magick ^ -size 100x100 gradient:#f00-#fff ^ -gravity Center ^ -background None -extent 300x300 ^ bp_s2b.png %IMG7%magick ^ bp_s1a.png bp_s2b.png ^ -composite ^ bp_s2c.png call %PICTBAT%proc2LapPyr ^ bp_s1a.png bp_s2b.png ^ . "-composite" ^ bp_s2d.png %IMG7%magick ^ bp_s2d.png ^ %BOUNDARY% ^ bp_s2d.png |


|
%IMG7%magick ^ -size 300x300 gradient:white-black ^ PNG48:bp_s3a.png %IMG7%magick ^ bp_s3a.png bp_s1b.png ^ -composite ^ bp_s3c.png call %PICTBAT%proc2LapPyr ^ bp_s3a.png bp_s1b.png ^ . "-composite" ^ bp_s3d.png |

|
%IMG7%magick ^ -size 300x300 gradient:white-black ^ PNG48:bp_s4a.png %IMG7%magick ^ -size 100x100 gradient:#f00-#fff ^ -region 50x50+50+0 -negate +region ^ -gravity Center ^ -background None -extent 300x300 ^ bp_s4b.png %IMG7%magick ^ bp_s4a.png bp_s4b.png ^ -composite ^ bp_s4c.png call %PICTBAT%proc2LapPyr ^ bp_s4a.png bp_s4b.png ^ . "-composite" ^ bp_s4d.png %IMG7%magick ^ bp_s4d.png ^ %BOUNDARY% ^ bp_s4d.png |
|
%IMG7%magick ^ -size 100x100 gradient:#f00-#fff ^ -region 50x50+50+0 -negate +region ^ -gravity Center ^ -background None -extent 300x300 ^ bp_s5b.png %IMG7%magick ^ bp_s1a.png bp_s5b.png ^ -composite ^ bp_s5c.png call %PICTBAT%proc2LapPyr ^ bp_s1a.png bp_s5b.png ^ . "-composite" ^ bp_s5d.png %IMG7%magick ^ bp_s5d.png ^ %BOUNDARY% ^ bp_s5d.png |

|
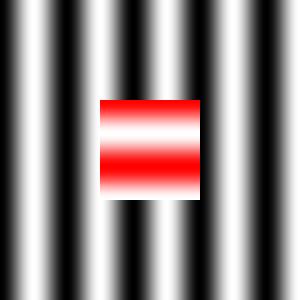
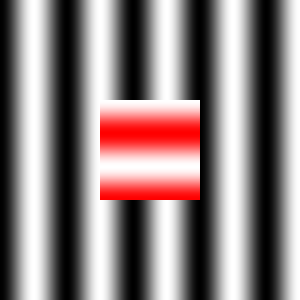
%IMG7%magick ^ -size 100x100 gradient:#f00-#fff ^ -function sinusoid 1.5,90,0.5,0.5 -negate ^ -gravity Center ^ -background None -extent 300x300 ^ bp_s6b.png %IMG7%magick ^ bp_s1a.png bp_s6b.png ^ -composite ^ bp_s6c.png call %PICTBAT%proc2LapPyr ^ bp_s1a.png bp_s6b.png ^ . "-composite" ^ bp_s6d.png %IMG7%magick ^ bp_s6d.png ^ %BOUNDARY% ^ bp_s6d.png |

|
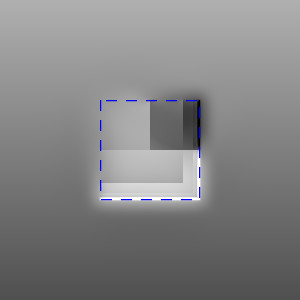
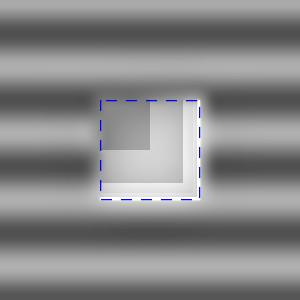
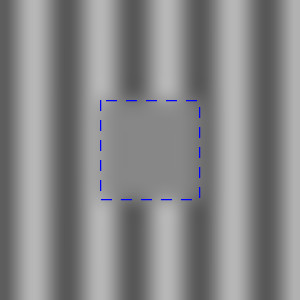
%IMG7%magick ^ -size 300x300 gradient:white-black ^ -function sinusoid 4.5,90,0.5,0.5 -negate ^ PNG48:bp_s7a.png %IMG7%magick ^ bp_s7a.png bp_s6b.png ^ -composite ^ bp_s7c.png call %PICTBAT%proc2LapPyr ^ bp_s7a.png bp_s6b.png ^ . "-composite" ^ bp_s7d.png %IMG7%magick ^ bp_s7d.png ^ %BOUNDARY% ^ bp_s7d.png |
|
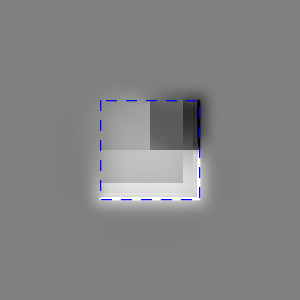
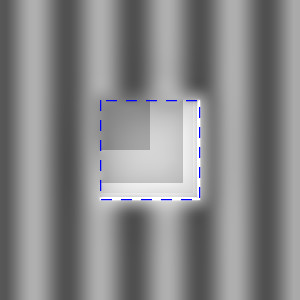
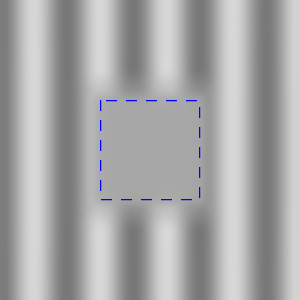
%IMG7%magick ^ -size 300x300 gradient:white-black -rotate 90 ^ -function sinusoid 4.5,90,0.5,0.5 -negate ^ PNG48:bp_s8a.png %IMG7%magick ^ bp_s8a.png bp_s6b.png ^ -composite ^ bp_s8c.png call %PICTBAT%proc2LapPyr ^ bp_s8a.png bp_s6b.png ^ . "-composite" ^ bp_s8d.png %IMG7%magick ^ bp_s8d.png ^ %BOUNDARY% ^ bp_s8d.png |


|
|
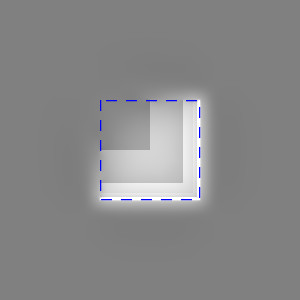
As previous, but with centre
%IMG7%magick ^
  -size 300x300 gradient:white-black -rotate 90 ^
  -function sinusoid 4.5,90,0.5,0.5 -negate ^
  -alpha set ^
  -region 100x100+100+100 ^
    -alpha transparent ^
  +region ^
  PNG64:bp_s9a.png

%IMG7%magick ^
  bp_s9a.png bp_s6b.png ^
  -composite ^
  bp_s9c.png

call %PICTBAT%proc2LapPyr ^
  bp_s9a.png bp_s6b.png ^
  . "-composite" ^
  bp_s9d.png

%IMG7%magick ^
  bp_s9d.png ^
  %BOUNDARY% ^
  bp_s9d.png
Foreground detail has spread further into the background;
|
|
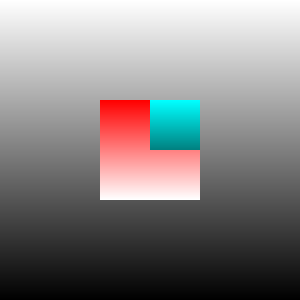
Detail at the lowest frequency (solid colour) spreads entirely between images. Detail at the highest frequency doesn't spread at all. Detail at intermediate frequencies spreads by intermediate amounts.
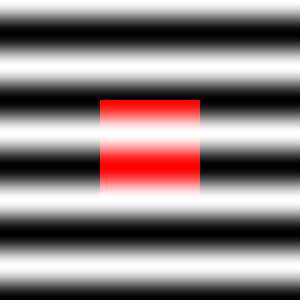
Where the foreground was red and white, why has the white become cyan? Because the lowest frequency of the background is the mean colour, which is 50% gray. This has spread entirely into the centre 100x100 pixels, mixing with the mean from the foreground, resulting in an overall mean of roughly 50% gray. We can show this:
%IMG7%magick bp_s6d.png -crop 96x97+102+102 +repage -scale "1x1^!" txt:
# ImageMagick pixel enumeration: 1,1,0,65535,srgba
0,0: (49666,49760,49666,65535)  #C202C260C202FFFF  srgba(75.7853%,75.9285%,75.7853%,1)
But the higher frequencies have not spread as much. The higher frequencies of the foreground contained two areas with "more red than average" and two with "less red than average". The average has changed from a light red to roughly 50% gray, and "less red than 50% gray" is cyan.
As with the leaves on the wall, we can adjust the alpha.
%IMG7%magick ^
  bp_s8a.png bp_s6b.png ^
  -channel A -evaluate Pow 0.1 +channel -composite ^
  bp_a1c.png

call %PICTBAT%proc2LapPyr ^
  bp_s8a.png bp_s6b.png ^
  . "-channel A -evaluate Pow 0.1 +channel -composite" ^
  bp_a1d.png

%IMG7%magick ^
  bp_a1d.png ^
  %BOUNDARY% ^
  bp_a1d.png
With power <1, foreground detail spreads further into the background;
|


|
%IMG7%magick ^
  bp_s8a.png bp_s6b.png ^
  -channel A -evaluate Pow 10 +channel -composite ^
  bp_a2c.png

call %PICTBAT%proc2LapPyr ^
  bp_s8a.png bp_s6b.png ^
  . "-channel A -evaluate Pow 10 +channel -composite" ^
  bp_a2d.png

%IMG7%magick ^
  bp_a2d.png ^
  %BOUNDARY% ^
  bp_a2d.png
With power >1, foreground detail spreads less far into the background;
|


|
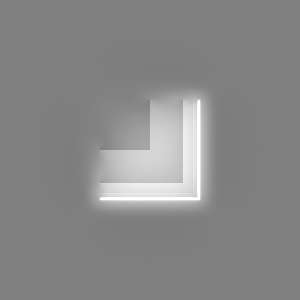
With ImageMagick, we can compose an image with transparency over an equal-sized image, or we can use an equal-sized third image (typically grayscale) as a mask that determines transparency. We have a similar choice with pyramids: the second Laplacian pyramid might have transparency, or it can be opaque and we use a third pyramid as a mask. This third pyramid will be Gaussian. We do this with the script proc3LapPyr.bat that takes three images, builds the pyramids, applies a process level-by-level, and collapses the resulting pyramid. For the process, we use "-alpha off -composite".
Corresponding to examples above, we make three opaque 300x300 images. The third (bp_llg1m.png) is the mask. As above, we show a result made from a conventional IM compose, then the result made with pyramids (with a blue square to mark the boundary).
%IMG7%magick ^ -size 300x300 gradient:white-black -rotate 90 ^ -function sinusoid 4.5,90,0.5,0.5 -negate ^ PNG48:bp_llg1a.png %IMG7%magick ^ -size 300x300 gradient:#f00-#fff ^ -function sinusoid 4.5,90,0.5,0.5 -negate ^ bp_llg1b.png %IMG7%magick ^ -size 300x300 xc:Black ^ -fill White -draw "rectangle 100,100 199,199" ^ bp_llg1m.png %IMG7%magick ^ bp_llg1a.png bp_llg1b.png bp_llg1m.png ^ -alpha off -composite ^ bp_llg1c.png call %PICTBAT%proc3LapPyr ^ bp_llg1a.png bp_llg1b.png bp_llg1m.png ^ . "-alpha off -composite" ^ bp_llg1d.png %IMG7%magick ^ bp_llg1d.png ^ %BOUNDARY% ^ bp_llg1d.png |
|
When using a mask, we adjust the spread by adjusting the mask.
%IMG7%magick ^ bp_llg1a.png bp_llg1b.png bp_llg1m.png ^ ( +clone -evaluate Pow 0.1 ) ^ +swap +delete ^ -alpha off -composite ^ bp_llg2c.png call %PICTBAT%proc3LapPyr ^ bp_llg1a.png bp_llg1b.png bp_llg1m.png ^ . ^ "^( +clone -evaluate Pow 0.1 ^) +swap +delete -alpha off -composite" ^ bp_llg2d.png %IMG7%magick ^ bp_llg2d.png ^ %BOUNDARY% ^ bp_llg2d.png |

|
As always, operations can be performed in L*a*b* space. Blah.
set mkpKEEP_ALPHA_RES=
Blending Laplacian pyramids is a fast and effective method for seamlessly combining photographs, especially when used with minimum error boundary cut.
The heaviest processing work is in creating the pyramids, and darkestmeander is also expensive. All the image processing on this web page was performed in about ten seconds on my laptop.
For convenience, .bat scripts are also available in a single zip file. See Zipped BAT files.
rem Makes version of %1 that resembles %2,
rem by gain-and-bias method.
rem %3 is optional output filename.
@rem
@rem Updated:
@rem   6-September-2022 for IM v7.
@rem

@if "%2"=="" findstr /B "rem @rem" %~f0 & exit /B 1

@setlocal enabledelayedexpansion

@call echoOffSave

call %PICTBAT%setInOut %1 mlgb

set INFILE2=%2

if not "%3"=="" set OUTFILE=%3

set PYR_PARAM=%~3
if "%PYR_PARAM%"=="." set PYR_PARAM=
if "%PYR_PARAM%"=="" set PYR_PARAM=. . . .

if not "%4"=="" set OUTFILE=%4

set TMPDIR=%TEMP%
rem for /F "usebackq" %%L in (`cygpath -u %TMPDIR%`) do set CYGTMPDIR=%%L

set pyPREFIX=mlgb_
call %PICTBAT%mkLapPyr %INFILE2% %pyPREFIX%pyr2.tiff %PYR_PARAM%
call %PICTBAT%mkLapPyr %INFILE% %pyPREFIX%pyr1.tiff %PYR_PARAM%

set FILE_LIST=

for /L %%i in (0,1,%mklpNUM_OCTAVES%) do (

  call %PICTBAT%imgGainBias ^
    %pyPREFIX%pyr1.tiff[%%i] ^
    %pyPREFIX%pyr2.tiff[%%i] ^
    %TMPDIR%\%pyPREFIX%out_%%i.tiff

  if ERRORLEVEL 1 exit /B 1

  set FILE_LIST=!FILE_LIST! %TMPDIR%\%pyPREFIX%out_%%i.tiff
)

%IMG7%magick %FILE_LIST% %pyPREFIX%pyr1.tiff

%IMG7%magick -script %pyPREFIX%mklp_recon.scr

%IMG7%magick %mklpRECON_FILE% %OUTFILE%

if ERRORLEVEL 1 exit /B 1

call echoRestore

endlocal & set mlgbOUTFILE=%OUTFILE%
rem Makes version of %1 that resembles %2,
rem by histogram-matching grids in Laplacian pyramids with four parameters %3.
rem %4 is optional output filename.
@rem
@rem Updated:
@rem   6-September-2022 for IM v7.
@rem

@if "%2"=="" findstr /B "rem @rem" %~f0 & exit /B 1

@setlocal enabledelayedexpansion

rem @call echoOffSave

call %PICTBAT%setInOut %1 mlh

set INFILE2=%2

if not "%3"=="" set OUTFILE=%3

set PYR_PARAM=%~3
if "%PYR_PARAM%"=="." set PYR_PARAM=
if "%PYR_PARAM%"=="" set PYR_PARAM=. . . .

if not "%4"=="" set OUTFILE=%4

set TMPDIR=%TEMP%
for /F "usebackq" %%L in (`cygpath -u %TMPDIR%`) do set CYGTMPDIR=%%L

set pyPREFIX=mlh_
call %PICTBAT%mkLapPyr %INFILE2% %pyPREFIX%pyr2.tiff %PYR_PARAM%
call %PICTBAT%mkLapPyr %INFILE% %pyPREFIX%pyr1.tiff %PYR_PARAM%

set FILE_LIST=

for /L %%i in (0,1,%mklpNUM_OCTAVES%) do (

  %IM7DEV%magick ^
    %pyPREFIX%pyr1.tiff[%%i] ^
    ^( -clone 0 ^
       -process 'mkhisto cumul norm' ^
    ^) ^
    ^( %pyPREFIX%pyr2.tiff[%%i] ^
       -process 'mkhisto cumul norm' ^
       -process 'mkhisto cumul norm' ^
    ^) ^
    ^( -clone 1-2 -clut ^) ^
    -delete 1-2 ^
    -clut ^
    %CYGTMPDIR%\%pyPREFIX%out_%%i.tiff

  if ERRORLEVEL 1 exit /B 1

  set FILE_LIST=!FILE_LIST! %TMPDIR%\%pyPREFIX%out_%%i.tiff
)

%IMG7%magick %FILE_LIST% %pyPREFIX%pyr1.tiff

%IMG7%magick -script %pyPREFIX%mklp_recon.scr

%IMG7%magick %mklpRECON_FILE% %OUTFILE%

if ERRORLEVEL 1 exit /B 1


call echoRestore

endlocal & set mlhOUTFILE=%OUTFILE%
rem From image %1, makes Laplacian pyramid with four parameters %2,
rem applies IM processing %3,
rem collapses pyramid into output %4.
@rem
@rem Updated:
@rem   5-September-2022 for IM v7.
@rem

@if "%1"=="" findstr /B "rem @rem" %~f0 & exit /B 1

@setlocal

@call echoOffSave

call %PICTBAT%setInOut %1 plp


set PYR_PARAM=%~2
if "%PYR_PARAM%"=="." set PYR_PARAM=
if "%PYR_PARAM%"=="" set PYR_PARAM=. . . .

set IM_PROC=%~3
if "%IM_PROC%"=="." set IM_PROC=
if "%IM_PROC%"=="" set IM_PROC=+write info:

if not "%4"=="" set OUTFILE=%4

set TMPDIR=%TEMP%

set pyPREFIX=plp_
call %PICTBAT%mkLapPyr %INFILE% %pyPREFIX%pyr.tiff %PYR_PARAM%

set FILE_LIST=

for /L %%i in (0,1,%mklpNUM_OCTAVES%) do (

  %IMG7%magick ^
    %pyPREFIX%pyr.tiff[%%i] ^
    %IM_PROC% ^
    %TMPDIR%\%pyPREFIX%out_%%i.tiff

  set FILE_LIST=!FILE_LIST! %TMPDIR%\%pyPREFIX%out_%%i.tiff
)

%IMG7%magick %FILE_LIST% %pyPREFIX%pyr.tiff

%IMG7%magick -script %pyPREFIX%mklp_recon.scr

%IMG7%magick %mklpRECON_FILE% %OUTFILE%

if ERRORLEVEL 1 exit /B 1


call echoRestore

endlocal & set plpOUTFILE=%OUTFILE%
rem From images %1 and %2, makes Laplacian pyramid with four parameters %3,
rem applies IM processing %4 (which should create one image from two),
rem collapses pyramid into output %5.
@rem
@rem Updated:
@rem   15 May 2016 use %IML% for @script.
@rem   5-September-2022 for IM v7.
@rem

@if "%2"=="" findstr /B "rem @rem" %~f0 & exit /B 1

@setlocal

@call echoOffSave

call %PICTBAT%setInOut %1 p2lp

set INFILE2=%2

set PYR_PARAM=%~3
if "%PYR_PARAM%"=="." set PYR_PARAM=
if "%PYR_PARAM%"=="" set PYR_PARAM=. . . .

set IM_PROC=%~4
if "%IM_PROC%"=="." set IM_PROC=
if "%IM_PROC%"=="" set IM_PROC=+write info:

if not "%5"=="" set OUTFILE=%5

set TMPDIR=%TEMP%

set pyPREFIX=p2lp_
call %PICTBAT%mkLapPyr %INFILE2% %pyPREFIX%pyr2.tiff %PYR_PARAM%
call %PICTBAT%mkLapPyr %INFILE% %pyPREFIX%pyr1.tiff %PYR_PARAM%

set FILE_LIST=

for /L %%i in (0,1,%mklpNUM_OCTAVES%) do (

  %IMG7%magick ^
    %pyPREFIX%pyr1.tiff[%%i] ^
    %pyPREFIX%pyr2.tiff[%%i] ^
    %IM_PROC% ^
    %TMPDIR%\%pyPREFIX%out_%%i.tiff

  set FILE_LIST=!FILE_LIST! %TMPDIR%\%pyPREFIX%out_%%i.tiff
)

%IMG7%magick %FILE_LIST% %pyPREFIX%pyr1.tiff

%IMG7%magick -script %pyPREFIX%mklp_recon.scr

%IMG7%magick %mklpRECON_FILE% %OUTFILE%

if ERRORLEVEL 1 exit /B 1

call echoRestore

endlocal & set p2lpOUTFILE=%OUTFILE%
rem From images %1 and %2 and mask %3,
rem   makes Laplacian pyramid of first two
rem   and Gaussian pyramid of third, with four parameters %4,
rem applies IM processing %5 (which should create one image from two),
rem collapses pyramid into output %6.
@rem
@rem Updated:
@rem   15 May 2016 use %IML% for @script.
@rem   5-September-2022 for IM v7.
@rem

@if "%3"=="" findstr /B "rem @rem" %~f0 & exit /B 1

@setlocal

rem @call echoOffSave

call %PICTBAT%setInOut %1 p3lp

set INFILE2=%2
set MSKFILE=%3

set PYR_PARAM=%~4
if "%PYR_PARAM%"=="." set PYR_PARAM=
if "%PYR_PARAM%"=="" set PYR_PARAM=. . . .

set IM_PROC=%~5
if "%IM_PROC%"=="." set IM_PROC=
if "%IM_PROC%"=="" set IM_PROC=+write info:

if not "%6"=="" set OUTFILE=%6

set TMPDIR=%TEMP%

set pyPREFIX=p3lp_
call %PICTBAT%mkGausPyr %MSKFILE% %pyPREFIX%msk.tiff %PYR_PARAM%
call %PICTBAT%mkLapPyr %INFILE2% %pyPREFIX%pyr2.tiff %PYR_PARAM%
call %PICTBAT%mkLapPyr %INFILE% %pyPREFIX%pyr1.tiff %PYR_PARAM%

set FILE_LIST=

for /L %%i in (0,1,%mklpNUM_OCTAVES%) do (

  %IMG7%magick ^
    %pyPREFIX%pyr1.tiff[%%i] ^
    %pyPREFIX%pyr2.tiff[%%i] ^
    %pyPREFIX%msk.tiff[%%i] ^
    %IM_PROC% ^
    %TMPDIR%\%pyPREFIX%out_%%i.tiff

  set FILE_LIST=!FILE_LIST! %TMPDIR%\%pyPREFIX%out_%%i.tiff
)

%IMG7%magick %FILE_LIST% %pyPREFIX%pyr1.tiff

%IMG7%magick -script %pyPREFIX%mklp_recon.scr

%IMG7%magick %mklpRECON_FILE% %OUTFILE%

if ERRORLEVEL 1 exit /B 1

call echoRestore

endlocal & set p3lpOUTFILE=%OUTFILE%
All images on this page were created by the commands shown, using:
%IMG7%magick -version
Version: ImageMagick 7.1.0-42 Q16-HDRI x64 396d87c:20220709 https://imagemagick.org
Copyright: (C) 1999 ImageMagick Studio LLC
License: https://imagemagick.org/script/license.php
Features: Cipher DPC HDRI OpenCL
Delegates (built-in): bzlib cairo freetype gslib heic jng jp2 jpeg jxl lcms lqr lzma openexr pangocairo png ps raqm raw rsvg tiff webp xml zip zlib
Compiler: Visual Studio 2022 (193231332)
Source file for this web page is blendpyr.h1. To re-create this web page, execute "procH1 blendpyr".
This page, including the images, is my copyright. Anyone is permitted to use or adapt any of the code, scripts or images for any purpose, including commercial use.
Anyone is permitted to re-publish this page, but only for non-commercial use.
Anyone is permitted to link to this page, including for commercial use.
Page version v1.0 21-Oct-2014.
Page created 07-Sep-2022 07:57:43.
Copyright © 2022 Alan Gibson.