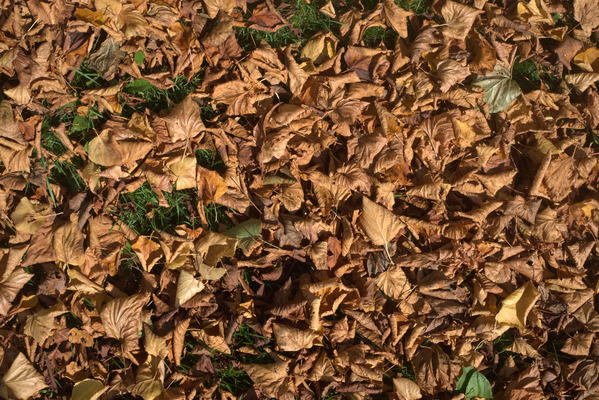
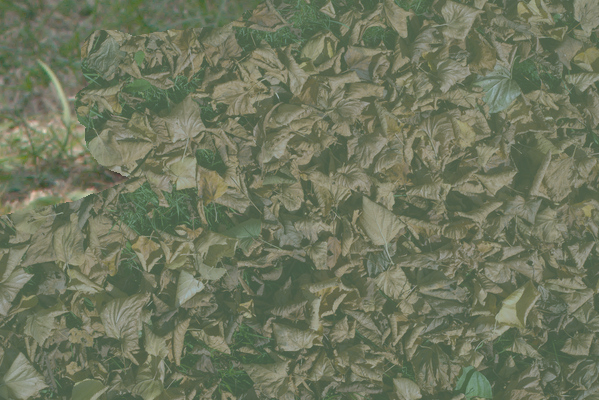
set SRCA=dpt_lvs_sm.jpg
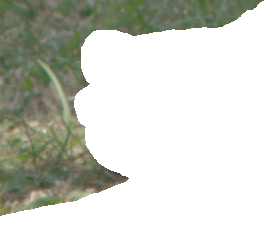
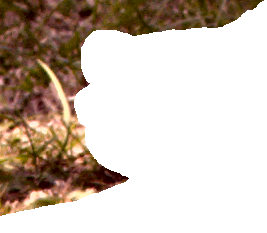
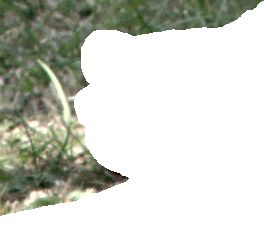
set SRCB=toes_holed.png
This image is mostly transparent.
We can tweak an image to match the brightness (and colour) and contrast of another.
This technique is frequently mentioned, and is described in detail (but only in the context of opaque images) in Optimized Hierarchical Block Matching for Fast and Accurate Image Registration, Changsoo Je, Hyung-Min Park, 2013.
This simple method applies linear transformations to the colour channels of an image to make the mean and standard deviation of each channel match those of a second image. It works for opaque images, and images with transparency. It is less precise, but also simpler and quicker, than alternatives such as matching histograms and blending pyramids. The change to the histogram is less extreme than we get from matching histograms, and can be more appropriate when the histograms of the two images are not really related.
The gain and bias method changes the image to a given mean and standard deviation. A simpler alternative is to change only the mean; see Setting the mean. Generalisations of gain and bias are shown on Colours to matrix and polynomials.
See also Set mean and stddev, which transforms with -sigmoidal-contrast and -evaluate Pow and therefore cannot cause clipping.
These techniques work for ordinary photographs. For graphics images that are mostly areas of flat colour, we want to apply most weight to those colours, and ordinary cluts may not give satisfactory results. For graphics, a "-hald-clut" solution may be better. See Sparse hald cluts.
Suppose we want to change image A to match image B. For each of the colour channels we want to apply a linear transformation:
Vout = VA * gain + bias
where VA is a pixel value in image A, Vout is the resulting pixel value, and:
gain = SDB / SDA
bias = meanB - meanA * gain
SD is the standard deviation. If image B is a flat colour, SDB==0, so gain=0 and bias=meanB, so image A will be made exactly the same colour as image B. We can use the results, gain and bias, as two arguments to "-function Polynomial".
The inverse is simple:
VA = (Vout - bias) / gain
VA = Vout/gain - bias/gain
By doing this process to three colour channels independently, we get a colour shift. Alternatively, we can apply it just to the L channel of the CIELab colorspace, or to the aggregated colour channels.
ASIDE: This is essentially the same normalisation that is performed for Normalised Cross Correlation. For NCC, pixels values are normalised by adjusting for the means and SD of the entire image:
normA = (VA - meanA) / SDA
An entire image can be normalised in this way, but values will be outside 0 to 100%. An ordinary photograph might have VA ranging from 0.0 to 1.0, with mean = 0.5 and SD = 0.16. Resulting pixel values will range from -3.125 to +3.125.
BEWARE: this method can clip pixels. Values near 0 or 100% can be pushed beyond those limits, so they are all clamped at 0 or 100%. If the input has been auto-levelled, any gain-bias change can make a clipped output. A more sophisticated method uses -sigmoidal-contrast to adjust standard deviation (contrast) and -evaluate Pow to adjust mean (lightness); see the Set mean and stddev page.
As example images, we use:
set SRCA=dpt_lvs_sm.jpg |
|
set SRCB=toes_holed.png This image is mostly transparent. |
|
ImageMagick directly gives us the mean and standard deviation of opaque images:
set FMT=^
MN_R=%%[fx:mean.r]\n^
MN_G=%%[fx:mean.g]\n^
MN_B=%%[fx:mean.b]\n^
SD_R=%%[fx:standard_deviation.r]\n^
SD_G=%%[fx:standard_deviation.g]\n^
SD_B=%%[fx:standard_deviation.b]\n

%IMG7%magick ^
  %SRCA% ^
  -format "%FMT%" ^
  info:
MN_R=0.477363
MN_G=0.327198
MN_B=0.194767
SD_R=0.250103
SD_G=0.19511
SD_B=0.146472
For images with transparency, it isn't so easy. We find the numbers for the second source: first for the entire image, then for just the top-left corner.
%IMG7%magick ^
  %SRCB% ^
  -format "entire:\n%FMT%" ^
  +write info: ^
  -crop 20x20+0+0 +repage ^
  -format "\ntop-left:\n%FMT%" ^
  info:
entire:
MN_R=0.16406
MN_G=0.174321
MN_B=0.138335
SD_R=0.218872
SD_G=0.2288
SD_B=0.184282

top-left:
MN_R=0.375216
MN_G=0.418598
MN_B=0.317598
SD_R=0.0495122
SD_G=0.0203595
SD_B=0.0516884
For the transparent pixels, IM has used black, with zero values, so the means for the entire image are lower than just the corner, and the SDs are higher.
By scaling to 1x1, IM can give us accurate means:
%IMG7%magick ^
  %SRCB% ^
  -scale "1x1^!" ^
  -format "entire:\n%FMT%" ^
  info:
entire:
MN_R=0.435476
MN_G=0.462861
MN_B=0.367326
SD_R=0
SD_G=0
SD_B=0
These means are much closer to the ones for the top-left corner. Of course, scaling to 1x1 has removed information for the SD. The SD is the square root of the variance, which is the mean of the squares of the values less the square of the mean. We can do all this in IM.
%IMG7%magick ^
  %SRCB% ^
  ( -clone 0 ^
    -evaluate Pow 2 ^
    -scale "1x1^!" ^
  ) ^
  ( -clone 0 ^
    -scale "1x1^!" ^
    -format "mn_R=%%[fx:mean.r]\nmn_G=%%[fx:mean.g]\nmn_B=%%[fx:mean.b]\n" ^
    +write info: ^
    -evaluate Pow 2 ^
  ) ^
  -delete 0 ^
  -alpha off ^
  -compose MinusSrc -composite ^
  -evaluate Pow 0.5 ^
  -format "sd_R=%%[fx:mean.r]\nsd_G=%%[fx:mean.g]\nsd_B=%%[fx:mean.b]\n" ^
  info:
mn_R=0.435476
mn_G=0.462861
mn_B=0.367326
sd_R=0.0935353
sd_G=0.0725356
sd_B=0.0770738
We put this in the simple script meanSdTr.bat.
call %PICTBAT%meanSdTr %SRCA% SRC_A_
set SRC_A_
SRC_A_mn_B=0.1947673923046845113
SRC_A_mn_G=0.3271981038281071008
SRC_A_mn_R=0.4773625853551537457
SRC_A_sd_B=0.146471217073891824
SRC_A_sd_G=0.195109438777943095
SRC_A_sd_R=0.2501022533283741578
call %PICTBAT%meanSdTr %SRCB% SRC_B_
set SRC_B_
SRC_B_mn_B=0.3673256656748302706
SRC_B_mn_G=0.462861179856183691
SRC_B_mn_R=0.4354760636015106434
SRC_B_sd_B=0.07707375919117646912
SRC_B_sd_G=0.07253559345674066849
SRC_B_sd_R=0.09353533059624627444
These are listed in alphabetical order.
The script calcGainBias.bat then uses those environment variables to calculate gain and bias:
call %PICTBAT%calcGainBias SRC_A_ SRC_B_ A2B_
set A2B_
A2B_bias_B=0.2648382596665107558
A2B_bias_G=0.3412191476318818806
A2B_bias_R=0.2569480150083253145
A2B_gain_B=0.5262041289128791544
A2B_gain_G=0.3717687566068727523
A2B_gain_R=0.3739883561682195712
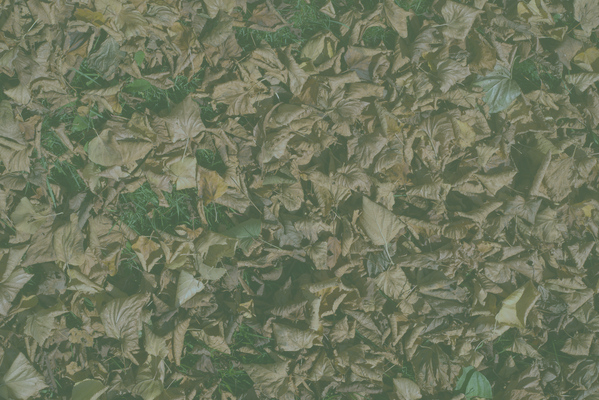
We can plug these gain and bias numbers into -function Polynomial:
%IMG7%magick ^
  %SRCA% ^
  -channel R ^
    -function Polynomial !A2B_gain_R!,!A2B_bias_R! ^
  -channel G ^
    -function Polynomial !A2B_gain_G!,!A2B_bias_G! ^
  -channel B ^
    -function Polynomial !A2B_gain_B!,!A2B_bias_B! ^
  +channel ^
  gb_a2b.png
|

|
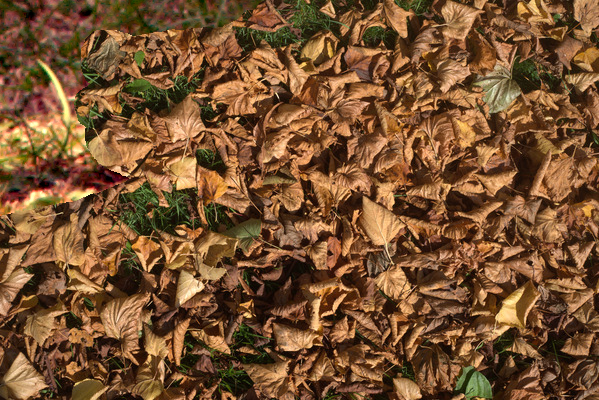
We can see the image has acquired a green cast and the contrast has lowered to roughly match the grass.
Check the statistics of the result:
call %PICTBAT%meanSdTr gb_a2b.png A2B_out_
set A2B_out_
A2B_out_mn_B=0.3673633363851377398
A2B_out_mn_G=0.4628575439173723827
A2B_out_mn_R=0.43544262488555735
A2B_out_sd_B=0.0770348889190890368
A2B_out_sd_G=0.0725447354586289811
A2B_out_sd_R=0.09358486281185625366
These numbers agree with the desired numbers, given above as SRC_B_mn_B etc.
We glue it all together in a single script imgGainBias.bat that directly transforms an image to match another.
|
Make the leaves look like the grass. call %PICTBAT%imgGainBias ^ %SRCA% %SRCB% gb_1to2.png |
|
|
Make the grass look like the leaves. call %PICTBAT%imgGainBias ^ %SRCB% %SRCA% gb_2to1.png |
|
For direct comparison:
|
Composite the grass over the grassy-leaves. %IMG7%magick ^ gb_1to2.png ^ %SRCB% ^ -composite ^ gb_comp_b.png This is successful. |
|
|
Composite the leavsey-grass over the leaves. %IMG7%magick ^ %SRCA% ^ gb_2to1.png ^ -composite ^ gb_comp_a.png This is less successful. |
|
We can do the work in L*a*b* space instead of sRGB:
|
Make the grass look like the leaves, via Lab. %IMG7%magick %SRCA% -colorspace Lab -set colorspace sRGB gb_labA.miff %IMG7%magick %SRCB% -colorspace Lab -set colorspace sRGB gb_labB.miff call %PICTBAT%imgGainBias gb_labB.miff gb_labA.miff gb_2to1lab.png %IMG7%magick ^ gb_2to1lab.png ^ -set colorspace Lab -colorspace sRGB ^ gb_2to1lab.png |
|
Instead of transforming one image to match another, we can match any number of images to a common standard. For example, we set the L channel of Lab versions to a mean of 0.5 and a standard deviation of 0.1667.
call %PICTBAT%imgMnSdL ^ %SRCA% ^ 0.5 0.1667 ^ gb_lvs_ms.png |
|
call %PICTBAT%imgMnSdL ^ %SRCB% ^ 0.5 0.1667 ^ gb_toes_ms.png |
|
This technique is useful when we want to apply a linear process IM to an entire image, but the statistics for that process should come from a crop of that image.
For example, we might want to process an image such that the central 50% in both directions is normalized. IM's "-normalize" works by building a histogram, finding the cut-off points in the histogram, and stretching values accordingly. The stretching could be done with "-level" or "-function Polynomial", but IM doesn't tell us what the arguments would be. The gain-and-bias technique finds the parameters.
Here, we assume the image is fully opaque so we can use IM to calculate the mean and standard deviation directly, and we assume that we want to adjust the colour channels by the same amount so we don't get a colour shift. We find the mean and standard deviation for the cropped image, and for the normalized cropped image. From those four numbers, we calculate the gain and bias that transforms the crop into the normalized crop.
|
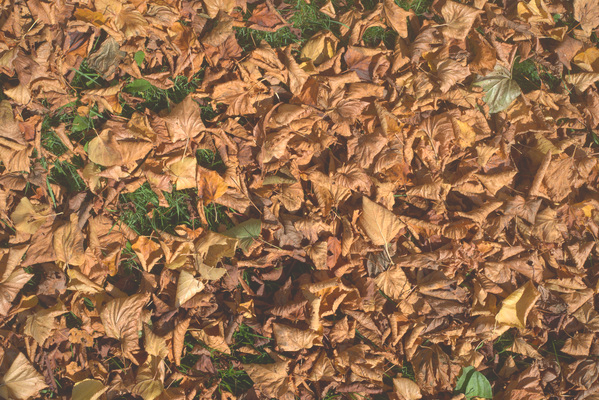
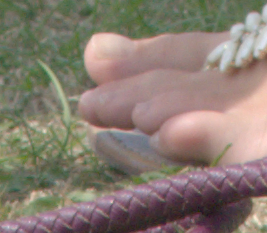
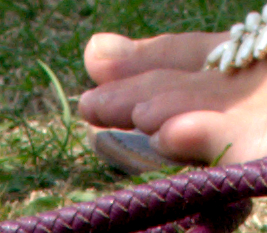
toes.png |
|
for /F "usebackq" %%L in (`%IMG7%magick ^
  toes.png ^
  -gravity Center -crop 50%%x50%%+0+0 +repage ^
  -format "MN0=%%[fx:mean]\nSD0=%%[fx:standard_deviation]\n" ^
  +write info: ^
  -normalize ^
+write gb_test.png ^
  -format "MN1=%%[fx:mean]\nSD1=%%[fx:standard_deviation]\n" ^
  info:`) do set %%L

for /F "usebackq" %%L in (`%IMG7%magick identify ^
  -format ^
    "GAIN=%%[fx:%SD1%/%SD0%]\nBIAS=%%[fx:%MN1%-%MN0%*%SD1%/%SD0%]"
  xc:`) do set %%L

%IMG7%magick ^
  toes.png ^
  -function Polynomial %GAIN%,%BIAS% ^
  gb_toes_norm.png
|
|
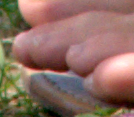
Writing to gb_test.png isn't necessary, but can be useful to check the crop and normalize do what we want.
|
gb_test.png |
|
We might want to modulate the effect by a parameter α, where 0.0 <= α <= 1.0, with 0.0 leaving the image unchanged, and 1.0 giving the full effect.
Vout = (1-α)*VA + α*(VA * gain + bias)

Vout = VA * (1 - α + α*gain) + α*bias
Check the algebra: when α==0, the formula becomes:
Vout = VA * (1-α+α*g) + α*b
Vout = VA * (1-0+0*g) + 0*b
Vout = VA
When α==1, the formula becomes:
Vout = VA * (1-α+α*g) + α*b
Vout = VA * (1-1+1*g) + 1*b
Vout = VA * g + b
Put this another way: the effect of α is to tranform gain and bias into gain' and bias':
gain' = 1 - α + α*gain

bias' = α*bias
Then:
Vout = VA * gain' + bias'
This technique is used in Painting with Patches.
As an aside from gain and bias, the method of deriving standard deviation from first principles can solve another problem.
The usual "-statistic StandardDeviation" generates blocky results. As the rectangular window moves over the image, individual pixels jump from taking no part in the calculation, to being as important as every other pixel in the rectangle. To show the problem we create a sample image with high contrast between one pixel and the others. We enlarge so we can see it.
|
A sample image. %IMG7%magick ^ xc:White ^ -gravity Center -bordercolor Black -border 3 ^ gb_one.png call %PICTBAT%blockPix gb_one.png |
|
We apply the usual "-statistic StandardDeviation" to that image. The maximum possible SD is 0.5 (i.e. 50%), so we multiply by 2 for clarity without clipping.
%IMG7%magick ^ gb_one.png ^ -statistic StandardDeviation 3x3 ^ -evaluate Multiply 2 ^ gb_one_sd.png call %PICTBAT%blockPix gb_one_sd.png |
|
In the result, nine pixels have the same standard deviation.
In the first-principle SD, we use a blur instead of mean for the calculation. (Strictly speaking "-gaussian-blur" is needed for proper Gaussian, but "-blur" is quicker and almost exactly the same.) When the window moves over the image, an individual pixel gradually transitions from taking no part in the calculation to taking full part.
set sBLUR=-blur 0x0.3

%IMG7%magick ^
  gb_one.png ^
  ( -clone 0 ^
    -evaluate Pow 2 ^
    %sBLUR% ^
  ) ^
  ( -clone 0 ^
    %sBLUR% ^
    -evaluate Pow 2 ^
  ) ^
  -delete 0 ^
  -alpha off ^
  -compose MinusSrc -composite ^
  -evaluate Pow 0.5 ^
  -evaluate Multiply 2 ^
  gb_one_gsd.png

call %PICTBAT%blockPix gb_one_gsd.png
The SD has a clear maximum. |
|
We implement this in a script gaussStdDev.bat.
In the following example, we also -auto-level for visual clarity.
call %PICTBAT%gaussStdDev ^ toes.png gb_toes_gsd.png ^ "-blur 0x0.3" "-auto-level" |
|
("Gaussian standard deviation" is my name for this operation, to distinguish it from the usual IM operation.)
For convenience, .bat scripts are also available in a single zip file. See Zipped BAT files.
This script is included for completness, but meanSdTr.bat is always preferred.
rem From opaque image %1,
rem calculates mean and standard deviation.
rem Prefixes output variable names with %2.
rem
rem If image has transparency, this gives the WRONG results.
rem For images with transparency, meanSdTr.bat should be used.
rem
rem meanSdTr.bat is also faster than this script.
@rem
@rem Updated:
@rem   4-August-2022 for IM v7.
@rem

@for /F "usebackq" %%L in (`%IMG7%magick ^
  %1 ^
  -precision 19 ^
  -format "%2mn_R=%%[fx:mean.r]\n%2mn_G=%%[fx:mean.g]\n%2mn_B=%%[fx:mean.b]\n" ^
  +write info: ^
  -format "%2sd_R=%%[fx:standard_deviation.r]\n%2sd_G=%%[fx:standard_deviation.g]\n%2sd_B=%%[fx:standard_deviation.b]\n" ^
  info:`) do set %%L
rem From image %1 with transparency,
rem calculates mean and standard deviation.
rem Prefixes output variable names with %2.
@rem
@rem Updated:
@rem   4-August-2022 for IM v7.
@rem

@for /F "usebackq" %%L in (`%IMG7%magick ^
  %1 ^
  -precision 19 ^
  ^( -clone 0 ^
    -evaluate Pow 2 ^
    -scale "1x1^!" ^
  ^) ^
  ^( -clone 0 ^
    -scale "1x1^!" ^
    -format "%2mn_R=%%[fx:mean.r]\n%2mn_G=%%[fx:mean.g]\n%2mn_B=%%[fx:mean.b]\n" ^
    +write info: ^
    -evaluate Pow 2 ^
  ^) ^
  -delete 0 ^
  -alpha off ^
  -compose MinusSrc -composite ^
  -evaluate Pow 0.5 ^
  -format "%2sd_R=%%[fx:mean.r]\n%2sd_G=%%[fx:mean.g]\n%2sd_B=%%[fx:mean.b]\n" ^
  info:`) do set %%L
rem From prefixes %1 and %2, calculates gain and bias to transform image 1 to be like 2.
rem Prefixes output variable names with %3.
rem If an SD==0, the script will attempt to divide by zero.
rem
rem Values for %1 and %2 can come from setEnvGainBias.bat.
@rem
@rem Updated:
@rem   4-August-2022 for IM v7.
@rem

rem This assumes "setlocal enabledelayedexpansion" has been set.

set cgbTEST=abc

if not "!cGBTEST!"=="abc" exit /B 1

if "%3"=="" exit /B 1

for /F "usebackq" %%L in (`%IMG7%magick identify ^
  -precision 19 ^
  -format "%3gain_R=%%[fx:!%2sd_R!/!%1sd_R!]\n%3gain_G=%%[fx:!%2sd_G!/!%1sd_G!]\n%3gain_B=%%[fx:!%2sd_B!/!%1sd_B!]\n" ^
  xc:`) do set %%L

for /F "usebackq" %%L in (`%IMG7%magick identify ^
  -precision 19 ^
  -format "%3bias_R=%%[fx:!%2mn_R!-!%1mn_R!*!%3gain_R!]\n%3bias_G=%%[fx:!%2mn_G!-!%1mn_G!*!%3gain_G!]\n%3bias_B=%%[fx:!%2mn_B!-!%1mn_B!*!%3gain_B!]\n" ^
  xc:`) do set %%L
rem From image %1 and reference image %2
rem applies gain and bias to match means and SD of reference.
rem Output to %3.

rem This assumes that "enabledelayedexpansion" is in effect.

rem echo off

call %PICTBAT%meanSdTr %1 igb1_
call %PICTBAT%meanSdTr %2 igb2_

call %PICTBAT%calcGainBias igb1_ igb2_ igb_gb_

%IMG7%magick ^
  %1 ^
  -channel R -function Polynomial !igb_gb_gain_R!,!igb_gb_bias_R! ^
  -channel G -function Polynomial !igb_gb_gain_G!,!igb_gb_bias_G! ^
  -channel B -function Polynomial !igb_gb_gain_B!,!igb_gb_bias_B! ^
  +channel ^
  %3

echo on
rem Given image %1,
rem writes %2 as Gaussian standard deviation,
rem with operation %3, default "-blur 0x1".
rem %4 is post-processing, eg "-auto-level".
rem %5 is not blank or ".", writes mean to this file.
@rem
@rem Updated:
@rem   17-December-2017 Added %5
@rem   23-January-2020 Use v7 magick; add QUANT_FP
@rem


@if "%1"=="" findstr /B "rem @rem" %~f0 & exit /B 1

@setlocal

@call echoOffSave

call %PICTBAT%setInOut %1 gsd

if not "%2"=="" if not "%2"=="." set OUTFILE=%2

call %PICTBAT%quantFP %OUTFILE%

set sBLUR=%~3
if "%sBLUR%"=="." set sBLUR=
if "%sBLUR%"=="" set sBLUR=-blur 0x1

set sPOST=%~4
if "%sPOST%"=="." set sPOST=

set OUT_MN=%5
if "%OUT_MN%"=="." set OUT_MN=

if "%OUT_MN%"=="" (
  set sOUT_MN=
) else (
  set sOUT_MN=+write %OUT_MN%
)

%IMG7%magick ^
  %INFILE% ^
  %QUANT_FP% ^
  ( -clone 0 ^
    -evaluate Pow 2 ^
    %sBLUR% ^
  ) ^
  ( -clone 0 ^
    %sBLUR% ^
    %sOUT_MN% ^
    -evaluate Pow 2 ^
  ) ^
  -delete 0 ^
  -alpha off ^
  -compose MinusSrc -composite ^
  -evaluate Pow 0.5 ^
  %sPOST% ^
  %OUTFILE%

call echoRestore

endlocal & set gsdOUTFILE=%OUTFILE%
All images on this page were created by the commands shown, using:
%IMG7%magick -version
Version: ImageMagick 7.1.0-42 Q16-HDRI x64 396d87c:20220709 https://imagemagick.org
Copyright: (C) 1999 ImageMagick Studio LLC
License: https://imagemagick.org/script/license.php
Features: Cipher DPC HDRI OpenCL
Delegates (built-in): bzlib cairo freetype gslib heic jng jp2 jpeg jxl lcms lqr lzma openexr pangocairo png ps raqm raw rsvg tiff webp xml zip zlib
Compiler: Visual Studio 2022 (193231332)
Source file for this web page is gainbias.h1. To re-create this web page, execute "procH1 gainbias".
This page, including the images, is my copyright. Anyone is permitted to use or adapt any of the code, scripts or images for any purpose, including commercial use.
Anyone is permitted to re-publish this page, but only for non-commercial use.
Anyone is permitted to link to this page, including for commercial use.
Page version v1.1 26-Oct-2016.
Page created 28-Aug-2022 04:05:38.
Copyright © 2022 Alan Gibson.