snibgo's ImageMagick pages
Selective blur
We sometimes want to vary the amount of blur across an image, perhaps by using a mask: maximum blur where the mask is white, and no blur where the mask is black.
Blurring involves (in a sense) moving pixels. Thus the common technique of blending two images for a selective effect creates two superimposed images, a "ghosting". This may be undersirable and certainly creates a different effect. Methods shown here avoid this ghosting.
See also
Image Mapped Effects: Variable Blur Mapping.
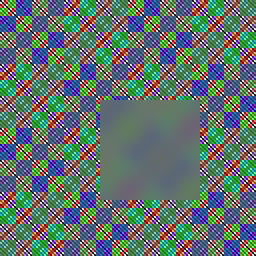
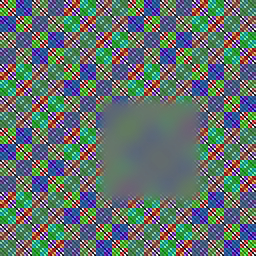
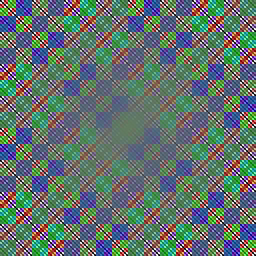
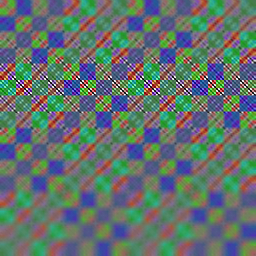
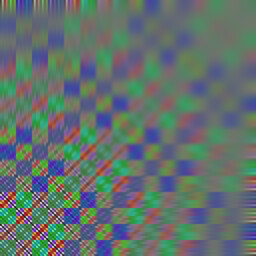
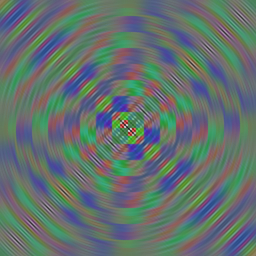
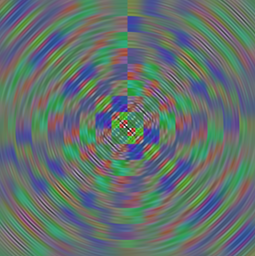
Create an artificial source of a repeating pattern with detail down to the pixel level.
%IMG7%magick ^
  xc:Black xc:gray(25%%) -append +repage ^
  ( +clone -rotate 180 ) ^
  +append +repage ^
  ( +clone -negate ) -append +repage ^
  ( +clone -rotate 180 ) ^
  +append +repage ^
  ( +clone -fill Red -colorize 50 ) -append +repage ^
  ( +clone -rotate 180 ) ^
  +append +repage ^
  ( +clone -fill Lime -colorize 50 ) -append +repage ^
  ( +clone -rotate 180 ) ^
  +append +repage ^
  ( +clone -fill Blue -colorize 50 ) -append +repage ^
  ( +clone -rotate 180 ) ^
  +append +repage ^
  ( +clone -modulate 100,50,100 ) -append +repage ^
  ( +clone -rotate 180 ) ^
  +append +repage ^
  ( +clone -modulate 100,100,50 ) -append +repage ^
  ( +clone -rotate 180 ) ^
  +append +repage ^
  ( +clone ) -append +repage ^
  ( +clone -rotate 180 ) ^
  +append +repage ^
  sb_src.png

set SRC=sb_src.png

for /F %%L in ('%IMG7%magick identify ^
  -format "WW=%%w\nHH=%%h" ^
  %SRC%') do set %%L
|

|
|
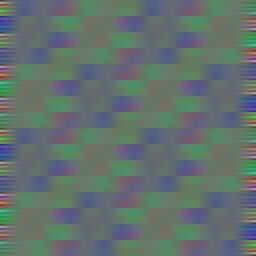
Blur the entire source.
set BLUR_SIG=10

%IMG7%magick ^
  %SRC% ^
  -blur 0x%BLUR_SIG% ^
  sb_b1.png
|

|
|
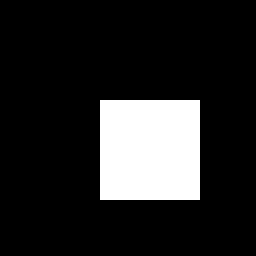
Create a mask for the effect.
%IMG7%magick ^
  -size %WW%x%HH% xc:Black ^
  -draw "fill White rectangle 100,100 199,199" ^
  sb_rect_mask.png
|
|
|
Apply the mask opacity to the blur.
%IMG7%magick ^
  %SRC% ^
  sb_b1.png ^
  sb_rect_mask.png ^
  -composite ^
  sb_rectmaskedBlur.png
The effect is analogous to placing a ground-glass screen over part of the image.
|
|
|
We can soften the edge of the effect by blurring the mask before applying its opacity.
%IMG7%magick ^
  %SRC% ^
  sb_b1.png ^
  ( sb_rect_mask.png -blur 0x4 ) ^
  -composite ^
  sb_rectmaskedBlur2.png
|
|
|
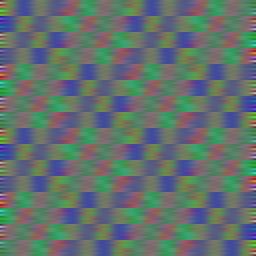
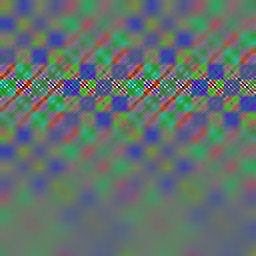
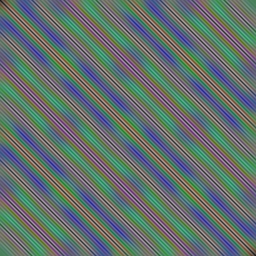
Blur horizontally.
%IMG7%magick ^
  sb_src.png ^
  -morphology Convolve Blur:0x5 ^
  sb_blr_x.png
|
|
|
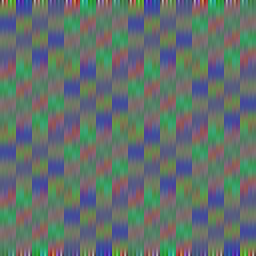
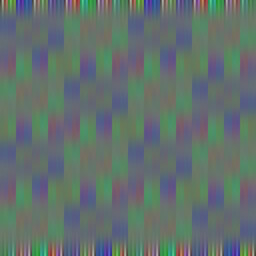
Blur vertically.
%IMG7%magick ^
  sb_src.png ^
  -morphology Convolve Blur:0x5,90 ^
  sb_blr_y.png
|
|
The sequence "-compose Blur -set option:compose:args SxxSy -composite", where Sx and Sy are numbers representing width and height of an elliptical Gaussian blur, creates a blur of dimension that depends on values in the Src image.
When the Src is black, the Dest image is more or less unchanged (eg RMSE 0.4%). When the Src is white and Sx == Sy, the effect is virtually identical to -blur 0xS (eg RMSE 0.007%).
|
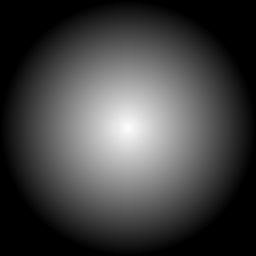
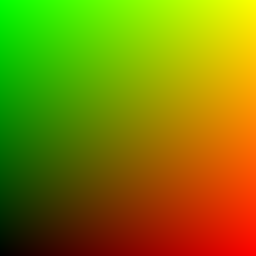
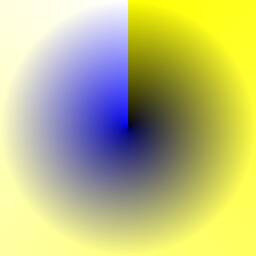
Create a mask for the effect.
%IMG7%magick ^
  -size %WW%x%HH% radial-gradient: ^
  sb_mask.png
This mask graduates to the corners, not the edges.
See
Gradients Cookbook for other possibilities.
|
|
|
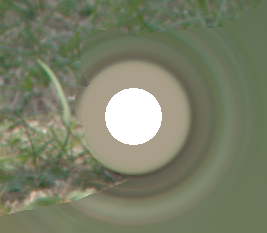
Apply the mask opacity to the blur.
%IMG7%magick ^
  %SRC% ^
  sb_b1.png ^
  sb_mask.png ^
  -composite ^
  sb_maskedBlur.png
Detail is still visible except for a handful of pixels at the centre.
Although blur has occured elsewhere, it is visually overwhelmed by the strong detail in the image.
|
|
|
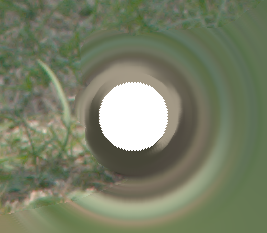
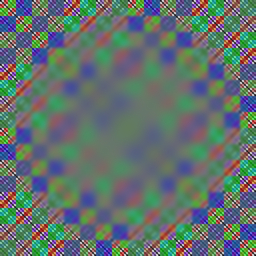
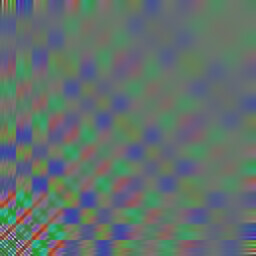
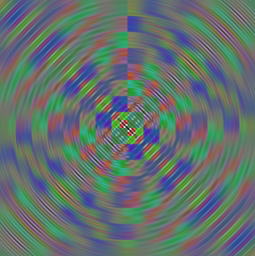
Use "-compose blur" to truly vary the blur.
%IMG7%magick ^
  %SRC% ^
  sb_mask.png  ^
  -compose Blur ^
  -set option:compose:args %BLUR_SIG%x%BLUR_SIG% -composite ^
  sb_maskedBlur2.png
The blur at the centre is now full, and it correctly decreases towards the edges.
|
|
|
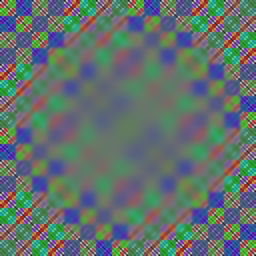
Mask the blur with a cheaper method.
%IMG7%magick ^
  sb_mask.png -write mpr:MASK ^
  %SRC% ^
  +swap ^
  -compose Blur ^
  -set option:compose:args %BLUR_SIG%x0 -composite ^
  mpr:MASK ^
  -set option:compose:args 0x%BLUR_SIG% -composite ^
  sb_maskedBlur3.png
Compare the methods:
%IMG7%magick compare ^
  -metric RMSE ^
  sb_maskedBlur2.png sb_maskedBlur3.png ^
  NULL:
cmd /c EXIT /B 0
1719.82 (0.0262428)
|
|
By sending these two versions as layers in a Gimp image (see
Gimp and IM) ...
call %PICTBAT%toGimp sb_maskedBlur2.png sb_maskedBlur3.png
... and blinking one layer on and off, we can see the difference is mostly in the corners, where there should be no blur. The cheaper method has introduced a small blur in these areas.
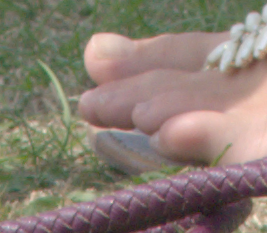
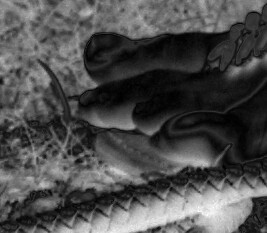
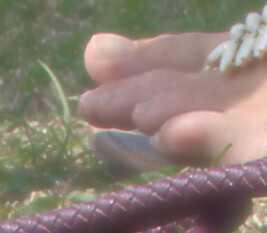
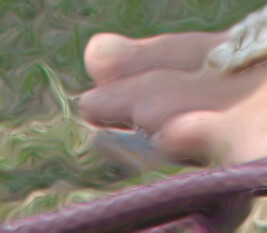
If we have a colour photograph, we can blur it with a radius proportional to the distance (in RGB space) each pixel is from a given colour.
|
Source photograph: toes.png.
set SRC_TOES=toes.png

%IMG7%magick identify -format %%[fx:mean] %SRC_TOES%
0.488162
|
|
|
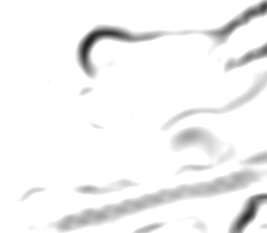
Colour distance. See
Making a picture greyscale.
Finds the distance to the closest of two colours, being the toes in shadow and the toes in sunshine.
call %PICTBAT%hashCol %SRC_TOES% -crop 10x10+116+86

set ONE_HASH_COL=%HASH_COL%

call %PICTBAT%hashCol %SRC_TOES% -crop 10x10+225+116

"%IMG7%magick" ^
  %SRC_TOES% ^
  ^( -clone 0 ^
    ^( +clone -fill %ONE_HASH_COL% -colorize 100 ^) ^
    -compose Difference -composite ^
    -grayscale RMS ^
  ^) ^
  ^( -clone 0 ^
    ^( +clone -fill %HASH_COL% -colorize 100 ^) ^
    -compose Difference -composite ^
    -grayscale RMS ^
  ^) ^
  -delete 0 ^
  -compose Darken -composite ^
  -auto-level ^
  sb_toes_cd.png
|
|
|
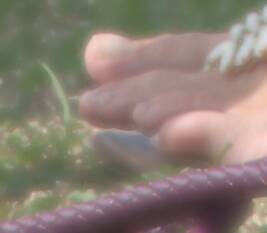
Blur, applying the "colour distance" mask.
%IMG7%magick ^
  %SRC_TOES% ^
  sb_toes_cd.png  ^
  -compose Blur ^
  -set option:compose:args %BLUR_SIG%x%BLUR_SIG% -composite ^
  sb_toes_cd_bld.png

%IMG7%magick identify -format %%[fx:mean] sb_toes_cd_bld.png
0.497378
|
|
|
Repeat the above, blurring in RGB colorspace.
%IMG7%magick ^
  %SRC_TOES% ^
  -set colorspace sRGB -colorspace RGB ^
  sb_toes_cd.png  ^
  -compose Blur ^
  -set option:compose:args %BLUR_SIG%x%BLUR_SIG% -composite ^
  -set colorspace RGB -colorspace sRGB ^
  sb_toes_cd_bldL.png

%IMG7%magick identify -format %%[fx:mean] sb_toes_cd_bldL.png
0.502436
|
|
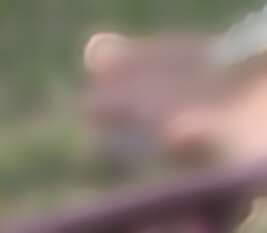
The grass has been heavily blurred; the toes are blurred far less. We could apply a gamma < 1 to the mask, darkening it, reducing the blurring of the colours fairly close to the toes.
Green from grass has not spread into the pink toes. However, pink from the toes has spread into the green grass, reducing local contrast of both tone and hue. We can use the mask to make the toes (nearly) transparent so they don't participate (much) in the blur, then turn alpha off after the blur. See also
Masking: read mask, which describes a technique for binary masks. I want continuous (not binary) masking, so I exclude the final step.
Blurring tends to remove outliers, so I also "-auto-level".
|
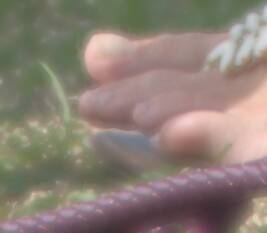
Apply the "colour distance" mask with read-mask.
%IMG7%magick ^
  %SRC_TOES% ^
  sb_toes_cd.png ^
  ( -clone 0-1 ^
    -alpha off -compose CopyOpacity -composite ^
  ) ^
  ( -clone 1 ) ^
  -compose Blur ^
  -set option:compose:args %BLUR_SIG%x%BLUR_SIG% -composite ^
  -alpha off ^
  sb_toes_cd_bld2.png

%IMG7%magick identify -format %%[fx:mean] sb_toes_cd_bld2.png
0.494536
|
|
|
Repeat the above, transforming in RGB colorspace.
%IMG7%magick ^
  %SRC_TOES% ^
  -set colorspace sRGB -colorspace RGB ^
  sb_toes_cd.png ^
  ( -clone 0-1 ^
    -alpha off -compose CopyOpacity -composite ^
  ) ^
  ( -clone 1 ) ^
  -compose Blur ^
  -set option:compose:args %BLUR_SIG%x%BLUR_SIG% -composite ^
  -alpha off ^
  -set colorspace RGB -colorspace sRGB ^
  sb_toes_cd_bld2L.png

%IMG7%magick identify -format %%[fx:mean] sb_toes_cd_bld2L.png
0.500174
|

|
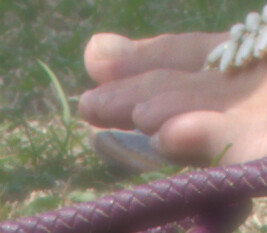
The result looks sharper as there is more contrast around the toes.
toes.png was cropped from a converted 14-bit camera raw file with minimal processing. An 8-bit/channel from the in-camera JPEG subjected to the same processing shows horrible quantum effects.
As we have a mask, we can use it to mask the unsharp operation so it will affect mostly light areas (the toes).
|
Sharpen.
%IMG7%magick ^
  sb_toes_cd_bld2.png ^
  -write-mask sb_toes_cd.png ^
  -unsharp 0x2 ^
  +write-mask ^
  sb_toes_cd_bld2u.png
|
|
Adaptive blur
The sharpness of the input image can modulate the blur. Here, we blur most where the input has the smallest slope.
This is like the built-in -adaptive-blur, but with greater control.
|
Detect edges.
call %PICTBAT%slopeXYbl ^
  %SRC_TOES% sb_slp.miff %BLUR_SIG%

call %PICTBAT%slopeXYMag ^
  sb_slp.miff sb_slp.miff

:: The following works est with HDRI.
::
%IMG7%magick ^
  sb_slp.miff ^
  -grayscale RMS -level 10%%,30%% ^
  -negate ^
  sb_slp_edge.png
|
|
|
Modulate blur by the edge image.
%IMG7%magick ^
  %SRC_TOES% ^
  sb_slp_edge.png ^
  -compose Blur ^
  -set option:compose:args %BLUR_SIG%x%BLUR_SIG% -composite ^
  -alpha off ^
  sb_toes_slp_bld.png
|
|
If we don't negate the edge image, we get an "adaptive sharpen" effect.
Toytown effect
We can leave a horizontal line (or band) sharp with progressive blur above and below the line.
|
Make a "toytown" mask. See
Clut Cookbook for the fx.
%IMG7%magick ^
  -size 1x%HH% gradient: ^
  -fx "VV=u*1.5;VV<1?VV:2-VV" ^
  -negate ^
  -scale "%WW%x%HH%^!" ^
  sb_mask2.png
|

|
|
Apply the "toytown" mask.
%IMG7%magick ^
  %SRC% ^
  sb_mask2.png  ^
  -compose Blur ^
  -set option:compose:args %BLUR_SIG%x%BLUR_SIG% -composite ^
  sb_masked2Blur.png
|
|
Running a toytown ("Tilt-shift") mask on a 7500x5000 pixel image took 354 seconds for the true method and 103 seconds for the cheaper method. The RMSE was 912.454 (0.0139231).
We can also use
integral images:
|
Apply the "toytown" mask.
%IM7DEV%magick ^
  %SRC% ^
  -process integim ^
  sb_mask2.png ^
  -process 'deintegim2 window %BLUR_SIG%x%BLUR_SIG%' ^
  sb_masked2Blur_ii.png
|
|
|
Use a larger window:
%IM7DEV%magick ^
  %SRC% ^
  -process integim ^
  sb_mask2.png ^
  -process 'deintegim2 window %%[fx:3*%BLUR_SIG%]x%%[fx:3*%BLUR_SIG%]' ^
  sb_masked2Blur_ii2.png
|
|
By using different values in the red and green channels of the mask, we can independently vary the blur amounts in the x and y directions.
|
Make an x-y mask.
%IMG7%magick ^
  -size %HH%x%WW% gradient: -rotate 90 ^
  -size %WW%x%HH% gradient: ^
  xc:black ^
  -combine ^
  sb_maskxy.png
|
|
|
Apply the x-y mask.
%IMG7%magick ^
  %SRC% ^
  sb_maskxy.png  ^
  -compose Blur ^
  -set option:compose:args %BLUR_SIG%x%BLUR_SIG% -composite ^
  sb_maskedxy.png
There is a visual problem top-left and bottom-right.
|
|
|
Apply the gamma-changed x-y mask.
%IMG7%magick ^
  %SRC% ^
  ( sb_maskxy.png -gamma 0.5 ) ^
  -compose Blur ^
  -set option:compose:args %BLUR_SIG%x%BLUR_SIG% -composite ^
  sb_maskedxy2.png
|
|
By supplying two extra arguments, representing start and end angles, the blue channel of the mask will vary the rotation of the blur. This is pointless unless the x- and y-sigmas are different. In this section, we use %BLUR_SIG% for the x-sigma and zero for the y-sigma.
We first illustrate the effect with solid colours in the mask. The red and green channels are given values of 100%.
|
Blue channel = 0.
%IMG7%magick ^
  %SRC% ^
  ( +clone -fill rgb(100%%,100%%,0) -colorize 100 ) ^
  -compose Blur ^
  -set option:compose:args %BLUR_SIG%x0+0+360 -composite ^
  sb_solmskang1.png
This gives a horizontal blur.
|
|
|
Blue channel = 12.5%.
%IMG7%magick ^
  %SRC% ^
  ( +clone -fill rgb(100%%,100%%,12.5%%) -colorize 100 ) ^
  -compose Blur ^
  -set option:compose:args %BLUR_SIG%x0+0+360 -composite ^
  sb_solmskang2.png
The blur is rotated clockwise by 12.5% of a complete revolution, 45°.
|
|
|
Blue channel = 25%.
%IMG7%magick ^
  %SRC% ^
  ( +clone -fill rgb(100%%,100%%,25%%) -colorize 100 ) ^
  -compose Blur ^
  -set option:compose:args %BLUR_SIG%x0+0+360 -composite ^
  sb_solmskang3.png
The blur is rotated clockwise by 25% of a complete revolution, 90°.
|
|
We now show effects where the mask is not a solid colour.
|
Create a varying-angle mask.
for /F %%i in ('%IMG7%magick identify ^
  -format "%%[fx:max(%WW%,%HH%)/2]" ^
  xc:') do set RMAX=%%i

set /A POL_WI=RMAX*3
set /A POL_HT=RMAX

%IMG7%magick ^
  -size %WW%x%HH% radial-gradient: -negate ^
  ( +clone ) ^
  ( -size %POL_HT%x%POL_WI% gradient: ^
    -rotate 90 ^
    +distort Polar ^"%RMAX%^" ^
    +repage -flop ^
    -gravity center -crop %WW%x%HH%+0+0 +repage ^
  ) ^
  -combine ^
  sb_maskang.png
|
|
|
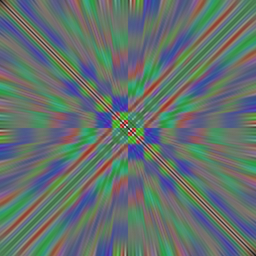
Apply the varying-angle mask.
%IMG7%magick ^
  %SRC% ^
  sb_maskang.png ^
  -compose Blur ^
  -set option:compose:args %BLUR_SIG%x0+0+360 -composite ^
  sb_maskedang.png
As radial-gradient continues to edges not corners,
the blur varies to the edges not corners.
|
|
|
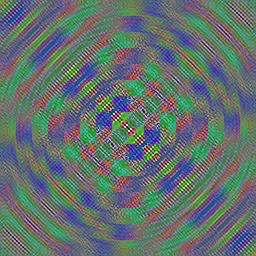
The same but reversing the x and y sigmas.
%IMG7%magick ^
  %SRC% ^
  sb_maskang.png ^
  -compose Blur ^
  -set option:compose:args 0x%BLUR_SIG%+0+360 -composite ^
  sb_maskedang2.png
As radial-gradient continues to edges not corners,
the blur varies to the edges not corners.
|
|
|
We can use the "-rotational-blur" operator. (In v6, this was misnamed "-radial-blur".) The parameter is in degrees.
%IMG7%magick ^
  %SRC% ^
  -rotational-blur 10 ^
  sb_radb.png
|
|
|
We can do a round-trip depolar/polar.
%IMG7%magick ^
  %SRC% ^
  -virtual-pixel Edge ^
  -set option:distort:scale 4   -distort DePolar -1 ^
  -virtual-pixel Tile ^
  -scale "5%%x100%%^!" ^
  -filter Gaussian -resize "2000%%x100%%^!" +filter ^
  -virtual-pixel HorizontalTile -background Black ^
  -set option:distort:scale .25 -distort Polar -1 ^
  sb_depol.png
But we have a sharp vertical line upwards from the centre.
|
|
|
Another round-trip depolar/polar.
%IMG7%magick ^
  %SRC% ^
  -virtual-pixel Edge ^
  -set option:distort:scale 4   -distort DePolar -1 ^
  -virtual-pixel Tile ^
  -resize "5%%x100%%^!" ^
  -filter Gaussian -resize "2000%%x100%%^!" +filter ^
  -virtual-pixel HorizontalTile -background Black ^
  -set option:distort:scale .25 -distort Polar -1 ^
  sb_depol2.png
We still have a sharp vertical line upwards from the centre.
|
|
On depolar/polar, see the official
Distorting: Polar Tricks and my own
Polar distortions.
The blurFill.bat script can be regarded as a selective blur. For more details, see
Filling holes: by blur. Here are some examples:
As shown on the
Slopes page, blurring can be in the direction of a slope, or perpendicular to that direction. The same method can make an unsharp mask for a sharpening process.
|
Input image: toes.png
|

|
|
After a blur perpendicular to the slope at each pixel.
slp_bs_blr.jpg
|

|
|
Previous result, sharpened with mask parallel to the slopes.
slp_bs_blr_sh.jpg
|
|
Similarly, we can modulate the blur by the slope magnitude.
|
Most blur where the slope is smallest.
slp_bs_blr2.jpg
|

|
All images on this page were created by the commands shown, (except that to conserve bandwidth some PNG files were converted to JPG), using:
%IMG7%magick identify -version
Version: ImageMagick 7.1.0-49 Q16-HDRI x64 7a3f3f1:20220924 https://imagemagick.org
Copyright: (C) 1999 ImageMagick Studio LLC
License: https://imagemagick.org/script/license.php
Features: Cipher DPC HDRI OpenCL
Delegates (built-in): bzlib cairo freetype gslib heic jng jp2 jpeg jxl lcms lqr lzma openexr pangocairo png ps raqm raw rsvg tiff webp xml zip zlib
Compiler: Visual Studio 2022 (193331630)
Source file for this web page is selblur.h1. To re-create this web page, execute "procH1 selblur".
This page, including the images, is my copyright. Anyone is permitted to use or adapt any of the code, scripts or images for any purpose, including commercial use.
Anyone is permitted to re-publish this page, but only for non-commercial use.
Anyone is permitted to link to this page, including for commercial use.
Page version v1.0 29-Jan-2014.
Page created 16-Mar-2023 11:57:19.
Copyright © 2023 Alan Gibson.