set SRC=barbara_test.png
We partion an image into areas of flat or slowly-changing colour.
A partition (or segment, or component) boundary mask is an image of connected black pixels at each partition, separated by white pixels that flag the boundaries between the partitions.
The white pixels may all be connected to each other, but in general they will not be. The lines formed by the white pixels can be any thickness.
Scripts on this page assume that the version of ImageMagick in %IM7DEV% has been built with various process modules. See Process modules.
set SRC=barbara_test.png |
|
We can process the edge image from the EEP method (shown at Cartoon and texture: erase edge pixels) using methods from the Mending broken lines page, to find boundaries for a segmentation of the image.
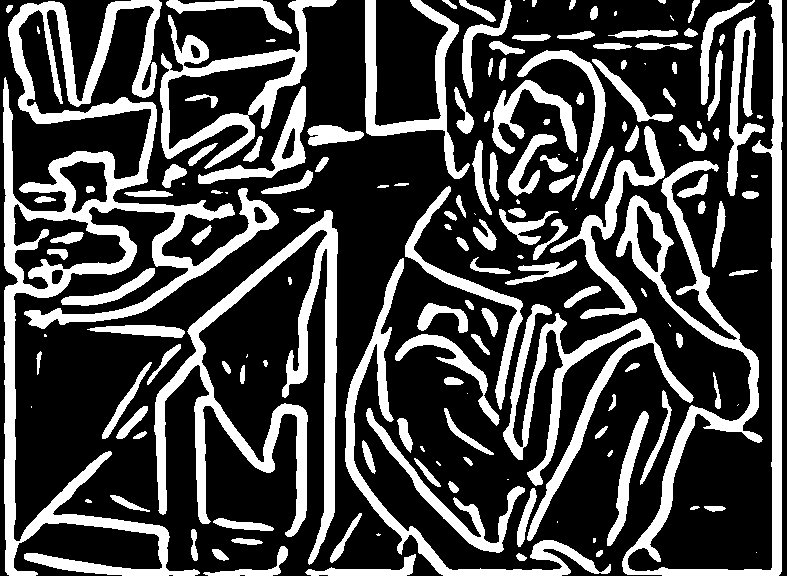
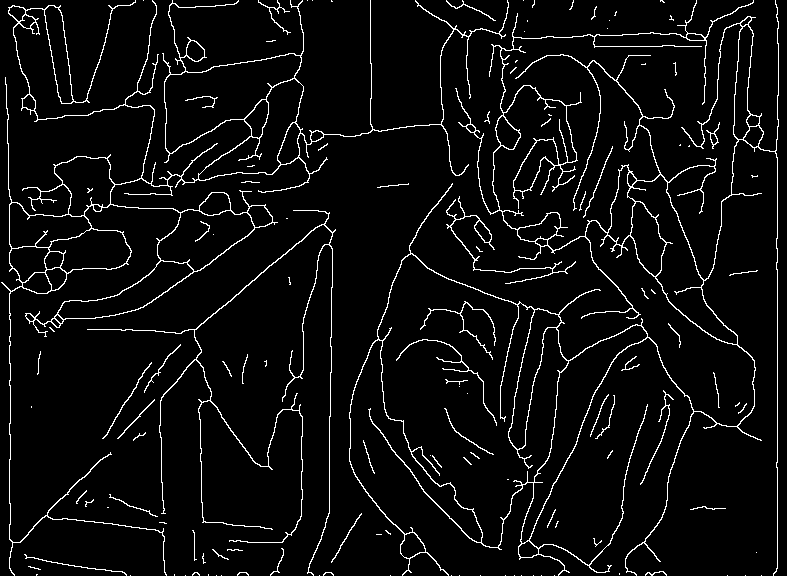
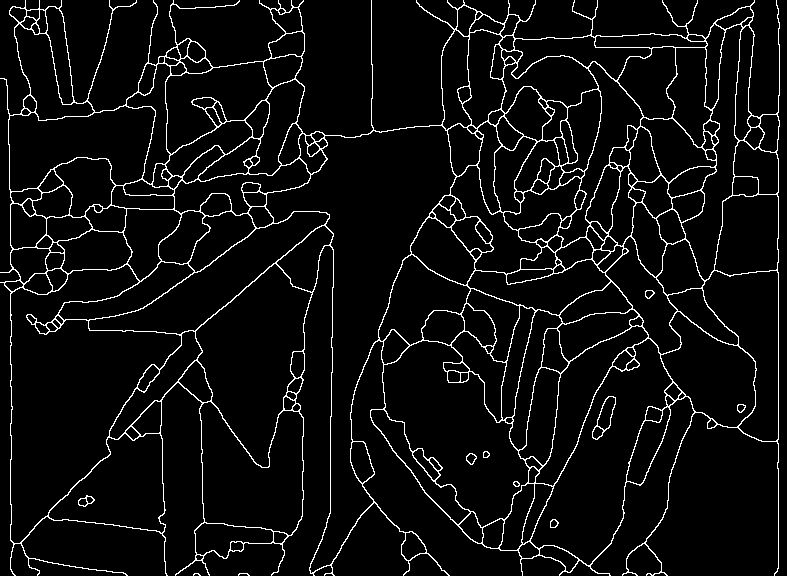
We start with the edges image:
set EDGES_SRC=ctx_edges.png |
|
|
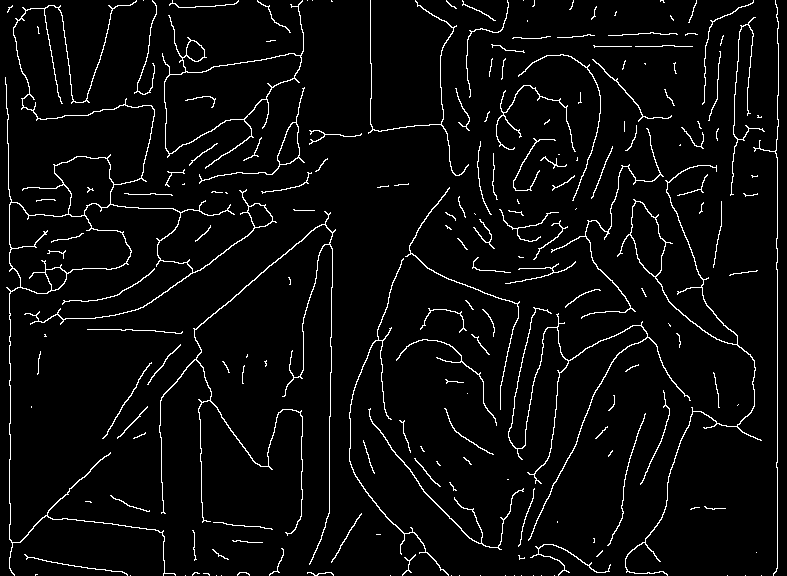
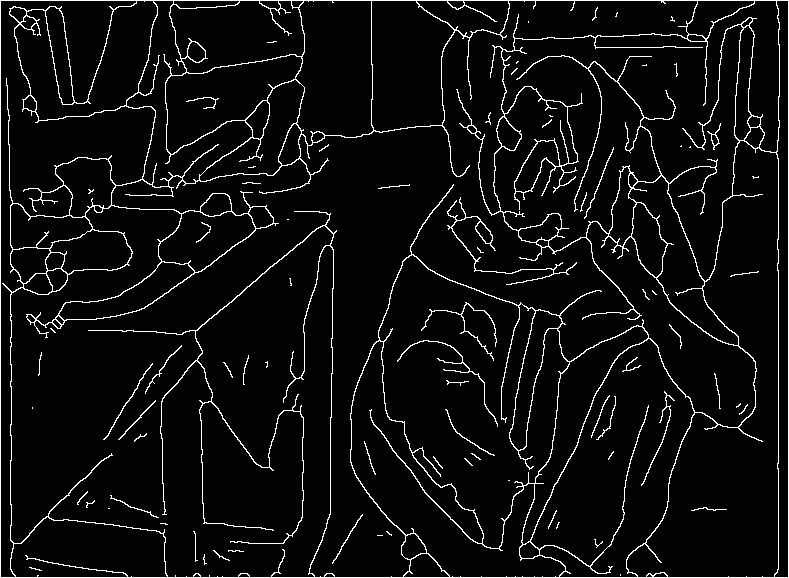
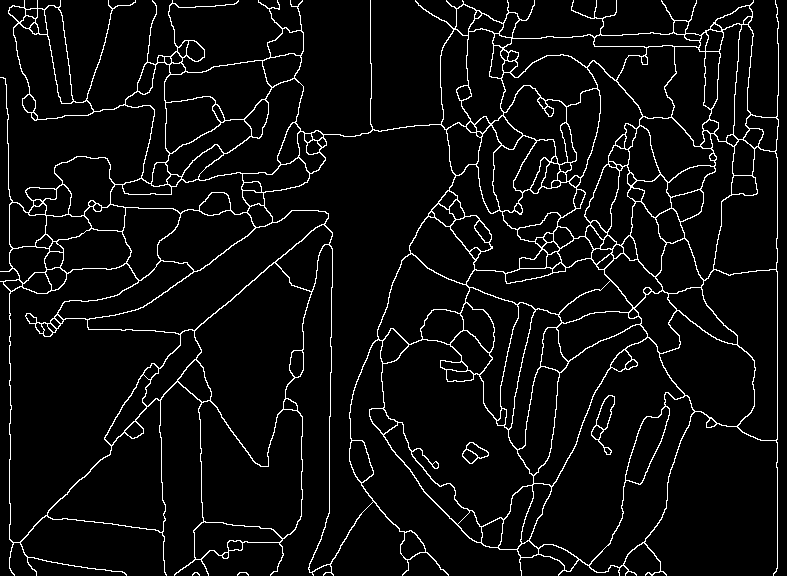
Thin to a skeleton. %IMG7%magick ^ %EDGES_SRC% ^ -morphology Thinning:-1 skeleton ^ -clamp ^ pb_seg0.png |
|
|
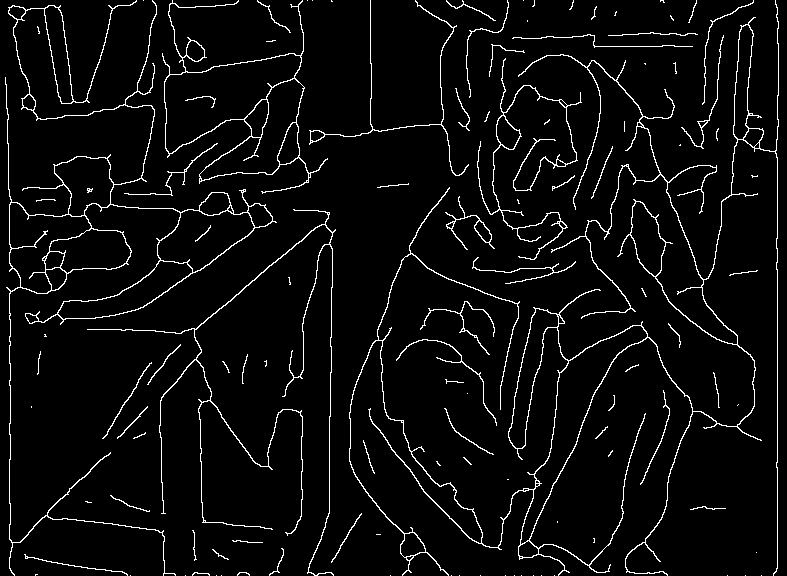
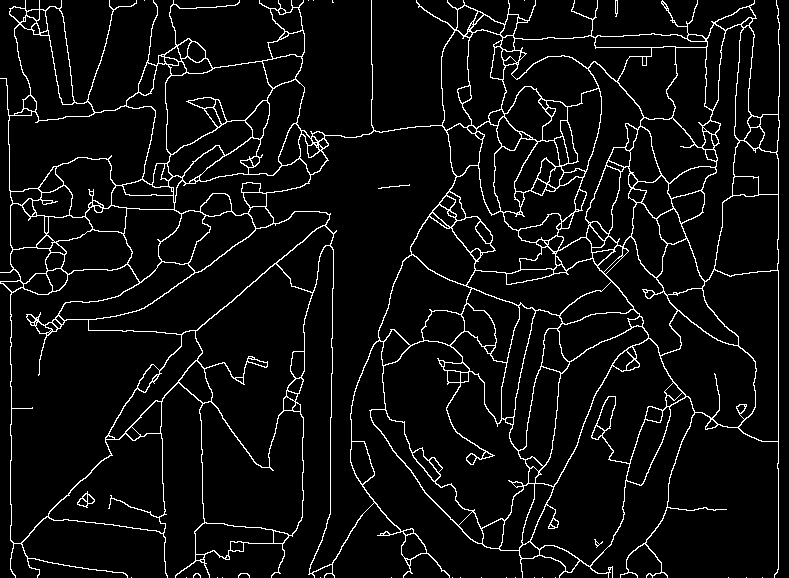
Join line ends by proximity, and thin to a skeleton. set skelLineEnds=1 call %PICTBAT%proxLineEnds ^ pb_seg0.png ^ pb_seg2.png ^ 12 set skelLineEnds= |
|
|
Join line ends by extending, and thin to a skeleton. set skelLineEnds=1
call %PICTBAT%extLineEnds ^
pb_seg2.png ^
pb_seg3.png ^
24
set skelLineEnds=
%IMG7%magick ^
pb_seg3.png ^
( +clone ^
-morphology HMT ^
3x3:1,1,1,1,0,1,1,1,1 ^
) ^
-compose Lighten -composite ^
-morphology Thinning:-1 Skeleton ^
-clamp ^
-threshold 50% ^
pb_seg3.png
|

|
|
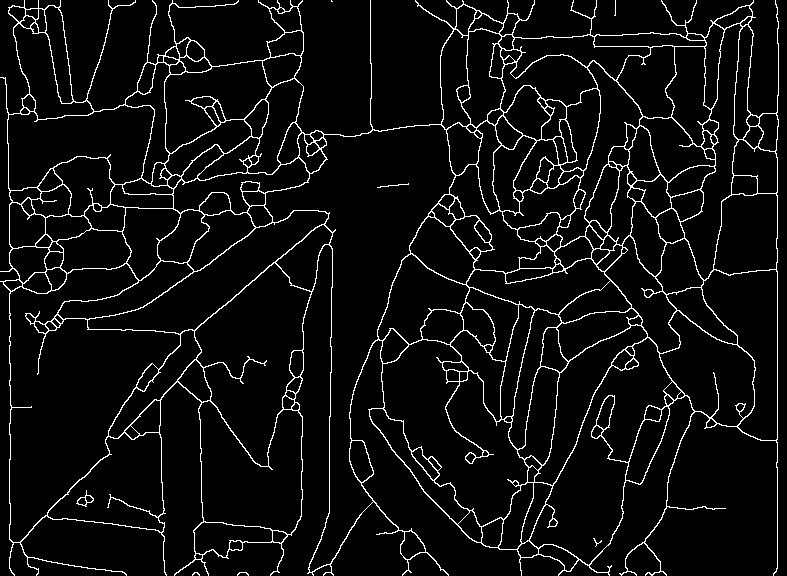
Close small black gaps, and thin to a skeleton. %IMG7%magick ^ pb_seg3.png ^ -morphology Close Disk:2 ^ -threshold 50%% ^ -morphology Thinning:-1 Skeleton ^ -clamp ^ pb_seg4.png |
|
|
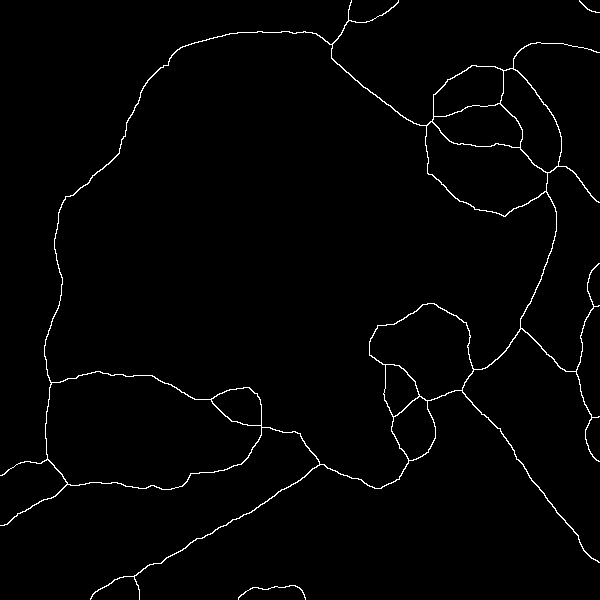
Possibly prune small stubs. call %PICTBAT%pruneStubs ^ pb_seg4.png ^ pb_seg5.png ^ 0 |
|
|
Make T-junctions from line-ends to lines, including image edges. %IMG7%magick ^ pb_seg5.png ^ -bordercolor White -border 1 ^ pb_seg5.png set skelLineEnds=1 call %PICTBAT%TjuncLineEnds ^ pb_seg5.png ^ pb_seg6.png ^ 24 set skelLineEnds= |
|
|
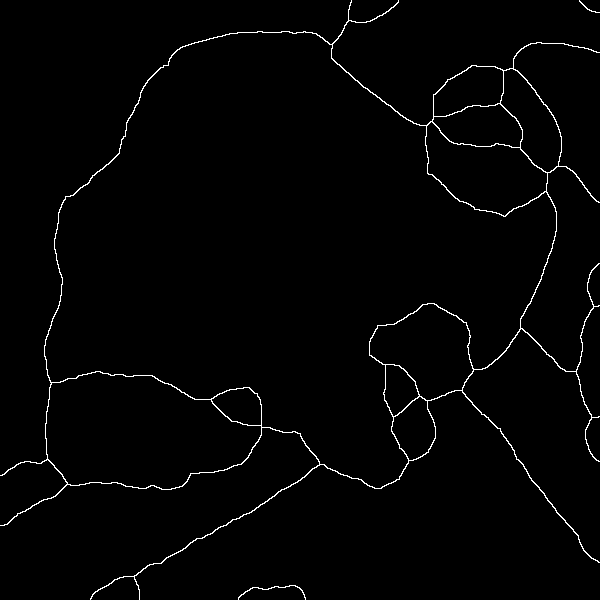
Shave the white border, again close small black gaps,
%IMG7%magick ^ pb_seg6.png ^ -shave 1 ^ -morphology Close Disk:2 ^ -threshold 50%% ^ -morphology Thinning:-1 Skeleton ^ -clamp ^ -threshold 50%% ^ pb_seg7.png |
|
|
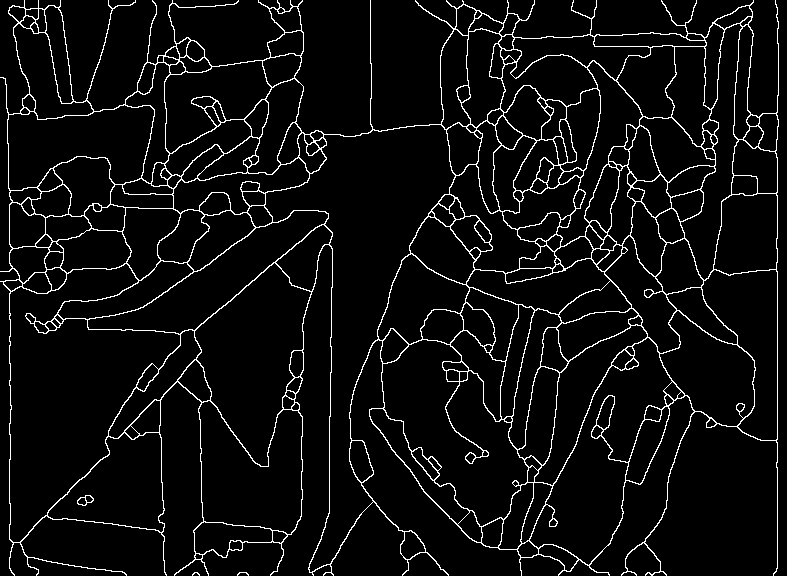
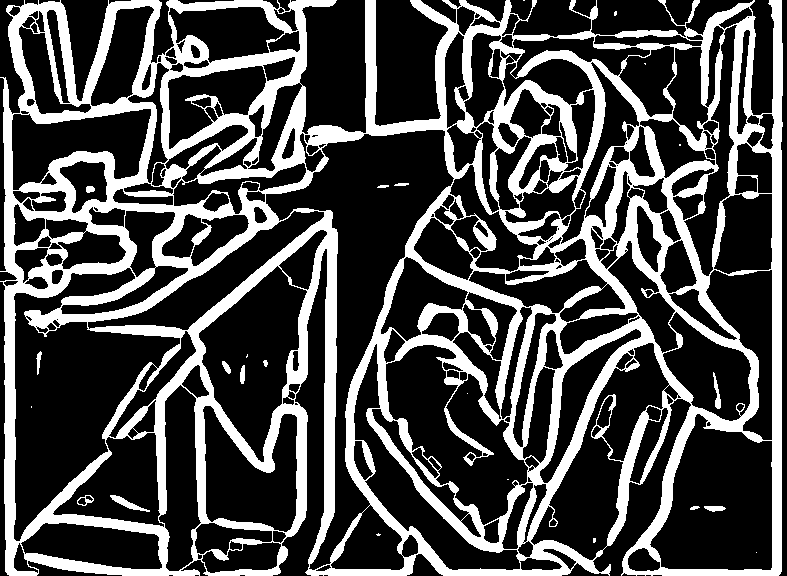
Prune all stubs, repeatedly. call %PICTBAT%pruneStubsRep ^ pb_seg7.png ^ pb_seg8.png ^ all The result is a boundary mask. |
|
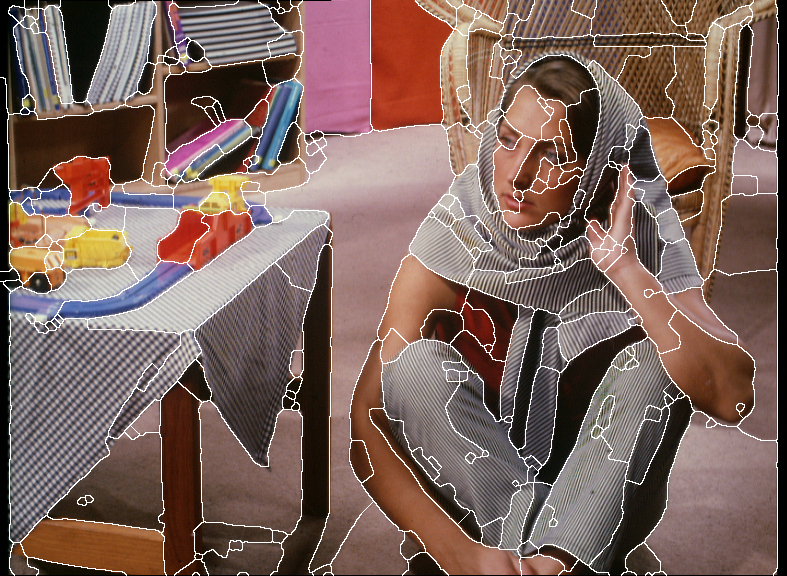
As a visual check:
%IMG7%magick ^
  ( %SRC% +level 0,90%% ) ^
  ( pb_seg8.png ^
    -threshold 50%% -transparent Black ) ^
  -compose Over -composite ^
  pb_partover.png
|
|
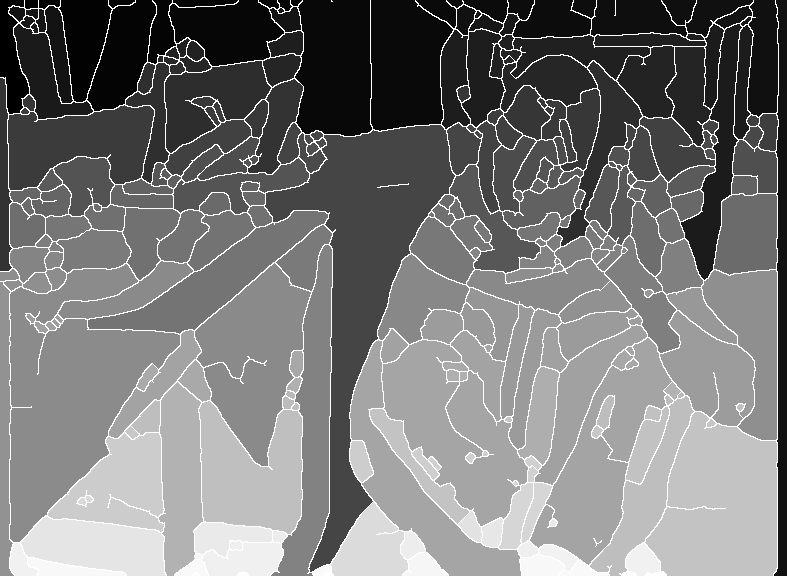
Instead of the final repeated pruning of all stubs, we can use connected-components to distinguish the black components, and make pixels that were white, transparent. Then fill transparent pixels from neighbours, eg with shiftFill.bat. Then detect edges. This removes all white pixels that do not form part of a partition, including all stubs, and single lines that connect two rings, and so on. However, it also shifts the positions of some remaining white pixels. Perhaps this can be reduced or fixed by changing the order of the shift-fill operations. Another example of this technique is shown at Partition boundary masks.
%IMG7%magick ^
  pb_seg7.png -negate ^
  ( +clone ^
    -connected-components 4 -auto-level ^
  ) ^
  +swap -alpha off ^
  -compose CopyOpacity -composite ^
  pb_comps.png
|
|
call %PICTBAT%shiftFill ^ pb_comps.png . pb_comps_sf.png |
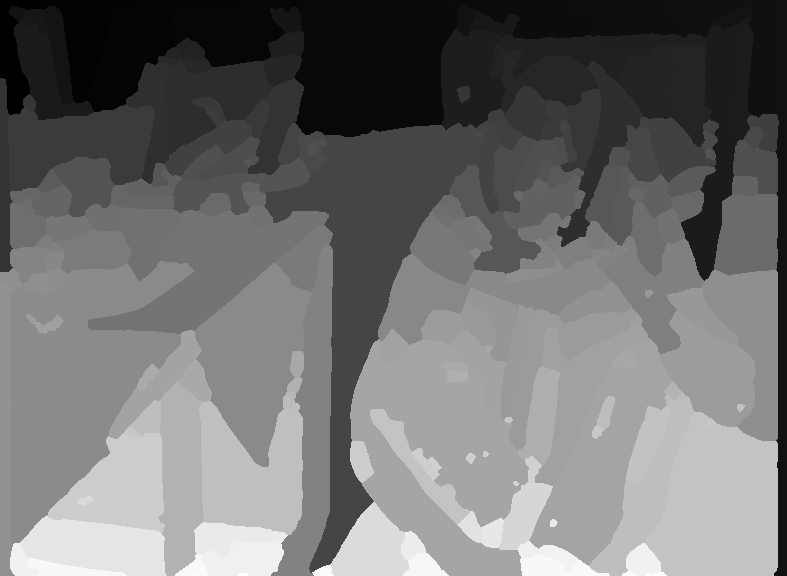
|
%IMG7%magick ^ pb_comps_sf.png ^ -statistic StandardDeviation 2x2 ^ -alpha off -threshold 0 ^ pb_comps_sd.png |
|
|
Visual check: %IMG7%magick ^
( %SRC% +level 0,90%% ) ^
( pb_comps_sd.png ^
-threshold 50%% ^
-transparent Black ^
) ^
-compose Over -composite ^
pb_partover2.png
|

|
We implement this as script skel2SegBnd.bat. From a skeleton, it creates a boundary mask.
call %PICTBAT%skel2SegBnd ^ pb_seg0.png pb_s2sb_out.png 12 |
|
Hence, we have a segmentation of the image. Connected-components can then be used, with a shift-fill to also cover the white boundaries, and each component could then be used as a mask to extract the mean colour of that patch. See the Flat colour cartoons page.
The edge has been heavily processed to get this segmentation, so it will be chaotic (for small changes to the input, the output will have heavy changes). So it won't be useful for animation of sigma, or for processing video frames.
The EDGES_SRC image has thick lines, but it isn't a boundary mask. From it, we have created pb_seg8.png which is a thin boundary mask. We can combine these to make a boundary mask that has some thick portions.
%IMG7%magick ^ %EDGES_SRC% ^ pb_seg8.png ^ -compose Lighten -composite ^ pb_thkbnd.png |
|
Ideally, each boundary pixel defines the boundary between two or more partitions. If we knew which partitions, we could do a cute blending of partitions within the boundaries.
In practice, some boundary pixels may be superfluous, and not actually on a boundary. For example, a boundary image could be just two loops joined by a line segment. The loops would then define boundaries but the segment joining them would not.
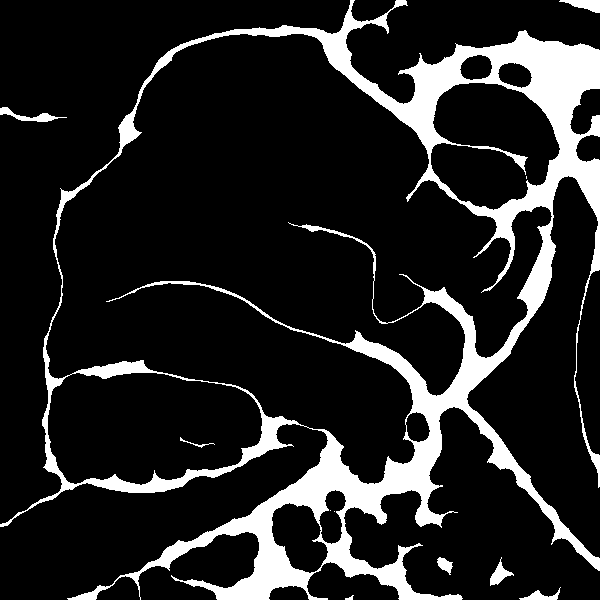
From a thick boundary mask, we can make a thin boundary mask by thinning to an 8-connected skeleton and repeated pruning. Using an example from the Mending broken lines page:
|
A thick boundary mask. mbl_morphcl.png |
|
%IMG7%magick ^ mbl_morphcl.png ^ -morphology Thinning:-1 Skeleton ^ -clamp ^ pb_morphclsk.png call %PICTBAT%pruneStubsRep ^ pb_morphclsk.png pb_partbnd.png all |
|
|
Make a 4-connected version. %IMG7%magick ^ pb_partbnd.png ^ -morphology thicken "3>:-,0,-,1,-,1,0,1,0" ^ -morphology thicken "3>:-,0,0,1,-,0,0,1,-" ^ pb_partbnd4.png |
|
For convenience, .bat scripts are also available in a single zip file. See Zipped BAT files.
rem From %1, white 4-connected skeleton on black bacground,
rem make %2 a partition boundary image.
rem %3 is threshold for proximity [Default 12]
rem %4 is threshold for extending [Default 2 * prox_threshold]
rem %5 is length for pruning [Default 0]
rem %6 is threshold for t-junctions [Default ext_threshold]
@rem
@rem Updated:
@rem   6-August-2022 for IM v7
@rem

@if "%1"=="" findstr /B "rem @rem" %~f0 & exit /B 1

@setlocal enabledelayedexpansion

@call echoOffSave

call %PICTBAT%setInOut %1 s2bd

if not "%2"=="" if not "%2"=="." set OUTFILE=%2

set PROX_TH=%3
if "%PROX_TH%"=="." set PROX_TH=
if "%PROX_TH%"=="" set PROX_TH=12

set EXT_TH=%4
if "%EXT_TH%"=="." set EXT_TH=
if "%EXT_TH%"=="" set /A EXT_TH=2*%PROX_TH%

set nPRUNE=%5
if "%nPRUNE%"=="." set nPRUNE=
if "%nPRUNE%"=="" set nPRUNE=0

set TJ_TH=%6
if "%TJ_TH%"=="." set TJ_TH=
if "%TJ_TH%"=="" set TJ_TH=%EXT_TH%

set TMP_OUT=%BASENAME%_%sioCODE%.tiff

set skelLineEnds=1

echo %0: proxLineEnds %PROX_TH% ...
call %PICTBAT%proxLineEnds ^
  %INFILE% ^
  %TMP_OUT% ^
  %PROX_TH%

if ERRORLEVEL 1 exit /B 1

set /A EXT_TH_2=(%EXT_TH%+1)/4

echo %0: extLineEnds EXT_TH=%EXT_TH% EXT_TH_2=%EXT_TH_2% ...

if %EXT_TH_2% LSS %EXT_TH% (

  echo %0: extLineEnds first %EXT_TH_2% ...

  call %PICTBAT%extLineEnds ^
    %TMP_OUT% ^
    %TMP_OUT% ^
    %EXT_TH_2%

  if ERRORLEVEL 1 exit /B 1
)

echo %0: extLineEnds second %EXT_TH% ...

call %PICTBAT%extLineEnds ^
  %TMP_OUT% ^
  %TMP_OUT% ^
  %EXT_TH%

if ERRORLEVEL 1 exit /B 1

echo %0: extLineEnds finished

rem %IMG7%magick ^
rem   %TMP_OUT% ^
rem   ( +clone ^
rem     -morphology HMT 3x3:1,1,1,1,0,1,1,1,1 ) ^
rem   -compose Lighten -composite -compose Over ^
rem   -morphology Thinning:-1 Skeleton ^
rem   -threshold 50% ^
rem   -morphology Close Disk:2 ^
rem   -threshold 50%% ^
rem   -morphology Thinning:-1 Skeleton ^
rem   %TMP_OUT%

%IMG7%magick ^
  %TMP_OUT% ^
  -clamp ^
  -morphology Close Disk:2 ^
  -alpha off ^
  -threshold 50%% ^
  -morphology Thinning:-1 Skeleton -clamp ^
  -alpha off ^
  %TMP_OUT%

if ERRORLEVEL 1 exit /B 1

echo %0: prune %nPRUNE% %nPRUNE%...
if not %nPRUNE%==0 call %PICTBAT%pruneStubs ^
  %TMP_OUT% ^
  %TMP_OUT% ^
  %nPRUNE%

if ERRORLEVEL 1 exit /B 1

%IMG7%magick ^
  %TMP_OUT% ^
  -clamp ^
  -bordercolor White -border 1 ^
  %TMP_OUT%

if ERRORLEVEL 1 exit /B 1

echo %0: TjuncLineEnds %TJ_TH%...
call %PICTBAT%TjuncLineEnds ^
  %TMP_OUT% ^
  %TMP_OUT% ^
  %TJ_TH%

if ERRORLEVEL 1 exit /B 1

%IMG7%magick ^
  %TMP_OUT% ^
  -clamp ^
  -shave 1 ^
  -morphology Close Disk:2 ^
  -alpha off ^
  -threshold 50%% ^
  -morphology Thinning:-1 Skeleton -clamp ^
  -alpha off ^
  -threshold 50%% ^
  %TMP_OUT%

if ERRORLEVEL 1 exit /B 1

echo %0: pruneStubsRep...
call %PICTBAT%pruneStubsRep ^
  %TMP_OUT% ^
  %OUTFILE% ^
  all

if ERRORLEVEL 1 exit /B 1


call echoRestore

endlocal & set s2bdOUTFILE=%OUTFILE%
All images on this page were created by the commands shown, using:
%IMG7%magick -version
Version: ImageMagick 7.1.0-47 Q16-HDRI x64 15861e0:20220827 https://imagemagick.org
Copyright: (C) 1999 ImageMagick Studio LLC
License: https://imagemagick.org/script/license.php
Features: Cipher DPC HDRI OpenCL
Delegates (built-in): bzlib cairo freetype gslib heic jng jp2 jpeg jxl lcms lqr lzma openexr pangocairo png ps raqm raw rsvg tiff webp xml zip zlib
Compiler: Visual Studio 2022 (193331629)
To improve internet download speeds, some images may have been automatically converted (by ImageMagick, of course) from PNG or TIFF or MIFF to JPG.
Source file for this web page is partbound.h1. To re-create this web page, run "procH1 partbound".
This page, including the images, is my copyright. Anyone is permitted to use or adapt any of the code, scripts or images for any purpose, including commercial use.
Anyone is permitted to re-publish this page, but only for non-commercial use.
Anyone is permitted to link to this page, including for commercial use.
Page version v1.0 20-July-2016.
Page created 23-Sep-2022 21:08:22.
Copyright © 2022 Alan Gibson.