snibgo's ImageMagick pages
Follow line
We can distort an image (perhaps representing fabric) so the central line follows an arbitrary path, and do the inverse.
This distorts the image. We will adopt the following constraints:
- The image's central vertical line will follow the line.
- Hence, the central vertical line may become shorter or longer. Any stretch or shrinkage will be linear (ie the same scale along the entire length).
- Other parts of the image will stretch or shrink as appropriate.
- This will not simulate folds in the cloth.
Scripts on this page assume that the version of ImageMagick in %IM7DEV% is V7 and has been built with various process modules. See
Process modules.
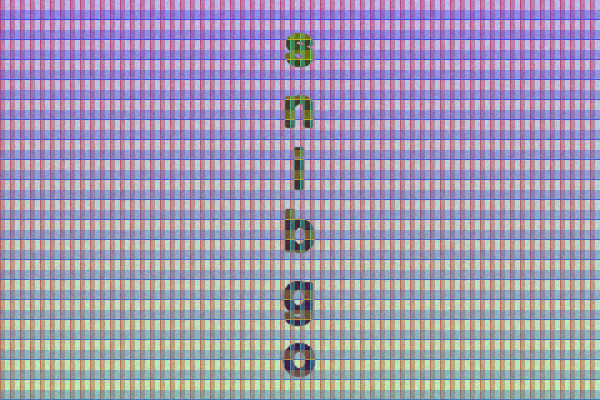
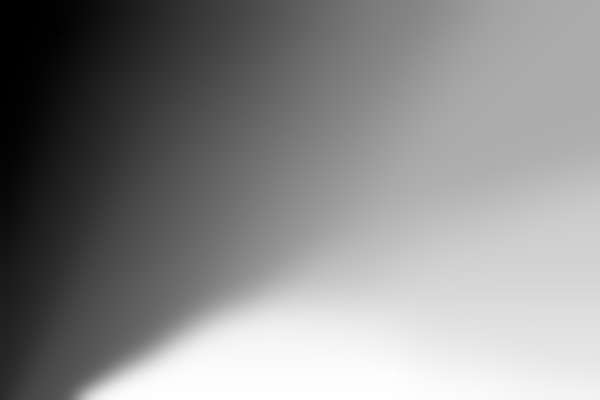
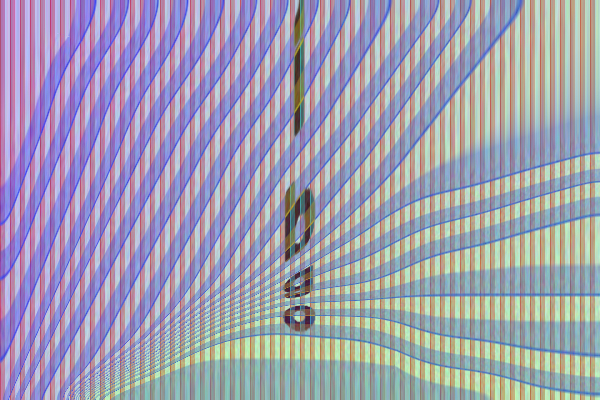
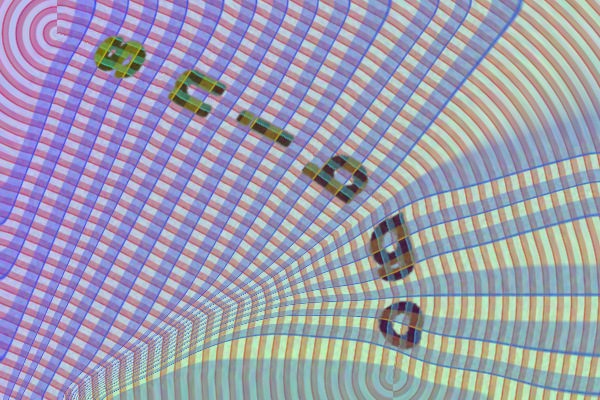
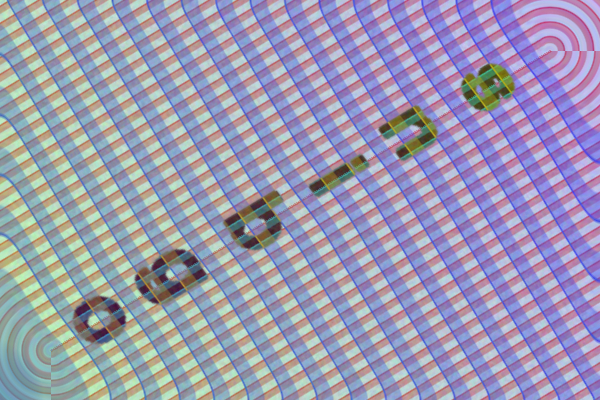
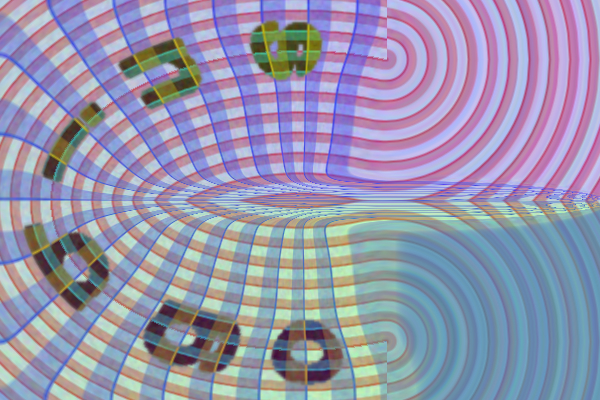
We create an image that repesents fabric or a printed rubber sheet. We will distort this fabric so the central vertical line follows a defined line. Parts of the fabric will stretch, while other parts will shrink.
rem goto skip2

%IMG7%magick ^
  -size 10x20 xc:#fff ^
  -fill #f00f -draw "line 0,0 0,19" ^
  -fill #f008 -draw "rectangle 1,0 4,19" ^
  -fill #00ff -draw "line 0,19 9,19" ^
  -fill #00f6 -draw "rectangle 0,10 9,18" ^
  +write mpr:PATTERN +delete ^
  -size 600x400 ^
  tile:mpr:PATTERN ^
  ( +clone ^
    -sparse-color bilinear ^
      "0,0,blue 0,%%[fx:h],lime" ^
    -alpha set -channel A ^
    -evaluate set 30%% ^
    +channel ^
  ) ^
  -compose Over -composite ^
  ( +clone ^
    +noise Random ^
    -blur 0x0.5 ^
    -alpha set -channel A ^
    -evaluate set 20%% ^
    +channel ^
  ) ^
  -compose Over -composite ^
  -negate ^
  -evaluate Multiply 0.8 ^
  -negate ^
  ( +clone ^
    -fill Black -colorize 100 ^
    -fill White ^
    -pointsize 55 ^
    -gravity Center ^
    -annotate 0 "s\nn\ni\nb\ng\no" ^
    -blur 0x0.5 +opaque Black -blur 0x0.5 ^
  ) ^
  -compose Exclusion -composite ^
  -alpha off ^
  fl_fabric.png
|
|
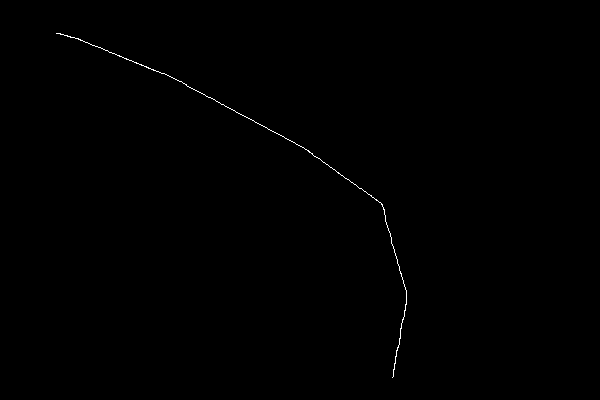
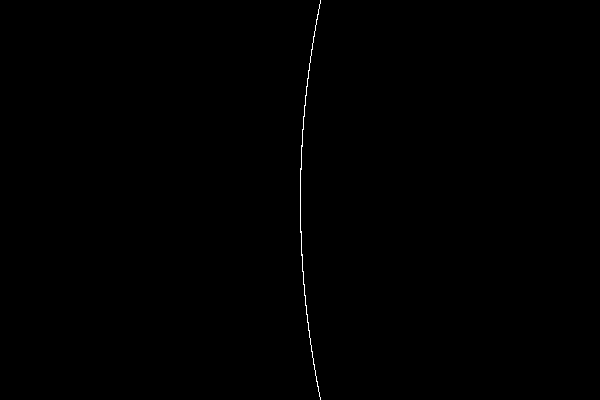
With Gimp, I create a white line on a black background, the same size as the fabric. I use the pencil tool with no antialiasing. The line is mostly one pixel wide, with some wider patches where the mouse jiggled. It has no loops. The result is black and white only.
set SRC=fl_src1.png
|
|
How long is the line? To the first approximation, it is the number of white pixels in the image.
for /F "usebackq" %%L in (`%IMG7%magick ^
  %SRC% ^
  -format "APPROX_LEN=%%[fx:int(mean*w*h+0.5)]" ^
  INFO:`) do set %%L

echo APPROX_LEN=%APPROX_LEN%
APPROX_LEN=532
We can find the coordinates of the two ends of the line. The -virtual-pixel Black ensures each end is found even if it is at an edge.
%IM7DEV%magick ^
  %SRC% ^
  -virtual-pixel Black ^
  -morphology HMT LineEnds ^
  -process allwhite ^
  NULL:
allwhite:
56,33
392,377
We put the coordinate of the ends into variables. We also find the image's width, height and diagonal.
for /F "usebackq tokens=2,3 delims=:, " %%X in (`%IM7DEV%magick ^
  %SRC% ^
  -morphology HMT LineEnds ^
  -process onewhite ^
  fl_two_ends.png 2^>^&1`) do (
  set X0=%%X
  set Y0=%%Y
)

for /F "usebackq tokens=2,3 delims=:, " %%X in (`%IM7DEV%magick ^
  fl_two_ends.png ^
  -fill Black -draw "point %X0%,%Y0%" ^
  -process onewhite ^
  NULL: 2^>^&1`) do (
  set X1=%%X
  set Y1=%%Y
)

echo X0=%X0% Y0=%Y0%
echo X1=%X1% Y1=%Y1%

for /F "usebackq" %%L in (`%IMG7%magick identify ^
  -format "WW=%%w\nHH=%%h\nDIAG=%%[fx:int(hypot(w,h)+0.5)]" ^
  %SRC%`) do set %%L

echo WW=%WW%  HH=%HH% DIAG=%DIAG%

rem goto skip
X0=56 Y0=33
X1=392 Y1=377
WW=600  HH=400 DIAG=721
Starting at this top-most end, we can generate a distance gradient along the line. We assume the line is no longer than the diagonal of the image. (We could check that the gradient fully covers the original line.)
A possible choice for KNL_SCALE would be 1, but this leads to rounding errors with integer IM. A better KNL_SCALE would give black at the top of the line and white at the bottom. This would map the fabric so the top of the fabric will be at the top of the line, and the bottom of the fabric will be at the bottom of the line. The value that would do this is Quantum / line_length. We have only the approximate length, so we choose 90% of this value.
The -morphology IterativeDistance operation is slow. For digital photographs, eg 4000x3000 pixels, it is horribly slow. As we need the line to be one pixel thick, we can't simply resize the input down and resize the output up. (Since first writing this page, I have developed a technique using
Dark Paths: gradient lines, which is massively quicker.)
set /A KNL_SCALE_V=100
set /A KNL_SCALE_V=65535/%HH%/2
set /A KNL_SCALE_V=65535*90/%APPROX_LEN%/100

%IMG7%magick ^
  %SRC% ^
  -negate +write mpr:MASK ^
  -fill White -colorize 100 ^
  -fill Black -draw "point %X0%,%Y0%" ^
  -write-mask mpr:MASK ^
  -morphology ^
    IterativeDistance:%DIAG% ^
    Euclidean:7,%KNL_SCALE_V% ^
  +write-mask ^
  +depth ^
  fl_line_grad0.png
|
|
The line varies from black to some level of gray. The values can be used as an absolute displacement to another image. What is the lightest gray on the line?
echo KNL_SCALE_V=%KNL_SCALE_V%

%IMG7%magick ^
  %SRC% ^
  fl_line_grad0.png ^
  -compose Darken -composite ^
  -format "MAX_GRAY=%%[fx:maxima*QuantumRange]\nLINE_LEN=%%[fx:maxima*QuantumRange/%KNL_SCALE_V%]" ^
  info:
KNL_SCALE_V=110
MAX_GRAY=60150
LINE_LEN=546.818
MAX_GRAY should be less than Quantum. Provided it is, then MAX_GRAY divided by KNL_SCALE_V is the length of the line in pixels.
If we want a more precise kernel scale, we can use this revised length to re-calculate the kernel.
for /F "usebackq" %%L in (`%IMG7%magick ^
  %SRC% ^
  fl_line_grad0.png ^
  -compose Darken -composite ^
  -format "KNL_SCALE_V=%%[fx:%KNL_SCALE_V%/maxima]" ^
  info:`) do set %%L

%IMG7%magick ^
  %SRC% ^
  -negate +write mpr:MASK ^
  -fill White -colorize 100 ^
  -fill Black -draw "point %X0%,%Y0%" ^
  -write-mask mpr:MASK ^
  -morphology ^
    IterativeDistance:%DIAG% ^
    Euclidean:7,%KNL_SCALE_V% ^
  +write-mask ^
  +depth ^
  fl_line_grad.png
|
|
Re-calculate the statistics:
echo KNL_SCALE_V=%KNL_SCALE_V%

%IMG7%magick ^
  %SRC% ^
  fl_line_grad.png ^
  -compose Darken -composite ^
  -format "MAX_GRAY=%%[fx:maxima*QuantumRange]\nLINE_LEN=%%[fx:maxima*QuantumRange/%KNL_SCALE_V%]" ^
  info:
KNL_SCALE_V=119.848
MAX_GRAY=65535
LINE_LEN=546.818
MAX_GRAY is close enough to 65535. If it wasn't, we could iterate again.
If we wanted a non-linear stretch or shrink along line, we could apply a process such as -gamma or -sigmoidal-contrast to fl_line_grad.png.
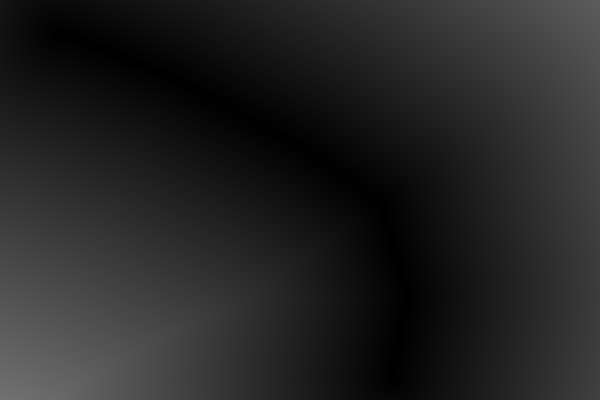
Using
blurFill.bat, we can spread the line values throughout the entire image. Then the gray values give the vertical positions for the source from the fabric.
blurFill.bat uses HDRI IM. With integer IM, quantization errors would be propagated at increasing distances from the line, and these would be visible as errors in the displacements.
%IMG7%magick ^
  fl_line_grad.png ^
  -transparent White ^
  fl_line_grad_tw.png

set bfTHRESH_PC=3

call %PICTBAT%blurFill ^
  fl_line_grad_tw.png 0.6+ fl_line_bf.png

set bfTHRESH_PC=
|
|
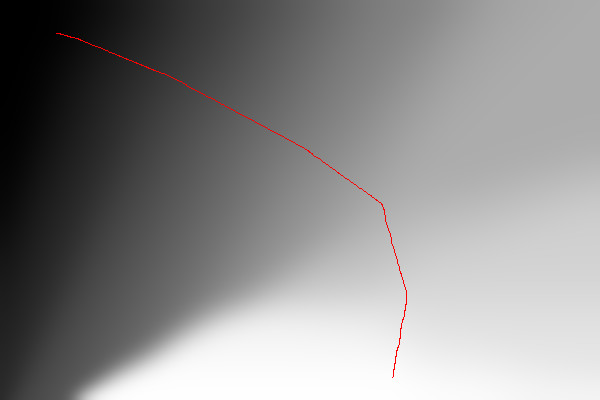
For visibility, we auto-level and overlay a red copy of the line.
%IM7DEV%magick ^
  fl_line_bf.png ^
  -auto-level ^
  -set colorspace sRGB ^
  ( %SRC% ^
    -set colorspace sRGB ^
    -transparent Black ^
    -fill Red -opaque White ^
  ) ^
  -composite ^
  fl_line_red.png
|
|
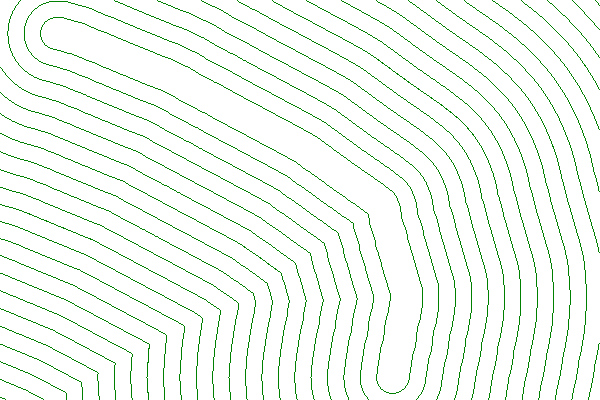
The values are smoothly graduated on the outside of the curve. On the inside, values have been squeezed together.
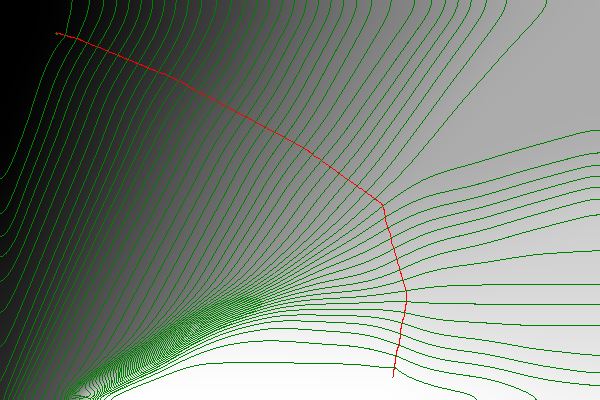
We can overlay contours (see page
Gradient contours):
%IMG7%magick ^
  fl_line_bf.png ^
  ( -size 1x500 gradient: -rotate 90 ^
    -duplicate 49 +append +repage ) ^
  -clut ^
  -morphology edgein diamond:1 ^
  -threshold 40%% ^
  -transparent Black ^
  -fill Green -opaque White ^
  fl_line_red.png ^
  -compose DstOver -composite ^
  fl_line_cont.png
|
|
A KNL_SCALE of 1 would result in the contours being somewhat "stepped". Working throughout in floating-point might cure this.
The contours are spaced evenly along the line. The first and last contours have a kink, artifacts from blurFill. (A smaller blur-sigma, eg 0.5, almost removes the kink. Sadly, it also angles the contour lines away from the perpendicular.) Where the perpendiculars of the line meet, the contours are naturally squeezed together very tightly. Approaching the edges of the image, contours become perpendicular to the edge.
We can find the distance perpendicular to the line very simply and quickly, by taking the -morphology Distance Euclidean of an image that has a black line on a white background. The following also shows contour lines of these distances.
We want the fabric to scale equally in the horizontal and vertical directions along the line, so squares and circles in the fabric pattern remain squares and circles when displaced. To do this, we set the horizontal kernel scale equal to the vertical kernel scale multipled by the image height, divided by the image width.
(For simple mapping of the fabric, if the line was vertically down the centre, we would want the two sides to be 50%.)
rem set /A KNL_SCALE_H=65535/%HH%/2

for /F "usebackq" %%L in (`%IMG7%magick identify ^
  -format ^
    "KNL_SCALE_H=%%[fx:%KNL_SCALE_V%*%HH%/%WW%]" ^
  xc:`) do set %%L

%IMG7%magick ^
  %SRC% ^
  -negate ^
  -morphology Distance Euclidean:7,%KNL_SCALE_H% ^
  +depth ^
  +write fl_dperp.png ^
  ( -size 1x500 gradient: -rotate 90 ^
    -duplicate 49 +append +repage ) ^
  -clut ^
  -morphology edgein diamond:1 ^
  -threshold 40%% ^
  -transparent Black ^
  -fill Green -opaque White ^
  fl_dperp_ct.png

echo KNL_SCALE_H=%KNL_SCALE_H%
KNL_SCALE_H=79.8987
|
|
Why are these contours not spaced as above? Because we need to multiply vertical scale by HH/WW.
The distance from the line varies from zero upwards. For some purposes, we might want distances on one side of the line to be positive and distances on the other side to be negative. Or, for integer IM, distances on one side to be greater than 50% and distances on the other to be less than 50%.
We start by creating a mask of the two sides. We can do this by joining each end to an edge, then flood-filling from top-left with white. (The script join the ends to the nearest edges, and flood-fills from the first black pixel.) This is rather crude. It would be better to extend both ends of the line to the boundary.
Ideally, we want the mask to be white on the right-side of the line (as we walk from the dark end of the line towards the light end), and black on the left.
:skip

%IMG7%magick ^
  %SRC% ^
  -fill None ^
  -stroke White -strokewidth 1 ^
  +antialias ^
  -draw "line %X0%,%Y0% %X0%,0" ^
  -draw "line %X1%,%Y1% %X1%,%HH%" ^
  -fill White -draw "color 0,0 floodfill" ^
  fl_mask_side.png
|

|
We use this as a mask, so distances on one side are greater than 50% and distances on the other are less than 50%.
%IMG7%magick ^
  fl_dperp.png ^
  -evaluate Add 50%% ^
  ( +clone -negate ) ^
  ( fl_mask_side.png -alpha off ) ^
  -compose Over -composite ^
  fl_dperp_plus.png
|

|
The distances have low values (dark) on the left, with high values (light) on the right.
Future: Multiplying KNL_SCALE_H by a factor would change the aspect ratio evenly. A gamma-shift, or sigmoidal contrast, on this horizontal relative displacement map might be interesting.
We can make the distance values into a displacement map. We put the distances from the line into the red channel, and distances parallel to the line's length in the green channel.
%IMG7%magick ^
  fl_dperp_plus.png ^
  fl_line_bf.png ^
  ( +clone -evaluate set 0 ) ^
  -combine ^
  fl_disp_map_abs.png
|
|
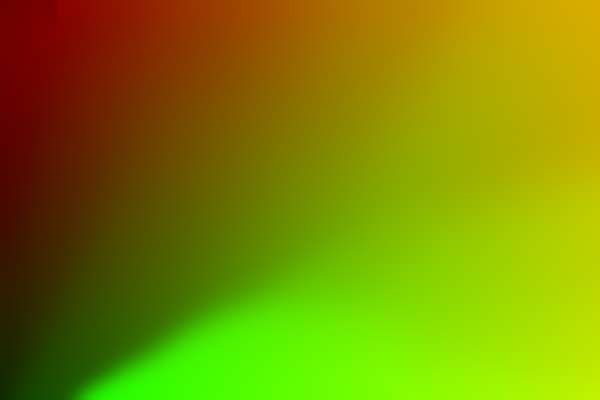
This is an absolute displacement map. We can create a relative displacement map by creating the identity absolute map (with sparse-color) and subtracting this from the absolute displacement map.
%IMG7%magick ^
  fl_disp_map_abs.png ^
  ( +clone ^
    -sparse-color bilinear ^
0,0,#000,^
%%[fx:w-1],0,#f00,^
0,%%[fx:h-1],#0f0,^
%%[fx:w-1],%%[fx:h-1],#ff0 ^
  ) ^
  -compose Mathematics ^
    -define compose:args=0,-0.5,0.5,0.5 ^
    -composite ^
  fl_disp_map_rel.png
|

|
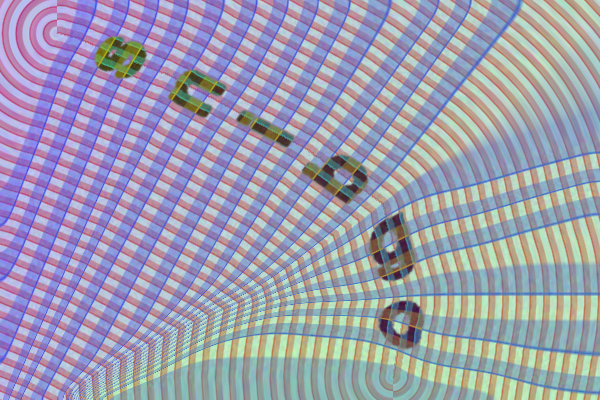
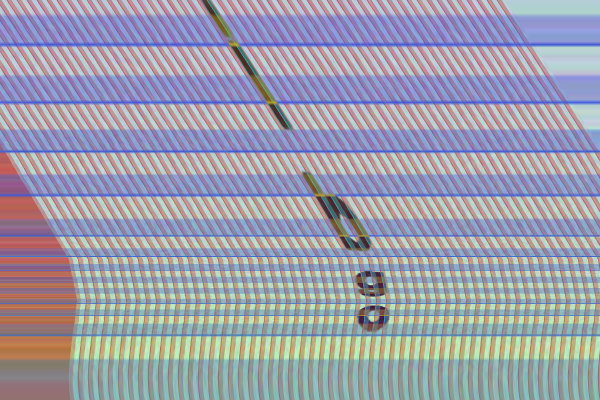
We can use the relative displacement map to transform the fabric image.
As the relative map was created with compose:args=0,-0.5,0.5,0.5, we don't need to divide width and height by two.
set /A Wm1=%WW%-1
set /A Hm1=%HH%-1

%IMG7%magick ^
  fl_fabric.png ^
  fl_disp_map_rel.png ^
  -compose Displace ^
    -set option:compose:args %Wm1%x%Hm1% ^
    -composite ^
  fl_fabric_disp.png
|

|
|
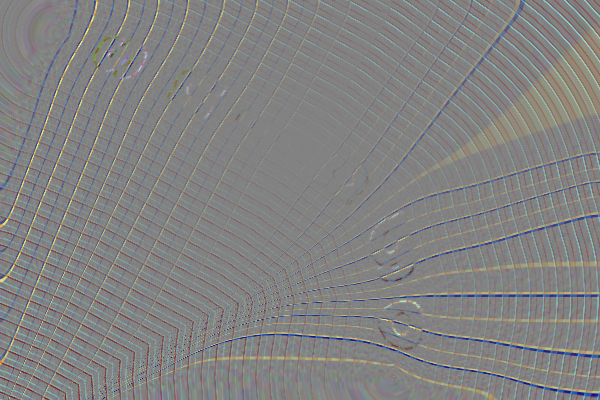
We can use the absolute map with -compose Distort,
instead of converting to relative map and using -compose Displace.
set /A W_2=%WW%/2
set /A H_2=%HH%/2

%IMG7%magick ^
  fl_fabric.png ^
  fl_disp_map_abs.png ^
  -compose Distort ^
    -set option:compose:args %W_2%x%H_2% ^
    -composite ^
  fl_fabric_disp_a.png
|
|
|
Compare the two results:
%IMG7%magick ^
  fl_fabric_disp.png ^
  fl_fabric_disp_a.png ^
  -compose Mathematics ^
    -define compose:args=0,-1,1,0.5 ^
    -composite ^
  -auto-level ^
  fl_diff.png

%IMG7%magick compare ^
  -metric RMSE ^
  fl_fabric_disp.png ^
  fl_fabric_disp_a.png ^
  NULL:

cmd /c exit /B 0
1980.92 (0.030227)
|
|
We can easily displace just horizontally, or just vertically. (However, this will not displace the pixels from the central line just horizontally or vertically.)
|
Horizontally:
%IMG7%magick ^
  fl_fabric.png ^
  fl_disp_map_rel.png ^
  -compose Displace ^
    -set option:compose:args %Wm1%x0 ^
    -composite ^
  fl_fabric_disp_h.png
|

|
|
Vertically:
%IMG7%magick ^
  fl_fabric.png ^
  fl_disp_map_rel.png ^
  -compose Displace ^
    -set option:compose:args 0x%Hm1% ^
    -composite ^
  fl_fabric_disp_v.png
|
|
As a variation, we can crop the central vertical line of the displacement map and scale it up, "spreading" the values aross the lines.
|
Horizontal and vertical:
%IMG7%magick ^
  fl_fabric.png ^
  ( fl_disp_map_rel.png ^
    -gravity Center ^
    -crop 1x%HH%+0+0 +repage ^
    -scale "%WW%x%HH%^!" ^
  ) ^
  -compose Displace ^
    -set option:compose:args %Wm1%x%Hm1% ^
    -composite ^
  fl_fabric_disp_hv2.png
|
|
|
Horizontally:
%IMG7%magick ^
  fl_fabric.png ^
  ( fl_disp_map_rel.png ^
    -gravity Center ^
    -crop 1x%HH%+0+0 +repage ^
    -scale "%WW%x%HH%^!" ^
  ) ^
  -compose Displace ^
    -set option:compose:args %Wm1%x0 ^
    -composite ^
  fl_fabric_disp_h2.png
|
|
|
Vertically:
%IMG7%magick ^
  fl_fabric.png ^
  ( fl_disp_map_rel.png ^
    -gravity Center ^
    -crop 1x%HH%+0+0 +repage ^
    -scale "%WW%x%HH%^!" ^
  ) ^
  -compose Displace ^
    -set option:compose:args 0x%Hm1% ^
    -composite ^
  fl_fabric_disp_v2.png
|
|
The script
followLine.bat encapsulates the above.
Currently, the script can get the side polarity wrong. The polarity can be changed with set flFAB_TRANS=-flop.
The first example uses the fabric and curved line from images shown at the top of this page. If the environment variable flDEBUG_TXT is set, the script writes some debugging text to that file.
set flDEBUG_TXT=fl_dbg.txt

call %PICTBAT%followLine ^
  fl_fabric.png fl_src1.png fl_sc1.png

set flDEBUG_TXT=
WW=600 HH=400 OKAY=1
X0=56 Y0=33  X1=392 Y1=377
APPROX_LEN=532
KNL_SCALE_V=110
MAX_01=0.91783 MAX_GRAY=60150 LINE_LEN=546.818
KNL_SCALE_V=119.848
MAX_01=1 MAX_GRAY=65535 LINE_LEN=546.818
KNL_SCALE_H=79.8987
Closest edges: (56,0) (392,399)
Floodfill mask: (0,0)
OUTFILE=fl_sc1.png
|
|
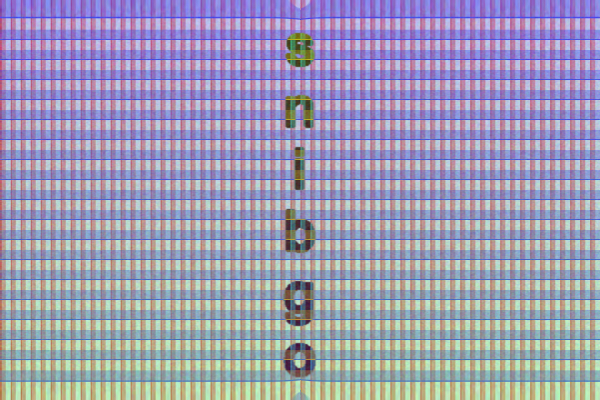
We can use the script to create other examples. For each one, we first create a line image. The first of these has the identity line image, the full height, centred horizontally. So there is (almost) no distortion to the fabric.
Two of the examples need set flFAB_TRANS=-flop.
In all these examples, the line is defined mathematically. Thus, the displacement could also be defined mathematically, which would give a more accurate result.
followLine.bat calls blurFill.bat, with the second parameter suffixed with "+", which enables an increment of the blur radius with each iteration. This speeds up the processing, but leads to inaccuracies that are evident perpendicular to the line ends. The inaccuracies increase as the distance from the line increases.
In practice, the line can be made longer than needed, and the result trimmed.
%IMG7%magick ^
  -size %WW%x%HH% xc:Black ^
  -fill None ^
  -stroke White -strokewidth 1 ^
  +antialias ^
  -draw "line 300,0 300,399" ^
  fl_line_v.png

call %PICTBAT%followLine ^
  fl_fabric.png ^
  fl_line_v.png ^
  fl_sc2.png
|

|
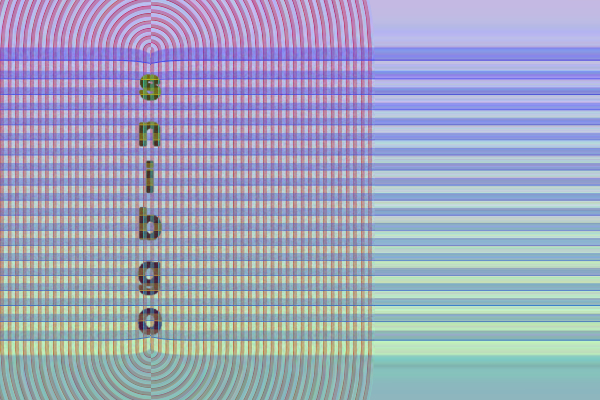
%IMG7%magick ^
  -size %WW%x%HH% xc:Black ^
  -fill None ^
  -stroke White -strokewidth 1 ^
  +antialias ^
  -draw "line 150,50 150,350" ^
  fl_line_v2.png

call %PICTBAT%followLine ^
  fl_fabric.png ^
  fl_line_v2.png ^
  fl_sc3.png
|

|
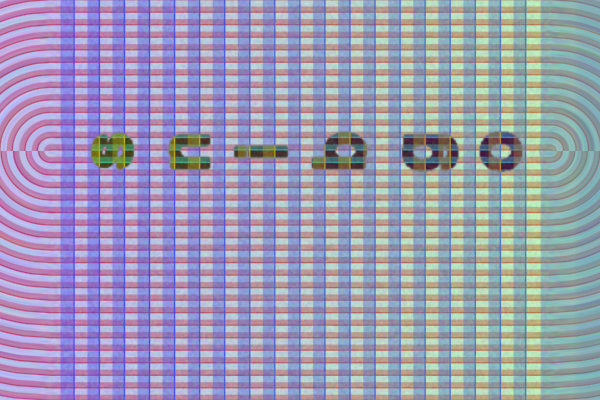
set flFAB_TRANS=-flop

%IMG7%magick ^
  -size %WW%x%HH% xc:Black ^
  -fill None ^
  -stroke White -strokewidth 1 ^
  +antialias ^
  -draw "line 50,150 550,150" ^
  fl_line_h.png

call %PICTBAT%followLine ^
  fl_fabric.png ^
  fl_line_h.png ^
  fl_sc4.png
|

|
%IMG7%magick ^
-size %WW%x%HH% xc:Black ^
-fill None ^
-stroke White -strokewidth 1 ^
+antialias ^
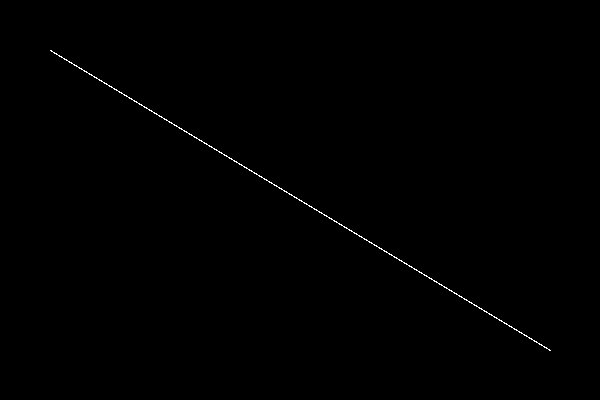
-draw "line 50,50 550,350" ^
fl_line_d5.png
call %PICTBAT%followLine ^
fl_fabric.png ^
fl_line_d5.png ^
fl_sc5.png
set flFAB_TRANS=
|

|
%IMG7%magick ^
-size %WW%x%HH% xc:Black ^
-fill None ^
-stroke White -strokewidth 1 ^
+antialias ^
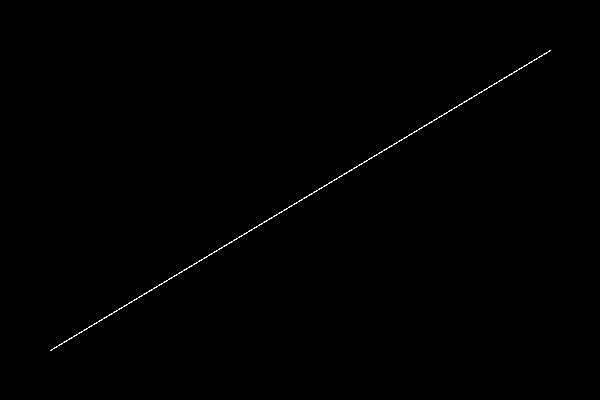
-draw "line 50,350 550,50" ^
fl_line_d6.png
call %PICTBAT%followLine ^
fl_fabric.png ^
fl_line_d6.png ^
fl_sc6.png
|
|
%IMG7%magick ^
-size %WW%x%HH% xc:Black ^
-stroke White -fill None ^
+antialias ^
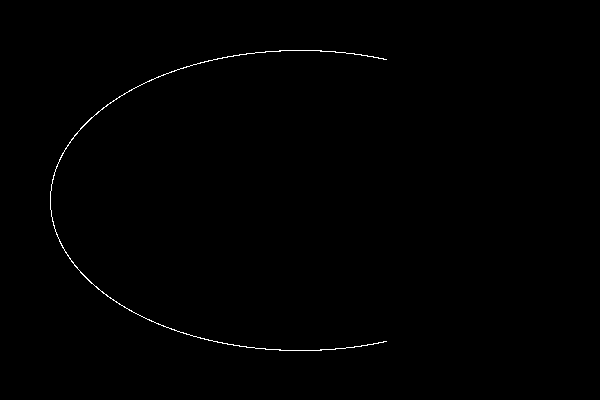
-draw "arc 50,50 550,350 70,290" ^
fl_line_arc.png
call %PICTBAT%followLine ^
fl_fabric.png ^
fl_line_arc.png ^
fl_sc7.png
|
|
%IMG7%magick ^
  -size %WW%x%HH% xc:Black ^
  -stroke White -fill None ^
  +antialias ^
  -draw "circle 1300,200 300,200" ^
  fl_line_circ.png

call %PICTBAT%followLine ^
  fl_fabric.png ^
  fl_line_circ.png ^
  fl_sc8.png
|

|
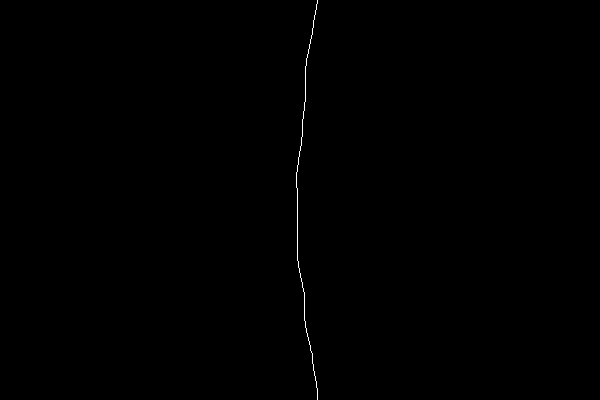
To demonstrate the script working on a non-mathematical displacement, we randomly shift the line horizontally:
:skip2
call %PICTBAT%ranHorShLn ^
fl_line_circ.png 10 5 10
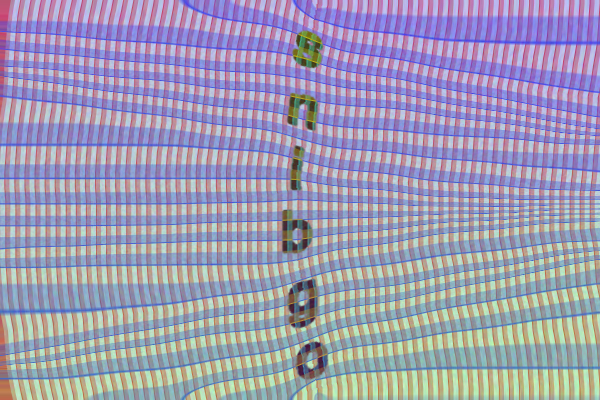
call %PICTBAT%followLine ^
fl_fabric.png ^
fl_line_circ_rhsl.png ^
fl_sc9.png
|
|
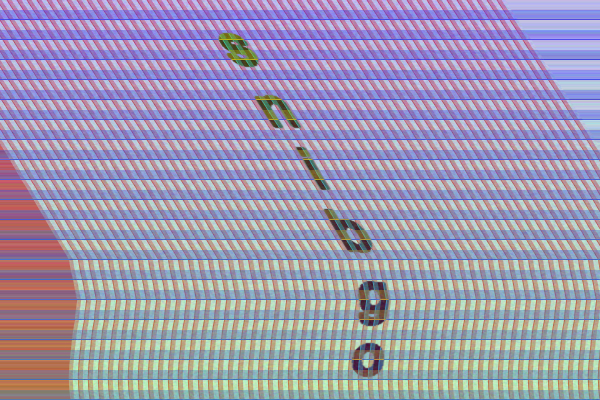
Given a line, and an image that follows that line, can we make the undistorted version?
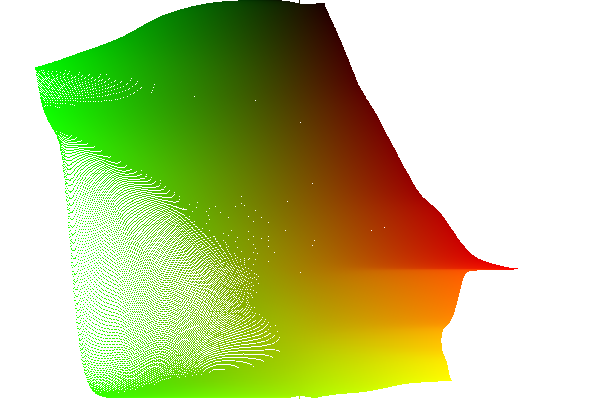
Yes, with some caveats. The process is to create the absolute displacement map as shown above, then invert it (see
Process modules: invert displacement map), and use that to displace the follow-line image. This will straighten the line that was bent.
|
The first absolute displacement map created above,
fl_disp_map_abs.png.
|
|
|
The result of distorting by this map, fl_fabric_disp_a.png.
|
|
|
Invert the map.
%IM7DEV%magick ^
  fl_disp_map_abs.png ^
  -alpha set ^
  -process invdispmap ^
  fl_inv_disp.png
|
|
|
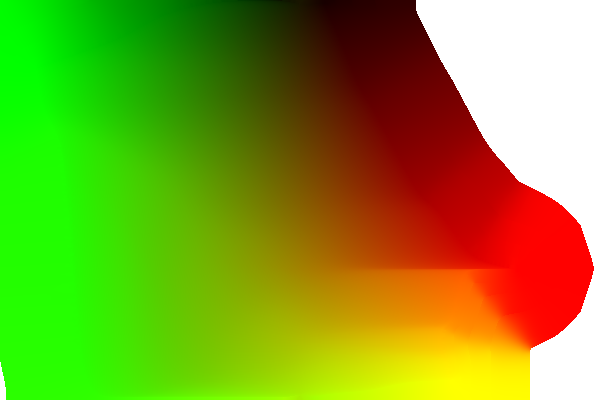
Fill the holes.
call %PICTBAT%blurFillSparse ^
  fl_inv_disp.png ^
  . ^
  fl_inv_disp_bf.png
|
|
|
Apply this displacement to the displaced image.
set FORM=WW=%%w\n^
HH=%%h\n^
W_2=%%[fx:w/2]\n^
H_2=%%[fx:h/2]

for /F "usebackq" %%L in (`%IMG7%magick identify ^
  -format "%FORM%" ^
  fl_fabric_disp_a.png`) do set %%L

%IMG7%magick ^
  fl_fabric_disp_a.png ^
  fl_inv_disp_bf.png ^
  -compose Distort ^
    -set option:compose:args %W_2%x%H_2% ^
    -composite ^
  fl_dedisp_a.png
|

|
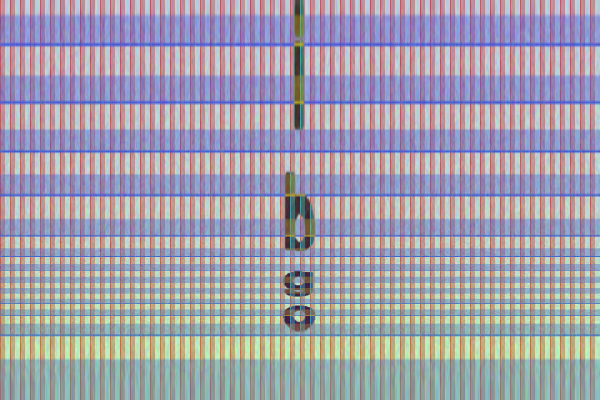
The distorted image has been correctly undistorted. However, quantization errors have introduced a roughness to the result. Super-sampling would reduce this problem.
The transparent pixels in the inverse map are from two causes:
- No pixels from the source image were displaced to positions outside the central area, so the inversion process cannot determine the source coordinates. Blur-fill has no information to work with.
- Within the central area, especially toward the bottom-left, the forwards displacement has squashed pixels together. The forwards displacement shows each destination pixel is derived from one source coordinate, although many source pixels map to the single destination pixel. Hence the inverse process cannot determine the displacement required to derive some source pixels, leaving small holes in the displacement map. Blur-fill gives plausible inverse displacements for these pixels.
For this example, we could distinguish between the two cases by creating a black/white image from the alpha channel, then either flood-filling from an edge or using connected-components.
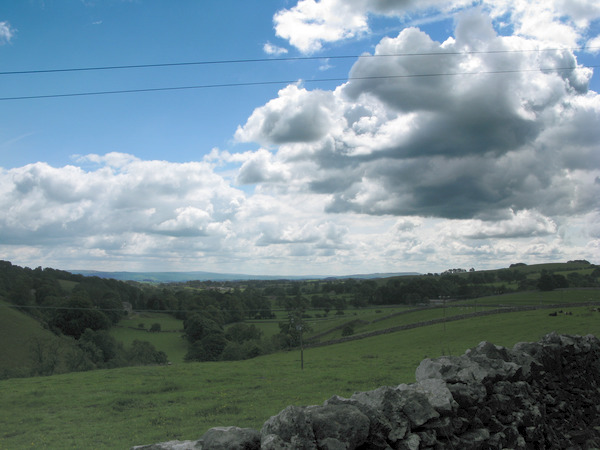
We can use the inverse process to straighten a horizon. The script
followLine.bat makes a displacement map to move the central vertical column to a defined line. The inverse will move a defined line to the central vertical column.
The process is explored in detail on my page
Straightening horizons.
|
Example input.
|
|
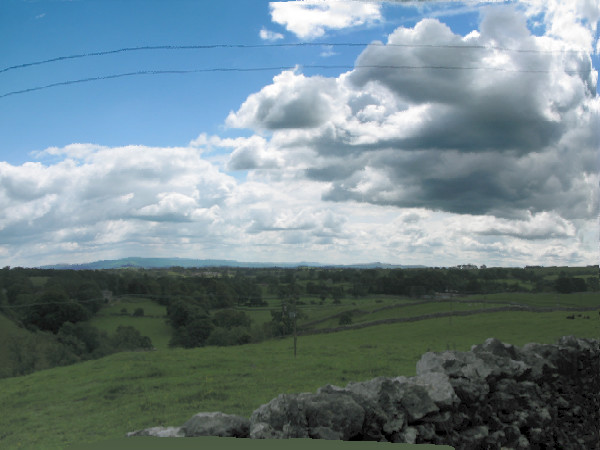
|
Output.
|
|
We don't need to keep all those miff files, so delete them.
rem del fl_*.miff
For convenience, .bat scripts are also available in a single zip file. See
Zipped BAT files.
set QUANT_FP=

if /I "%~x1"==".miff" set QUANT_FP=+depth -depth 32 -define "quantum:format=floating-point"

rem echo QUANT_FP=%QUANT_FP%
@rem From image %1 with transparency,
@rem blurs until fully opaque.
@rem
@rem Optional:
@rem   %2 blur sigma (default 1)
@rem     %2 can have a "+" suffix.
@rem     If it has, the sigma will increment on each pass.
@rem   %3 output filename
@rem   %4 blur type
@rem     0 -blur 0x{sigma}
@rem     1 -motion-blur 0x{sigma}+{angle}
@rem     2 -rotational-blur {angle}
@rem   %5 angle
@rem
@rem  bfTHRESH_PC percentage of alpha for thresholding.
@rem    For thin lines, use a low value eg 3.
@rem  bfMAX_ITER maximum number of iterations. [Default max(w,h).]
@rem  bfMAX_SIG Stop when + results in sigma greater than this.
@rem   [Default no check.]
@rem
@rem  An equivalent compiled program wouldn't need to save images
@rem    between iterations, so would be faster.
@rem
@rem  Updated:
@rem    28-August-2018 Added bfMAX_SIG
@rem    13-July-2022 Upgraded for IM v7.

@if "%1"=="" findstr /B "rem @rem" %~f0 & exit /B 1

@setlocal

@call echoOffSave

call %PICTBAT%setInOut %1 bf


set IN_BLR_SIG=%2
if "%IN_BLR_SIG%"=="." set IN_BLR_SIG=
if "%IN_BLR_SIG%"=="" set IN_BLR_SIG=1

rem echo IN_BLR_SIG=%IN_BLR_SIG%

set BLR_SUFFIX=%IN_BLR_SIG:~-1%
if "%BLR_SUFFIX%"=="+" (
  set BLR_SIG=%IN_BLR_SIG:~0,-1%
) else (
  set BLR_SUFFIX=
  set BLR_SIG=%IN_BLR_SIG%
)

if not "%3"=="" if not "%3"=="." set OUTFILE=%3

echo %~n0: INFILE=%INFILE% OUTFILE=%OUTFILE% BLR_SIG=%BLR_SIG% BLR_SUFFIX=%BLR_SUFFIX%  OUT_NUM=%OUT_NUM%

set BLR_TYPE=%4
if "%BLR_TYPE%"=="." set BLR_TYPE=
if "%BLR_TYPE%"=="" set BLR_TYPE=0

set BLR_ANG=%5
if "%BLR_ANG%"=="." set BLR_ANG=
if "%BLR_ANG%"=="" set BLR_ANG=0

if %BLR_TYPE%==0 (
  set sBLUR=-blur 0x%BLR_SIG%
) else if %BLR_TYPE%==1 (
  set sBLUR=-channel RGBA -motion-blur 0x%BLR_SIG%+%BLR_ANG% +channel
) else if %BLR_TYPE%==2 (
  set sBLUR=-channel RGBA -rotational-blur %BLR_ANG% +channel
) else (
  echo %0: Unknown BLR_TYPE=%BLR_TYPE%
  exit /B 1
)

if "%bfMAX_SIG%"=="" set bfMAX_SIG=1e9
set SIG_OK=1

echo %0: sBLUR=%sBLUR%

call %PICTBAT%quantFp %OUTFILE%

if "%bfTHRESH_PC%"=="" set bfTHRESH_PC=25

if "%bfMAX_ITER%"=="" for /F "usebackq" %%L in (`%IMG7%magick identify ^
  -format "bfMAX_ITER=%%[fx:max(w,h)]" ^
  %INFILE%`) do set %%L
if "%bfMAX_ITER%"=="" exit /B 1

rem echo %0: bfMAX_ITER=%bfMAX_ITER%

set TMPDIR=\temp
set TMP_INFILE=%TMPDIR%\bf_tmpin.miff
set TMP_FILE=%TMPDIR%\bf1.miff

%IMG7%magick ^
  %INFILE% ^
  +write %TMP_INFILE% ^
  -channel A ^
  -threshold %bfTHRESH_PC%%% ^
  +channel ^
  -define quantum:format=floating-point -depth 32 ^
  %TMP_FILE%
if ERRORLEVEL 1 exit /B 1

set nITER=0
set MEAN=-1

:loop
set PREV_MEAN=%MEAN%

set MEAN=

for /F "usebackq" %%L in (`%IMG7%magick ^
  %TMP_FILE% ^
  ^( +clone ^
     -alpha extract ^
     +write mpr:ALP ^
     +delete ^
  ^) ^
  %sBLUR% ^
  ^( +clone ^
     -alpha extract ^
     mpr:ALP ^
     -compose Lighten -composite ^
     -threshold %bfTHRESH_PC%%% ^
     -precision 15 ^
     -format "MIN=%%[fx:minima]\nMAX=%%[fx:maxima]\nMEAN=%%[fx:mean]\n" +write info: ^
  ^) ^
  -alpha off -compose CopyOpacity -composite ^
  %TMP_INFILE% ^
  -compose Over -composite ^
  -channel RGBA -clamp +channel ^
  +depth ^
  -define "quantum:format=floating-point" -depth 32 ^
  %TMP_FILE%`) do set %%L

if "%MEAN%"=="" (
  echo %0: magick failed, no mean
  exit /B 1
)

if "%BLR_SUFFIX%"=="+" (
  for /F "usebackq" %%L in (`%IMG7%magick identify ^
  -format "BLR_SIG=%%[fx:%BLR_SIG%*1.01]\nSIG_OK=%%[fx:%BLR_SIG%>%bfMAX_SIG%?0:1]" ^
  xc:`) do set %%L

  if %BLR_TYPE%==0 (
    set sBLUR=-blur 0x%BLR_SIG%
  ) else if %BLR_TYPE%==1 (
    set sBLUR=-motion-blur 0x%BLR_SIG%+%BLR_ANG%
  )
)

set /A nITER+=1

echo %~n0: nITER=%nITER% MIN=%MIN% MAX=%MAX% MEAN=%MEAN% BLR_SIG=%BLR_SIG% SIG_OK=%SIG_OK%

if %nITER% LSS %bfMAX_ITER% if "%PREV_MEAN%" NEQ "%MEAN%" if %SIG_OK%==1 goto loop

echo %~n0: bfMAX_ITER=%bfMAX_ITER% nITER=%nITER%

%IMG7%magick ^
  %TMP_FILE% ^
  %QUANT_FP% ^
  %OUTFILE%

if not "%MEAN%"=="1" (
  set BUST=1
) else (
  set BUST=0
)

call echoRestore

@endlocal & set bfOUTFILE=%OUTFILE%& set bfBUST=%BUST%
For some lines, both ends might be joined to the same edge pixel. For example, this will happen for short horizontal lines close to the right or left edge. The script checks for this (error message "ends have same closest edge pixel") but doesn't attempt to find a solution.
To make the mask lighter on the right side of the line, maybe we should find the direction of the triangle (XF0,YF0 XF,YF, Xblk,Yblk). For one direction, negate the mask. Annoyingly, these three points could be collinear, eg if the line-ends are on the top or left edge.
rem Given %1 is a fabric,
rem %2 is a white line on black background,
rem distorts the fabric to make the central vertical column follow the line.
rem %3 is optional output file.
rem Writes displacement map to fl_disp_map_abs.miff
@rem
@rem Also uses:
@rem
@rem   flDEBUG_TXT if not blank, deletes this file then echoes debugging text to it.
@rem   flFAB_TRANS valid IM transformation to apply to the fabric.
@rem     Eg -flop or -flip or both.
@rem
@rem Updated:
@rem   18-August-2022 for IM v7.
@rem


@if "%2"=="" findstr /B "rem @rem" %~f0 & exit /B 1

@setlocal

@call echoOffSave

call %PICTBAT%setInOut %1 fl

if not "%3"=="" set OUTFILE=%3

set TMPDIR=\temp\

if "%flDEBUG_TXT%"=="" (
  set flDEBUG_TXT=nul
) else (
  del %flDEBUG_TXT% >nul
)

set ERR=0

set LINE_FILE=%2

set APPROX_LEN_PC=90


set WW=
for /F "usebackq" %%L in (`%IMG7%magick identify ^
  -format "WW=%%w\nHH=%%h\nDIAG=%%[fx:int(hypot(w,h)+0.5)]" ^
  %INFILE%`) do set %%L

if "%WW%"=="" (
  echo Can't open INFILE [%INFILE%]
  exit /B 1
)

set OKAY=
for /F "usebackq" %%L in (`%IMG7%magick identify ^
  -format "OKAY=%%[fx:w==%WW%&&h==%HH%?1:0]" ^
  %LINE_FILE%`) do set %%L

if "%OKAY%"=="" (
  echo Can't open LINE_FILE [%LINE_FILE%]
  exit /B 1
)

if not "%flDEBUG_TXT%"=="nul" echo WW=%WW% HH=%HH% OKAY=%OKAY% >>%flDEBUG_TXT%

if not "%OKAY%"=="1" (
  echo Sizes don't match [%INFILE%] [%LINE_FILE%]
  exit /B 1
)

for /F "usebackq tokens=2,3 delims=:, " %%X in (`%IM7DEV%magick ^
  %LINE_FILE% ^
  -virtual-pixel Black ^
  -morphology HMT LineEnds ^
  -process onewhite ^
  %TMPDIR%fl_two_ends.miff 2^>^&1`) do (
  set X0=%%X
  set Y0=%%Y
)

if "%X0%"=="none" (
  echo %0: no line ends [%LINE_FILE%]
  set ERR=1
  goto end
)

for /F "usebackq tokens=2,3 delims=:, " %%X in (`%IM7DEV%magick ^
  %TMPDIR%fl_two_ends.miff ^
  -fill Black -draw "point %X0%,%Y0%" ^
  -process onewhite ^
  NULL: 2^>^&1`) do (
  set X1=%%X
  set Y1=%%Y
)

if "%X1%"=="none" (
  echo %0: no second line end [%LINE_FILE%]
  set ERR=1
  goto end
)

if not "%flDEBUG_TXT%"=="nul" echo X0=%X0% Y0=%Y0%  X1=%X1% Y1=%Y1% >>%flDEBUG_TXT%


::===

for /F "usebackq" %%L in (`%IMG7%magick ^
  %LINE_FILE% ^
  -format "APPROX_LEN=%%[fx:int(max(hypot(%X1%-%X0%,%Y1%-%Y0%),mean*w*h+0.5))]" ^
  INFO:`) do set %%L

if not "%flDEBUG_TXT%"=="nul" echo APPROX_LEN=%APPROX_LEN% >>%flDEBUG_TXT%

set /A KNL_SCALE_V=65535*%APPROX_LEN_PC%/%APPROX_LEN%/100

echo %0: Start IterativeDistance   KNL_SCALE_V=%KNL_SCALE_V%
:: Assume next is Q16.
%IMG7%magick ^
  %LINE_FILE% ^
  -negate +write mpr:MASK ^
  -fill White -colorize 100 ^
  -fill Black -draw "point %X0%,%Y0%" ^
  -write-mask mpr:MASK ^
  -morphology ^
    IterativeDistance:%DIAG% ^
    Euclidean:7,%KNL_SCALE_V% ^
  +write-mask ^
  +depth ^
  -define quantum:format=floating-point -depth 32 ^
  %TMPDIR%fl_line_grad0.miff
echo %0: Finished IterativeDistance

if not "%flDEBUG_TXT%"=="nul" echo KNL_SCALE_V=%KNL_SCALE_V% >>%flDEBUG_TXT%

for /F "usebackq" %%L in (`%IMG7%magick ^
  %LINE_FILE% ^
  %TMPDIR%fl_line_grad0.miff ^
  -compose Darken -composite ^
  -format "MAX_01=%%[fx:maxima]\nMAX_GRAY=%%[fx:maxima*QuantumRange]\nLINE_LEN=%%[fx:maxima*QuantumRange/%KNL_SCALE_V%]" ^
  info:`) do set %%L

if not "%flDEBUG_TXT%"=="nul" echo MAX_01=%MAX_01% MAX_GRAY=%MAX_GRAY% LINE_LEN=%LINE_LEN% >>%flDEBUG_TXT%

if "%MAX_01%"=="1" (
  echo %0: Bad first MAX_01 == %MAX_01%
  set ERR=1
  goto end
)

for /F "usebackq" %%L in (`%IMG7%magick ^
  %LINE_FILE% ^
  %TMPDIR%fl_line_grad0.miff ^
  -compose Darken -composite ^
  -format "KNL_SCALE_V=%%[fx:%KNL_SCALE_V%/maxima]" ^
  info:`) do set %%L

if not "%flDEBUG_TXT%"=="nul" echo KNL_SCALE_V=%KNL_SCALE_V% >>%flDEBUG_TXT%

echo %0: Start IterativeDistance2. Why do this twice? Different KNL_SCALE_V=%KNL_SCALE_V%
%IMG7%magick ^
  %LINE_FILE% ^
  -negate +write mpr:MASK ^
  -fill White -colorize 100 ^
  -fill Black -draw "point %X0%,%Y0%" ^
  -write-mask mpr:MASK ^
  -morphology ^
    IterativeDistance:%DIAG% ^
    Euclidean:7,%KNL_SCALE_V% ^
  +write-mask ^
  +depth ^
  -define quantum:format=floating-point -depth 32 ^
  %TMPDIR%fl_line_grad.miff
echo %0: Finished IterativeDistance2

for /F "usebackq" %%L in (`%IMG7%magick ^
  %LINE_FILE% ^
  %TMPDIR%fl_line_grad.miff ^
  -compose Darken -composite ^
  -format "MAX_01=%%[fx:maxima]\nMAX_GRAY=%%[fx:maxima*QuantumRange]\nLINE_LEN=%%[fx:maxima*QuantumRange/%KNL_SCALE_V%]" ^
  info:`) do set %%L

if not "%flDEBUG_TXT%"=="nul" echo MAX_01=%MAX_01% MAX_GRAY=%MAX_GRAY% LINE_LEN=%LINE_LEN% >>%flDEBUG_TXT%

:: "%MAX_01%" should be "1", more or less.
:: MAX_GRAY should be >= QuantumRange - KNL_SCALE_V

for /F "usebackq" %%L in (`%IMG7%magick identify ^
  -format "GRAY_OK=%%[fx:%MAX_GRAY%>QuantumRange-%KNL_SCALE_V%?1:0]"
  xc:`) do set %%L

if not "%GRAY_OK%"=="1" (
  echo %0: Bad second MAX_01 = %MAX_01% MAX_GRAY = %MAX_GRAY%
  set ERR=1
  goto end
)

:===


%IMG7%magick ^
  %TMPDIR%fl_line_grad.miff ^
  -transparent White ^
  %TMPDIR%fl_line_grad_tw.miff


echo %0: Start blurFill.

set bfTHRESH_PC=3
set bfMAX_ITER=
set bfMAX_SIG=

call %PICTBAT%blurFill ^
  %TMPDIR%fl_line_grad_tw.miff 0.6+ %TMPDIR%fl_line_bf.miff

if "%bfBUST%"=="1" (
  echo %0: bfBUST
  set ERR=1
  goto end
)
echo %0: Finished blurFill.


for /F "usebackq" %%L in (`%IMG7%magick identify ^
  -format ^
    "KNL_SCALE_H=%%[fx:%KNL_SCALE_V%*%HH%/%WW%]" ^
  xc:`) do set %%L

rem Next should be HDRI? Just Q16 because we use 65536 above.
rem 17-July-2018: change next from %IM16f%convert to %IMDEV%convert
%IMG7%magick ^
  %LINE_FILE% ^
  -negate ^
  -morphology Distance Euclidean:7,%KNL_SCALE_H% ^
  +depth ^
  -define quantum:format=floating-point -depth 32 ^
  %TMPDIR%fl_dperp.miff

if ERRORLEVEL 1 exit /B 1

if not "%flDEBUG_TXT%"=="nul" echo KNL_SCALE_H=%KNL_SCALE_H% >>%flDEBUG_TXT%

set /A Wm1=%WW%-1
set /A Hm1=%HH%-1

call :FindEdge %X0% %Y0%
set XF0=%XF%
set YF0=%YF%
call :FindEdge %X1% %Y1%

if %XF0%==%XF% if %YF0%==%YF% (
  echo %0: ends have same closest edge pixel [%LINE_FILE%]
  set ERR=1
  goto end
)

if not "%flDEBUG_TXT%"=="nul" echo Closest edges: (%XF0%,%YF0%) (%XF%,%YF%) >>%flDEBUG_TXT%

:: Join line-ends to nearest edge,
:: and find first black pixel for flood-fill.
:: (Probably coord 0,0.)

for /F "usebackq tokens=2,3 delims=:, " %%X in (`%IM7DEV%magick ^
  %LINE_FILE% ^
  -fill White ^
  -draw "line %X0%,%Y0% %XF0%,%YF0%" ^
  -draw "line %X1%,%Y1% %XF%,%YF%" ^
  +write %TMPDIR%fl_mask_side.miff ^
  -alpha off ^
  -negate ^
  -process onewhite ^
  NULL: 2^>^&1`) do (
  set Xblk=%%X
  set Yblk=%%Y
)

if "%Xblk%"=="none" (
  echo %0: no black pixels [%LINE_FILE%]
  set ERR=1
  goto end
)

if not "%flDEBUG_TXT%"=="nul" echo Floodfill mask: (%Xblk%,%Yblk%) >>%flDEBUG_TXT%

:: FIXME: collapse into next
::
%IMG7%magick ^
  %TMPDIR%fl_mask_side.miff ^
  -fill White ^
  -draw "color %Xblk%,%Yblk% floodfill" ^
  %TMPDIR%fl_mask_side.miff

set flTWEAK_RED=-auto-level
set flTWEAK_RED=

%IMG7%magick ^
  %TMPDIR%fl_dperp.miff ^
  -evaluate Add 50%% ^
  ( +clone -negate ) ^
  ( %TMPDIR%fl_mask_side.miff -alpha off ) ^
  -compose Over -composite ^
  %flTWEAK_RED% ^
  %TMPDIR%fl_line_bf.miff ^
  ( +clone -evaluate set 0 ) ^
  -set colorspace sRGB ^
-define quantum:format=floating-point -depth 32 ^
+write %TMPDIR%fl_x3.miff ^
+write %TMPDIR%fl_x3.png ^
  -combine ^
+write %TMPDIR%fl_x2.png ^
  +write fl_disp_map_abs.miff ^
  ( +clone ^
    -sparse-color bilinear ^
0,0,#000,^
%Wm1%,0,#f00,^
0,%Hm1%,#0f0,^
%Wm1%,%Hm1%,#ff0 ^
  ) ^
  -compose Mathematics ^
    -define compose:args=0,-0.5,0.5,0.5 ^
    -composite ^
  fl_disp_map_rel.miff

%IMG7%magick ^
  %INFILE% ^
  %flFAB_TRANS% ^
  fl_disp_map_rel.miff ^
  -compose Displace ^
    -set option:compose:args %Wm1%x%Hm1% ^
    -composite ^
  %OUTFILE%

if not "%flDEBUG_TXT%"=="nul" echo OUTFILE=%OUTFILE% >>%flDEBUG_TXT%

:end

call echoRestore

endlocal & set flOUTFILE=%OUTFILE%& set flERR=%ERR%

exit /B %flERR%

:: =========================================
:: Subroutine

:FindEdge
echo fe %1 %2

set /A DW=%1
set /A DN=%2
set /A DE=Wm1-%1
set /A DS=Hm1-%2

set /A Dmin=DW

if %Dmin% GTR %DN% set /A Dmin=DN
if %Dmin% GTR %DE% set /A Dmin=DE
if %Dmin% GTR %DS% set /A Dmin=DS

if %Dmin%==%DW% (
  set /A XF=0
  set /A YF=DN
) else if %Dmin%==%DN% (
  set /A XF=DW
  set /A YF=0
) else if %Dmin%==%DE% (
  set /A XF=Wm1
  set /A YF=DN
) else if %Dmin%==%DS% (
  set /A XF=DW
  set /A YF=Hm1
)

echo XF=%XF% YF=%YF%

exit /B 0
rem Given image %1 is roughly vertical white line on black background,
rem creates image with random horizontal shifts of entire rows.
@rem
@rem   %2 is blur sigma of noise [10]
@rem   %3 is displacement [%2 * 3]
@rem   %4 is blur sigma for smoothing the line,
@rem      and joining points in nearly horizontal lines
@rem   %5 is output file, or "." for same as input file
@rem
@rem Updated:
@rem   18-August-2022 for IM v7.
@rem


@if "%1"=="" findstr /B "rem @rem" %~f0 & exit /B 1

@setlocal

rem @call echoOffSave

call %PICTBAT%setInOut %1 rhsl


set BlurSig=%2
if "%BlurSig%"=="." set BlurSig=
if "%BlurSig%"=="" set BlurSig=10

set DISP=%3
if "%DISP%"=="." set DISP=
if "%DISP%"=="" set /A DISP=BlurSig*3

set BlurSig2=%4
if "%BlurSig2%"=="." set BlurSig2=
if "%BlurSig2%"=="" set BlurSig2=3

if not "%5"=="" set OUTFILE=%5
if "%OUTFILE%"=="." set OUTFILE=%INFILE%

if "%blurSig2%" == "" (
  set sBLUR2=
) else (
  set sBLUR2=-blur 0x%blurSig2%
)

if "%rhslDEBUG%"=="1" (
  set CH_IN=-channel RG
  set CH_OUT=+channel
) else (
  set CH_IN=
  set CH_OUT=
)

set WW=
for /F "usebackq" %%L in (`%IMG7%magick identify -format "WW=%%w\nHH=%%h" %INFILE%`) do set %%L
if "%WW%"=="" exit /B 1

set sNORM=-auto-level -auto-gamma

:: For possible bug replace "-morphology Thinning:-1 Skeleton:2"
:: with "-morphology Thinning:-1 3x1:0,-,1;3x1:0,-,1 -clamp".
::
%IMG7%magick ^
  %INFILE% ^
  ( +clone ^
    +noise Random ^
    -virtual-pixel Tile ^
    -blur 0,%blurSig% ^
    -modulate 100,0,100 ^
    -crop 1x0+0+0 +repage -scale "%WW%x%HH%^!" ^
    %sNORM% ^
    ( +clone ^
      -sparse-color bilinear ^
0,0,#000,^
%%[fx:w-1],0,#f00,^
0,%%[fx:h-1],#0f0,^
%%[fx:w-1],%%[fx:h-1],#ff0 ^
    ) ^
    -compose Mathematics ^
      -define compose:args=0,-0.5,0.5,0.5 ^
      -composite ^
  ) ^
  -compose Displace ^
    -set option:compose:args %DISP%x0 ^
    -composite ^
+write a.png ^
  %sBLUR2% ^
  -fill White +opaque Black ^
+write a2.png ^
  %CH_IN% ^
  -morphology Thinning:-1 3x1:0,-,1;3x1:1,-,0 -clamp ^
+write a3.png ^
  %CH_OUT% ^
  -morphology Thinning:-1 LineEnds ^
  %OUTFILE%

if ERRORLEVEL 1 exit /B 1


call echoRestore

endlocal & set rhslOUTFILE=%OUTFILE%
All images on this page were created by the commands shown, using:
%IMG7%magick -version
Version: ImageMagick 7.1.0-42 Q16-HDRI x64 396d87c:20220709 https://imagemagick.org
Copyright: (C) 1999 ImageMagick Studio LLC
License: https://imagemagick.org/script/license.php
Features: Cipher DPC HDRI OpenCL
Delegates (built-in): bzlib cairo freetype gslib heic jng jp2 jpeg jxl lcms lqr lzma openexr pangocairo png ps raqm raw rsvg tiff webp xml zip zlib
Compiler: Visual Studio 2022 (193231332)
The customised development version is:
%IM7DEV%magick -version
Version: ImageMagick 7.1.0-20 Q32-HDRI x86_64 2021-12-29 https://imagemagick.org
Copyright: (C) 1999-2021 ImageMagick Studio LLC
License: https://imagemagick.org/script/license.php
Features: Cipher DPC HDRI Modules OpenMP(4.5)
Delegates (built-in): bzlib cairo fontconfig fpx freetype jbig jng jpeg lcms ltdl lzma pangocairo png raqm rsvg tiff webp wmf x xml zip zlib
Compiler: gcc (11.2)
To improve internet download speeds, some images may have been automatically converted (by ImageMagick, of course) from PNG or TIFF or MIFF to JPG.
Source file for this web page is followline.h1. To re-create this web page, run "procH1 followline".
This page, including the images, is my copyright. Anyone is permitted to use or adapt any of the code, scripts or images for any purpose, including commercial use.
Anyone is permitted to re-publish this page, but only for non-commercial use.
Anyone is permitted to link to this page, including for commercial use.
Page version v1.0 25-April-2015.
Page created 23-Aug-2022 07:56:47.
Copyright © 2022 Alan Gibson.