set SRC1=dp_src2.png

set SRC2=dp_src3.png

An image can be cut by up to four dark paths to make a piece that will sit with small boundary error on another image.
The "boundary error" is the difference between the pixel at the edge of the piece, and the background pixel it replaces. As an image, this error is black where there is zero error. If we add all the differences around the boundary, we have a total boundary error. The task is to minimize this total.
This page follows directly on from material in Dark paths.
This technique is closely related to the more complex Tiling with dark paths.
This page is based heavily on material in Image Quilting for Texture Synthesis and Transfer, Alexei A. Efros and William T. Freeman, 2001.
We have two images of the same size. We want to cut four ragged paths around one image so that when it is placed on the other image, the ragged edges are not obvious. The result will be like one sheet paper placed on top of another, but with one or more margins torn from the top sheet.
We will constrain the bounding box of each ragged path to lie within a given proximity to the image edge, a margin. (Alternative constraints are possible, eg the ragged paths can be anywhere provided the bounding boxes at at least X pixels apart.)
In the general case, we might want fewer than four cuts. For example, we might want to cut a ragged path at the left and top, but not the right or bottom.
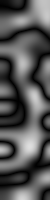
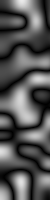
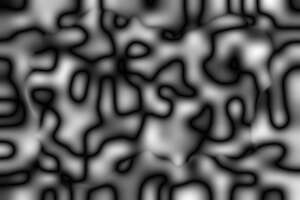
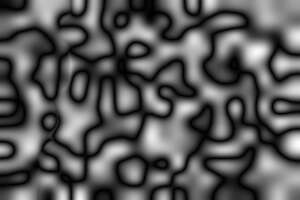
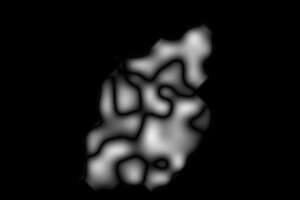
As examples, we use:
set SRC1=dp_src2.png |
|
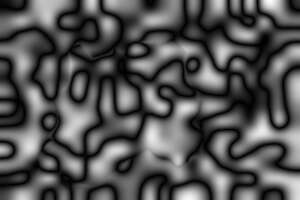
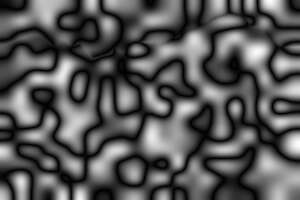
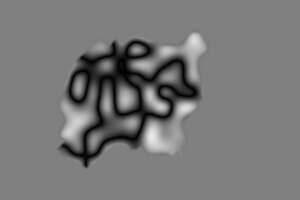
set SRC2=dp_src3.png |
|
There will be up to four cuts, corresponding to the left, top, right and bottom image edges. For the left cut, we will:
A similar process finds the top, right and botom cuts. From the four cuts (or as many as are required), we make a mask, and apply the opacity to the image.
The script will be general-purpose. For this worked example, suppose we want the cuts to occur within 50 pixels of the image edges.
|
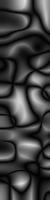
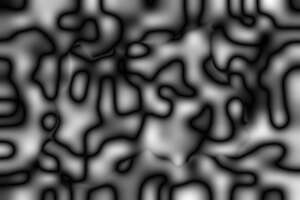
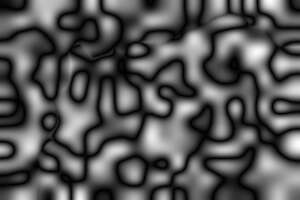
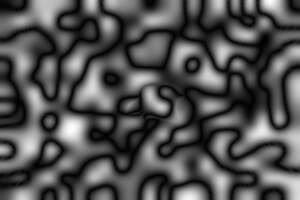
Make the left-side crops, and find the difference. %IMG7%magick ^ %SRC1% ^ -crop 50x+0+0 +repage ^ dpr_cr1L.png %IMG7%magick ^ %SRC2% ^ -crop 50x+0+0 +repage ^ dpr_cr2L.png %IMG7%magick ^ dpr_cr1L.png dpr_cr2L.png ^ -compose Difference -composite ^ dpr_dL.png |
|
|
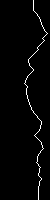
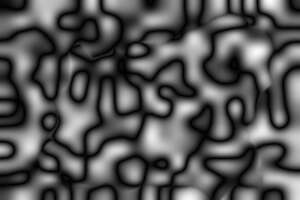
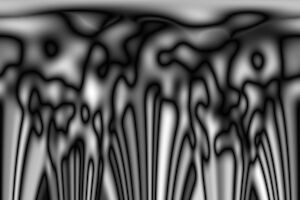
Find the difference between the left-side crops. %IM7DEV%magick ^ dpr_dL.png ^ -process darkestpath ^ dpr_dLdp.png |
|
|
Similarly for the top ... %IM7DEV%magick ^
-gravity North ^
( %SRC1% ^
-crop x50+0+0 +repage ^
) ^
( %SRC2% ^
-crop x50+0+0 +repage ^
) ^
-rotate -90 ^
-compose Difference -composite ^
-process darkestpath ^
dpr_dTdp.png
|

|
|
... and the right side ... %IM7DEV%magick ^
-gravity East ^
( %SRC1% ^
-crop 50x+0+0 +repage ^
) ^
( %SRC2% ^
-crop 50x+0+0 +repage ^
) ^
-compose Difference -composite ^
-process darkestpath ^
dpr_dRdp.png
|
|
|
... and the bottom. %IM7DEV%magick ^
-gravity South ^
( %SRC1% ^
-crop x50+0+0 +repage ^
) ^
( %SRC2% ^
-crop x50+0+0 +repage ^
) ^
-rotate -90 ^
-compose Difference -composite ^
-process darkestpath ^
dpr_dBdp.png
|

|
We have used darkestpath rather than darkestmeander for reasons explained on Tiling with dark paths.
For these four line images, make the black pixels to the left of the white line white, and negate the left and top.
%IMG7%magick ^ dpr_dLdp.png ^ -morphology dilate:-1 2x1+1+0:1,1 ^ -negate ^ dpr_dLm.png %IMG7%magick ^ dpr_dTdp.png ^ -morphology dilate:-1 2x1+1+0:1,1 ^ -negate ^ dpr_dTm.png %IMG7%magick ^ dpr_dRdp.png ^ -morphology dilate:-1 2x1+1+0:1,1 ^ dpr_dRm.png %IMG7%magick ^ dpr_dBdp.png ^ -morphology dilate:-1 2x1+1+0:1,1 ^ dpr_dBm.png |


|
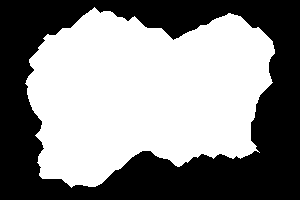
Assemble into a mask.
for /F "usebackq" %%L in (`%IMG7%magick identify ^ -format "WW=%%w\nHH=%%h" ^ %SRC1%`) do set %%L set /A Rx=%WW%-50 set /A By=%HH%-50 %IMG7%magick ^ -background White ^ -compose Multiply ^ dpr_dLm.png ^ ( dpr_dTm.png -rotate 90 ) ^ ( dpr_dRm.png -repage +%Rx%+0 ) ^ ( dpr_dBm.png -rotate 90 -repage +0+%By% ) ^ -layers mosaic ^ dpr_mask.png |
|
Check the mask by composing one image over the other with the mask, then again using the images in the opposite order:
%IMG7%magick ^ %SRC1% ^ %SRC2% ^ dpr_mask.png ^ -composite ^ dpr_chk1.png |

|
%IMG7%magick ^ %SRC2% ^ %SRC1% ^ dpr_mask.png ^ -composite ^ dpr_chk2.png |

|
The script rectDp.bat implements the above. It takes arguments for two inputs and one output file, then the four margins: left, top, right and bottom, expressed as pixels or percentage or proportion of image width and height. A margin of zero at an edge will result in no cut at that edge.
For the calculation of the difference and hence the cut lines and the mask, it converts the inputs to grayscale with "-colorspace Gray".
The output will be the second input, with torn margins, composited over the first input. If the environment variable rdpMASK_FILE is set, the script also writes the mask to a file with the supplied name.
In the following, we tell the script to create a mask file, and we show it.
|
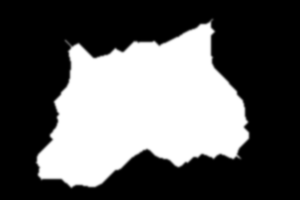
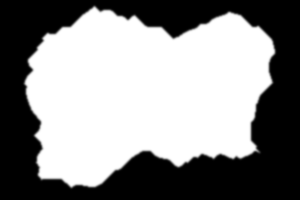
Default settings. set rdpMASK_FILE=dpr_msk1.png call %PICTBAT%rectDp ^ %SRC1% %SRC2% dpr_ex1.png |
|
|
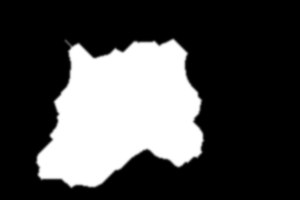
Margin 50 pixels, as the worked example. set rdpMASK_FILE=dpr_msk2.png call %PICTBAT%rectDp ^ %SRC1% %SRC2% dpr_ex2.png 50 50 50 50 |
|
|
All margins 50 percent. set rdpMASK_FILE=dpr_msk3.png call %PICTBAT%rectDp ^ %SRC1% %SRC2% dpr_ex3.png 50c 50c 50c 50c |
|
|
Left margin 50 percent. set rdpMASK_FILE=dpr_msk4.png call %PICTBAT%rectDp ^ %SRC1% %SRC2% dpr_ex4.png 50c 0 0 0 |

|
|
Top margin 50 percent. set rdpMASK_FILE=dpr_msk5.png call %PICTBAT%rectDp ^ %SRC1% %SRC2% dpr_ex5.png 0 50c 0 0 |

|
|
Left and top margin 50 percent. set rdpMASK_FILE=dpr_msk6.png call %PICTBAT%rectDp ^ %SRC1% %SRC2% dpr_ex6.png 50c 50c 0 0 |

|
|
Margins 10 to 50 percent. set rdpMASK_FILE=dpr_msk7.png call %PICTBAT%rectDp ^ %SRC1% %SRC2% dpr_ex7.png 50c 30c 20c 10c |

|
By making the background image solid black (or some other colour), we find a shape with a black (or whatever) boundary, more or less.
|
Margin 50 percent. %IMG7%magick ^ %SRC1% ^ -fill Black -colorize 100 ^ dpr_blk.png set rdpMASK_FILE=dpr_mskc1.png call %PICTBAT%rectDp ^ dpr_blk.png %SRC2% dpr_exc1.png 50c 50c 50c 50c |

|
|
Margin 50 percent. %IMG7%magick ^ %SRC1% ^ -fill Gray(50%%) -colorize 100 ^ dpr_gry.png set rdpMASK_FILE=dpr_mskc2.png call %PICTBAT%rectDp ^ dpr_gry.png %SRC2% dpr_exc2.png 50c 50c 50c 50c |

|
Examples above create masks that are essentially rectangular, defined by two jagged vertical lines and two jagged horizontal lines. We can create essentially circular jagged masks, with polar distotions.
|
Unroll the images and run the script. %IMG7%magick ^ %SRC1% ^ -distort depolar -1 ^ dpr_dep1.png %IMG7%magick ^ %SRC2% ^ -distort depolar -1 ^ dpr_dep2.png set rdpMASK_FILE=dpr_mskr1.png call %PICTBAT%rectDp ^ dpr_dep1.png ^ dpr_dep2.png ^ dpr_exr1.png 0 0 0 95c set rdpMASK_FILE= |

|
|
Roll up the output and the mask. %IMG7%magick ^ dpr_exr1.png ^ -distort polar -1 ^ dpr_exr1r.png %IMG7%magick ^ dpr_mskr1.png ^ -distort polar -1 ^ dpr_mskr1r.png |
|
The mask is essentially circular, but may be discontinuous at the "north" point. One solution would be to find the least-difference row, and place super-white gates at each end.
We often want to paste a small image over part of a larger image, at a given location. We do this by cropping the appropriate area from the large image, calling rectDp.bat, and compositing the result over the original large image, at the required location. This replaces part of the original image. For convenience, we put this in a script, rectDpRepl.bat.
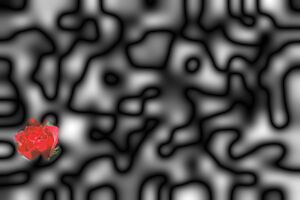
For example, suppose we want to place the rose: image over SRC1, blending only the right and bottom edges:
call %PICTBAT%rectDpRepl ^ %SRC1% rose: ^ dpr_repl1.png ^ 100 50 "0 0 30c 30c" |
|
This process doesn't tell us where to place rose: over SRC1; it is merely a blending technique that is used after the location has been chosen.
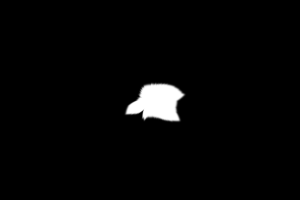
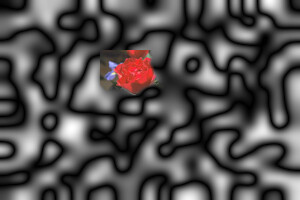
To choose a location, we might search for the best approximation to rose: within SRC1. This time, we blend all four margins, and they can be wider (50% of the width and height).
call %PICTBAT%srchImg %SRC1% rose: call %PICTBAT%rectDpRepl ^ %SRC1% rose: ^ dpr_repl2.png ^ %siCOMP_XW% %siCOMP_YW% "50c 50c 50c 50c" |
|
(This search criteria may not be not ideal. We might not care about how closely we are replacing like-with-like, but more about how well the edges match.)
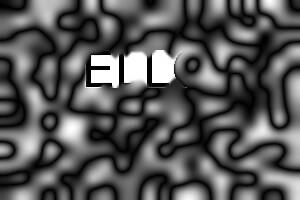
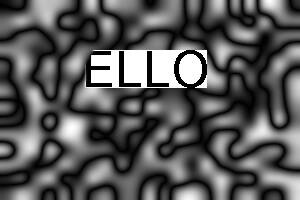
%IMG7%magick ^ +antialias ^ -pointsize 50 ^ label:HELLO ^ -trim +repage ^ dpr_hello.png |
|
call %PICTBAT%rectDpRepl ^ %SRC1% dpr_hello.png ^ dpr_replh1.png ^ 50 50 "50c 50c 50c 50c" |
|
call %PICTBAT%rectDpRepl ^ %SRC1% dpr_hello.png ^ dpr_replh2.png ^ 50 50 "50c 0 0 0" |
|
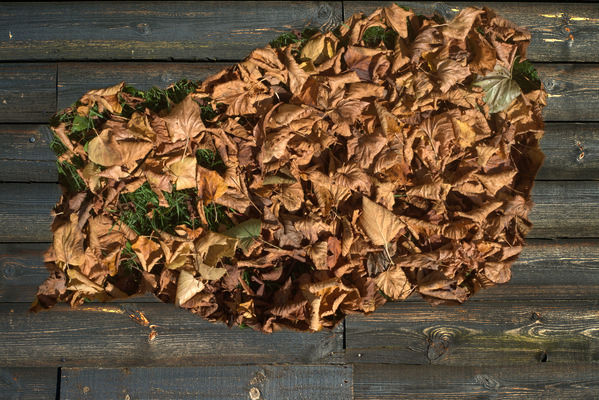
We paste leaves on a wall, with a ragged minimum-error rectangular boundary. Reddish leaves will never blend well with a gray wall, so I first darken the wall.
%IMG7%magick ^ etsrc1.png ^ -resize 600x400 ^ -auto-level ^ -evaluate pow 2 ^ dpr_darker_wall.miff call %PICTBAT%rectDp ^ dpr_darker_wall.miff ^ dpt_lvs_sm.jpg ^ dpr_lvs_wall.png ^ 30c 30c 30c 30c |
|
This page has shown we can composite images with a minimum-error boundary that is roughly rectangular, by making four cuts with -process darkestpath. The horizontal cuts are made by rotating the inputs by 90°, finding the vertical cuts, then rotating back.
We could generalise this to any shaped boundary that can be appoximated by straight lines. As the boundary will be ragged, this could approximate circles etc. However, the processing becomes messy. For boundaries around awkward shapes such as the letter "G", we need a better method. That method is developed in Awkward boundaries with dark paths.
For convenience, .bat scripts are also available in a single zip file. See Zipped BAT files.
rem Rectangular boundary from dark paths.

@rem %1,%2 input images
@rem %3 output image (%2, with cut margins, composited over %1). Can be either input file.
@rem %4 %5 %6 %7 left, top, right and bottom margins
@rem   Margins are numbers optionally suffixed with c or % (percent) or p (proportion).
@rem   Margin of zero means no ragged cut at that margin.
@rem   Default margins: 30%.
@rem
@rem Also uses:
@rem
@rem   rdpMASK_FILE if not blank, writes mask to this file.
@rem   rdpBLR_SIG sigma for blur of the mask. 0=no blur. [1]
@rem
@rem Updated:
@rem   15-July-2022 for IM v7.
@rem

@if "%2"=="" findstr /B "rem @rem" %~f0 & exit /B 1

@setlocal

@call echoOffSave

call %PICTBAT%setInOut %1 rdp

set SRC1=%1
set SRC2=%2

if not "%3"=="" set OUTFILE=%3

if "%rdpBLR_SIG%"=="" set rdpBLR_SIG=1

if "%rdpBLR_SIG%"=="0" (
  set sBLUR=
) else (
  set sBLUR=-blur 0x%rdpBLR_SIG%
)

if "%rdpMASK_FILE%"=="" (
  set sWR_MASK=
) else (
  set sWR_MASK=+write %rdpMASK_FILE%
)

set mL=%4
set mT=%5
set mR=%6
set mB=%7

if "%mL%"=="." set mL=
if "%mT%"=="." set mT=
if "%mR%"=="." set mR=
if "%mB%"=="." set mB=

if "%mL%"=="" set mL=30c
if "%mT%"=="" set mT=30c
if "%mR%"=="" set mR=30c
if "%mB%"=="" set mB=30c

for /F "usebackq" %%L in (`%IMG7%magick identify ^
  -format "WW=%%w\nHH=%%h" ^
  %SRC1%`) do set %%L

call xyCoord %WW% %HH% %mL% %mT%
set mLi=%xycXi%
set mTi=%xycYi%

call xyCoord %WW% %HH% %mR% %mB%
set mRi=%xycXi%
set mBi=%xycYi%

set /A Rx=%WW%-%mRi%
set /A By=%HH%-%mBi%

echo %0: mLi=%mLi% mTi=%mTi% mRi=%mRi% mBi=%mBi%

set HAS_ANY=0

if %mLi%==0 (
  set MK_L=

  set ASS_L=
) else (
  set HAS_ANY=1

  set MK_L=^
    ^( -clone 0-1 ^
    ^( -clone 0 -crop %mLi%x+0+0 +repage ^) ^
    ^( -clone 1 -crop %mLi%x+0+0 +repage ^) ^
    -delete 0-1 ^
    -compose Difference -composite ^
    -process darkestpath ^
    -flop ^
    -morphology dilate:-1 2x1+1+0:1,1 ^
    -flop ^
    +write mpr:Lm ^
    +delete ^
  ^)

  set ASS_L=mpr:Lm
)

if %mTi%==0 (
  set MK_T=

  set ASS_T=
) else (
  set HAS_ANY=1

  set MK_T=^
    ^( -clone 0-1 ^
    ^( -clone 0 -crop x%mTi%+0+0 +repage ^) ^
    ^( -clone 1 -crop x%mTi%+0+0 +repage ^) ^
    -delete 0-1 ^
    -compose Difference -composite ^
    -rotate -90 ^
    -process darkestpath ^
    -flop ^
    -morphology dilate:-1 2x1+1+0:1,1 ^
    -flop ^
    +write mpr:Tm ^
    +delete ^
  ^)

  set ASS_T=^( mpr:Tm -rotate 90 ^)
)

if %mRi%==0 (
  set MK_R=

  set ASS_R=
) else (
  set HAS_ANY=1

  set MK_R=^
    ^( -clone 0-1 ^
    -gravity East ^
    ^( -clone 0 -crop %mRi%x+0+0 +repage ^) ^
    ^( -clone 1 -crop %mRi%x+0+0 +repage ^) ^
    -delete 0-1 ^
    -compose Difference -composite ^
    -process darkestpath ^
    -morphology dilate:-1 2x1+1+0:1,1 ^
    +write mpr:Rm ^
    +delete ^
  ^)

  set ASS_R=^( mpr:Rm -repage +%Rx%+0 ^)
)

if %mBi%==0 (
  set MK_B=

  set ASS_B=
) else (
  set HAS_ANY=1

  set MK_B=^
    ^( -clone 0-1 ^
    -gravity South ^
    ^( -clone 0 -crop x%mBi%+0+0 +repage ^) ^
    ^( -clone 1 -crop x%mBi%+0+0 +repage ^) ^
    -delete 0-1 ^
    -compose Difference -composite ^
    -rotate -90 ^
    -process darkestpath ^
    -morphology dilate:-1 2x1+1+0:1,1 ^
    +write mpr:Bm ^
    +delete ^
  ^)

  set ASS_B=^( mpr:Bm -rotate 90 -repage +0+%By% ^)
)

if %HAS_ANY%==0 goto :do_none

  %IM7DEV%magick ^
    %SRC1% ^
    %SRC2% ^
    -set colorspace sRGB ^
    +repage ^
    ^( -clone 0-1 ^
       -colorspace Gray ^
       %MK_L% ^
       %MK_T% ^
       %MK_R% ^
       %MK_B% ^
-size %WW%x%HH% xc:White ^
       -delete 0-1 ^
       -background White ^
       -compose Multiply ^
       %ASS_L% %ASS_T% %ASS_R% %ASS_B% ^
       -layers mosaic ^
       %sBLUR% ^
       -alpha off ^
       %sWR_MASK% ^
    ^) ^
    -compose Over -composite ^
    %OUTFILE%

goto :end

:do_none
  %IMG7%magick ^
    %SRC2% ^
    %OUTFILE%

:end

if ERRORLEVEL 1 exit /B 1

call echoRestore

endlocal & set rdpOUTFILE=%OUTFILE%
@rem %1 is image width
@rem %2 is image height
@rem %3 is an x-coord,
@rem    possibly fractional, possibly negative, possibly suffixed with c or % or p
@rem %4 is an y-coord, likewise
@rem Returns actual pixel coords, possibly fractional, as xycX and xycY
@rem and as rounded integers in xycXi and xycYi.
@rem
@rem Updated:
@rem   15-July-2022 for IM v7.

@setlocal enabledelayedexpansion

@call echoOffSave

set WW=%1
set HH=%2

set X=%3
set chX=%X:~-1%
set vX=%X:~0,-1%

set Y=%4
set chY=%Y:~-1%
set vY=%Y:~0,-1%

if "%chX%"=="%%" set chX=c
if "%chY%"=="%%" set chY=c

if "%chX%"=="c" (
  set vX=%vX%*%1/100
) else if "%chX%"=="p" (
  set vX=%vX%*%1
) else (
  set vX=%X%
)

if "%chY%"=="c" (
  set vY=%vY%*%2/100
) else if "%chY%"=="p" (
  set vY=%vY%*%2
) else (
  set vY=%Y%
)

for /F "usebackq" %%L in (`%IMG7%magick identify ^
  -precision 16 ^
  -format "vX=%%[fx:%vX%]\nvY=%%[fx:%vY%]\nvXi=%%[fx:int(%vX%+0.5)]\nvYi=%%[fx:int(%vY%+0.5)]" ^
  xc:`) do set %%L

if ERRORLEVEL 1 (
  echo %0: vX=[%vX%] vY=[%vY%]
  exit /B 1
)

call echoRestore

@endlocal & set xycX=%vX%& set xycY=%vY%& set xycXi=%vXi%& set xycYi=%vYi%
rem Replaces part of image %1 with image %2, using rectangular boundary from dark paths.
@rem %3: output image (%2, with cut margins, composited over %1)
@rem %4 %5:  xy coords in %1 for top-left of %2.
@rem %6: string of up to 4 numbers, space-separated:
@rem   sizes of margins left, top, right, bottom.
@rem   each number can be suffixed c or % or p.
@rem   Any number can instead be a dot (.) for default.
@rem
@rem Updated:
@rem   15-July-2022 for IM v7.

@if "%2"=="" findstr /B "rem @rem" %~f0 & exit /B 1

@setlocal

@call echoOffSave

call %PICTBAT%setInOut %1 rdr


set SRC1=%1
set SRC2=%2

if not "%3"=="" set OUTFILE=%3

set DX=%4
if "%DX%"=="." set DX=
if "%DX%"=="" set DX=0

set DY=%5
if "%DY%"=="." set DY=
if "%DY%"=="" set DY=0

set MARG_PARM=%~6
if "%MARG_PARM%"=="." set MARG_PARM=
if "%MARG_PARM%"=="" set MARG_PARM=. . . .

echo six is [%~6]
echo MARG_PARM=[%MARG_PARM%]

set TMP_IMG=rdr_tmp.miff

for /F "usebackq" %%L in (`%IMG7%magick identify ^
  -format "WW=%%w\nHH=%%h" ^
  %SRC2%`) do set %%L

if ERRORLEVEL 1 exit /B 1

rem DX and DY may contain a sign. Does this cause problems?

%IMG7%magick ^
  %SRC1% ^
  -crop %WW%x%HH%+%DX%+%DY% +repage ^
  %TMP_IMG%

if ERRORLEVEL 1 exit /B 1

call %PICTBAT%rectDp %TMP_IMG% %SRC2% %TMP_IMG% %MARG_PARM%

if ERRORLEVEL 1 exit /B 1

%IMG7%magick ^
  %SRC1% ^
  %TMP_IMG% ^
  -set colorspace sRGB ^
  -geometry +%DX%+%DY% ^
  -compose Over -composite ^
  %OUTFILE%

if ERRORLEVEL 1 exit /B 1


call echoRestore

endlocal & set rdrOUTFILE=%OUTFILE%
All images on this page were created by the commands shown, using:
%IMG7%magick identify -version
Version: ImageMagick 7.1.0-62 Q16-HDRI x64 32ce406:20230212 https://imagemagick.org
Copyright: (C) 1999 ImageMagick Studio LLC
License: https://imagemagick.org/script/license.php
Features: Cipher DPC HDRI OpenCL
Delegates (built-in): bzlib cairo freetype gslib heic jng jp2 jpeg jxl lcms lqr lzma openexr pangocairo png ps raqm raw rsvg tiff webp xml zip zlib
Compiler: Visual Studio 2022 (193431937)
%IM7DEV%magick identify -version
Version: ImageMagick 7.1.1-5 (Beta) Q32-HDRI x86_64 852a723f1:20230319 https://imagemagick.org
Copyright: (C) 1999 ImageMagick Studio LLC
License: https://imagemagick.org/script/license.php
Features: Cipher DPC HDRI Modules OpenMP(4.5)
Delegates (built-in): bzlib cairo fftw fontconfig freetype heic jbig jng jpeg lcms ltdl lzma pangocairo png raqm raw rsvg tiff webp wmf x xml zip zlib
Compiler: gcc (11.3)
Source file for this web page is dprect.h1. To re-create this web page, execute "procH1 dprect".
This page, including the images, is my copyright. Anyone is permitted to use or adapt any of the code, scripts or images for any purpose, including commercial use.
Anyone is permitted to re-publish this page, but only for non-commercial use.
Anyone is permitted to link to this page, including for commercial use.
Page version v1.0 28-Oct-2015.
Page created 21-Apr-2023 11:18:09.
Copyright © 2023 Alan Gibson.