set SRC=toes.png

The effect is along, or across, edges.
The script on Adaptive blur and sharpen applies a Gaussian (circular, 2D) blur/sharpen. This page develops that idea, applying a linear blur/sharpen that is either parallel or perpendicular to contours. (A contour is an imaginary line that joins pixels of equal intensity.) The effect is anisotropic, meaning the effect is directional.
Although a linear blur is conceptually simpler than a 2D blur, it offers more possibilities.
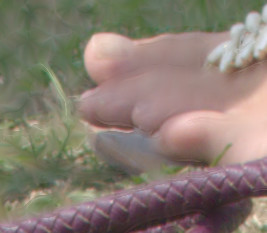
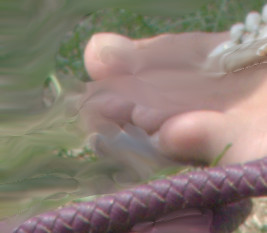
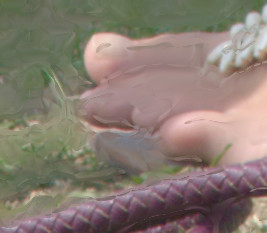
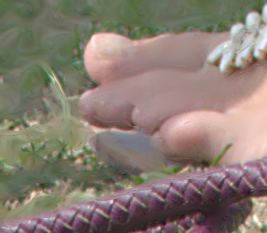
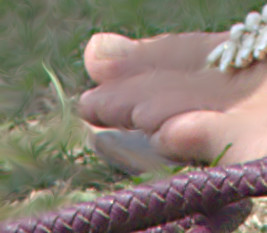
We will demonstrate on the usual image:
set SRC=toes.png |
|
The script adapContBlrShp.bat blurs or sharpens an image, with the greatest effect either where there is most detail (the edges) or where there is least detail (non-edges).
| Parameter | Description |
|---|---|
| %1 | Input image (mandatory parameter) |
| %2 | Output image |
| %3 | One of:
|
| %4 | Edge detector sigma
Default: 10 |
| %5 | Blur sigma
Default: half of %4 |
| %6 | Blend percentage
|
| %7 | Colorspace for operation |
| %8 | Blur direction, one of:
|
The input is mandatory. All other parameters are optional. As usual, a dot "." may be used as a placeholder.
The script adapContBlrShp.bat blurs an image using a mask that is white where there is most detail, and black where there is least detail. By default the mask is negated, so the blur is greatest where there is least detail. The blurred result is blended with the input at a certain percentage. The default percentage is 100 so the result is the blur. Alternative percentages include zero so there is no effect, and -100 so the effect is a sharpening. Other values can be used, eg 50 for a reduced blur or 150 for an increased blur.
By default, the mask is made from the magnitude of the slopes of a grayscale version of the input, where the slopes are found by the comet blur method. However, a user-supplied mask can be used instead.
There are eight basic modes of operation:
| Parallel | Perpendicular | ||
|---|---|---|---|
|
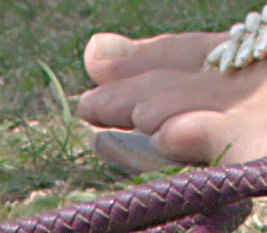
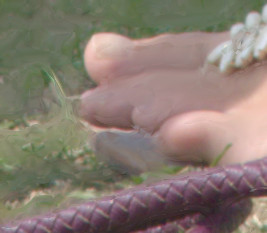
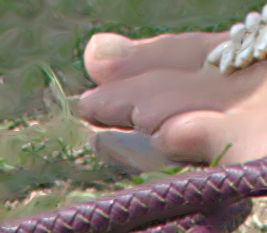
Blur non-edges (default) call %PICTBAT%adapContBlrShp ^ %SRC% ^ acbs_ex1.png |

|
Blur non-edges (default) call %PICTBAT%adapContBlrShp ^ %SRC% ^ acbs_ex1t.png . . . . . ^ perpendicular |
|
|
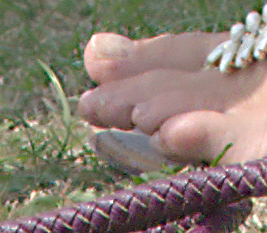
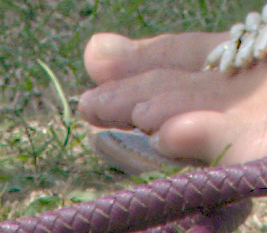
Blur the edges call %PICTBAT%adapContBlrShp ^ %SRC% ^ acbs_ex2.png E |

|
Blur the edges call %PICTBAT%adapContBlrShp ^ %SRC% ^ acbs_ex2t.png E . . . . ^ Perpendicular |

|
|
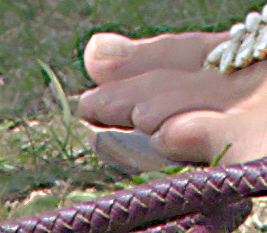
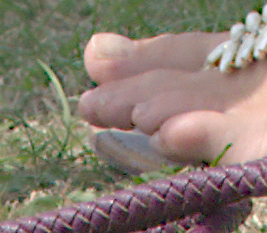
Sharpen non-edges call %PICTBAT%adapContBlrShp ^ %SRC% ^ acbs_ex3.png . . . -100 |

|
Sharpen non-edges call %PICTBAT%adapContBlrShp ^ %SRC% ^ acbs_ex3t.png . . . -100 . ^ Perpendicular |

|
|
Sharpen the edges call %PICTBAT%adapContBlrShp ^ %SRC% ^ acbs_ex4.png E . . -100 |

|
Sharpen the edges call %PICTBAT%adapContBlrShp ^ %SRC% ^ acbs_ex4t.png E . . -100 . ^ Perpendicular |
|
|
Over-sharpen the non-edges call %PICTBAT%adapContBlrShp ^ %SRC% ^ acbs_ex5.png N . . -200 |

|
Over-sharpen the non-edges call %PICTBAT%adapContBlrShp ^ %SRC% ^ acbs_ex5t.png N . . -200 . ^ Perpendicular |

|
|
Over-sharpen the edges call %PICTBAT%adapContBlrShp ^ %SRC% ^ acbs_ex6.png E . . -200 |
|
Over-sharpen the edges call %PICTBAT%adapContBlrShp ^ %SRC% ^ acbs_ex6t.png E . . -200 . ^ Perpendicular |
|
The effect is generally strongest when it is perpendicular to contours. For example, blurring an edge in a direction along that edge doesn't change it, but blurring an edge perpendicular to the edge has a strong effect.
Over-sharpening causes pixels to exceed the range 0 to 100%, which is usually clipped. We can use Limit min-max to prevent pixel values being pushed outside the range of a local window:
call %PICTBAT%limitMinMax ^ toes.png ^ acbs_ex6t.png ^ acbs_ex6t_lmm.png ^ 20x20 |

|
The large window has created homogeneity on each side of edges. This can be reduced by setting a blend percentage less than 100%.
call %PICTBAT%limitMinMax ^ toes.png ^ acbs_ex6t.png ^ acbs_ex6t_lmm.png ^ 20x20 ^ 80 |
|
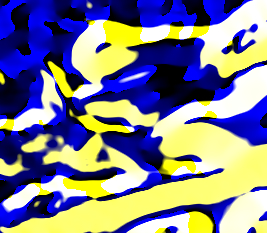
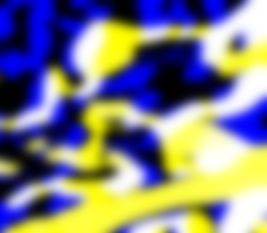
The mask for this effect has equal red and green channels that represent the magnitude of the effect, and a blue channel that represents the direction of the effect.
Instead of the default mask (and default processing of that mask), the user can supply a mask:
|
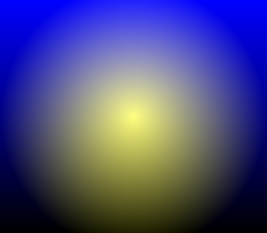
Make a mask %IMG7%magick ^ -size 267x233 ^ radial-gradient: ^ ( +clone ) ^ gradient: ^ -combine ^ -set colorspace sRGB ^ acbs_radmask.png |
|
|
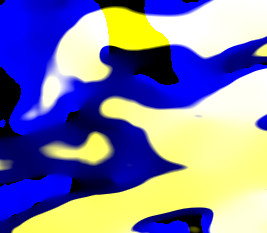
Apply the mask set acbsRD_MASK=acbs_radmask.png call %PICTBAT%adapContBlrShp ^ %SRC% ^ acbs_rm1.png set acbsRD_MASK= |

|
|
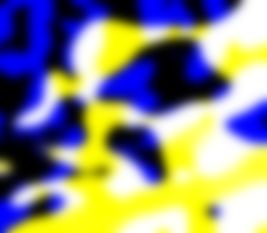
Apply the mask, blurring the "edges"
set acbsRD_MASK=acbs_radmask.png call %PICTBAT%adapContBlrShp ^ %SRC% ^ acbs_rm2.png E set acbsRD_MASK= |

|
There are two sigma controls: one for the edge detector, and one for the actual blur.
Large values for the edge detector don't work well:
|
Blur non-edges set acbsWR_MASK=acbs_msk_s1.png call %PICTBAT%adapContBlrShp ^ %SRC% ^ acbs_s1.png N 30 set acbsWR_MASK= |
|
The mask from a comet blur is streaky. We can blur before the stretch to remove the streaks, and after to smooth the boundary:
|
Blur non-edges set acbsWR_MASK=acbs_msk_s2.png set acbsMSK_PROC=-blur 0x5 -contrast-stretch 40%%x50%% -blur 0x5 call %PICTBAT%adapContBlrShp ^ %SRC% ^ acbs_s2.png N 10 15 set acbsMSK_PROC= set acbsWR_MASK= |

|
A blur sigma around half the edge detector sigma works well. Larger blur sigmas, with no special processing, create artifacts:
|
Blur non-edges call %PICTBAT%adapContBlrShp ^ %SRC% ^ acbs_s2x.png N 10 15 |
|
We can reduce the artifacts by limiting:
call %PICTBAT%limitMinMax ^ %SRC% ^ acbs_s2x.png ^ acbs_s2x_lmm.png ^ 5x5 |
|
Any operation that mixes colours from a number of pixels, such as blur and sharpen, is more correctly done in linear colorspace. (Well, that should read scene-referred colorspace, but we assume linear is a good approximation.)
call %PICTBAT%acbs_colsp %SRC%
| Colorspace | blur non-edges | blur edges | sharpen non-edges | sharpen edges |
|---|---|---|---|---|
| sRGB |

|

|

|

|
| RGB |

|

|
|
|
| Lab |

|

|

|

|
There is practically no difference between the colorspace versions.
We can call the script to blur, and call it again to sharpen that result:
call %PICTBAT%adapContBlrShp ^ %SRC% ^ acbs_bands.png call %PICTBAT%adapContBlrShp ^ acbs_bands.png ^ acbs_bands.png E . . -100 |
|
|
Or sharpen the blurred non-edges call %PICTBAT%adapContBlrShp ^ acbs_bands.png ^ acbs_bandsne.png N . . ^ -100 . perpendicular |

|
Or we can save the mask used in the blur, and use the same mask for sharpening.
set acbsWR_MASK=acbs_msk.png

call %PICTBAT%adapContBlrShp ^
  %SRC% ^
  acbs_bands2.png

set acbsWR_MASK=
We show the intermediate result and the mask. |

|
set acbsRD_MASK=acbs_msk.png call %PICTBAT%adapContBlrShp ^ acbs_bands2.png ^ acbs_bands2s.png E . . ^ -100 . perpendicular set acbsRD_MASK= |
|
The default settings give a fairly sharp line between the blurred and sharpened areas. We can cure this by setting acbsMSK_PROC:
set acbsMSK_PROC=-contrast-stretch 40%%x40%% -blur 0x5
set acbsWR_MASK=acbs_msk3.png

call %PICTBAT%adapContBlrShp ^
  %SRC% ^
  acbs_bands3.png

set acbsWR_MASK=
set acbsMSK_PROC=
We show the intermediate result and the mask. |

|
set acbsRD_MASK=acbs_msk3.png call %PICTBAT%adapContBlrShp ^ acbs_bands3.png ^ acbs_bands3s.png E . . ^ -100 . perpendicular set acbsRD_MASK= |
|
For convenience, .bat scripts are also available in a single zip file. See Zipped BAT files.
rem From image %1,
rem makes output %2
rem blurred or sharpened parallel to contours
rem with most effect at edges, or most at non-edges.
rem %3 E=blur at the edges, or N=blur at non-edges.
rem %4 edge detector sigma
rem %5 blur sigma
rem %6 blend percentage: 0=no effect, 100=blur, -100=sharpen
rem %7 colorspace
rem %8 parallel or perpendicular
@rem
@rem Also uses:
@rem   acbsWR_MASK if not blank, writes mask to this file
@rem   acbsRD_MASK if not blank, reads mask from this file
@rem   acbsMSK_PROC
@rem   acbsMSK_PRE
@rem
@rem Updated:
@rem   16-December-2017 Corrected PREV_COLSP bug.
@rem   29-August-2022 for IM v7.
@rem

@if "%1"=="" findstr /B "rem @rem" %~f0 & exit /B 1

@setlocal enabledelayedexpansion

rem @call echoOffSave

call %PICTBAT%setInOut %1 acbs

if not "%2"=="" if not "%2"=="." set OUTFILE=%2

set BLR_AT=%3
if "%BLR_AT%"=="." set BLR_AT=
if "%BLR_AT%"=="" set BLR_AT=N

set EDGE_SIG=%4
if "%EDGE_SIG%"=="." set EDGE_SIG=
if "%EDGE_SIG%"=="" set EDGE_SIG=10

set BLUR_SIG=%5
if "%BLUR_SIG%"=="." set BLUR_SIG=
if "%BLUR_SIG%"=="" set /A BLUR_SIG=%EDGE_SIG%/2

set BLEND_PC=%6
if "%BLEND_PC%"=="." set BLEND_PC=
if "%BLEND_PC%"=="" set BLEND_PC=100

set COLSP=%7
if "%COLSP%"=="." set COLSP=

set PARPERP=%8
if "%PARPERP%"=="." set PARPERP=
if "%PARPERP%"=="" set PARPERP=parallel

set TMPDIR=\temp\
set TMPGRAY=%TMPDIR%acbs_gray.miff
set TMPDIRN=%TMPDIR%acbs_gray_dirn.miff
set TMPMAG=%TMPDIR%acbs_gray_mag.miff
set TMPMASK=%TMPDIR%acbs_gray_mask.miff

if /I "%BLR_AT%"=="E" (
  set sNEG=
) else if /I "%BLR_AT%"=="N" (
  set sNEG=-channel RG -negate +channel
) else (
  echo Bad BLR_AT [%BLR_AT%] should be E or N.
  exit /B 1
)

:: FIXME: One of these is wrong
if /I "%PARPERP%"=="Parallel" (
  set sBLRARG=-set option:compose:args %BLUR_SIG%x0+0+360
) else if /I "%PARPERP%"=="Perpendicular" (
  set sBLRARG=-set option:compose:args 0x%BLUR_SIG%+0+360
) else (
  echo Bad PARPERP [%PARPERP%] should be Parallel or Perpendicular.
  exit /B 1
)

if "%acbsMSK_PROC%"=="" set acbsMSK_PROC=-contrast-stretch 45%%x45%%
if "%acbsMSK_PROC%"=="." set acbsMSK_PROC=

if "%acbsRD_MASK%"=="" (
  set sRD_MASK=%TMPMAG% -auto-level %acbsMSK_PROC%
  set sRD_MASK=%TMPMASK% -auto-level %acbsMSK_PROC%
) else (
  set sRD_MASK=%acbsRD_MASK%
)

if "%acbsWR_MASK%"=="" (
  set sWR_MASK=
) else (
  set sWR_MASK=+write %acbsWR_MASK%
)


set PREV_COLSP=
for /F "usebackq" %%L in (`%IMG7%magick ^
  %INFILE% ^
  -format "PREV_COLSP=%%[colorspace]" +write info: ^
  -colorspace Gray ^
  %acbsMSK_PRE% ^
  %TMPGRAY%`) do set %%L
if "%PREV_COLSP%"=="" exit /B 1
echo PREV_COLSP=%PREV_COLSP%

set COLSP_IN=
set COLSP_OUT=
if "%COLSP%" NEQ "" if /I "%COLSP%" NEQ "%PREV_COLSP%" (
  set COLSP_IN=-colorspace %COLSP% -set colorspace sRGB
  set COLSP_OUT=-set colorspace %COLSP% -colorspace %PREV_COLSP%
)

call %PICTBAT%slopeXYbl ^
  %TMPGRAY% %TMPGRAY% %EDGE_SIG%

call %PICTBAT%slopeXYmag ^
  %TMPGRAY% %TMPMAG%

call %PICTBAT%slopeXYdirn ^
  %TMPGRAY% %TMPDIRN% ^
  SWAP . 75

%IMG7%magick ^
  %TMPMAG% -auto-level %acbsMSK_PROC% ^
  ( +clone ) ^
  %TMPDIRN% ^
  -combine ^
  -set colorspace sRGB ^
  +depth ^
  -depth 32 ^
  -define "quantum:format=floating-point" ^
  %TMPMASK%

%IMG7%magick ^
  %INFILE% ^
  %COLSP_IN% ^
  ( +clone ^
    ( %sRD_MASK% ^
      %sWR_MASK% ^
      %sNEG% ^
    ) ^
    -compose Blur ^
    %sBLRARG% ^
    -composite ^
  ) ^
  -compose Blend -define compose:args=%BLEND_PC% -composite ^
  %COLSP_OUT% ^
  +depth ^
  -depth 32 ^
  -define "quantum:format=floating-point" ^
  %OUTFILE%

if ERRORLEVEL 1 exit /B 1


call echoRestore

@endlocal & set acbsOUTFILE=%OUTFILE%
All images on this page were created by the commands shown, using:
%IMG7%magick -version
Version: ImageMagick 7.1.0-42 Q16-HDRI x64 396d87c:20220709 https://imagemagick.org
Copyright: (C) 1999 ImageMagick Studio LLC
License: https://imagemagick.org/script/license.php
Features: Cipher DPC HDRI OpenCL
Delegates (built-in): bzlib cairo freetype gslib heic jng jp2 jpeg jxl lcms lqr lzma openexr pangocairo png ps raqm raw rsvg tiff webp xml zip zlib
Compiler: Visual Studio 2022 (193231332)
To improve internet download speeds, some images may have been automatically converted (by ImageMagick, of course) from PNG or TIFF or MIFF to JPG.
Source file for this web page is adapcontblrshp.h1. To re-create this web page, execute "procH1 adapcontblrshp".
This page, including the images, is my copyright. Anyone is permitted to use or adapt any of the code, scripts or images for any purpose, including commercial use.
Anyone is permitted to re-publish this page, but only for non-commercial use.
Anyone is permitted to link to this page, including for commercial use.
Page version v1.0 4-December-2017.
Page created 29-Aug-2022 04:43:58.
Copyright © 2022 Alan Gibson.