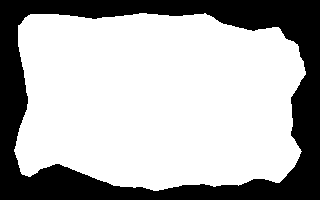
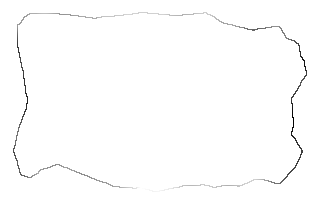
is_easy_mainland.png, from the Islands page.
blah
A physical membrane might be a thin sheet of rubber stretched across a wire loop. If the points on the wire loop are co-planar, the membrane will be in the same plane. But if the points on the wire are not co-planar, the membrane will take a complex 3-D shape.
Membranes are sometimes useful in image processing, such as for seamless pasting of one image over another.
This can be regarded as a hole-filling technique, where the hole is filled using colour informaton only from pixels at the edge of the hole. (See Filling holes for other techniques.)
Code on this page uses a process module, midlightest.
We create source images to demonstrate techniques:
|
is_easy_mainland.png, from the Islands page. |
|
Get some metdata:
for /F "usebackq" %%L in (`%IMG7%magick identify ^
  -format "WW=%%w\nHH=%%h\nWW_2=%%[fx:w/2]\nHH_2=%%[fx:h/2]\nDIAG_2=%%[fx:hypot(w,h)/2]" ^
  is_easy_mainland.png`) do set %%L

echo WW=%WW%  HH=%HH%  DIAG_2=%DIAG_2%
WW=320 HH=200 DIAG_2=188.68
|
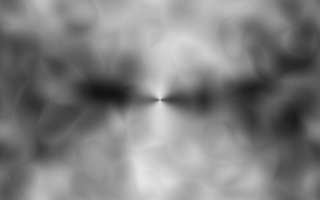
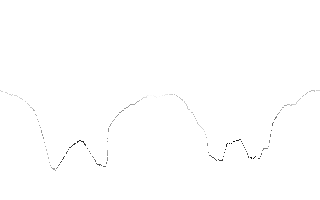
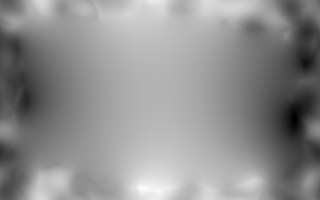
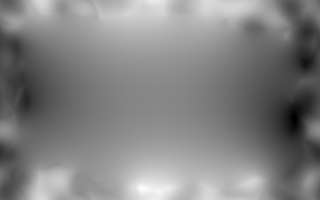
Create a blobby image of the same size. set mbmSEED=1234 call %PICTBAT%mBlobMask mem_full.png %WW% %HH% %IMG7%magick ^ -size %HH_2%x%WW% gradient: ^ -function Sinusoid 2,90 -rotate 90 ^ +distort Polar "%HH_2%,0 -.5,0.5" ^ -resize "%WW%x%HH%^!" ^ +repage ^ mem_full.png ^ -colorspace Gray ^ -evaluate-sequence Mean ^ mem_full.png |
|
|
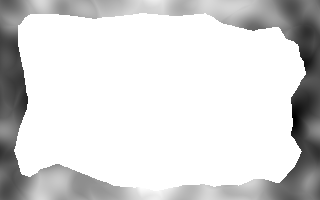
Make the "water" transparent. %IMG7%magick ^ mem_full.png ^ ( is_easy_mainland.png -alpha off -negate ) ^ -compose CopyOpacity -composite ^ -background gray(50%%) -alpha background ^ -auto-level ^ mem_hollow.png |
|
|
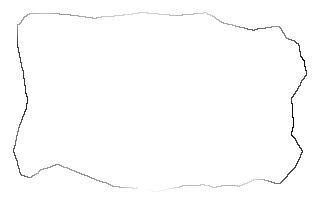
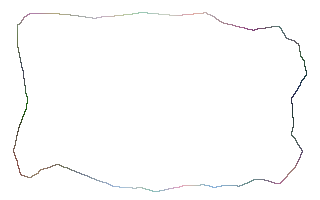
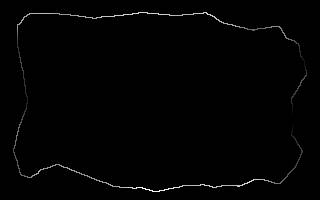
Isolate a one-pixel rim around the "beach". %IMG7%magick ^ mem_hollow.png ^ ( is_easy_mainland.png -morphology EdgeOut Square ) ^ -compose CopyOpacity -composite ^ -background Black -alpha background ^ mem_rim.png |
|
(EdgeOut with square, instead of diamond, gives a 4-connected rim. This reduces the need for super-sampling when we unroll.)
mem_hollow.png and mem_rim.png have transparent centres. We will populate these. An application may be concerned with the equivalent of either mem_hollow.png or mem_rim.png
We can consider the grayscale to be a heightfield, where light pixels are higher than low pixels. We stretch a membrane, like a thin sheet of rubber, across the transparent centre, fixing it to the heights of the pixels of the rim. The height at each point on the membrane define the pixel values.
The height of the membrane will be influenced by the height of the rim, but not by points outside the rim.
We will initally consider grayscale only. Colour images, with three channels, can have the same processing applied to each channel independently.
We will consider three general methods:
A simple and obvious technique for creating a membrane is to repeatedly blur the rim.
call %PICTBAT%blurFillSparse mem_rim.png . mem_bfs.png call %PICTBAT%blurFill mem_bfs.png . mem_bfs.png |
|
The result isn't too bad, but there is obvious discontinuity in tone at the centre. This is inevitable, where blurs from opposing sides of the rim meet in the middle.
Instead, an alternative is to calculate a required value for the centre, and ensure that all values from the rim inwards work towards this value.
What should be the gray value in the centre of the image? An approximation would be the average of the values around the rim. We can easily calculate this, on a scale of 0.0 (black) to 1.0 (white):
%IMG7%magick mem_rim.png -scale "1x1^!" -format "%%[fx:mean]" info:
0.264947
This takes the average of the rim values, giving equal weighting to all rim points, however far they are from the centre. A better value will come from a weighted average, where near points have a greater weight than distant points. This is considered below.
This method finds coordinates (CX,CY) of the centre of the rim line, and calculates Vc, the required value of the membrane at that point. Then it populates the pixel values for the membrane, such that:
So the gradient will be constant from any rim point to the centre, but the gradient will change suddenly (second order discontinuity) at the centre.
We can define a gradient within the rim, to a centre that we define as the point that is furthest from any rim point. Assuming the rim is within the image, the maximum possible distance between the rim and this centre is the semi-diagonal of the image.
This worked example uses is_easy_mainland.png to define the inside of the rim. The script will derive this data from the rim image.
|
The next two commands must use IM varieties with the same Q-number. for /F "usebackq" %%L in (`%IM7DEV%magick identify ^ -precision 19 ^ -format "DELTA=%%[fx:int(QuantumRange/%DIAG_2%)]" ^ mem_rim.png`) do set %%L echo DELTA=%DELTA% DELTA=22763235 for /F "usebackq tokens=1-2 delims=," %%X in (`%IM7DEV%magick ^ is_easy_mainland.png ^ -morphology Distance "Euclidean:4,%DELTA%" ^ +depth ^ -alpha off ^ +write mem_rimgrad.png ^ -process midlightest ^ NULL: 2^>^&1`) do ( set CX=%%X set CY=%%Y ) echo CX=%CX% CY=%CY% CX=154 CY=101 |

|
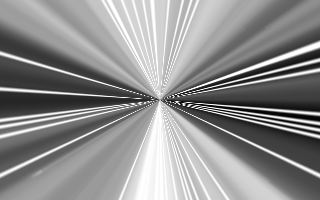
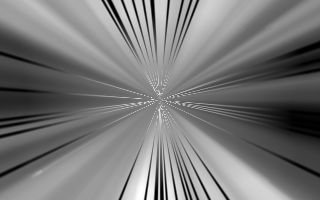
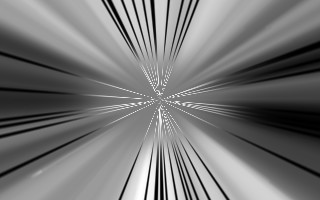
%IMG7%magick ^ -size %WW%x%HH% ^ -define gradient:center=%CX%,%CY% ^ -define gradient:radii=%DIAG_2%,%DIAG_2% ^ radial-gradient: ^ -alpha off ^ mem_radgrad.png |

|
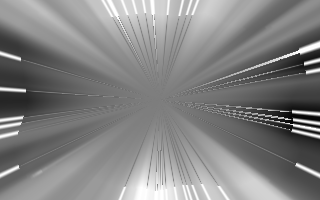
call %PICTBAT%fanComp ^ mem_radgrad.png ^ mem_rimgrad.png ^ mem_fangrad.png |

|
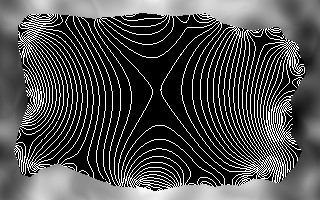
The result, mem_fangrad.png, is white at this defined centre, and black at the rim and outside the rim.
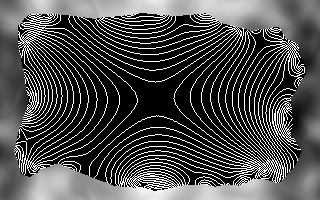
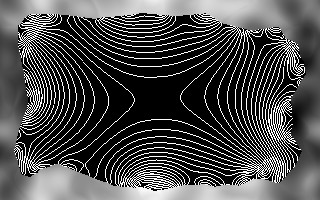
ASIDE: Just for interest, we find the contours of the mem_fangrad.png gradient:
%IMG7%magick ^
  mem_fangrad.png ^
  ( -size 1x500 gradient: ^
    -rotate 90 -duplicate 10 ^
    +append +repage ^
  ) ^
  -clut ^
  -morphology edgein diamond:1 ^
  mem_fgc.png
|

|
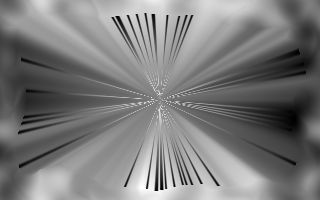
The mem_radgrad.png gradient, negated, gives the distance from the centre (CX,CY) to any point, on a scale of 0.0 to 1.0, where 1.0 is the semi-diagonal of the image. We can mask this with the transparency from mem_rim.png to get the distance to each point on the rim.
%IMG7%magick ^ mem_radgrad.png ^ -negate ^ mem_rim.png ^ -compose copy_opacity -composite ^ mem_rdist.png |

|
To get Vc, the gray value at the centre (CX,CY), we find the weighted average rim values:
      sum(Vr.Dr)
Vc = -----------
       sum(Dr)
... where Vr is the value at a rim point and Dr is the distance from the centre to that rim point. We can divide top and bottom by n, where n is the number of rim points, so:
for /F "usebackq" %%L in (`%IMG7%magick ^
  -precision 16 ^
  mem_rim.png ^
  mem_rdist.png ^
  -compose Multiply -composite ^
  -scale "1x1^!" ^
  -format "SUM_VR_DR=%%[fx:mean.r]" ^
  info:`) do set %%L

for /F "usebackq" %%L in (`%IMG7%magick ^
  -precision 16 ^
  mem_rdist.png ^
  -scale "1x1^!" ^
  -format "SUM_DR=%%[fx:mean.r]" ^
  info:`) do set %%L

for /F "usebackq" %%L in (`%IMG7%magick identify ^
  -precision 16 ^
  -format "Vc=%%[fx:%SUM_VR_DR%/%SUM_DR%]\nVcPC=%%[fx:100*%SUM_VR_DR%/%SUM_DR%]" ^
  xc:`) do set %%L

echo SUM_VR_DR=%SUM_VR_DR% SUM_VR_DR=%SUM_DR% Vc=%VcPC% Vc=%VcPC%
SUM_VR_DR=0.3210866271362631 SUM_VR_DR=0.6583250481612879 Vc=48.77326603826834 Vc=48.77326603826834
Vc is the value at the centre (CX,CY). If the entire membrane was at this value, it would look like this:
%IMG7%magick ^ -size %WW%x%HH% ^ xc:gray(%VcPC%%%) ^ mem_vc.png |

|
Now we know Vc, the value at the centre, and the value at each rim point, Vr. To get a linear gradient between these two, we want the value Vp at any point P between the centre and a rim point to be:
Vp = Gp.Vc + (1-Gp).Vr
   = -Gp.Vr + Gp.Vc + Vr
... where Gp is the gradient at point P, from mem_fangrad.png, scaled from 0.0 (at the centre) to 1.0. Vc is a scalar constant, derived above.
Before we can calculate Vp, we need to know the rim value Vr required for each point P. We find this by unrolling the rim around (CX,CY), spreading the values vertically with shiftFill.bat, and rolling that back up.
We create and show small versions of intermediate results purely for illustration.
|
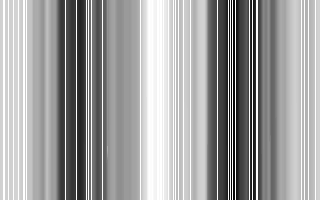
Unroll the rim. %IMG7%magick ^ mem_rim.png ^ -distort depolar -1,0 ^ ( +clone -alpha extract -threshold 50%% ) ^ -alpha off ^ -compose CopyOpacity -composite ^ +write mem_rim_spd.png ^ -resize "%WW%x%HH%^!" ^ mem_rim_spd_sm.png |
|
|
Spread values vertically. call %PICTBAT%shiftFill ^ mem_rim_spd.png 0x mem_rim_shft.png %IMG7%magick ^ mem_rim_shft.png ^ -resize "%WW%x%HH%^!" ^ mem_rim_shft_sm.png |
|
Every row is the same. Some columns may be transparent (transparent black). We fill transparency with blur-fill. That can be slow, but we need to do only one row, then scale that back to the full height.
|
Crop, blur-fill and scale. %IMG7%magick ^ mem_rim_shft.png ^ -crop x1+0+0 +repage ^ mem_rim_shft2.png call %PICTBAT%blurFill ^ mem_rim_shft2.png %IMG7%magick ^ mem_rim_shft2_bf.png ^ -scale "%WW%x%HH%^!" ^ mem_rim_shft3.png |

|
|
Roll it back up. %IMG7%magick ^ mem_rim_shft3.png ^ -distort polar -1,0 ^ -resize "%WW%x%HH%^!" ^ mem_rim_spd2.png |
|
If the rim was thinner, we might need "-resize 200%" or "-resize 400%" before "-distort depolar". Even then, some values in the rim, where they lie on a radius from (Cx,Cy), might be skipped (made transparent). The spreading by shiftFill would fill those in.
The image mem_rim_spd2.png contains the values for Vr, the rim values spread along the radii from (CX,CY).
Now we calculate the membrane values, Vp = -Gp.Vr + Gp.Vc + Vr
%IMG7%magick ^
  mem_fangrad.png ^
  mem_rim_spd2.png ^
  -compose Mathematics ^
    -define compose:args=-1,1,%Vc%,0 ^
    -composite ^
  mem_mem.png
|
|
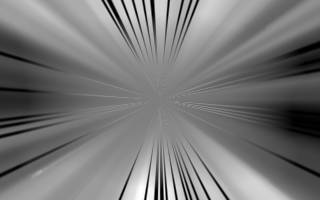
The image mem_mem.png is the required membrane, with values extrapolated outside the rim. We can check it by compositing mem_hollow.png over it:
%IMG7%magick ^ mem_mem.png ^ mem_hollow.png ^ -composite ^ mem_mem_chk.png |
|
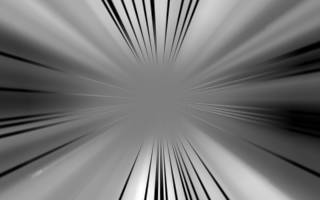
If we want, we can use mem_fangrad.png as a mask to modulate the effect. This will steepen the slope near the rim while zeroing the slope near the centre, resulting in continuity of slope here.
This is useful provided the rim doesn't have a tilt. Any modulation reduces contrast, thus introduces flatness, in some areas. If the rim has a systemic tilt (for example, an oblique cross-section of a cone), the zero-slope centre will look wrong. An alternative is to introduce a horizontal blur after the spreading of the unrolled vales; see Selective blur.
%IMG7%magick ^ mem_mem.png ^ mem_vc.png ^ mem_fangrad.png ^ -composite ^ mem_mem_mod1.png |
|
|
Check this by compositing mem_hollow.png over it. %IMG7%magick ^ mem_mem_mod1.png ^ mem_hollow.png ^ -composite ^ mem_mem_mod1_chk.png |

|
We can tweak the mask, usually such that 0.0 and 1.0 remain unchanged, but other values are changed, eg by -evaluate Pow or -sigmoidal-contrast.
%IMG7%magick ^
  mem_mem.png ^
  mem_vc.png ^
  ( mem_fangrad.png ^
    -sigmoidal-contrast 10,50%% ^
  ) ^
  -composite ^
  mem_mem_mod2.png
|
|
|
Check this by compositing mem_hollow.png over it. %IMG7%magick ^ mem_mem_mod2.png ^ mem_hollow.png ^ -composite ^ mem_mem_mod2_chk.png |

|
A more direct technique for modulating the result is to tweak values of Gp:
%IMG7%magick ^
  mem_fangrad.png -sigmoidal-contrast 10,50%% ^
  mem_rim_spd2.png ^
  -compose mathematics ^
    -define compose:args=-1,1,%Vc%,0 -composite ^
  mem_mem_mod3.png
|
|
|
Check this by compositing mem_hollow.png over it. %IMG7%magick ^ mem_mem_mod3.png ^ mem_hollow.png ^ -composite ^ mem_mem_mod3_chk.png |

|
The script membrane.bat performs the above operations, starting from rim, making a membrane image the interpolates between the centre and rim, and extrapolates beyond the rim. It operates on three channels independently.
call %PICTBAT%membrane mem_rim.png mem_out2.png |
|
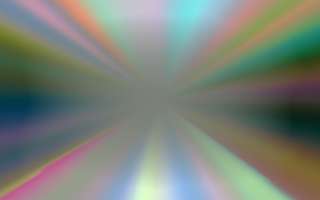
We make a colour rim:
set mbmSEED=1234 call %PICTBAT%mBlobMask mem_full_c.png %WW% %HH% . . . 1 %IMG7%magick ^ -size %HH_2%x%WW% gradient: ^ -function Sinusoid 2,90 -rotate 90 ^ +distort Polar "%HH_2%,0 -.5,0.5" ^ -resize "%WW%x%HH%^!" ^ +repage ^ mem_full_c.png ^ -evaluate-sequence Mean ^ mem_full_c.png |
|
%IMG7%magick ^ mem_full_c.png ^ ( is_easy_mainland.png -alpha off -negate ) ^ -compose CopyOpacity -composite ^ -background gray(50%%) -alpha background ^ -auto-level ^ mem_hollow_c.png |

|
%IMG7%magick ^ mem_hollow_c.png ^ ( is_easy_mainland.png -morphology EdgeOut Square ) ^ -compose CopyOpacity -composite ^ -background Black -alpha background ^ mem_rim_c.png |
|
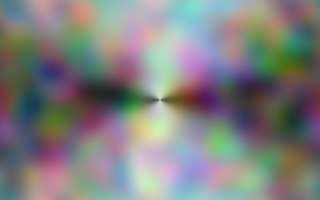
From that colour rim, calculate a membrane:
call %PICTBAT%membrane ^ mem_rim_c.png mem_out_c.png |
|
We can relax any of the above results. (See Filling holes: relaxation.) First, we set some abbreviations to simplify the commands.
set FREQm1=49

set TO_CONTOUR=^
( -size 1x500 gradient: -rotate 90 ^
-duplicate %FREQm1% +append +repage ) ^
-clut -morphology edgein diamond:1 -threshold 40%% ^
mem_hollow.png -composite

set RF_PARAMS=1e-6 50
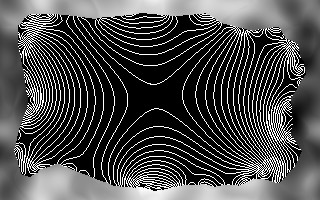
The following table shows the source used for the first approximation, the result from relaxation, and a contour of that result.
| Code | Source | Relaxed | Contour of relaxed |
|---|---|---|---|
call %PICTBAT%relaxFill ^
  mem_hollow.png mem_bfs.png ^
  mem_bfs_rf.png %RF_PARAMS%

echo rfITER=%rfITER%
rfITER=5000 %IMG7%magick ^ mem_bfs_rf.png ^ %TO_CONTOUR% ^ mem_bfs_c.png |
|
|
|
call %PICTBAT%relaxFill ^
  mem_hollow.png mem_mem.png ^
  mem_mem_rf.png %RF_PARAMS%

echo rfITER=%rfITER%
rfITER=5000 %IMG7%magick ^ mem_mem_rf.png ^ %TO_CONTOUR% ^ mem_mem_c.png |
|

|
|
call %PICTBAT%relaxFill ^
  mem_hollow.png mem_mem_mod1.png ^
  mem_mem_mod1_rf.png %RF_PARAMS%

echo rfITER=%rfITER%
rfITER=5000 %IMG7%magick ^ mem_mem_mod1_rf.png ^ %TO_CONTOUR% ^ mem_mem_mod1_c.png |
|

|
|
call %PICTBAT%relaxFill ^
  mem_hollow.png mem_mem_mod2.png ^
  mem_mem_mod2_rf.png %RF_PARAMS%

echo rfITER=%rfITER%
rfITER=5000 %IMG7%magick ^ mem_mem_mod2_rf.png ^ %TO_CONTOUR% ^ mem_mem_mod2_c.png |
|
|
|
call %PICTBAT%relaxFill ^
  mem_hollow.png mem_mem_mod3.png ^
  mem_mem_mod3_rf.png %RF_PARAMS%

echo rfITER=%rfITER%
rfITER=5000 %IMG7%magick ^ mem_mem_mod3_rf.png ^ %TO_CONTOUR% ^ mem_mem_mod3_c.png |
|

|

|
|
Without supplying a first approximation: call %PICTBAT%relaxFill ^ mem_hollow.png . ^ mem_none_rf.png %RF_PARAMS% echo rfITER=%rfITER% rfITER=5000 %IMG7%magick ^ mem_none_rf.png ^ %TO_CONTOUR% ^ mem_none_c.png |
[No image] |

|
|
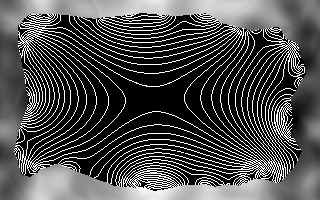
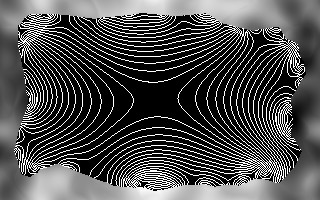
The results are similar. The contour shows the saddle we expect, as the top and bottom are lighter than the left and right sides. The blur-fill source took the least number of iterations to stabilise, but it is slightly different to the other results.
%IMG7%magick compare -metric RMSE mem_none_rf.png mem_bfs_rf.png NULL:
12052.2 (0.183904)
The other results are practically identical to each other, for example:
%IMG7%magick compare -metric RMSE mem_none_rf.png mem_mem_rf.png NULL:
616.859 (0.00941267)
For good performance, we should generally use the multi-scale version of the script, relaxFillMS.bat. For this, there is virtually no benefit from supplying a first approximation, so we don't.
| Code | Relaxed | Contour of relaxed |
|---|---|---|
call %PICTBAT%relaxFillMS ^
  mem_hollow.png . ^
  mem_none_rfms.png %RF_PARAMS%

echo rfmsITER=%rfmsITER%
rfmsITER=10000 %IMG7%magick ^ mem_none_rfms.png ^ %TO_CONTOUR% ^ mem_none_msc.png |

|
|
%IMG7%magick compare -metric RMSE mem_none_rf.png mem_none_rfms.png NULL:
1201.29 (0.0183305)
relaxFillMS.bat gives virtually the same result as relaxFill.bat but with far fewer iterations (about 3%), and most of those iterations are at coarse scale (i.e. on smaller images).
For convenience, .bat scripts are also available in a single zip file. See Zipped BAT files.
rem Makes a tiled blob gradient mask.
rem %1 is output filename.
rem %2 and %3 are overall width and height.
rem %4 and %5 are repetitions horizontally and vertically (default 1).
rem %6 is blur sigma (default 10).
rem %7 0 for greyscale, 1 for colour
@rem
@rem Also uses:
@rem   mbmSEED if given, use this as seed.
@rem
@rem Updated:
@rem   25-May-2016 added mbmSEED feature.
@rem   5-August-2022 for IM v7.
@rem


@if "%3"=="" findstr /B "rem @rem" %~f0 & exit /B 1

@setlocal enabledelayedexpansion

@call echoOffSave

call %PICTBAT%setInOut %1 mbm


set OUTFILE=%1
if "%OUTFILE%"=="" set OUTFILE=blobMask.png

set numWi=%4
if "%numWi%"=="." set numWi=
if "%numWi%"=="" set numWi=1

set numHt=%5
if "%numHt%"=="." set numHt=
if "%numHt%"=="" set numHt=1

set blurSig=%6
if "%blurSig%"=="." set blurSig=
if "%blurSig%"=="" set blurSig=10

set IsCol=%7
if "%IsCol%"=="." set IsCol=
if "%IsCol%"=="" set IsCol=0

set sSEED=
if not "%mbmSEED%"=="" set sSEED=-seed %mbmSEED%

set TEMP_FILE=%TEMP%\bmOne.miff

set /A oneWi=%2/%numWi%
set /A oneHt=%3/%numHt%

echo %oneWi% %oneHt%

set /A semiHt=%oneHt%/2
set /A oneHt=%semiHt%*2
set /A semiWi=%oneWi%/2

set /A oneWim1=%oneWi%-1
set /A oneHtm1=%oneHt%-1

if %IsCol%==0 (
  set sCOL=-modulate 100,0,100
) else (
  set sCOL=-channel RGB
)

rem This starts tiling top-left, so any partial tiles will be at right and bottom.
rem We could use -tile-offset, or generate over-size then trim.

goto skip

%IMG7%magick ^
  -size %oneWi%x%oneHt% ^
  xc: ^
  %sSEED% +noise Random ^
  -virtual-pixel Tile ^
  -blur 0,%blurSig% ^
  -modulate 100,0,100 ^
  -auto-level ^
  -auto-gamma ^
  %TEMP_FILE%

%IMG7%magick ^
  -size %2x%3 ^
  tile:%TEMP_FILE% ^
  %OUTFILE%
:skip

%IMG7%magick ^
  -size %oneWi%x%oneHt% ^
  xc: ^
  %sSEED% +noise Random ^
  -virtual-pixel Tile ^
  -blur 0,%blurSig% ^
  %sCOL% ^
  -auto-level ^
  -auto-gamma ^
  +channel ^
  +write mpr:NSE +delete ^
  -size %2x%3 ^
  tile:mpr:NSE ^
  %OUTFILE%

call echoRestore

@endlocal & set mbmOUTFILE=%OUTFILE%
rem From %1, a image where pixels on a rim are opaque and others are transparent,
rem write %2, a membrane image.
@rem
@rem Also uses:
@rem   memSUPER_SAMP_PC percentage for supersampling, eg 400.
@rem
@rem Also sets environment vaiables:
@rem   memCX, memCY  coordinates of rim centre.
@rem   memVc  colour at (memCX,memCY).
@rem
@rem Updated:
@rem   13-August-2022 for IM v7.
@rem

@if "%1"=="" findstr /B "rem @rem" %~f0 & exit /B 1

@setlocal enabledelayedexpansion

@call echoOffSave

call %PICTBAT%setInOut %1 mem

if not "%2"=="" if not "%2"=="." set OUTFILE=%2

set memSUPER_SAMP_PC=


set EXT=.miff
set RIMGRAD=%BASENAME%_mem_rimgrad%EXT%
set RADGRAD=%BASENAME%_mem_radgrad%EXT%
set FANGRAD=%BASENAME%_mem_fangrad%EXT%
set RIMSPD=%BASENAME%_mem_rimspd%EXT%
set FCPIX=%BASENAME%_mem_fcpix%EXT%

set WW=
for /F "usebackq" %%L in (`%IMG7%magick identify ^
  -format "WW=%%w\nHH=%%h\nWW_2=%%[fx:w/2]\nHH_2=%%[fx:h/2]\nDIAG_2=%%[fx:hypot(w,h)/2]" ^
  %INFILE%`) do set %%L

if "%WW%"=="" exit /B 1

:: Next two magicks must use same Q-number.

for /F "usebackq" %%L in (`%IM7DEV%magick identify ^
  -precision 19 ^
  -format "DELTA=%%[fx:int(QuantumRange/%DIAG_2%)]" ^
  %INFILE%`) do set %%L

echo %0: WW=%WW% HH=%HH% DIAG_2=%DIAG_2% DELTA=%DELTA%

set CX=
for /F "usebackq tokens=1-2 delims=," %%X in (`%IM7DEV%magick ^
  %INFILE% ^
  -alpha extract ^
  -bordercolor Black -border 1 ^
  -fill Red -draw "color 0,0 floodfill" ^
  -shave 1x1 ^
  -fill White -opaque Red ^
  -negate ^
  -morphology Distance "Euclidean:4,%DELTA%" ^
  +depth ^
  -alpha off ^
  +write %RIMGRAD% ^
  -process midlightest ^
  NULL: 2^>^&1`) do (
  set CX=%%X
  set CY=%%Y
)

if "%CX%"=="" exit /B 1

echo %0: CX=%CX%  CY=%CY%

%IMG7%magick ^
  -size %WW%x%HH% ^
  -define gradient:center=%CX%,%CY% ^
  -define gradient:radii=%DIAG_2%,%DIAG_2% ^
  radial-gradient: ^
  -alpha off ^
  %RADGRAD%

call %PICTBAT%fanComp ^
  %RADGRAD% ^
  %RIMGRAD% ^
  %FANGRAD%
if ERRORLEVEL 1 exit /B 1

echo %0: Made fancomp.

%IMG7%magick ^
  %RADGRAD% ^
  -negate ^
  %INFILE% ^
  -compose copy_opacity -composite ^
  +write mpr:RDIST ^
  %INFILE% ^
  -compose Multiply -composite ^
  mpr:RDIST ^
  -scale "1x1^!" ^
  -alpha off ^
  -compose DivideSrc -composite ^
  %FCPIX%

echo %0: Made fcpix.

if "%memSUPER_SAMP_PC%"=="" (
  set sRES=
) else (
  set sRES=-resize %memSUPER_SAMP_PC%%%
)


%IMG7%magick ^
  %INFILE% ^
  %sRES% ^
  -distort depolar -1,0 ^
  ( +clone -alpha extract -threshold 50%% ) ^
  -alpha off ^
  -compose CopyOpacity -composite ^
  %RIMSPD%

echo %0: Made rimspd.

call %PICTBAT%shiftFill %RIMSPD% 0x %RIMSPD%
if ERRORLEVEL 1 exit /B 1

echo %0: done shiftFill.

%IMG7%magick ^
  %RIMSPD% ^
  -crop x1+0+0 +repage ^
  %RIMSPD%

call %PICTBAT%blurFill ^
  %RIMSPD% . %RIMSPD%

%IMG7%magick ^
  %RIMSPD% ^
  -scale "%WW%x%HH%^!" ^
  -distort polar -1,0 ^
  -resize "%WW%x%HH%^!" ^
  %RIMSPD%


:: out = rimspd - (fan * rimspd) + (fan * fcpix)

%IMG7%magick ^
  %FANGRAD% +write mpr:FAN ^
  ( %FCPIX% -scale "%WW%x%HH%^!" +write mpr:FC ) ^
  -compose Multiply -composite ^
  +write mpr:FxGC ^
  -delete 0-2 ^
  %RIMSPD% +write mpr:SPD ^
  ( mpr:FAN mpr:SPD -compose Multiply -composite -negate ) ^
  mpr:FxGC ^
  -colorspace sRGB ^
  -evaluate-sequence AddModulus ^
  mpr:FC ^
  mpr:FAN ^
  -compose Over -composite ^
  %OUTFILE%

if ERRORLEVEL 1 exit /B 1

echo %0: Made outfile %OUTFILE%.


call echoRestore

endlocal & set memOUTFILE=%OUTFILE%
All images on this page were created by the commands shown, using:
%IMG7%magick -version
Version: ImageMagick 7.1.1-15 Q16-HDRI x64 a0a5f3d:20230730 https://imagemagick.org
Copyright: (C) 1999 ImageMagick Studio LLC
License: https://imagemagick.org/script/license.php
Features: Cipher DPC HDRI OpenCL OpenMP(2.0)
Delegates (built-in): bzlib cairo freetype gslib heic jng jp2 jpeg jxl lcms lqr lzma openexr pangocairo png ps raqm raw rsvg tiff webp xml zip zlib
Compiler: Visual Studio 2022 (193532217)
To improve internet download speeds, some images may have been automatically converted (by ImageMagick, of course) from PNG or TIFF or MIFF to JPG.
Source file for this web page is membrane.h1. To re-create this web page, run "procH1 membrane".
This page, including the images, is my copyright. Anyone is permitted to use or adapt any of the code, scripts or images for any purpose, including commercial use.
Anyone is permitted to re-publish this page, but only for non-commercial use.
Anyone is permitted to link to this page, including for commercial use.
Page version v1.0 17-June-2016.
Page created 02-Sep-2023 12:16:10.
Copyright © 2023 Alan Gibson.