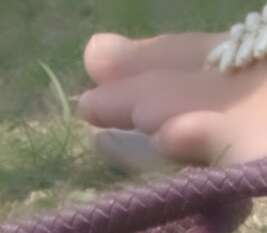
set SRC=toes.png

... for blurring that preserves edges, and other purposes.
Locally, the output is a linear transformation of the guidance image:
output = A * guide + B
When used with integral images, the performance is O(N) where N is the number of pixels, and is independent of the window size.
On this page, we consider only opaque images.
See also:
On bilateral filters:
First, we give the simple method. This is used when the guide image is single-channel (grayscale), or when the guide image is multi-channel (colour) and we want to apply each channel of the guide image independently to the input image.
From an image p, mean(p) is an image of the same size, where each pixel is the mean of pixels in a window of p. In the references above, the window is square, radius r, so it has (2r+1)2 pixels, and the mean is a simple average of those pixels. The script provides alternative methods for calculating means, such as non-square or Gaussian windows.
From an input image INP and guide image GDE, the simple method is:
MN_INP = mean(INP)
MN_GDE = mean(GDE)

VAR_G = mean (GDE*GDE) - MN_GDE*MN_GDE
COV = mean(INP*GDE) - MN_INP*MN_GDE

AK = COV / ( VAR_G + epsilon )
BK = MN_INP - AK * MN_GDE

output = GDE * mean(AK) + mean(BK)
That's all. Quite simple.
Note that VAR_G is the variance of a single image, variance(GDE), and COV is the covariance of both images, covariance(INP,GDE).
Note also that:
covariance(p,p) = variance(p)
covariance(a,b) = covariance(b,a)
An equivalent definition of covariance is:
covariance(A,B) = mean ((A-meanA)*(B-meanB))
Note that when image P has two pixels, values 0 and 1, then:
VAR_G = mean (P*P) - mean(P)*mean(P)
      = mean (0,1) - 0.5*0.5
      = 0.5 - 0.25
      = 0.25
So the variance of an image is in the range [0,0.25]. The variance is sqrt(standard_deviation), so the maximum SD is 0.5. An ordinary photograph has overall SD about 0.16 to 0.2, so typical variance is 0.0256 to 0.04. The value chosen for epsilon (ε) will often be below this typical variance.
By similar reasoning, the covariance of a pair of images is in the range [-0.25,+0.25], but for ordinary photos the typical range is [-0.04,+0.04].
In cases where the guide image GDE and input image INP are the same:
COV = VAR_G

AK = VAR_G / ( VAR_G + epsilon )
BK = MN_INP - AK * MN_INP
   = MN_INP * (1 - AK)

output = INP * mean(AK) + mean(BK)
When epsilon is very much less than VAR_G then AK=1 and BK=0 so output=INP (there is no smoothing).
When epsilon is very much more than VAR_G then AK=0 and BK=MN_INP so output=MN_INP (the output is entirely smoothed).
In general, decreasing epsilon will reduce smoothing, and increasing epsilon will increase smoothing.
As noted above, the simple method can be used when the guided filter is colour. But that will use the guided filter channels independently of each other. For example, the output red channel will use data from the input red and guide red, with no cross-feed between channels.
The following more complex method uses data from all guide channels for every output channel. For example, the output red will use data from the input red and all channels of the guide image.
The literature often presents this method as needing the input image to be single-channel (grayscale), and the created output is also single-channel. When the input image (as well as the guide image) is colour, part of the algorithm needs to be run three times, once for each input (and output) channel.
We need to calculate Σk ("SigmaK"), which is a 3x3 matrix at each pixel, the covariance matrix of the guide image in the window centred at k. The matrix is symmetrical, so of the nine elements, three are equal to another three, so we need only six calculations. SigmaK is calculated from the guide image only, so we don't need to re-calculate it for each channel in the input image.
In the following pseudo-code:
... and likewise for .g and .b.
var_rr = mean (GDE.r*GDE.r) - MN_GDE.r*MN_GDE.r + eps
var_rg = mean (GDE.r*GDE.g) - MN_GDE.r*MN_GDE.g
var_rb = mean (GDE.r*GDE.b) - MN_GDE.r*MN_GDE.b
var_gg = mean (GDE.g*GDE.g) - MN_GDE.g*MN_GDE.g + eps
var_gb = mean (GDE.g*GDE.b) - MN_GDE.g*MN_GDE.b
var_bb = mean (GDE.b*GDE.b) - MN_GDE.b*MN_GDE.b + eps
The six values var_rr etc, without the eps terms, are the values in the 3x3 SigmaK matrix. We add eps to the diagonal elements, and then invert the resulting matrix:
invrr = var_gg*var_bb - var_gb*var_gb
invrg = var_gb*var_rb - var_rg*var_bb
invrb = var_rg*var_gb - var_gg*var_rb
invgg = var_rr*var_bb - var_rb*var_rb
invgb = var_rb*var_rg - var_rr*var_gb
invbb = var_rr*var_gg - var_rg*var_rg

covDet = invrr*var_rr + invrg*var_rg + invrb*var_rb

invrr /= covDet
invrg /= covDet
invrb /= covDet
invgg /= covDet
invgb /= covDet
invbb /= covDet
The next sections should be repeated for each channel ch in the input image INP.
We calculate COV:
COV = mean(INP.ch*GDE) - MN_INP.ch*MN_GDE
When INP is a colour image (with three channels), so is COV. The value of COV is different for each of the three channels in INP.
Now we can calculate AK and BK, which will also be different for each of the three channels in GDE:
AK.r = invrr*COV.r + invrg*COV.g + invrb*COV.b
AK.g = invrg*COV.r + invgg*COV.g + invgb*COV.b
AK.b = invrb*COV.r + invgb*COV.g + invbb*COV.b

BK = MN_INP.ch - AK.r*MN_GDE.r - AK.g*MN_GDE.g - AK.b*MN_GDE.b
AK has three channels at each pixel; BK has one.
From AK and BK, we calculate mean(AK) and mean(BK) as above. Then:
output.ch = AK.r*GDE.r + AK.g*GDE.g + AK.b*GDE.b + BK
For each channel in INP, we repeat the calculation of COV, AK, BK and output.ch. If INP has only one channel then so does output.ch, and we don't need to repeat the work; this doesn't save much time, as most work is in calculating invrr etc.
Finally, if INP has three channels, we combine output.r, output.g and output.b to make the final colour output output.
In the script, there are two complex methods, for the cases when the input image is grayscale (method "grayCol") or colour (method "colCol").
Not all systems include this complex method of guided filter. For example, MathWorks documentation says the processing is determined according to the number of channels. When A is the image to be filtered and G is the guide image:
The colour (multi-channel) version takes much longer than the grayscale (independent channels) version. When should we use the colour (multi-channel) version? My current advice is: for any given application, try both versions, then use the most suitable.
| Input image | Guide image | Output | Comments |
|---|---|---|---|
| Grayscale | Grayscale | Grayscale | |
| Colour | Grayscale | Colour | |
| Grayscale | Colour | Grayscale | |
| Colour | Colour | Colour |
The "fast" method performs most of the work on downsampled images. At the end, AK and BK are upsampled, and the original full-sized version of GDE is used to calculate:
output = GDE * mean(AK) + mean(BK)
The script guideFilt.bat takes an input image and a guide image, and makes the result image.
| Parameter | Meaning |
|---|---|
| %1 | Input image |
| %2 | Guide image [default: %1] |
| %3 | Output image |
| %4 | Method for overall filter
One of: auto, simple, grayCol, colCol. [Default: auto] |
| %5 | Method for "mean"
One of: blur, gauss, stat, stat2, integ. [Default: integ] |
| %6 | Window radii XxY eg 20x20 [default: 9x9] |
| %7 | Epsilon, 0 to 1 [default 0.01] |
| %8 | Scale factor eg 4 for quarter-size linear [1]. Implements the fast version. Generally shouldn't be larger than window radius. |
| %9 | Power factor for Ak [1] |
For the blur method, the X value of parameter %5 is used for the blur sigma, and the Y value is ignored, so the actual window will be larger (and square).
The script also processes according to environment variables, if they are set:
| Variable | Meaning |
|---|---|
| gfPRE_INP | Processing applied to input image |
| gfPRE_GDE | Processing applied to guide image |
| gfPOST | Processing applied to output image before writing the output |
When the filter method is "auto", the script chooses the method according to whether the input and guide filters are grayscale or colour:
| Input image | Guide image | Method used |
|---|---|---|
| Grayscale | Grayscale | simple |
| Grayscale | Colour | grayCol |
| Colour | Grayscale | colCol |
| Colour | Colour | colCol |
The "auto" method takes time. If a workflow is certain that a particular method should be used, specifying that method will slightly reduce the time taken.
The script runs a single "magick" command. For the simple method, the command is fairly short, and the script runs the command directly.
For the complex method, the command can exceed 8000 characters which is too long for Windows. So the script writes an ImageMagick v7 script in sections: preliminary processing to calculate SigmaK etc from an environment variable PROC_PRE, and then processing for one channel from an environment variable PROC_ONE. When we have three channels, PROC_ONE is included three times. After writing the IM v7 script to a file, it is executed with "magick -script".
(An alternative but slower strategy would be to directly run multiple commands with intermediate results written to files.)
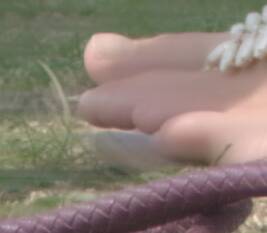
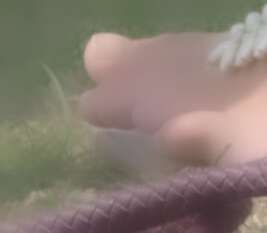
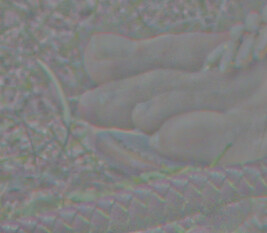
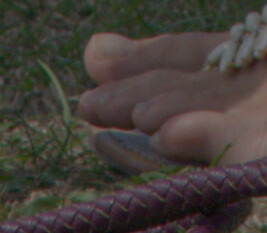
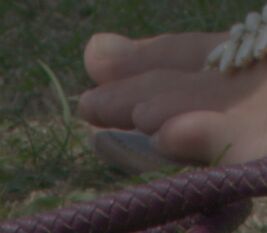
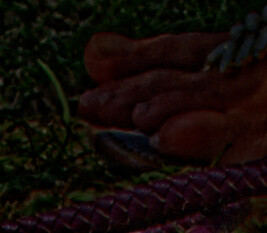
set SRC=toes.png |
|
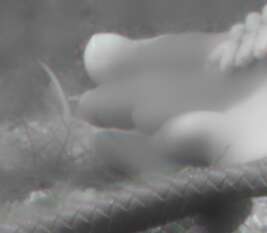
We also make a grayscale version:
%IMG7%magick ^ %SRC% ^ -colorspace Gray ^ -set colorspace sRGB ^ gf_src_gr.png |

|
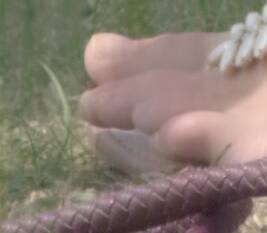
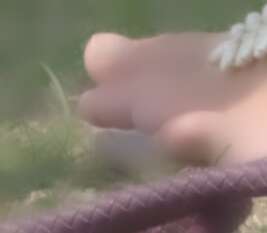
When the input image is also used as the guide, we get an edge-preserving blur. Edges are defined not by luminosity or any particular colour channel, but by all colour channels combined. Edges are not defined in a binary way; edges will have less blur than non-edges, but are not preserved exactly. Similarly, non-edges have variable blur.
(Contrast this with IM's -selective-blur, which is binary: each pixel has either full blur or no blur at all.)
A simple example that also says which filter method was used:
call %PICTBAT%guideFilt ^
  %SRC% %SRC% gf_gf1.png
echo gfFiltMeth=%gfFiltMeth%
gfFiltMeth=colCol |

|
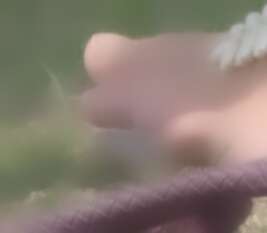
Test extreme values of epsilon:
|
No smoothing: call %PICTBAT%guideFilt ^ %SRC% %SRC% gf_ep0.png . . . 0 |

|
|
Very low smoothing: call %PICTBAT%guideFilt ^ %SRC% %SRC% gf_epvsml.png . . . 0.0001 |

|
|
Low smoothing: call %PICTBAT%guideFilt ^ %SRC% %SRC% gf_epsml.png . . . 0.001 |

|
|
Entirely smoothed: call %PICTBAT%guideFilt ^ %SRC% %SRC% gf_epbig.png . . . 1000 |

|
The effect does not need to be the same in the X and Y directions:
call %PICTBAT%guideFilt ^ %SRC% %SRC% gf_st1.png . . 30x0 |
|
call %PICTBAT%guideFilt ^ %SRC% %SRC% gf_st2.png . . 0x30 |
|
Horizontal or vertical smearing is visible, eg in the background grass.
We can use a grayscale image for both inputs, or just one:
|
Use a grayscale input with grayscale guide: call %PICTBAT%guideFilt ^ gf_src_gr.png gf_src_gr.png gf_grgr.png echo gfFiltMeth=%gfFiltMeth% gfFiltMeth=simple |
|
|
Use a grayscale input with colour guide: call %PICTBAT%guideFilt ^ gf_src_gr.png %SRC% gf_grcol.png echo gfFiltMeth=%gfFiltMeth% gfFiltMeth=grayCol |
|
|
Use a colour input with grayscale guide: call %PICTBAT%guideFilt ^ %SRC% gf_src_gr.png gf_colgr.png echo gfFiltMeth=%gfFiltMeth% gfFiltMeth=colCol |
|
Repeat the last two, forcing the simple method:
|
Use a grayscale input with colour guide: call %PICTBAT%guideFilt ^ gf_src_gr.png %SRC% gf_grcol_s.png ^ simple echo gfFiltMeth=%gfFiltMeth% gfFiltMeth=simple |
|
|
Use a colour input with grayscale guide: call %PICTBAT%guideFilt ^ %SRC% gf_src_gr.png gf_colgr_s.png ^ simple echo gfFiltMeth=%gfFiltMeth% gfFiltMeth=simple |

|
Tweak the scale factor:
call %PICTBAT%guideFilt ^ %SRC% %SRC% gf_sc1.png ^ . . 10x10 . 1 |

|
call %PICTBAT%guideFilt ^ %SRC% %SRC% gf_sc2.png ^ . . 10x10 . 2 |
|
call %PICTBAT%guideFilt ^ %SRC% %SRC% gf_sc4.png ^ . . 10x10 . 4 |

|
call %PICTBAT%guideFilt ^ %SRC% %SRC% gf_sc10.png ^ . . 10x10 . 10 |

|
Larger scale factors cause smaller images to be processed which increases performance, and results in slightly greater smoothing of areas that are distant from edges, with almost no change to smoothness of edges.
When the scale factor is not one, the window size is also reduced by that factor. Hence, a scale factor larger than the window size is not advised.
We can iterate the process, either by using the same source as the guide...
call %PICTBAT%guideFilt ^ gf_gf1.png %SRC% gf_gf1_si1.png |
|
call %PICTBAT%guideFilt ^ gf_gf1_si1.png %SRC% gf_gf1_si2.png |

|
call %PICTBAT%guideFilt ^ gf_gf1_si2.png %SRC% gf_gf1_si3.png |
|
... or by using the previous result as the guide, which accelerates the blurring effect:
call %PICTBAT%guideFilt ^ gf_gf1.png gf_gf1.png gf_gf1_i1.png |
|
call %PICTBAT%guideFilt ^ gf_gf1_i1.png gf_gf1_i1.png gf_gf1_i2.png |
|
call %PICTBAT%guideFilt ^ gf_gf1_i2.png gf_gf1_i2.png gf_gf1_i3.png |

|
We can limit the result, so pixel values are constrained to be within a local range:
call %PICTBAT%guideFilt ^ gf_gf1.png gf_gf1.png gf_gf1_i1_lim.png call %PICTBAT%limitMinMax ^ %SRC% gf_gf1_i1_lim.png gf_gf1_i1_lim.png |
|
call %PICTBAT%guideFilt ^ gf_gf1_i1_lim.png gf_gf1_i1_lim.png gf_gf1_i2_lim.png call %PICTBAT%limitMinMax ^ %SRC% gf_gf1_i2_lim.png gf_gf1_i2_lim.png |

|
call %PICTBAT%guideFilt ^ gf_gf1_i2_lim.png gf_gf1_i2_lim.png gf_gf1_i3_lim.png call %PICTBAT%limitMinMax ^ %SRC% gf_gf1_i3_lim.png gf_gf1_i3_lim.png |

|
However, this doesn't seem to be particularly useful.
In the Kaiming He reference, the smoothed output is called the base layer, and the source image minus the base layer is called the detail layer.
DETL = SRC - BASE
Hence the source is the base plus detail. (Note the similarity to Cartoon plus texture.)
About half the detail pixels will be negative, so we save that image as floating-point TIFF, and we add 50% to display it.
set BASE=gf_gf1.png
set DETL=gf_det.tiff
%IMG7%magick ^ %SRC% %BASE% ^ -define compose:clamp=off ^ -compose MinusSrc -composite ^ -define quantum:format=floating-point -depth 32 ^ +write %DETL% ^ -evaluate Add 50%% ^ gf_det_disp.png |
|
Add some multiple of the detail to the base:
ENH = BASE + mult*DETL
set mult=2

%IMG7%magick ^
  %BASE% %DETL% ^
  -compose Mathematics ^
    -define compose:args=0,%mult%,1,0 ^
    -composite ^
  gf_det_add.png
|

|
Detail has been enhanced.
We can express this more directly:
ENH = BASE + mult*(SRC - BASE)
    = mult*SRC + (1-mult)*BASE
... so this is the usual extrapolation.
We can calculate ENH directly from SRC and BASE, without calculating the intermediate DETL:
set mult=2 %IMG7%magick ^ %SRC% %BASE% ^ -poly %mult%,1,%%[fx:1-%mult%],1 ^ gf_det_add2.png |

|
This is similar to enhancing detail above. We multiply the base by a factor 0<=FACT<=1, and add the detail:
set FACT=0.5

%IMG7%magick ^
  %BASE% %DETL% ^
  -compose Mathematics ^
    -define compose:args=0,1,%FACT%,0 ^
    -composite ^
  gf_hdr.png
|
|
|
Compare to the source multiplied by the same factor: %IMG7%magick ^ %SRC% ^ -evaluate Multiply %FACT% ^ gf_fact.png |
|
The difference is most evident in the grass at the top of the image. The source image isn't really HDR, so this darkens the image, but this illustrates the principle: we can reduce the dynamic range while retaining detail and without introducing negative gradients (tone reversal).
In general, the HDR input will have values above 100% of QuantumRange. We could multiply it by FACT = QuantumRange/(max(BASE)+max(abs(DETL))), to guarantee the output is not greater than 100%.
The script compressL.bat combines the two operations of compressing dynamic range and enhancing detail. Inputs and outputs are sRGB, but operations are performed on the L channel of a Lab version.
call %PICTBAT%compressL toes.png gf_cdred.png ^ "integ 9x9 . ." ^ "+level 20,80%%%%" ^ "-evaluate Multiply 3" |
|
This reduces the tonal range of the base layer (lightening dark areas and darkening light areas) and increases detail within those areas by a factor of 3.
Future: the script might be more intelligent, calculating compression from enhancement (or vice versa) such that result isn't quite clipped.
See Dehazing.
|
dh_4564_sm.jpg,
|

|
|
dh_j2.jpg,
|

|
Dehazing has improved the clarity of the background buildings.
See Guided Depth Image Filter-based Image Feathering, Yujie Li et al, 2013.
|
gdf_col.jpg: |

|
|
gdf_msk.png: |

|
call %PICTBAT%guideFilt ^
  gdf_msk.png gdf_col.jpg ^
  gf_gdf.png ^
  . . 60x60 0.00001
echo gfFiltMeth=%gfFiltMeth%
gfFiltMeth=grayCol |
|
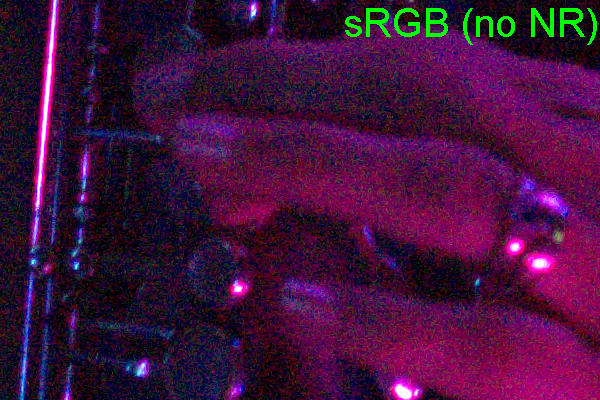
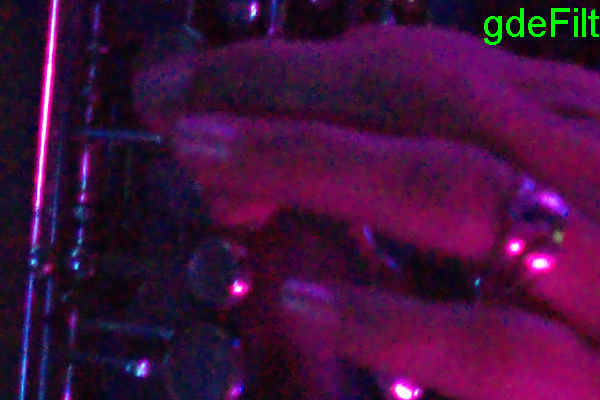
The Xin Sun reference above gives a denoising method that uses wavelets and guided filters. However, we can use guided filters more directly (and crudely), such as this example from Camera noise: guided filter.
|
cns_srgb_cr_an.jpg,
|
|
|
cns_gdefilt_cr.jpg,
|
|
Suppose we want to photograph a static subject with "available light", meaning not much ambient light. Ideally we would use a tripod, so we can use a long exposure, and there is no problem. But suppose we don't have a tripod.
We take a photograph, but a short exposure creates a noisy result (mostly photon shot noise):
[Sample image]
Or we use a long exposure, and camera shake causes blur.
[Sample image]
We take another photograph using on-camera flash. This photo is not noisy or blurred, but the lighting is horrible.
[Sample image]
We can combine the results by first aligning them, then transferring the detail from the flash photo to the base of the no-flash photo. We can do this in a single step by using a guided filter process with small window, using the flash image as the guide.
[Sample result]
The method can also be used when the non-flash image is blurred.
[Sample result]
A recent (as at v7.1.0-4) version of IM has implemented a "-bilateral-blur" operation. For example:
%IMG7%magick ^ toes.png ^ -bilateral-blur 9 ^ cns_bilat1.png |

|
"Bilateral" here refers to filtering that combines both geometric and photometric locality, also known as domain and range filters, or both spatial closeness and colour similarity.
IM's "-bilateral-blur" smooths the image while preserving edges, as expected. The algorithm also slightly sharpens edges, which is useful when we want to sharpen edges while blurring other areas. However, the edge-sharpening means that if we use "-bilateral-blur" as the mask in unsharp-masking to enhance detail, the result will have sharpened detail but the edges will be slightly blurred.
For convenience, .bat scripts are also available in a single zip file. See Zipped BAT files.
rem %1 input image
rem %2 guide image
rem %3 output
rem %4 filter method: auto, simple, grayCol, colCol [auto]
rem %5 method for "mean": one of blur, gauss, stat, stat2, integ, bilateral [integ]
rem %6 window radius XxY [9x9]
rem %7 epsilon: number or "auto" [0.01]
rem %8 scale factor eg 4 for quarter-size linear [1]
rem %9 power factor for AK [1]
@rem
@rem Assumes IM "magick" has HDRI.
@rem
@rem Reference: http://im.snibgo.com/gdefilt.htm
@rem
@rem Also uses:
@rem   gfPRE_INP
@rem   gfPRE_GDE
@rem   gfPOST
@rem   gfPROC_AK eg "-clamp"
@rem
@rem Updated:
@rem   1-January-2023 %7 (epsilon) "auto" option.
@rem

:: FIXME: When output is grayscale, ensure it has only one channel.

@if "%1"=="" findstr /B "rem @rem" %~f0 & exit /B 1

@setlocal enabledelayedexpansion

@call echoOffSave

call %PICTBAT%setInOut %1 gf

set SCR_FILE=gfc.im

del %SCR_FILE% 2>nul

set INFILE=%1
if "%INFILE%"=="." set INFILE=
if "%INFILE%"=="" set INFILE=toes.png

set GDEFILE=%2
if "%GDEFILE%"=="." set GDEFILE=
if "%GDEFILE%"=="" (
  set GDEFILE=mpr:IN0
  set fGDEFILE=%INFILE%
) else (
  set fGDEFILE=%GDEFILE%
)

set OUTFILE=%3
if "%OUTFILE%"=="." set OUTFILE=
if "%OUTFILE%"=="" set OUTFILE=x.png

set FiltMeth=%4
if "%FiltMeth%"=="." set FiltMeth=
if "%FiltMeth%"=="" set FiltMeth=auto

set MeanMeth=%5
if "%MeanMeth%"=="." set MeanMeth=
if "%MeanMeth%"=="" set MeanMeth=integ

for /F "usebackq" %%L in (`%IMG7%magick ^
  -ping %INFILE% ^
  -format "WW=%%w\nHH=%%h" ^
  info:`) do set %%L

set WINRADS=%6
if "%WINRADS%"=="." set WINRADS=
if "%WINRADS%"=="" set WINRADS=9x9

set EPS=%7
if "%EPS%"=="." set EPS=
if "%EPS%"=="" set EPS=0.01

if /I %EPS%==auto (
  echo %0: AutoEps

  @rem : Crude, should do this in main command.

  for /F "usebackq" %%L in (`%IMG7%magick ^
    %fGDEFILE% ^
    -format "nEPS=%%[fx:standard_deviation*standard_deviation/2]\n" ^
    info:`) do set %%L
) else (
  set nEPS=%EPS%
)

set AdjEps=-evaluate Multiply 5
set AdjEps=-poly 1,1,%%[fx:0.1*QuantumRange],1
set AdjEps=-evaluate Multiply 1.1
set AdjEps=-poly 0.99,1,%%[fx:0.5*QuantumRange],1

set AdjEps=-evaluate Add %%[fx:%nEPS%*QuantumRange]

echo %0: AdjEps=%AdjEps%

set SCAL=%8
if "%SCAL%"=="." set SCAL=
if "%SCAL%"=="" set SCAL=1

set POW=%9
if "%POW%"=="." set POW=
if "%POW%"=="" set POW=1

if %POW%==1 (
  set sPOW=
) else (
  set sPOW=-evaluate Pow %POW%
)


if /I %FiltMeth%==auto (
  call %PICTBAT%isGray %INFILE% INP_IS_GRAY
  if ERRORLEVEL 1 exit /B 1

  set GDE_IS_GRAY=!INP_IS_GRAY!

  if not %GDEFILE%==%INFILE% if not %GDEFILE%==mpr:IN0 (
    call %PICTBAT%isGray %GDEFILE% GDE_IS_GRAY
    if ERRORLEVEL 1 exit /B 1
  )

  echo %0: isGray: !INP_IS_GRAY! !GDE_IS_GRAY!

  if !INP_IS_GRAY!==1 (
    if !GDE_IS_GRAY!==1 (
      set FiltMeth=simple
    ) else (
      set FiltMeth=grayCol
    )
  ) else (
    if !GDE_IS_GRAY!==1 (
      rem Or grayCol?
      set FiltMeth=colCol
    ) else (
      set FiltMeth=colCol
    )
  )
)

if /I %FiltMeth%==simple (
  echo %0: FiltMeth is %FiltMeth%
) else if /I %FiltMeth%==grayCol (
  echo %0: FiltMeth is %FiltMeth%
) else if /I %FiltMeth%==colCol (
  echo %0: FiltMeth is %FiltMeth%
) else (
  echo %0: FiltMeth is %FiltMeth%
)

if %SCAL%==1 (
  set ScaleDn=
  set ScaleUp=
  set NewWW=%WW%
  set NewHH=%HH%
) else (

  for /F "usebackq" %%L in (`%IMG7%magick identify ^
    -format "NewWW=%%[fx:floor(%WW%/%SCAL%+0.5)]\nNewHH=%%[fx:floor(%HH%/%SCAL%+0.5)]\n"
    xc:`) do set %%L

  rem Note: these need trailing bangs. We do this later.
  set ScaleDn=!NewWW!x!NewHH!
  set ScaleUp=%WW%x%HH%
)
:: FIXME: maybe different ! for direct command?

call parseXxY2i %WW% %HH% Rad %WINRADS%
if ERRORLEVEL 1 exit /B 1

set /A Rad_X/=%SCAL%
set /A Rad_Y/=%SCAL%

set /A DIAM_X=%Rad_X%*2+1
set /A DIAM_Y=%Rad_Y%*2+1
set WINDIMS=%DIAM_X%x%DIAM_Y%

set IMI=%IMG7%

if /I %MeanMeth%==blur (
  set MEAN=-blur 0x%Rad_X%
) else if /I %MeanMeth%==blur2 (
  set MEAN=-morphology Convolve Blur:0x%Rad_X% -morphology Convolve Blur:0x%Rad_Y%,90
) else if /I %MeanMeth%==gauss (
  set MEAN=-gaussian-blur 0x%Rad_X%
) else if /I %MeanMeth%==stat (
  set MEAN=-statistic Mean %WINDIMS%
) else if /I %MeanMeth%==stat2 (
  set MEAN=-statistic Mean %DIAM_X%x1 -statistic Mean 1x%DIAM_Y%
) else if /I %MeanMeth%==integ (
  set MEAN=-process 'integim' -process 'deintegim window %WINDIMS%'
  set IMI=%IM7DEV%
) else if /I %MeanMeth%==bilateral (
  set MEAN=-bilateral-blur %Rad_X%
) else (
  echo %0: bad mean method %MeanMeth%
  exit /B 1
)

echo %0: MEAN = %MEAN%

setlocal disabledelayedexpansion

if not %SCAL%==1 (
  set ScaleDn=-resize "%ScaleDn%!"
  set ScaleUp=-resize "%ScaleUp%!"
)

echo %0: ScaleDn = %ScaleDn%
echo %0: ScaleUp = %ScaleUp%

set PROC_PRE=^
  -define compose:clamp=off +depth ^
  %INFILE%  +write mpr:IN0 %ScaleDn% %gfPRE_INP% +write mpr:INP +delete ^
  %GDEFILE% +write mpr:GDE0 %ScaleDn% %gfPRE_GDE% +write mpr:GDE %MEAN% +write mpr:MN_GDE +delete ^
  mpr:GDE -channel RGB -separate -write mpr:GDEch -delete 0--1 ^
  mpr:MN_GDE -channel RGB -separate -write mpr:MN_GDEch -delete 0--1 ^
 ^
  ( mpr:GDEch[0] mpr:GDEch[0] -compose Multiply -composite %MEAN% ) ^
  ( mpr:MN_GDEch[0] mpr:MN_GDEch[0] -compose Multiply -composite ) ^
    -compose MinusSrc -composite ^
    %AdjEps% ^
    -write mpr:var_rr +delete ^
  ( mpr:GDEch[0] mpr:GDEch[1] -compose Multiply -composite %MEAN% ) ^
  ( mpr:MN_GDEch[0] mpr:MN_GDEch[1] -compose Multiply -composite ) ^
    -compose MinusSrc -composite ^
    -write mpr:var_rg +delete ^
  ( mpr:GDEch[0] mpr:GDEch[2] -compose Multiply -composite %MEAN% ) ^
  ( mpr:MN_GDEch[0] mpr:MN_GDEch[2] -compose Multiply -composite ) ^
    -compose MinusSrc -composite ^
    -write mpr:var_rb +delete ^
  ( mpr:GDEch[1] mpr:GDEch[1] -compose Multiply -composite %MEAN% ) ^
  ( mpr:MN_GDEch[1] mpr:MN_GDEch[1] -compose Multiply -composite ) ^
    -compose MinusSrc -composite ^
    %AdjEps% ^
    -write mpr:var_gg +delete ^
  ( mpr:GDEch[1] mpr:GDEch[2] -compose Multiply -composite %MEAN% ) ^
  ( mpr:MN_GDEch[1] mpr:MN_GDEch[2] -compose Multiply -composite ) ^
    -compose MinusSrc -composite ^
    -write mpr:var_gb +delete ^
  ( mpr:GDEch[2] mpr:GDEch[2] -compose Multiply -composite %MEAN% ) ^
  ( mpr:MN_GDEch[2] mpr:MN_GDEch[2] -compose Multiply -composite ) ^
    -compose MinusSrc -composite ^
    %AdjEps% ^
    -write mpr:var_bb +delete ^
 ^
  ( mpr:var_gg mpr:var_bb -compose Multiply -composite ) ^
  ( mpr:var_gb mpr:var_gb -compose Multiply -composite ) ^
    -compose MinusSrc -composite ^
    -write mpr:invrr +delete ^
  ( mpr:var_gb mpr:var_rb -compose Multiply -composite ) ^
  ( mpr:var_rg mpr:var_bb -compose Multiply -composite ) ^
    -compose MinusSrc -composite ^
    -write mpr:invrg +delete ^
  ( mpr:var_rg mpr:var_gb -compose Multiply -composite ) ^
  ( mpr:var_gg mpr:var_rb -compose Multiply -composite ) ^
    -compose MinusSrc -composite ^
    -write mpr:invrb +delete ^
  ( mpr:var_rr mpr:var_bb -compose Multiply -composite ) ^
  ( mpr:var_rb mpr:var_rb -compose Multiply -composite ) ^
    -compose MinusSrc -composite ^
    -write mpr:invgg +delete ^
  ( mpr:var_rb mpr:var_rg -compose Multiply -composite ) ^
  ( mpr:var_rr mpr:var_gb -compose Multiply -composite ) ^
    -compose MinusSrc -composite ^
    -write mpr:invgb +delete ^
  ( mpr:var_rr mpr:var_gg -compose Multiply -composite ) ^
  ( mpr:var_rg mpr:var_rg -compose Multiply -composite ) ^
    -compose MinusSrc -composite ^
    -write mpr:invbb +delete ^
 ^
  ( mpr:invrr mpr:var_rr -compose Multiply -composite ) ^
  ( mpr:invrg mpr:var_rg -compose Multiply -composite ) ^
  ( mpr:invrb mpr:var_rb -compose Multiply -composite ) ^
  -evaluate-sequence Add ^
  -write mpr:covDet +delete ^
 ^
  ( mpr:invrr mpr:covDet -compose DivideSrc -composite +write mpr:invrr +delete ) ^
  ( mpr:invrg mpr:covDet -compose DivideSrc -composite +write mpr:invrg +delete ) ^
  ( mpr:invrb mpr:covDet -compose DivideSrc -composite +write mpr:invrb +delete ) ^
  ( mpr:invgg mpr:covDet -compose DivideSrc -composite +write mpr:invgg +delete ) ^
  ( mpr:invgb mpr:covDet -compose DivideSrc -composite +write mpr:invgb +delete ) ^
  ( mpr:invbb mpr:covDet -compose DivideSrc -composite +write mpr:invbb +delete )

set PROC_ONE=^
-define quantum:format=floating-point -depth 32 ^
  mpr:MN_GDE mpr:MN_INP ^
  -compose Multiply -composite ^
  ( mpr:GDE mpr:INP_CH -compose Multiply -composite %MEAN% ) ^
  -compose MinusDst -composite ^
  -channel RGB -separate -write mpr:COVch -delete 0--1 ^
 ^
  ( mpr:invrr mpr:COVch[0] -compose Multiply -composite ) ^
  ( mpr:invrg mpr:COVch[1] -compose Multiply -composite ) ^
  ( mpr:invrb mpr:COVch[2] -compose Multiply -composite ) ^
  -evaluate-sequence Add ^
  -write mpr:AK_R +delete ^
  ( mpr:invrg mpr:COVch[0] -compose Multiply -composite ) ^
  ( mpr:invgg mpr:COVch[1] -compose Multiply -composite ) ^
  ( mpr:invgb mpr:COVch[2] -compose Multiply -composite ) ^
  -evaluate-sequence Add ^
  -write mpr:AK_G +delete ^
  ( mpr:invrb mpr:COVch[0] -compose Multiply -composite ) ^
  ( mpr:invgb mpr:COVch[1] -compose Multiply -composite ) ^
  ( mpr:invbb mpr:COVch[2] -compose Multiply -composite ) ^
  -evaluate-sequence Add ^
  -write mpr:AK_B +delete ^
  mpr:AK_R mpr:AK_G mpr:AK_B -combine -set colorspace sRGB ^
  %sPOW% ^
  %gfPROC_AK% -write mpr:AK ^
  mpr:MN_GDE -compose Multiply -composite -channel RGB -separate -evaluate-sequence Add ^
 ^
  mpr:MN_INP ^
  -compose MinusDst -composite ^
  -write mpr:BK +delete ^
  mpr:AK %MEAN% %ScaleUp% ^
  mpr:GDE0 ^
  -compose Multiply -composite ^
  -channel RGB -separate ^
  ( mpr:BK %MEAN% %ScaleUp% ) ^
  -evaluate-sequence Add

:: Computed goto. Yuck, but it avoids escape-parenthesis problems.
::
if /I %FiltMeth%==simple (
  echo %0: FiltMeth is %FiltMeth%
  goto simple
) else if /I %FiltMeth%==grayCol (
  echo %0: FiltMeth is %FiltMeth%
  goto grayCol
) else if /I %FiltMeth%==colCol (
  echo %0: FiltMeth is %FiltMeth%
  goto colCol
) else (
  echo %0: Bad FiltMeth [%FiltMeth%]
  exit /B 1
)

:simple

:: FIXME: maybe use "-set colorspace sRGB" in either or both.
:: Below, "-set colorspace sRGB" is needed only where GDE is grayscale and INP is RGB.

%IMI%magick ^
  -define compose:clamp=off ^
  ( %INFILE%   +write mpr:IN0 %ScaleDn% %gfPRE_INP% +write mpr:INP %MEAN% +write mpr:MN_INP ) ^
  ( %GDEFILE%  +write mpr:GDE0 %ScaleDn% %gfPRE_GDE% +write mpr:GDE %MEAN% +write mpr:MN_GDE ) ^
  +depth ^
  -compose Multiply -composite ^
  ( mpr:INP mpr:GDE -compose Multiply -composite %MEAN% ) ^
  -compose MinusDst -composite ^
  -write mpr:COV +delete ^
  mpr:GDE -set colorspace sRGB -evaluate Pow 2 %MEAN% ^
  ( mpr:MN_GDE -evaluate Pow 2 ) ^
  -compose MinusSrc -composite ^
  %AdjEps% ^
  mpr:COV ^
  -compose DivideDst -composite ^
  %sPOW% ^
  +write mpr:AK ^
  mpr:MN_GDE ^
  -compose Multiply -composite ^
  mpr:MN_INP ^
  -compose MinusDst -composite ^
  +write mpr:BK ^
  +delete ^
  mpr:AK %MEAN% %ScaleUp% ^
  mpr:GDE0 ^
  -compose Multiply -composite ^
  ( mpr:BK %MEAN% %ScaleUp% ) ^
  -compose Plus -composite ^
  %gfPOST% ^
-define quantum:format=floating-point -depth 32 ^
  %OUTFILE%

if ERRORLEVEL 1 (
  echo %0: simple error
  exit /B 1
)

goto end


:grayCol

rem echo -verbose >%SCR_FILE%
if not "%PROC_PRE%"=="" echo %PROC_PRE% >%SCR_FILE%

echo mpr:INP +write mpr:INP_CH %MEAN% +write mpr:MN_INP +delete >>%SCR_FILE%
echo %PROC_ONE% >>%SCR_FILE%
echo %gfPOST% -write %OUTFILE% -exit >>%SCR_FILE%

%IMI%magick -script %SCR_FILE%
if ERRORLEVEL 1 (
  echo %0: grayCol error
  exit /B 1
)

goto end

:colCol

rem set gfPRE_GDE=-colorspace Gray -colorspace sRGB
rem set gfPRE_GDE=

rem set gfPRE_INP=
rem set gfPRE_INP=-colorspace Gray -colorspace sRGB
rem set gfPRE_INP=-negate
rem set gfPRE_INP=-colors 4
rem set gfPRE_INP=-colorspace Gray -auto-level -auto-gamma -threshold 50%%

rem -verbose +write info:
rem -define quantum:format=floating-point -depth 32
rem +write akc.miff

rem -verbose +write info:
rem +write bkc.miff

rem echo -verbose >%SCR_FILE%
if not "%PROC_PRE%"=="" echo %PROC_PRE% >%SCR_FILE%

echo mpr:INP -channel R -separate +channel +write mpr:INP_CH %MEAN% +write mpr:MN_INP +delete >>%SCR_FILE%
echo %PROC_ONE% >>%SCR_FILE%
echo -write mpr:OUT_R +delete >>%SCR_FILE%

echo mpr:INP -channel G -separate +channel +write mpr:INP_CH %MEAN% +write mpr:MN_INP +delete >>%SCR_FILE%
echo %PROC_ONE% >>%SCR_FILE%
echo -write mpr:OUT_G +delete >>%SCR_FILE%

echo mpr:INP -channel B -separate +channel +write mpr:INP_CH %MEAN% +write mpr:MN_INP +delete >>%SCR_FILE%
echo %PROC_ONE% >>%SCR_FILE%
echo -write mpr:OUT_B +delete >>%SCR_FILE%

echo mpr:OUT_R mpr:OUT_G mpr:OUT_B -combine >>%SCR_FILE%
echo %gfPOST% -write %OUTFILE% -exit >>%SCR_FILE%

%IMI%magick -script %SCR_FILE%
if ERRORLEVEL 1 (
  echo %0: colCol error
  exit /B 1
)

:end

call echoRestore

:: Note: yes, endlocal twice.
@endlocal

@endlocal & set gfFiltMeth=%FiltMeth%
rem %1 input image
rem %2 optional name of output environment variable:
rem       1 means image is gray and colorspace is a gray or RGB;
rem       0 otherwise.
@rem
@rem Note that CMYK images raise an error.

for /F "usebackq" %%A in (`%IMG7%magick %1 -ping -format "%%[colorspace]" info:`) do set ColSp=%%A

set isGray=0

if /I %ColSp%==Gray set isGray=1
if /I %ColSp%==LinearGray set isGray=1

if %isGray%==0 if /I not %ColSp%==sRGB if /I not %ColSp%==RGB (
  echo %0: Bad ColSp [%ColSp%]
  set isGray=-1
  exit /B 1
)

echo isGray is %isGray%

if %isGray%==0 (
  for /F "usebackq" %%L in (`%IMG7%magick ^
    %1 ^
    -colorspace HSL ^
    -format "isGray=%%[fx:maxima.g==0?1:0]" ^
    info:`) do set %%L
)

if not "%2"=="" set %2=%isGray%
rem Compress the dynamic range of L channel of Lab and expand detail.
rem Uses guided filter as base image. Both base and detail can be processed.

rem %1 input, assumed sRGB.
rem %2 output, sRGB.
rem %3 quoted parameters for guided filter [". 19x19 . 4"]
rem %4 quoted IM processing for base eg "+sigmoidal-contrast 5,50%%"
rem %5 quoted IM processing for detail eg "-evaluate Multiply 2.0"
@rem
@rem Note: This uses "-colorspace Lab".
@rem
@rem Also uses:
@rem   COMPRL_DBG format for debug files. Must contain _XX_, or be blank.
@rem

@if "%1"=="" findstr /B "rem @rem" %~f0 & exit /B 1

@setlocal enabledelayedexpansion

@call echoOffSave

call %PICTBAT%setInOut %1 compl

if not "%2"=="" if not "%2"=="." set OUTFILE=%2

set PROC_GDEFILT=%~3
if "%PROC_GDEFILT%"=="." set PROC_GDEFILT=
if "%PROC_GDEFILT%"=="" set PROC_GDEFILT=. 19x19 . 4

set PROC_BASE=%~4
if "%PROC_BASE%"=="." set PROC_BASE=

set PROC_DETL=%~5
if "%PROC_DETL%"=="." set PROC_DETL=

set TMPDIR=\temp\
set TMPDIR=
set TMPPREF=%TMPDIR%compl
set TMPEXT=miff

if "%COMPRL_DBG%"=="" (
  set WR_DETL=
  set WR_BASE_MOD=
  set WR_DETL_MOD=
  set WR_OUT=
) else (
  set WR_DETL=+write %COMPRL_DBG:_XX_=_detl_%
  set WR_BASE_MOD=+write %COMPRL_DBG:_XX_=_base_mod_%
  set WR_DETL_MOD=+write %COMPRL_DBG:_XX_=_detl_mod_%
  set WR_OUT=+write %COMPRL_DBG:_XX_=_out_%
)


%IMG7%magick ^
  %INFILE% ^
  -colorspace Lab -separate ^
  -define quantum:format=floating-point -depth 32 ^
  +adjoin ^
  %TMPPREF%_lab.%TMPEXT%

::--- call compressOne

call %PICTBAT%compressOne ^
  %TMPPREF%_lab-0.%TMPEXT% %INFILE% ^
  %TMPPREF%_src_mod.%TMPEXT% ^
  "%PROC_GDEFILT%" ^
  "%PROC_BASE%" ^
  "%PROC_DETL%"

goto skipOld

call %PICTBAT%guideFilt ^
  %TMPPREF%_lab-0.%TMPEXT% %INFILE% ^
  %TMPPREF%_base.%TMPEXT% ^
  . %PROC_GDEFILT%


rem Make detail, process base, process detail, and add modified base and detail.

:: How do we execute external command eg a PowLinPow curve?
:: Answer: create the clut before this script, and set PROC_BASE to "-clut clutfile.ext".

%IMG7%magick ^
  %TMPPREF%_lab-0.%TMPEXT% ^
  ( %TMPPREF%_base.%TMPEXT% -colorspace Gray +write mpr:BASE ) ^
  -define compose:clamp=off ^
  -compose MinusSrc -composite ^
  -define quantum:format=floating-point -depth 32 ^
  +write mpr:DETL ^
  %WR_DETL% ^
  +delete ^
  mpr:BASE ^
  %PROC_BASE% ^
  %WR_BASE_MOD% ^
  ( mpr:DETL ^
    %PROC_DETL% ^
    %WR_DETL_MOD% ^
  ) ^
  -compose Plus -composite ^
  %TMPPREF%_src_mod.%TMPEXT%

::-- end compressOne

:skipOld

:: Combine L*, a* and b*. Then oogbox in sRGB.
%IM7DEV%magick ^
  %TMPPREF%_src_mod.%TMPEXT% ^
  %TMPPREF%_lab-1.%TMPEXT% %TMPPREF%_lab-2.%TMPEXT% ^
  -combine ^
  -set colorspace Lab -colorspace sRGB ^
  -process oogbox ^
  %OUTFILE%

call echoRestore

@endlocal & set complOUTFILE=%OUTFILE%
All images on this page were created by the commands shown, using:
%IMG7%magick identify -version
Version: ImageMagick 7.1.1-20 Q16-HDRI x86 98bb1d4:20231008 https://imagemagick.org
Copyright: (C) 1999 ImageMagick Studio LLC
License: https://imagemagick.org/script/license.php
Features: Cipher DPC HDRI OpenCL OpenMP(2.0)
Delegates (built-in): bzlib cairo freetype gslib heic jng jp2 jpeg jxl lcms lqr lzma openexr pangocairo png ps raqm raw rsvg tiff webp xml zip zlib
Compiler: Visual Studio 2022 (193532217)
To improve internet download speeds, some images may have been automatically converted (by ImageMagick, of course) from PNG or TIFF or MIFF to JPG.
Source file for this web page is gdefilt.h1. To re-create this web page, execute "procH1 gdefilt".
This page, including the images, is my copyright. Anyone is permitted to use or adapt any of the code, scripts or images for any purpose, including commercial use.
Anyone is permitted to re-publish this page, but only for non-commercial use.
Anyone is permitted to link to this page, including for commercial use.
Page version v1.0 5-October-2021.
Page created 02-Mar-2024 17:23:27.
Copyright © 2024 Alan Gibson.