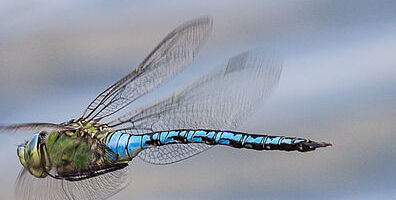
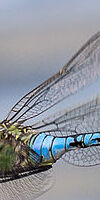
insect.jpg
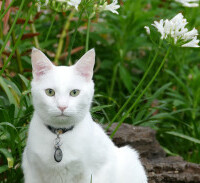
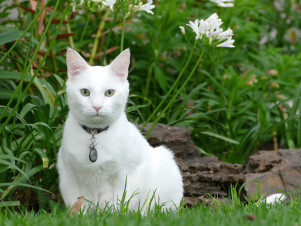
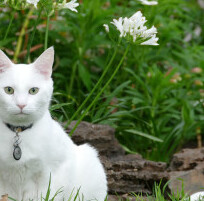
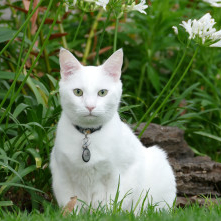
white_cat1.jpg
car_lady_dog1.jpg

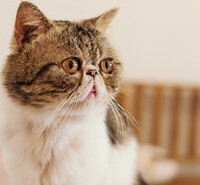
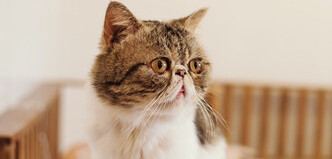
sofa_cat_small.jpg
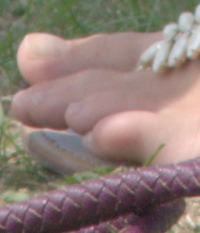
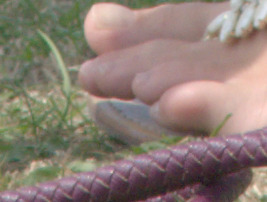
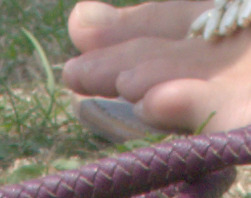
toes.png
A method for automatic cropping.
This page arose from a discussion on the IM forum: Smart crop function in IM?.
Cropping is a fundamental process for editing images, especially photographs. It is simple and quick, and needs a deep understanding of image content, aesthetic principles, visual psychology and gestalt theory to be most effective. The best tool is human intelligence.
On the other hand, we can automagickally crop photographs based entirely on the level of detail, with a fairly complex but fast process (4 seconds for a 35 million pixel image, with default parameters). There is no content analysis, no face detection. It might be called "semi-smart" or "slightly intelligent".
The process can be used on simple images containing a sharp subject on a blurred or out-of-focus background. That problem is quite straightforward. But it also works, and is surprisingly effective, on more complex images.
The scripts calls other published scripts. They do not use process modules.
CAUTION: This page, commands and scripts are still in development during July 2017, not even at alpha testing, are probably wrong, and are highly likely to change.
As always, use at your own peril.
The following are relevant to this page, though my method doesn't directly follow any of them.
Many papers explore computational aesthetics, for example:
The script cropToDetailSml.bat needs an input file and an output file, and possibly a required width and height. It writes a cropped version of the input where the crop contains the maximal detail.
| Parameter | Description |
|---|---|
| %1 | Input image file.
This is madatory. All other parameters are optional. |
| %2 | Output image file.
Use "null:" if no output is required. |
| %3 | Required dimensions in pixels, eg "250x150", "0x150", "250x0", "0x0", where "0" means "don't care".
Each dimension can be suffixed % or c or p. Default: "0x0" don't care about either dimension. |
| %4 | Required threshold, a number typically 50 to 99.99.
If supplied, the required width and height are ignored. Default: don't care. |
The dimensions should be in the form WxH, the required width and height, with an x between them. Either of the numbers may be suffixed with % or c or p. A suffix applies only to the dimension for which it is given. For example, "20x30%" means 20 pixels wide, and 30% of the input image height. For either dimension, "0" means "don't care". A blank or "." for the parameter is the same as "0x0".
The script caps both required dimensions to the input image dimensions, so giving a large value such as "999999" is equivalent to giving the input image width or height.
The script will calculate a reasonable value for any missing dimension, and crop to the rectangle of those dimensions that contains the most deail.
When neither dimension is given, the script will then crop off very roughly X% of the pixels, where X is a percentage threshold. (The parameter should be just a number, with no "%" percent sign.) This defaults to 85% or 90%, which is roughly the same as cropping to one-third horizontally and one-third vertically. If you want a tighter crop, use a higher number. For a looser crop, use a lower number.
Thresholding methods create an image where lightness represents detail, and threshold it, then take the bounding rectangle of either the largest white component, or all the white components. This rectangle is used either to crop the input image, or as the dimensions for a recursive search.
The script also uses values from some variables, as "expert settings".
| Variable | Description |
|---|---|
| ctdBLR_SIG | sigma for blur of slope magnitude [default 0 = no blur if trimming to only largest component, otherwise 20 * diagonal_factor]. |
| ctdUSE_CONN_COMP | whether to use only largest connected component [default 1]. |
| ctdDO_RECURSE | whether to recursively call [default 1]. |
| ctdDBG_IMG | if not blank, writes a debug image to this file [default no image]. |
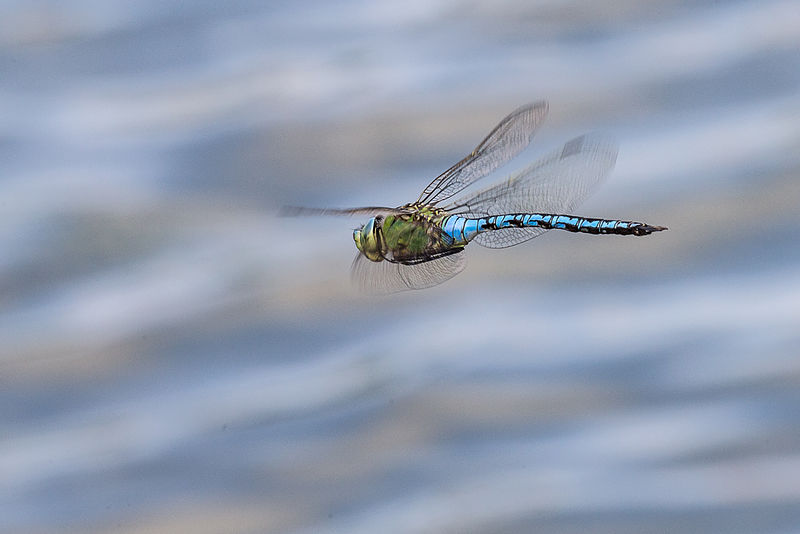
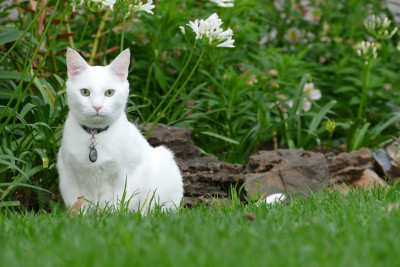
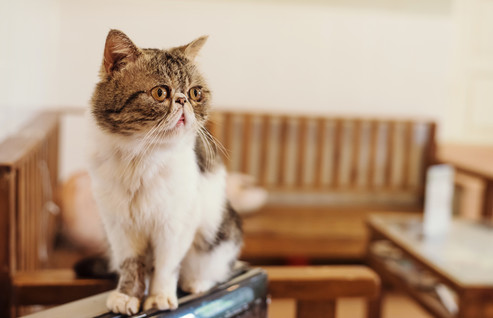
We will show the script operating on these images:
|
insect.jpg |

|
|
white_cat1.jpg |

|
|
car_lady_dog1.jpg |

|
|
sofa_cat_small.jpg |

|
|
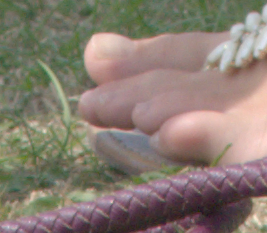
toes.png |

|
The toes.png image is my copyright; the others are not.
Of the first four images, the average diagonal is 664 pixels.
First, we supply no parameters, so the script chooses both width and height, and the crop offsets:
call %PICTBAT%cropToDetailSml ^ insect.jpg c2d_in0.jpg |
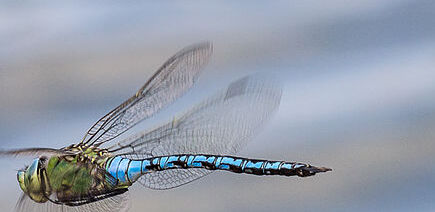
|
call %PICTBAT%cropToDetailSml ^ white_cat1.jpg c2d_wc0.jpg |
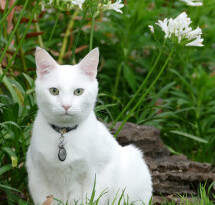
|
call %PICTBAT%cropToDetailSml ^ car_lady_dog1.jpg c2d_cld0.jpg |

|
call %PICTBAT%cropToDetailSml ^ sofa_cat_small.jpg c2d_scs0.jpg |
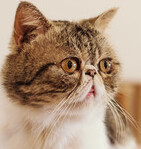
|
call %PICTBAT%cropToDetailSml ^ toes.png c2d_t0.jpg |
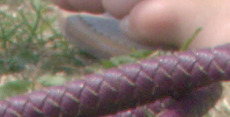
|
Specify width only, so the script chooses the height, and the crop offsets:
call %PICTBAT%cropToDetailSml ^ insect.jpg c2d_inw.jpg 200x0 |
|
call %PICTBAT%cropToDetailSml ^ white_cat1.jpg c2d_wcw.jpg 200x0 |
|
call %PICTBAT%cropToDetailSml ^ car_lady_dog1.jpg c2d_cldw.jpg 200x0 |

|
call %PICTBAT%cropToDetailSml ^ sofa_cat_small.jpg c2d_scsw.jpg 200x0 |
|
call %PICTBAT%cropToDetailSml ^ toes.png c2d_tw.jpg 200 |
|
Specify height only, so the script chooses the width, and the crop offsets:
call %PICTBAT%cropToDetailSml ^ insect.jpg c2d_inh.jpg 0x200 |
|
call %PICTBAT%cropToDetailSml ^ white_cat1.jpg c2d_wch.jpg 0x200 |
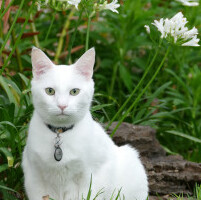
|
call %PICTBAT%cropToDetailSml ^ car_lady_dog1.jpg c2d_cldh.jpg 0x200 |

|
call %PICTBAT%cropToDetailSml ^ sofa_cat_small.jpg c2d_scsh.jpg 0x200 |
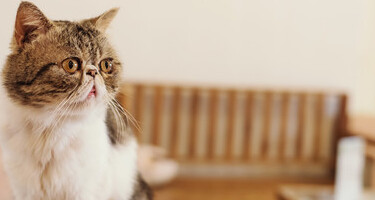
|
call %PICTBAT%cropToDetailSml ^ toes.png c2d_th.jpg 0x200 |
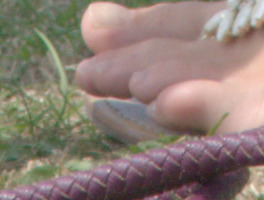
|
Specify both width and height, so the script chooses just the crop offsets:
call %PICTBAT%cropToDetailSml ^ insect.jpg c2d_inwh.jpg 200x200 |
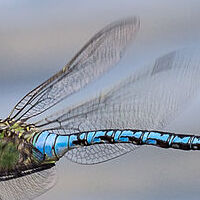
|
call %PICTBAT%cropToDetailSml ^ white_cat1.jpg c2d_wcwh.jpg 200x200 |
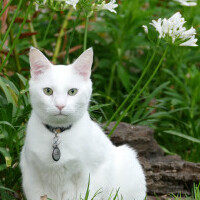
|
call %PICTBAT%cropToDetailSml ^ car_lady_dog1.jpg c2d_cldwh.jpg 200x200 |

|
call %PICTBAT%cropToDetailSml ^ sofa_cat_small.jpg c2d_scswh.jpg 200x200 |
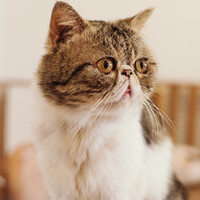
|
call %PICTBAT%cropToDetailSml ^ toes.png c2d_twh.jpg 200x200 |
|
We can explicitly set the output dimensions to a percentage of the input dimensions. (The script will accept % or c for percent, or p for proportion.)
call %PICTBAT%cropToDetailSml ^ toes.png c2d_tpc.jpg 40cx40c |

|
Instead of specifying dimensions, we can specify a threshold, so the script chooses width, height and offsets (like the first set of examples, but removing only about 75% of the image):
call %PICTBAT%cropToDetailSml ^ insect.jpg c2d_int.jpg . 75 |
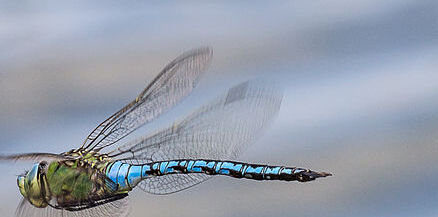
|
call %PICTBAT%cropToDetailSml ^ white_cat1.jpg c2d_wct.jpg . 75 |
|
call %PICTBAT%cropToDetailSml ^ car_lady_dog1.jpg c2d_cldt.jpg . 75 |

|
call %PICTBAT%cropToDetailSml ^ sofa_cat_small.jpg c2d_scst.jpg . 75 |
|
call %PICTBAT%cropToDetailSml ^ toes.png c2d_tt.jpg . 75 |
|
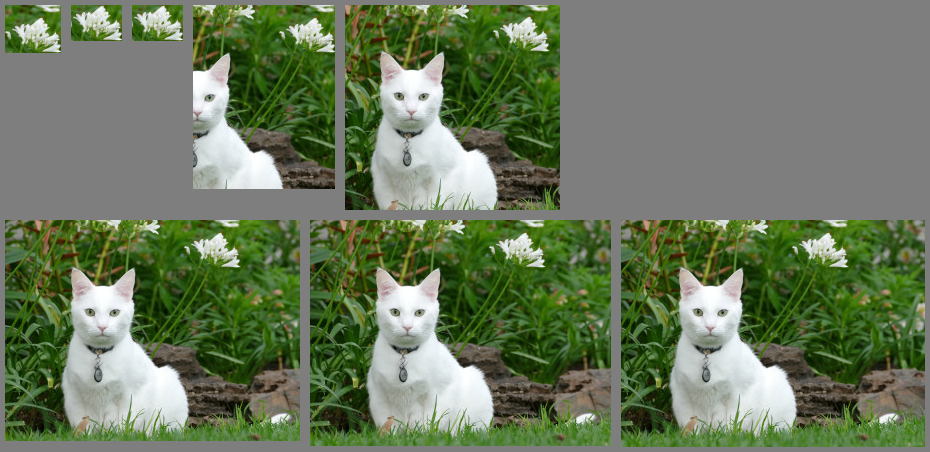
We can see the effect of varying the threshold by appending examples with the script c2dVaryThreshold.bat. For each input image, we show eight appended images with ctdUSE_CONN_COMP=0, then eight appended images with ctdUSE_CONN_COMP=1. The values of the eight thresholds are: 99, 97, 95, 90, 85, 80, 75 and 70.
In each group of eight, we often find that each image is a subimage of the next size large, but this is not always true.
call %PICTBAT%c2dVaryThreshold ^
  insect.jpg c2d_invt_0.png c2d_invt_1.png


call %PICTBAT%c2dVaryThreshold ^
  white_cat1.jpg c2d_wcvt_0.png c2d_wcvt_1.png

call %PICTBAT%c2dVaryThreshold ^
  car_lady_dog1.jpg c2d_cldvt_0.png c2d_cldvt_1.png
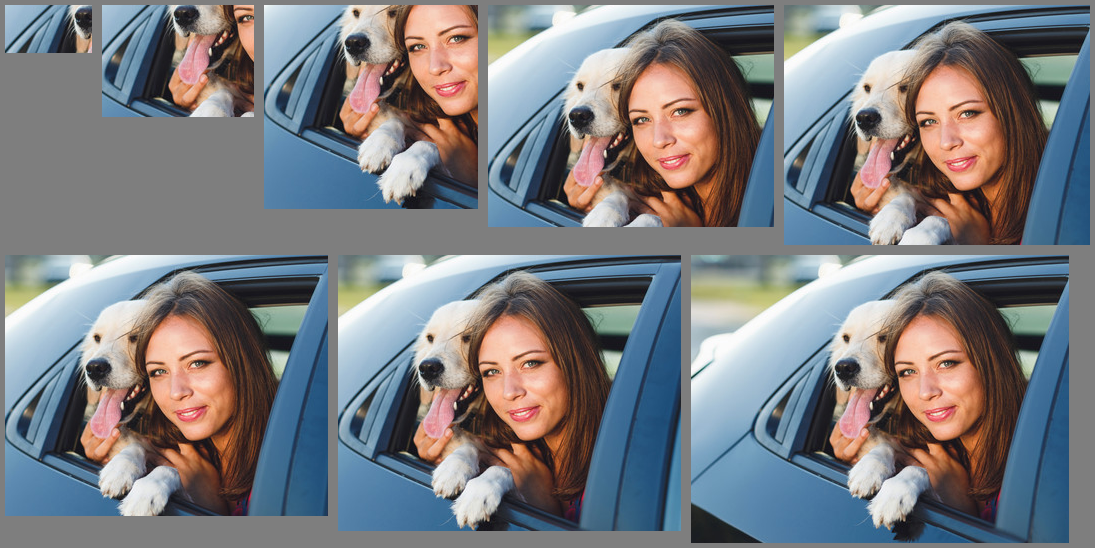
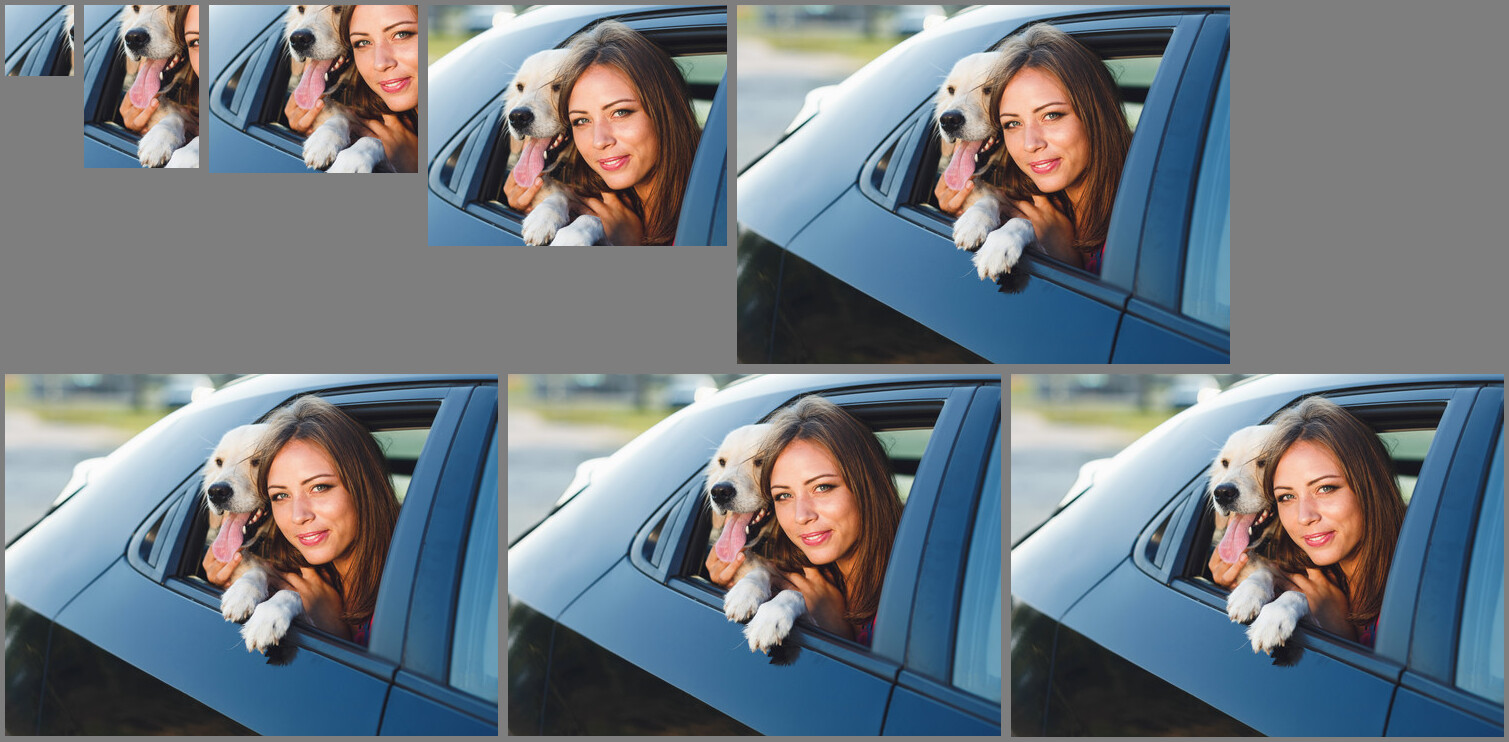
call %PICTBAT%c2dVaryThreshold ^
  sofa_cat_small.jpg c2d_scvt_0.png c2d_scvt_1.png
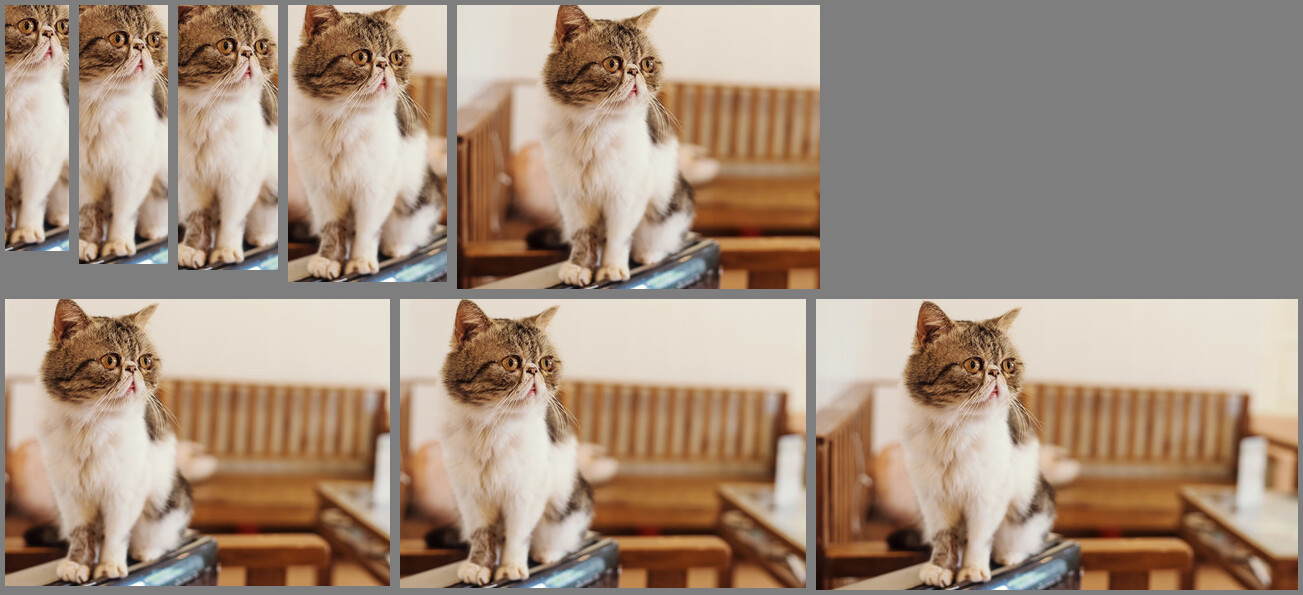
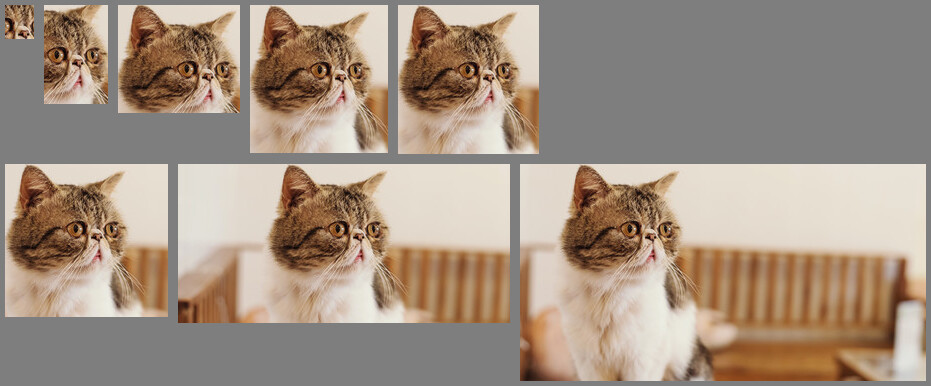
call %PICTBAT%c2dVaryThreshold ^
  toes.png c2d_tvt_0.png c2d_tvt_1.png
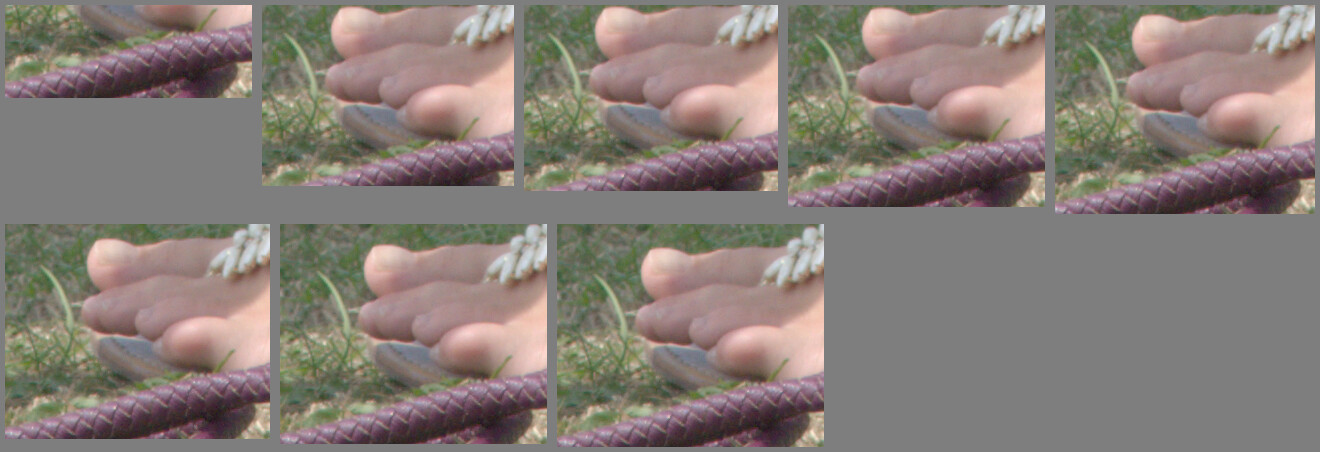
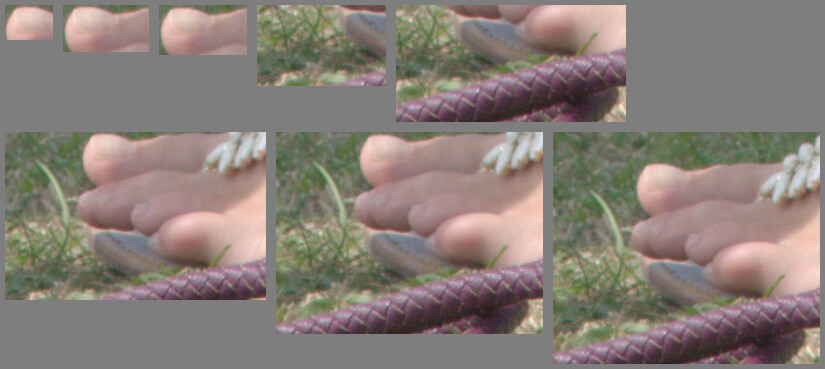
One of three methods is used, depending on whether the user has specified (1) both required dimensions or (2) only one required dimension or (3) a forced threshold but no dimensions.
In all cases, the script first creates a grayscale image that is black where there is no detail, and lighter (up to pure white) where there is most detail. In the literature, this is called a saliency map.
In method (1) where the script knows both required dimensions, the script creates a white image of those dimensions, and searches for this (RMSE metric) within an increased contrast version of the saliency map. (FIXME: This contrast adjustment is currently a hack. How do we determine how much we need?) The search is performed by srchImg.bat (see Searching an image), which does a multi-scale (aka "pyramid") search, so it is quite fast. Hence the result has the smallest RMSE from pure white. The calculated offset is used to crop the input image.
Method (3) crops according to a specified threshold. The saliency map is possibly blurred, then equalized and thresholded. Depending on ctdUSE_CONN_COMP, we find the bounding rectangle of just the largest connected white component (using the script connCompCropWhite.bat), or of all white pixels. The found trim parameters are used either to directly crop the input image, or to recursively call the script with just the found width and height so method (1) will be used. The variable ctdDO_RECURSE determines whether we use recursion. Using recursion is slower, but seems to give better results.
In method (2) where the user has supplied only one required dimension, the process has two phases. The first phase uses an iterative process to find the threshold that gives the closest match to the required dimension. (Iteration works, but inevitably takes time. There may be a quicker method.) Now we have found the trim parameters, we proceed as for method (3).
Methods (2) and (3) use a threshold of the blurred and equalized saliency map, either directly (because the user has supplied it, or we have a default threshold) or indirectly through iteration. This thresholded image will contain one or more white connected components. (It is equalized, so there is at least one white component provided the input image contained some details, ie it was not a flat colour. Mutiple components occur when multiple disconnected areas exceed this sharpness threshold.)
ASIDE: With large images, -connected-components breaks with the message too many components. To prevent this (I hope) we use -define connected-components:area-threshold=d*d where d is the image diagonal_factor (the diagonal / 664).
The iteration of method (2) is by trial and error (binary chop). The script finds the threshold that makes the result the required dimension, and hence finds the other dimension. A smaller value for the threshold will usually increase the trimmed dimensions or keep them the same, and increasing the threshold will usually decrease the trimmed dimensions or keep them the same. When we are trimmimg to all the connected components, a small change in threshold changes the trimmed dimensions by a small amount, so some threshold will give the required dimension, and the algorithm will find it.
When we are trimming to only the largest component, the situation is more complex. We might have two components, with the largest shaped like an "8" with a thin portion. If we then increase the threshold slightly, the thin portion can break, so the large piece becomes two smaller pieces, so the largest piece is now what was the smallest. This causes a sudden jump in the trimmed dimensions and offset, so there is no threshold that gives the target dimension, and the algorithm fails (it has "bust"). When this happens, we use dimensions and offset from whichever iteration gave us the closest to the target dimension, but force the required dimension to whatever was supplied.
ASIDE: The first phase finds the other dimension, but also the x and y offsets, which is all we need for a crop. So why bother with the recursive call? Because the method used in the first phase delivers a different offset to the "both dimensions" method, and it is generally worse, and some applications will need consistency.
The difference in offset can be great. For example, toes.png has the greatest detail around the big toe but little detail in the skin, so if the bounding rectangle is large a recursive search may prefer the more widespread detail at the base of the image.
There is an option to skip the second phase: set ctdDO_RECURSE to 0.
I might add an option: if the recursed rectangle doesn't overlap the original rectangle, we reject it.
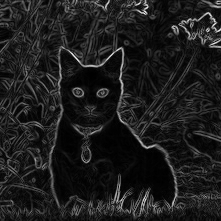
For a saliency map, the script uses the slope magnitude.
There are many possible definitions of slope magnitude, and thus many methods of calculating it. See Details, details.
Currently, the script calls slopeXYblMag.bat, with a sigma around 1.0 for web-sized images. Because the output pixel depends only on input pixels in the same row and column, this doesn't scale well to large sigma (eg 13).
To understand the process, it may be helpful to show the temporary images. We also use the ctdDBG_IMG option.
set ctdDBG_IMG=c2d_wc_dbg.jpg

call %PICTBAT%cropToDetailSml ^
  white_cat1.jpg NULL: 0x200

set ctdDBG_IMG=
|
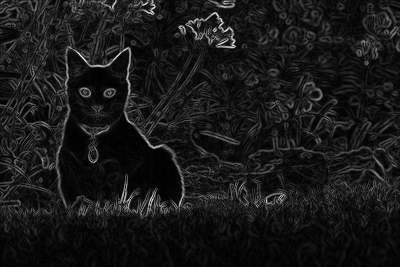
The slope magnitude. %IMG7%magick ^ \temp\ctd_sm.miff ^ c2d_sm_ex.png |
|
|
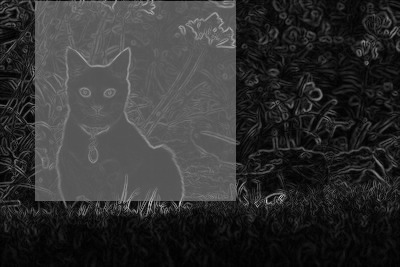
The debug image. |
|
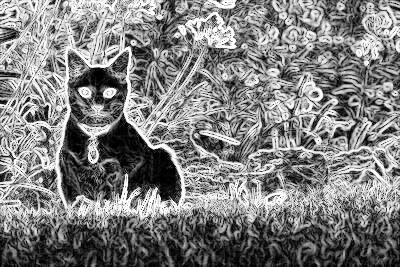
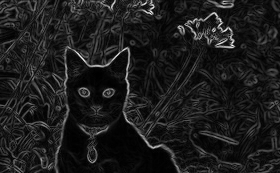
The cat's outline is high magnitude, but there is little detail within the outline. The highest magnitude is in the edge of the large flower at top-centre.
We are effectively doing a fuzzy trim on the equalized slope magnitude. However, when trimming to all white connected components, we want to ignore small areas of sharpness within a sea of blur. Hence the blur before the equalization.
|
The slope magnitude,
%IMG7%magick ^ \temp\ctd_sm_b.miff ^ c2d_sm_b_ex.png |
|
Equalization has two purposes. It makes "-threshold" operate on a percentage of pixels. For example, after equalization, "-threshold 90%" will makes 90% of pixels black and the remainder white. Secondly, it normalises the controls across a variety of inputs, so a certain percentage will have a similar effect on different images.
|
The previous, thresholded. %IMG7%magick ^ \temp\ctd_sm_c.miff ^ c2d_sm_c_ex.png |
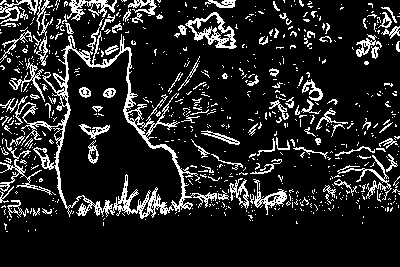
|
We then use "-connected-components", to find the largest white component, or "-format %@" to find the trim to all white components.
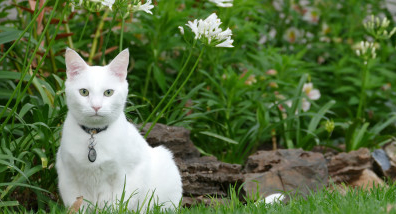
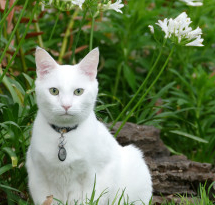
If everything else was equal, then trimming to just one component would always give a smaller result than trimming to all components. But this choice also affects the default blur: trimming to one component defaults to no blur; trimming to all has a blur with sigma=(20 * diag_factor).
|
Don't limit the components; default blur. set ctdUSE_CONN_COMP=0 set ctdBLR_SIG= call %PICTBAT%cropToDetailSml ^ white_cat1.jpg c2d_sm_ex_cc0.png |
|
|
Do limit the components; default blur. set ctdUSE_CONN_COMP=1 set ctdBLR_SIG= call %PICTBAT%cropToDetailSml ^ white_cat1.jpg c2d_sm_ex_cc1.png |
|
The bounding rectangle that contains all the values above 90% will also contain some values at 85%, 80%, whatever. This effect might be counter-balanced when we eliminate smaller areas, but it shows why a threshold of 90% crops to approximately 10% of the pixels. Some images will have detail extending to all four image edges, so even a high threshold like 99.9% won't crop away any pixels.
The amount of blur has a major impact on the result. A smaller blur results in more fragmentation, which gives a larger result when we include all components, or a smaller result when we include just the largest component. A larger blur removes irregular edges in components, so the largest component becomes more circular, so its bounding rectangle becomes more square. Conversely, a smaller blur can create less-square results.
| sigma=5 | sigma=25 | |
|---|---|---|
|
Don't limit the components. set ctdUSE_CONN_COMP=0 set ctdBLR_SIG=5 call %PICTBAT%cropToDetailSml ^ white_cat1.jpg c2d_sm_ex_cc0s.png set ctdBLR_SIG=25 call %PICTBAT%cropToDetailSml ^ white_cat1.jpg c2d_sm_ex_cc0sb.png |
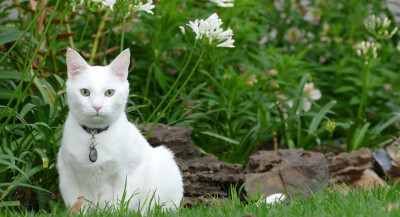
|

|
|
Do limit the components. set ctdUSE_CONN_COMP=1 set ctdBLR_SIG=5 call %PICTBAT%cropToDetailSml ^ white_cat1.jpg c2d_sm_ex_cc1s.png set ctdBLR_SIG=25 call %PICTBAT%cropToDetailSml ^ white_cat1.jpg c2d_sm_ex_cc1sb.png |
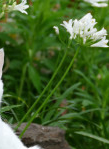
|
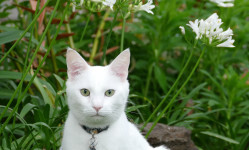
|
We might have a very small blur, limit to one component, which would give a very small result so we lower the threshold to compensate.
|
Use a very smaller blur.
set ctdBLR_SIG=1 set ctdUSE_CONN_COMP=1 call %PICTBAT%cropToDetailSml ^ white_cat1.jpg c2d_sm_ex_cc0s2.png ^ . 80 |
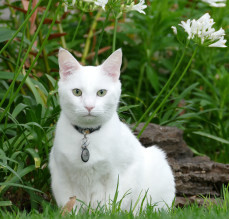
|
Note that the threshold parameter is relevant only when neither required dimension is specified, method (3). The variables ctdBLR_SIG and ctdUSE_CONN_COMP and ctdDO_RECURSE are relevant to that method, and when one required dimension is specified, method (2).
Reset the expert settings:
set ctdBLR_SIG=
set ctdUSE_CONN_COMP=
set ctdDO_RECURSE=
set ctdDBG_IMG=
The time required is slightly worse than proportional to the image size in pixels. (Worse, because some operations involve kernels that are proportional to the image diagonal.) For any given threshold, cropToDetailSml.bat is fast enough for web-size images (eg up to one million pixels) but unusably slow for large images, eg 2 minutes for 35 million pixels.
Ideally, the script would give results that were independent of image size. When we have an image at different scales, applying cropToDetailSml.bat with the same threshold to each would give the same result, at different sizes. Then we could apply a multi-scale (aka pyramid) method.
Sadly, I haven't yet found a method that gives good results for all input images at all thresholds, with the same results at all images scales. For now, cropToDetailSml.bat uses a method that gives good results for all input images at all thresholds, but gives different results at different scales.
We can apply two tests:
I have devised methods that satisfy these tests, more or less. However, although they give the same results, the individual results are not wonderful.
set LGE_SRC=zp_sus_sat.tiff

%IMG7%magick identify -format %%wx%%h %LGE_SRC%
4924x7378
|
Resize to web-size. set WEB_SIZE=600X600 %IMG7%magick ^ %LGE_SRC% ^ -resize %WEB_SIZE% ^ +write c2d_lge_sm.png ^ -format %%wx%%h info: 400x600 |
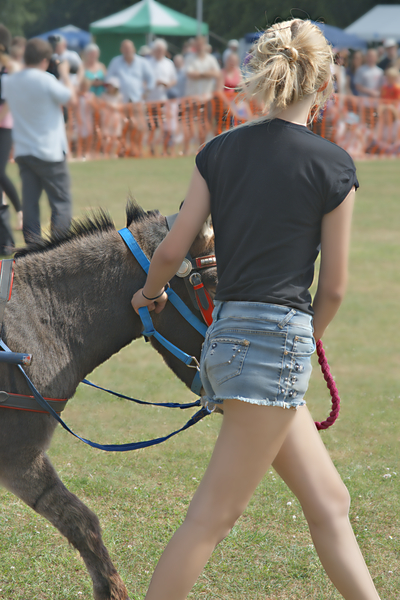
|
Crop the large image to a range of thresholds, and show the time taken.
call %PICTBAT%c2dVaryThreshold ^
  %LGE_SRC% . c2d_lge_1.png
0 03:12:10
Resize the result for the web
%IMG7%magick ^
  c2d_lge_1.png ^
  -resize %WEB_SIZE% ^
  c2d_lge_1_sm.png
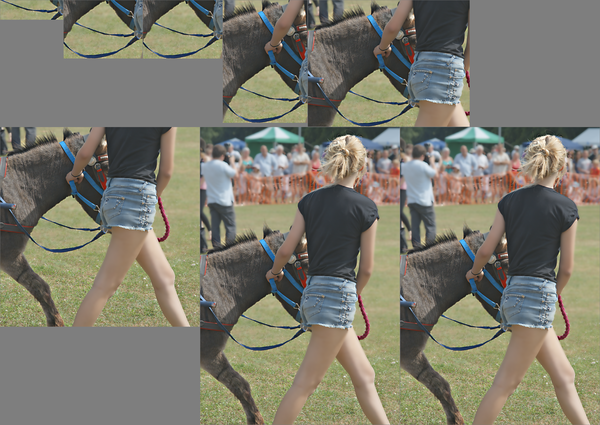
Crop the small image to a range of thresholds, and show the time taken.
call %PICTBAT%c2dVaryThreshold ^
  c2d_lge_sm.png . c2d_lge_sm_1.png
0 00:00:30
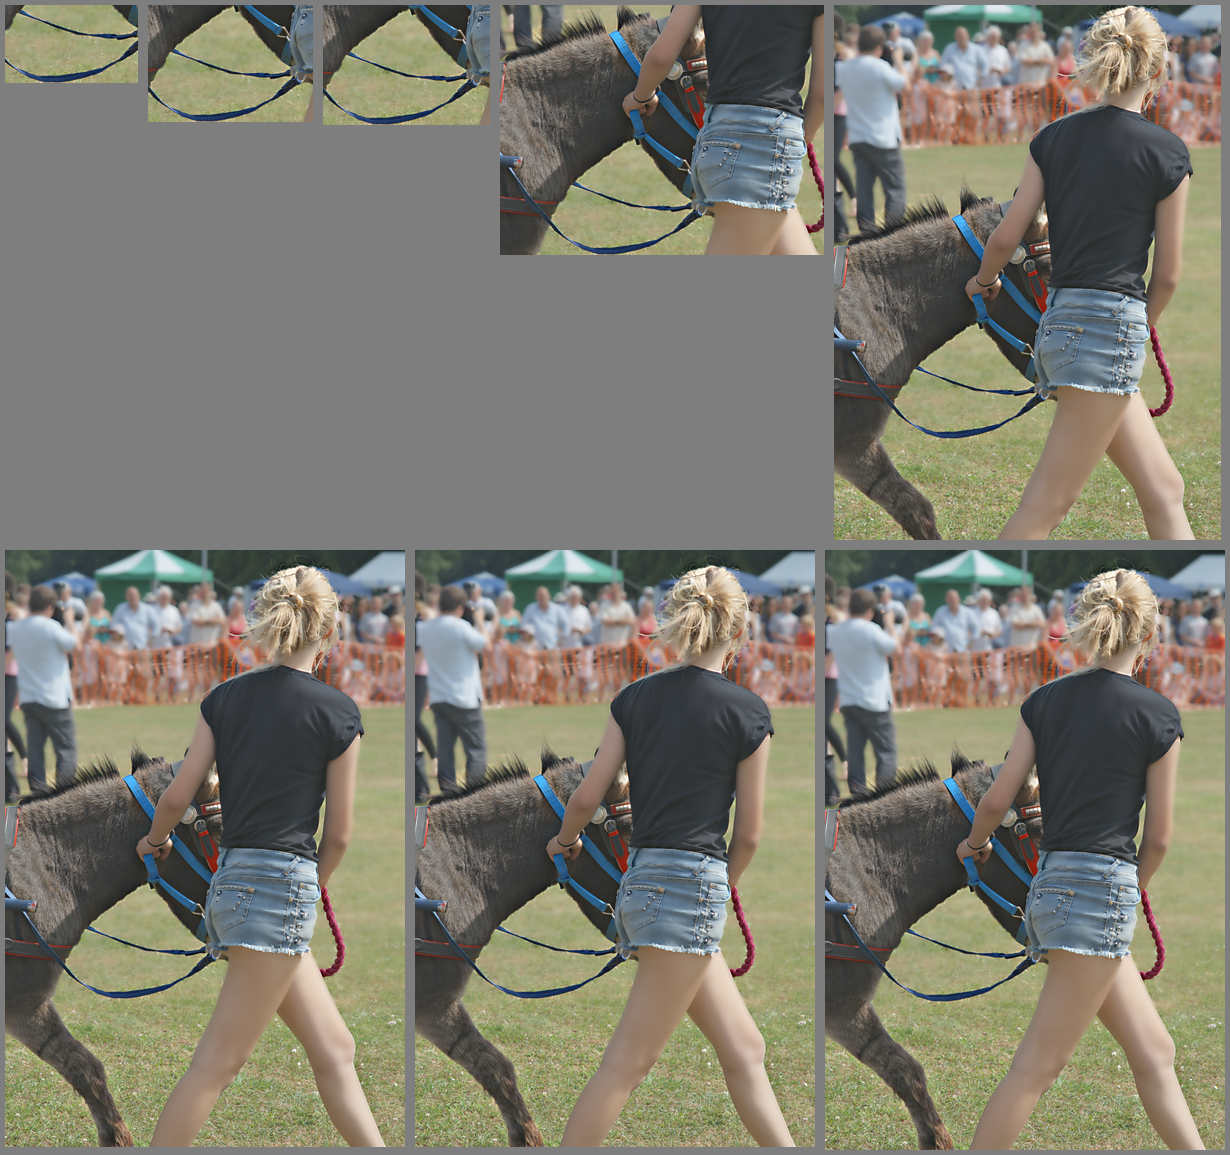
If we crop a small image, then enlarge the image, crop that and shrink the results, ideally we would find the same areas have been cropped.
set LGE_SRC=white_cat1.jpg

call %PICTBAT%c2dVaryThreshold ^
  %LGE_SRC% c2d_a.png c2d_b.png

%IMG7%magick %LGE_SRC% -resize 400%% c2d_lge.png

call %PICTBAT%c2dVaryThreshold ^
  c2d_lge.png c2d_lge_0.png c2d_lge_1.png

%IMG7%magick c2d_lge_0.png -resize 25%% c2d_lge_0.png
%IMG7%magick c2d_lge_1.png -resize 25%% c2d_lge_1.png
All components, small image:

All components, large image:
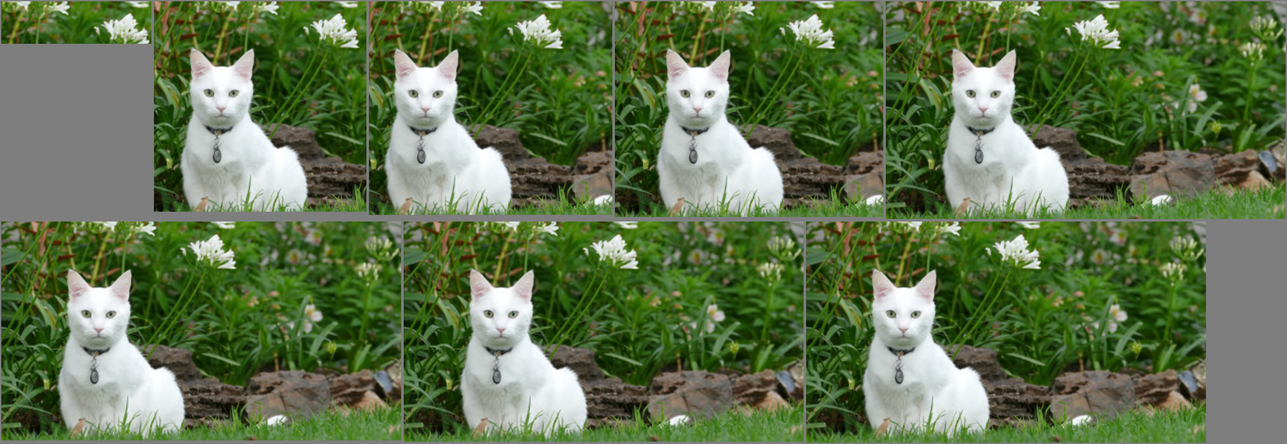
One component, small image:
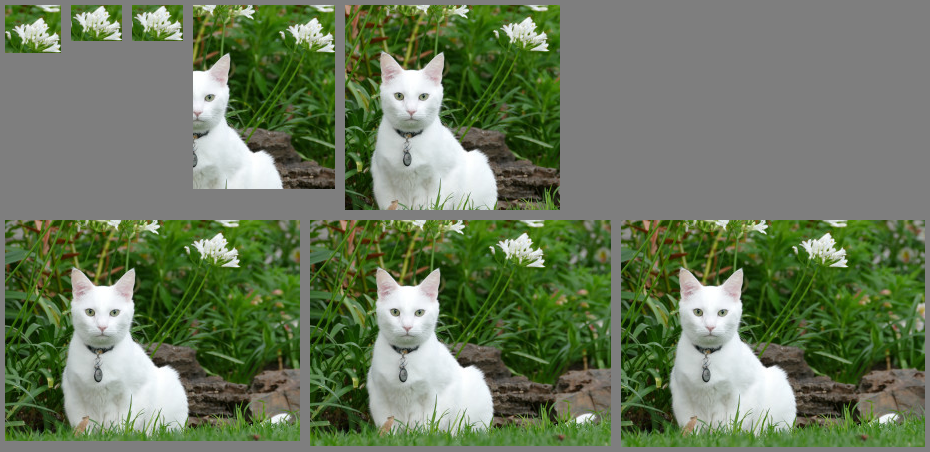
One component, large image:
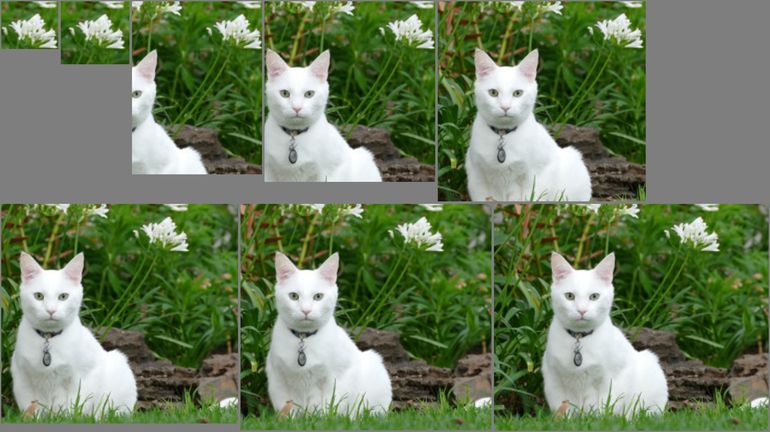
The script cropToDetailLge.bat is a drop-in replacement for cropToDetailSml.bat, and takes the same parameters. If the image has both dimensions less than or equal to a threshold, it simply calls cropToDetailSml.bat and exits. Otherwise, it makes a small version, and calls cropToDetailSml.bat, telling it not to make the output image, as we only want the crop parameters. It multiplies these parameters up for the full size, and uses them to crop the large image.
If we wanted greater precision, cropToDetailLge.bat could crop the large image plus a margin on all sides, and call cropToDetailSml.bat again. Would the results be better? I don't know. (We couldn't easily do this if we had called cropToDetailLge.bat with a threshold.)
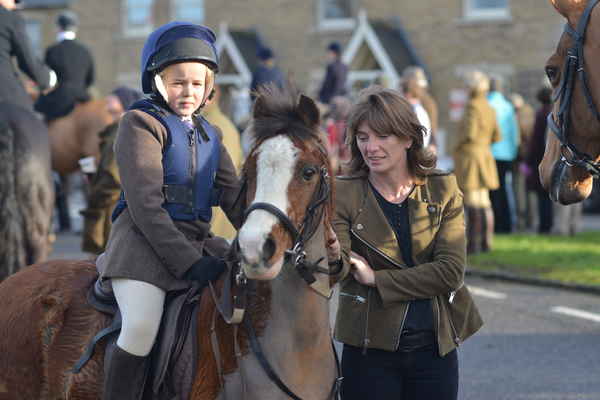
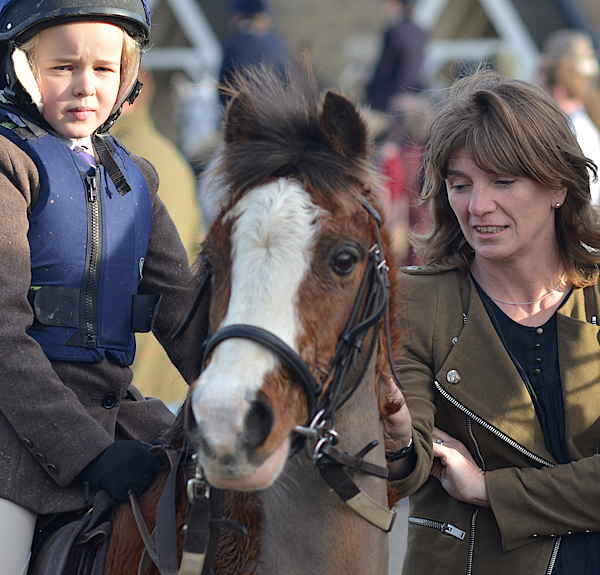
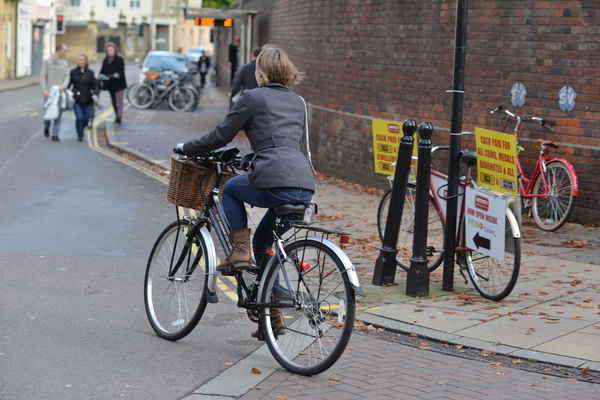
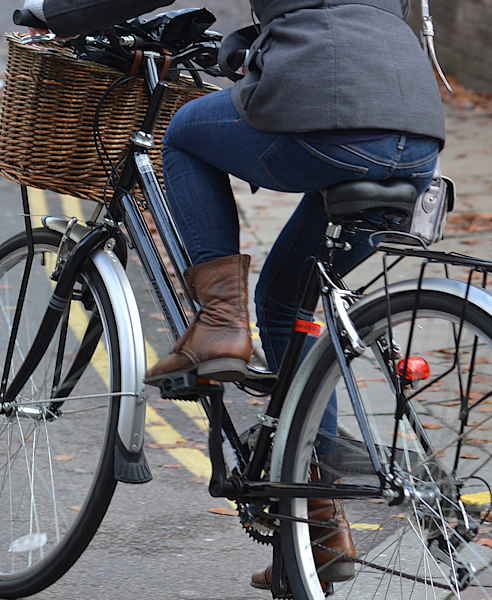
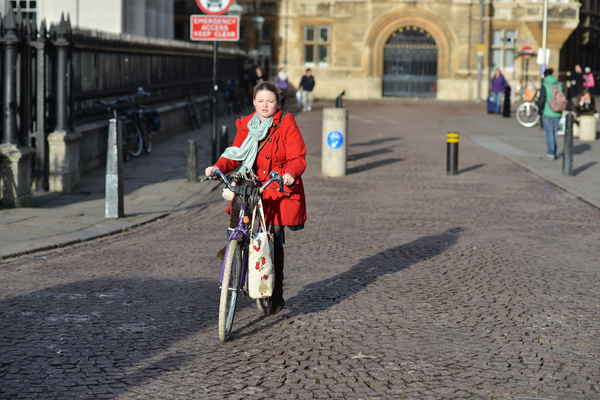
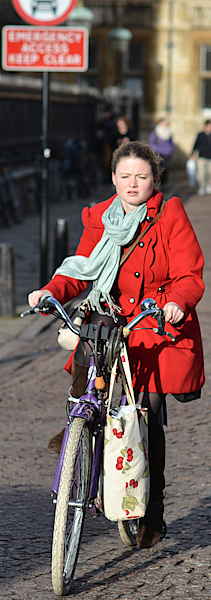
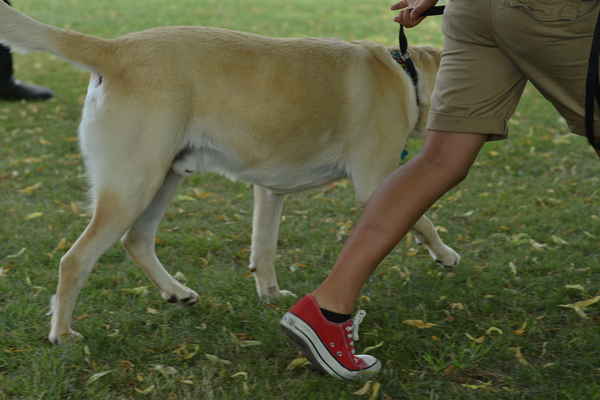
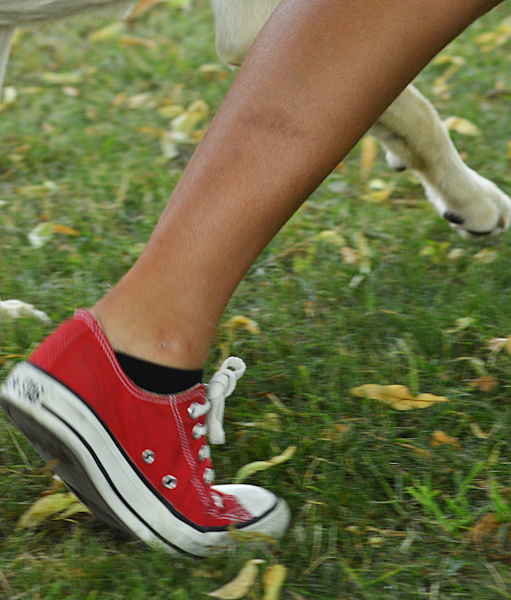
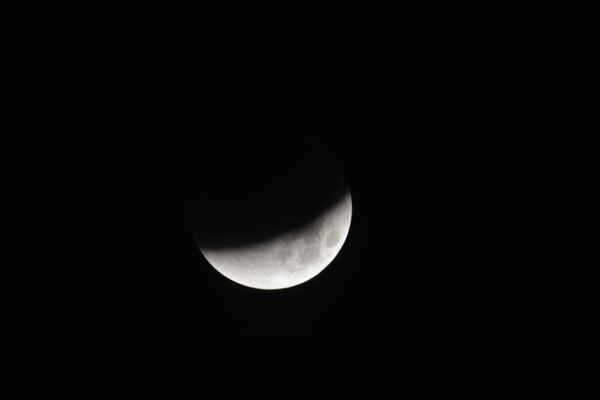
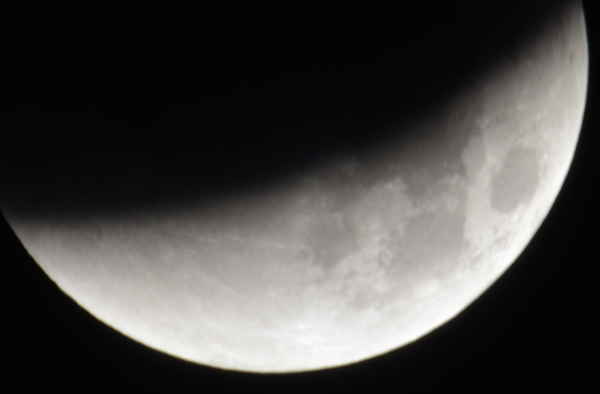
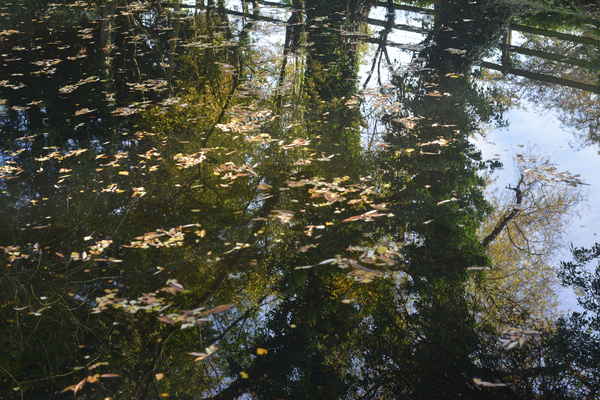
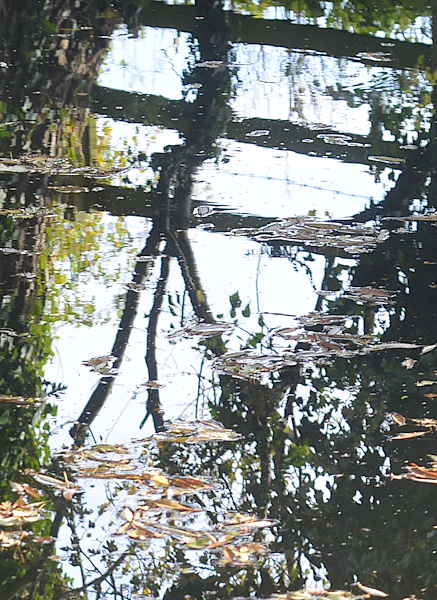
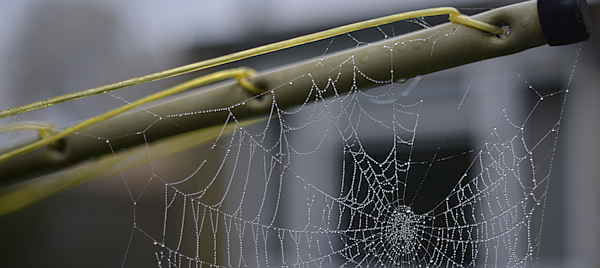
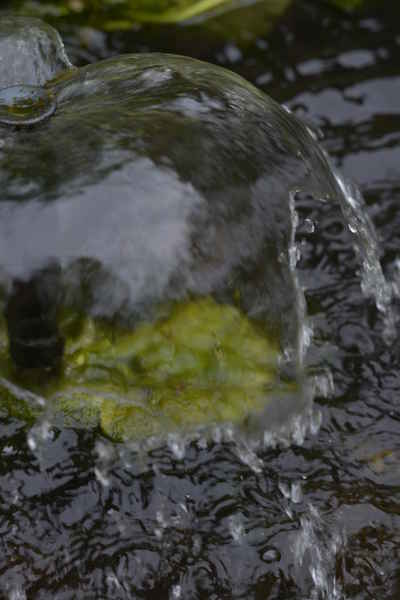
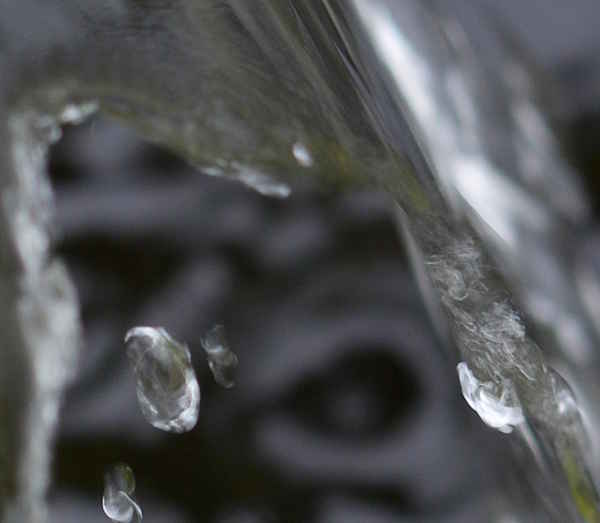
Here are some results from source images with 35 million pixels, with all parameters at default values. The full-frame of the in-camera JPEG is shown, resized for the web with a simple "-resize". The crop is auto-levelled, sigmoid-adjusted if required to raise the standard deviation to 0.16667, and resized with resampHM.bat (see Resampling with halo minimization).
| The full frame | The cropped result |
|---|---|
|
|
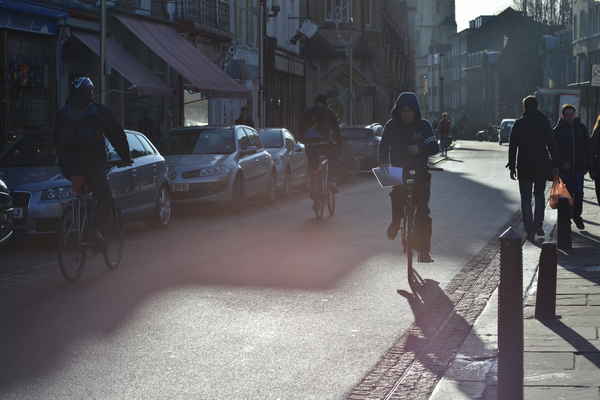
|
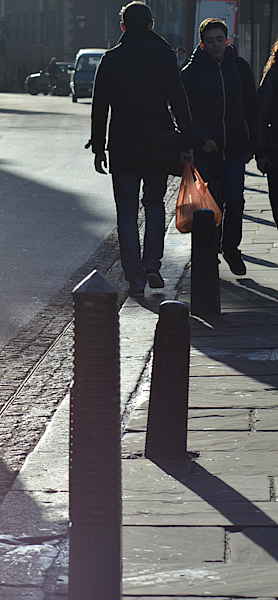
|
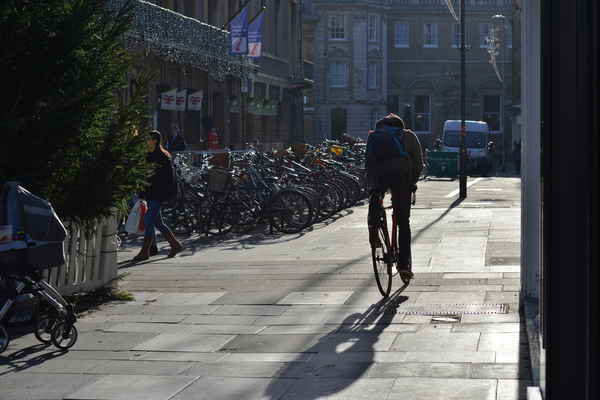
|
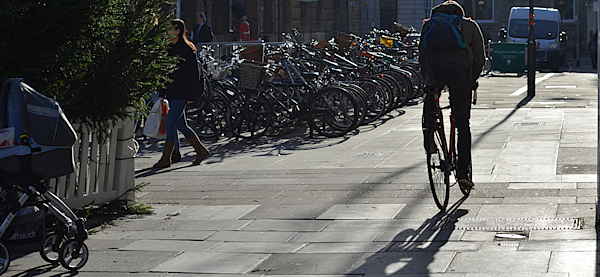
|
|
|
|
|
|
|
|
|
|

|
|
|
|
|
|

|
|

|
|

|
|
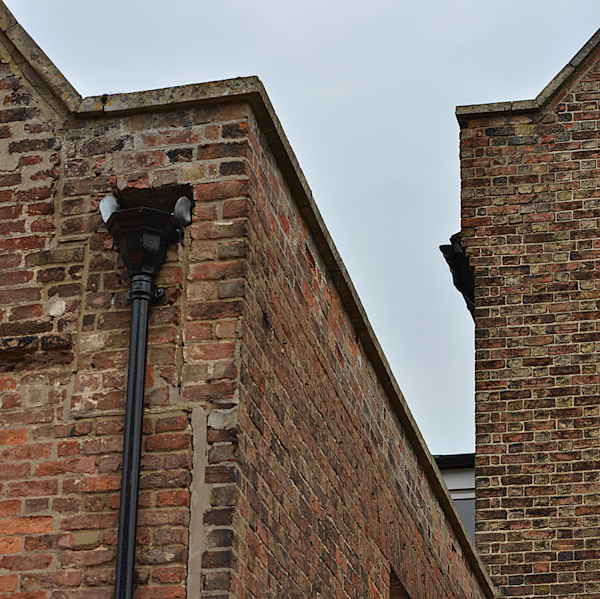
|
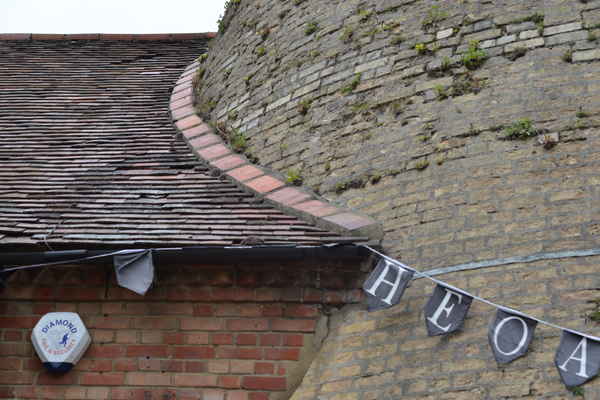
|
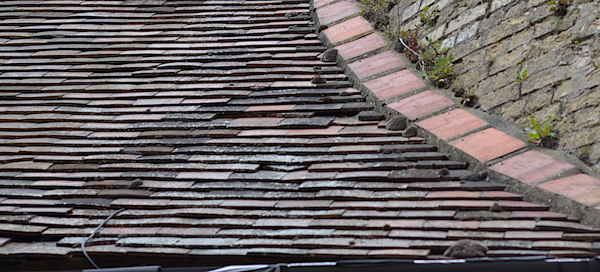
|
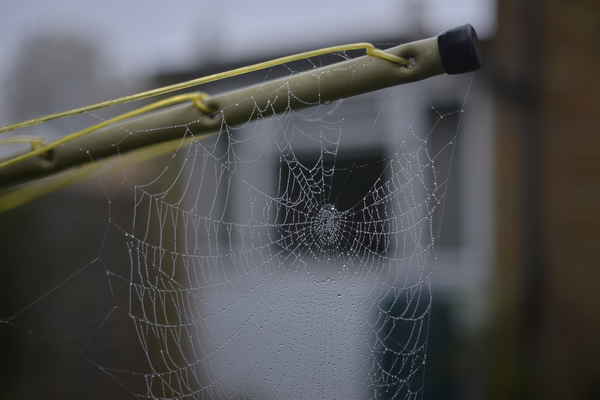
|
|
|
|
As can be seen above, the script can make very high aspect-ratio crops. If this is undesirable, a wrapper script can increase the small dimension and crop with that, or call cropToDetailSml.bat again with revised dimensions.
The script has no preference for portrait or landscape format, and will happily make a portrait or landscape output from a landscape or portrait input.
An application might need to know whether a portrait or landscape format gives a better result. cropToDetailSml.bat (or cropToDetailLge.bat) can be run twice, eg with dimensions 600x300 and 300x600, and the scores compared. Scores are in the range 0.0 to 1.0, typically around 0.98, with lower scores indicating more detail. Scores come from the "white rectangle" process, so are available when both dimensions are specified, or when recursion is used. A score of "999999" means no score is available.
|
Crop horizontally. call %PICTBAT%cropToDetailSml ^ insect.jpg c2d_inscr_h.jpg 200x100 echo ctdSCORE=%ctdSCORE% ctdSCORE=0.948164 |
|
|
Crop vertically. call %PICTBAT%cropToDetailSml ^ insect.jpg c2d_inscr_v.jpg 100x200 echo ctdSCORE=%ctdSCORE% ctdSCORE=0.968505 |
|
The horizontal crop has the lower score, so it contains more detail.
cropToDetailSml.bat takes up to about three seconds for each thresholded example shown on this page. For the highest speed (which may give horrible results):
These settings use all the white components, without blurring first, so have many outliers, creating a large result (not much cropping). To compensate, we use a higher threshold. For example:
set ctdBLR_SIG=0
set ctdUSE_CONN_COMP=0
set ctdDO_RECURSE=0

set THRESH=99.9
call %PICTBAT%cropToDetailSml ^ insect.jpg c2d_i_fst.jpg ^ . %THRESH% |

|
call %PICTBAT%cropToDetailSml ^ white_cat1.jpg c2d_wc_fst.jpg ^ . %THRESH% |
|
call %PICTBAT%cropToDetailSml ^ car_lady_dog1.jpg c2d_cld_fst.jpg ^ . %THRESH% |

|
call %PICTBAT%cropToDetailSml ^ sofa_cat_small.jpg c2d_sc_fst.jpg ^ . %THRESH% |

|
call %PICTBAT%cropToDetailSml ^ toes.png c2d_t_fst.jpg ^ . %THRESH% |
|
The total time to process these five images was:
0 00:00:13
This is fast, but the results are not as good as the default settings. In the white-cat and car-lady-dog images detail has been cropped off, while leaving areas of apparent low detail that could have been removed.
Reset the expert settings:
set ctdBLR_SIG=
set ctdUSE_CONN_COMP=
set ctdDO_RECURSE=
set ctdDBG_IMG=
Methods above show how we can find the best crop for an image, given required crop dimensions (width and/or height). Perhaps we don't care about the actual dimensions, but only about their ratio, the aspect ratio. For example, we might have an image that is 600x400 pixels that we want to crop in a 1:1 aspect ratio, so the result might be 400x400 pixels, or 350x350 or 200x200 or whatever. The problem then is to find the best crop at any size that maintains the aspect ratio.
From the methods above, we can find the best crop at each of a range of sizes. Now we need to evaluate which of those crops is the best.
There are many possible measurements for the quality of a crop. The input parameters to the measurement are:
We need a function of these four parameters that rewards high crop saliencies, and small crops. For example, this function:
score = cropSaliency  * (imageArea - cropArea)
        imageSaliency         imageArea
This gives a score in the interval [0,1).
If cropArea = imageArea, the score will be zero, and a better crop will probably be available. Beware of imageSaliency = 0, resulting in every possible cropSaliency also zero.
For a given image, imageSaliency and imageArea are constant, so we can use:
score = cropSaliency * (imageArea - cropArea)
This gives scores very much larger than 1.0 but the actual values don't matter; we simply want to find the crop that has the highest score.
This function has useful properties:
The script salMapCrop.bat takes a saliency map as input, and a maximum width and height of a crop. The given crop dimensions should be no larger than the saliency map dimensions. The given dimensions define the required aspect ratio, and the maximum size for the crop. The script finds the WxH+X+Y of the highest scoring crop that is less than or equal to the given dimensions, and is the same aspect ratio. It works by trial-and-error to find a maximum, so it is not fast. Strictly speaking, it may not find the overall maximum, merely a local maximum.
The script uses the process module srchimg.
For large saliency maps (say, more than a million pixels) a sub-sample factor may be given: a floating-point number greater than 1.0. The script will reduce the input width and height parameters, resize the saliency map image, and increase the output WxH+X+Y.
For example, we find the highest scoring crop that is between 10% and 100% of a 260x260 rectangle:
call %PICTBAT%salMapCrop c2d_sm_ex.png 260 260 . c2d_crop_

set c2d_crop_
c2d_crop_BestCrop=221x221+7+0
c2d_crop_BestScore=319874937.423682
|
Show the cropped saliency map. %IMG7%magick ^ c2d_sm_ex.png ^ -crop %c2d_crop_BestCrop% +repage ^ c2d_sm_ex_crp.png |
|
|
Show the cropped input image. %IMG7%magick ^ white_cat1.jpg ^ -crop %c2d_crop_BestCrop% +repage ^ c2d_white_cat1_crp.png |
|
Perhaps we have a choice of aspect ratios because we are making some kind of fit-together montage, or something. For example, we might choose a list of aspect ratios, such as 1:1, 2:1, 1:2. We might try all the aspect ratios and choose the one that yields the greatest score. But that would be very slow.
A simpler alternative is to find which of the ratios in the list is closest to the input image.
The script nearestAspect.bat walks through the aspect ratios. For each AR, it calculates the largest crop of that AR that fits in the image dimensions. So the result will have either the same width as the image, or the same height, or both. The difference between the the area of the input image and the area of the crop is a measure of "goodness". The AR with the smallest difference will result in the fewest pixels being cropped away, so it is deemed the best.
For example, we might want a crop in the aspect ratio of the golden mean, phi:1 or 1:phi, where phi = (sqrt(5)+1)/2 = 1.618034...:
call %PICTBAT%nearestAspect c2d_sm_ex.png . "1.618034:1,1:1.618034" c2d_near_

set c2d_near_
c2d_near__AR=1.618034:1
c2d_near__DIFF=8000
c2d_near__HH=247
c2d_near__WW=400
The width and height generated by nearestAspect.bat can be used as input to salMapCrop.bat:
call %PICTBAT%salMapCrop c2d_sm_ex.png %c2d_near__WW% %c2d_near__HH% . c2d_crop2_

set c2d_crop2_
c2d_crop2_BestCrop=280x173+1+0
c2d_crop2_BestScore=312772199.196765
|
Show the cropped saliency map. %IMG7%magick ^ c2d_sm_ex.png ^ -crop %c2d_crop2_BestCrop% +repage ^ c2d_sm_ex_crp2.png |
|
|
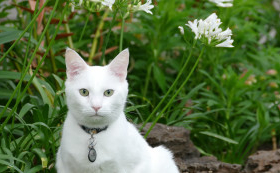
Show the cropped input image. %IMG7%magick ^ white_cat1.jpg ^ -crop %c2d_crop2_BestCrop% +repage ^ c2d_white_cat1_crp2.png |
|
The initial two guesses for thresholds should be variables.
A common requirement is to crop such that the output fits in a WxH box. The script would do this iteratively: find the smallest threshold such that each found dimension is less than or equal to the corresponding specified dimension. This will take longer, because probably no threshold can satisfy both dimensions exactly, so we will always iterate until bust.
Cropping to the exact bounding box means object boundaries often hit the image edges. A facility to slightly relax the crop would be useful.
Currently, the script thresholds on a given percentage of pixels. I may provide an option that instead thresholds on the blurred and auto-levelled (but not equalized) slope magnitude. The user could then eliminate areas that were (roughly speaking) blurrier than 25% of the sharpest areas.
There could be a weighting, eg to bias the results towards the centre on the input. This could be done before the script, as a pre-process: blur the image near the edges. Computationally it would be more efficient to selectively darken the magnitude image.
In principle, we could also "auto-rotate" if this would increase the score for a given crop.
To find the whitest area, srchImg.bat is used. Perhaps srchImgAg.bat, which is much faster, could be used.
Perhaps we can detect the "bust" state sooner.
Many operations can be combined to reduce disk I/O.
As always, the script could be written in a compiled language. This would improve performance mostly in the iterative process when only one dimension is known.
The scripts have a very simple interface, and they work. The user specifies the required width, or height, or both, or neither, and the script will automatically choose a crop.
Of course, the scripts don't always choose the same crop that I would, because I use more criteria than mere sharpness. But I have now tested this with thousands of images, and it has never made a "bad" crop with the default settings. Sometimes it makes interesting crops that hadn't occurred to me.
For convenience, .bat scripts are also available in a single zip file. See Zipped BAT files.
rem From %1 an ordinary image,
rem makes %2 cropped to detail of %1.
rem %3 is required dimensions, WxH.
rem %4 force the use of this threshold value.
@rem If width and height are both given, the job is easy.
@rem If neither width nor height are given, we use a threshold.
@rem If only one is given, it iterates to a solution.
@rem   This may not be exactly the specified dimension.
@rem   If not, recursively called with that specified dimension
@rem   and calculated dimension.
@rem
@rem Also uses:
@rem   ctdBLR_SIG: sigma for blur of slope magnitude [0 or 20]
@rem   ctdUSE_CONN_COMP 0 or 1:
@rem     whether to use only largest connected component. [1]
@rem   ctdDO_RECURSE 0 or 1: whether to recursively call. [1]
@rem   ctdDBG_IMG is not blank, writes a debug image to this.
@rem
@rem   ctdREUSE_SM if 1, use existing slope magnitude image (don't make a new one).
@rem     (This is used internally, at recursive calls.)
@rem
@rem Reference: http://im.snibgo.com/crop2det.htm
@rem
@rem Last updated:
@rem   9-July-2017 Use connCompCropWhite.bat; %3 format WxH.
@rem   12-July-2017 Numerous.
@rem   2-August-2020 for IM v7.
@rem


@if "%1"=="" findstr /B "rem @rem" %~f0 & exit /B 1

@setlocal enabledelayedexpansion

@call echoOffSave

echo %0: %1 %2 %3 %4
echo %0: ctdBLR_SIG=%ctdBLR_SIG% ctdUSE_CONN_COMP=%ctdUSE_CONN_COMP% ctdDO_RECURSE=%ctdDO_RECURSE%

call %PICTBAT%setInOut %1 ctd

if not "%2"=="" if not "%2"=="." set OUTFILE=%2

set DIMS=%3
if "%DIMS%"=="." set DIMS=
if "%DIMS%"=="" set DIMS=0x0

set FORCE_TH=%4
if "%FORCE_TH%"=="." set FORCE_TH=

if "%ctdUSE_CONN_COMP%"=="" set ctdUSE_CONN_COMP=1

if "%ctdDO_RECURSE%"=="" set ctdDO_RECURSE=1

rem   Ensure required dims don't exceed image dims.

set WW=
for /F "usebackq" %%L in (`%IMG7%magick identify ^
  -format "WW=%%w\nHH=%%h\nDIAG_FACT=%%[fx:hypot(w,h)/664]" ^
  %INFILE%`) do set %%L
if "%WW%"=="" exit /B 1

call parseXxY2i %WW% %HH% DIMS %DIMS%

set R_WI=%DIMS_X%
set R_HT=%DIMS_Y%

if not "%R_WI%"=="0" (
  if %R_WI% GTR %WW% set R_WI=%WW%
)

if not "%R_HT%"=="0" (
  if %R_HT% GTR %HH% set R_HT=%HH%
)

set HAS_BOTH=0
if not "%R_WI%"=="0" if not "%R_HT%"=="0" if "%FORCE_TH%"=="" set HAS_BOTH=1

if "%R_WI%"=="0" if "%R_HT%"=="0" if "%FORCE_TH%"=="" (
  set FORCE_TH=85
  if "%ctdUSE_CONN_COMP%"=="0" set FORCE_TH=90
)

if "%ctdBLR_SIG%"=="" (
  set ctdBLR_SIG=0
  if %ctdUSE_CONN_COMP%==0 set ctdBLR_SIG=20

  for /F "usebackq" %%L in (`%IMG7%magick identify ^
    -format "ctdBLR_SIG=%%[fx:!ctdBLR_SIG!*%DIAG_FACT%]\n" ^
    xc:`) do set %%L
)

echo %0: WW=%WW% HH=%HH% req:%R_WI%x%R_HT% ctdBLR_SIG=%ctdBLR_SIG% ctdUSE_CONN_COMP=%ctdUSE_CONN_COMP% ctdDO_RECURSE=%ctdDO_RECURSE% DIAG_FACT=%DIAG_FACT% FORCE_TH=%FORCE_TH%

rem For method 1, COMET_BLR=1*DIAG_FACT.
rem for method 11, try 2*...

for /F "usebackq" %%L in (`%IMG7%magick identify ^
  -format "COMET_BLR=%%[fx:0.5*%DIAG_FACT%]\ncccwAREA_TH=%%[fx:int(%DIAG_FACT%*%DIAG_FACT%*2+1)]\n" ^
  xc:`) do set %%L

set TMPDIR=\temp\
set SM_IMG=%TMPDIR%ctd_sm.miff
set SM_IMG_B=%TMPDIR%ctd_sm_b.miff
set SM_IMG_C=%TMPDIR%ctd_sm_c.miff
set SM_IMG_D=%TMPDIR%ctd_sm_d.miff
set WHT_IMG=%TMPDIR%ctd_white.miff

rem FIXME: make SM_METH a variable
rem FIXME: make one script to do any method?

set SCORE=999999

if "%ctdREUSE_SM%"=="1" goto made_sm

set SM_METH=11

if %SM_METH%==0 (
  call %PICTBAT%slopeMagF %INFILE% %SM_IMG%
) else if %SM_METH%==1 (
  echo %0: COMET_BLR=%COMET_BLR%

  call %PICTBAT%slopeXYblMag ^
    %INFILE% %SM_IMG% %COMET_BLR% ^
    "-grayscale Brightness -auto-level"

  if ERRORLEVEL 1 exit /B 1

) else if %SM_METH%==11 (
  echo %0: gsm BLR=%COMET_BLR%

  call %PICTBAT%gaussSlpMag ^
    %INFILE% %SM_IMG% %COMET_BLR% ^
    "-grayscale Brightness -auto-level"

  if ERRORLEVEL 1 exit /B 1

) else if %SM_METH%==2 (

  call %PICTBAT%gaussStdDev ^
    %INFILE% ^
    %SM_IMG% ^
    "-blur 0x3" ^
    "-separate -evaluate-sequence Max -auto-level"

) else if %SM_METH%==3 (

  for /F "usebackq" %%L in (`%IMG7%magick identify ^
    -format "METH_SIG=%%[fx:%DIAG_FACT%]\n" ^
    xc:`) do set %%L

  echo METH_SIG=!METH_SIG!

  call %PICTBAT%gaussStdDev ^
    %INFILE% ^
    %SM_IMG% ^
    "-blur 0x!METH_SIG!" ^
    "-separate -evaluate-sequence Max"

) else if %SM_METH%==3XX (

  for /F "usebackq" %%L in (`%IMG7%magick identify ^
    -format "METH__SIG=%%[fx:2*%DIAG_FACT%]\n" ^
    xc:`) do set %%L

  echo METH_SIG=!METH_SIG!

  call %PICTBAT%gaussStdDev ^
    %INFILE% ^
    %SM_IMG% ^
    "-blur 0x!METH_SIG!" ^
    "-separate -evaluate-sequence Max"

) else if %SM_METH%==4 (

  call %PICTBAT%slopeXY ^
    %INFILE% ^
    s.miff

  call %PICTBAT%slopeXYdiv ^
    s.miff ^
    %SM_IMG%

  %IMG7%magick ^
    %SM_IMG% ^
    -separate -evaluate-sequence Max ^
    %SM_IMG%
)
if ERRORLEVEL 1 exit /B 1

:made_sm

if %HAS_BOTH%==1 (
  %IMG7%magick -size %R_WI%x%R_HT% xc:white %WHT_IMG%
  if ERRORLEVEL 1 exit /B 1

  rem Next for method 1:
  rem %IM%convert %SM_IMG% -sigmoidal-contrast 20,50%% ctd_hack.miff

  rem Next for method 111:
  %IMG7%magick %SM_IMG% -sigmoidal-contrast 20,50%% ctd_hack.miff

  call %PICTBAT%srchImg ctd_hack.miff %WHT_IMG%
  if ERRORLEVEL 1 exit /B 1

  echo %0: crop is !siCOMP_CROP! score is !siCOMP_FLT!

  if /I "%OUTFILE%" NEQ "null:" (
    %IMG7%magick ^
      %INFILE% ^
      -crop !siCOMP_CROP! +repage ^
      %OUTFILE%
    if ERRORLEVEL 1 exit /B 1
  )

  set SCORE=!siCOMP_FLT!
  set CROP4=!siCOMP_CROP!

  goto end
)

if "%R_WI%"=="0" (
  set REQ_DIM=%R_HT%
) else (
  set REQ_DIM=%R_WI%
)

if "%ctdBLR_SIG%"=="0" (
  set sBLUR=
) else (
  set sBLUR=-blur 0x%ctdBLR_SIG%
)

echo %0: %sBLUR% equalize

%IMG7%magick ^
  %SM_IMG% ^
  %sBLUR% ^
  -equalize ^
  %SM_IMG_B%

if not "%FORCE_TH%"=="" (
  set BUST=0
  call :calcCrop %FORCE_TH%
  if ERRORLEVEL 1 exit /B 1

  goto foundCrop
)

set FINISHED=0
set T0=10
set T2=99.99
set T2=100

echo %0: T0=%T0% T2=%T2%

call :calcCrop %T0%
if ERRORLEVEL 1 exit /B 1
set D0=%CALC_DIM%

call :calcCrop %T2%
if ERRORLEVEL 1 set CALC_DIM=0
set D2=%CALC_DIM%

if %D0% LSS %REQ_DIM% (
  echo Bust: REQ_DIM=%REQ_DIM% D0=%D0%
  exit /B 1
)

if %D2% GTR %REQ_DIM% (
  echo Bust: REQ_DIM=%REQ_DIM% D1=%D1%
  exit /B 1
)

set BUST=0
set PREV_DIFF=999999
:loop

for /F "usebackq" %%L in (`%IMG7%magick identify ^
  -precision 9 ^
  -format "T1=%%[fx:sqrt(%T0%*%T2%)]"
  xc:`) do set %%L

call :calcCrop %T1%
if ERRORLEVEL 1 exit /B 1
set D1=%CALC_DIM%

set /A DIFF=%CALC_DIM%-%REQ_DIM%
if %DIFF% LSS 0 set /A DIFF=-%DIFF%

if %DIFF% LSS %PREV_DIFF% (
  set PREV_DIFF=%DIFF%
  set BW=%CW%
  set BH=%CH%
  set BX=%CX%
  set BY=%CY%
)

if %T0%==%T1% set BUST=1
if %T2%==%T1% set BUST=1

if %BUST%==1 set FINISHED=1

if %FINISHED%==0 (
  if %D1%==%REQ_DIM% (
    echo %0: Found T1=%T1% D1=%D1%
    set FINISHED=1
  ) else if %D1% GTR %REQ_DIM% (
    rem Solution is between 1 and 2
    set T0=%T1%
    set D0=%D1%
  ) else (
    rem Solution is between 0 and 1
    set T2=%T1%
    set D2=%D1%
  )
  goto loop
)


:foundCrop

echo %0: last crop is %CW%x%CH%+%CX%+%CY%

if %BUST%==1 (
  echo %0: ** BUST!!
  echo %0: best crop is %BW%x%BH%+%BX%+%BY%

  set CW=%BW%
  set CH=%BH%
  set CX=%BX%
  set CY=%BY%

  if "%R_WI%"=="0" (
    set /A CW=!CW!*%R_HT%/!CH!

    set CH=%R_HT%
  ) else (
    set /A CH=!CH!*%R_WI%/!CW!

    set CW=%R_WI%
  )
  rem FIXME: Should we also change the other dimension, in proportion?
)

rem Now we know both required dimensions, so maybe recursive call.

if %ctdDO_RECURSE%==0 (
  set CROP4=%CW%x%CH%+%CX%+%CY%
  if /I "%OUTFILE%" NEQ "null:" (
    %IMG7%magick ^
      %INFILE% ^
      -crop !CROP4! +repage ^
      %OUTFILE%
    if ERRORLEVEL 1 exit /B 1
  )
) else (
  set ctdREUSE_SM=1
  call %PICTBAT%cropToDetailSml %INFILE% %OUTFILE% %CW%x%CH%
  if ERRORLEVEL 1 exit /B 1
  set ctdREUSE_SM=

  set CROP4=!ctdCROP!
  set SCORE=!ctdSCORE!
)

rem FIXME: possibly make a debug image.

if not "%ctdDBG_IMG%"=="" %IMG7%magick ^
  %SM_IMG% ^
  -region %CROP4% ^
  +level 33,67%% ^
  %ctdDBG_IMG%

:end

echo %0: OUTFILE=%OUTFILE% ctdSCORE=%SCORE%

call echoRestore

endlocal & set ctdOUTFILE=%OUTFILE%& set ctdSCORE=%SCORE%& set ctdCROP=%CROP4%

@exit /B 0


::--------------------------------------------------
:: Subroutines.

:: calcCrop: Given a threshold %1 percent, find the crop params.
:: Returns just the dimension that was required in CALC_DIM.

:calcCrop

set CW=
if %ctdUSE_CONN_COMP%==1 (

  %IMG7%magick ^
    %SM_IMG_B% ^
    -threshold %1%% ^
    %SM_IMG_C%

  call %PICTBAT%connCompCropWhite %SM_IMG_C%

  if ERRORLEVEL 1 exit /B 1

  set /A AREA=!CW!*!CH!
) else (

  for /F "usebackq tokens=1-4 delims=+x" %%A in (`%IMG7%magick ^
    %SM_IMG_B% ^
    -threshold %1%% ^
    -bordercolor Black -border 1 ^
    -format %%@\n ^
    info:`) do (
    set CW=%%A
    set CH=%%B
    set /A CX=%%C-1
    set /A CY=%%D-1
    set /A AREA=%%A*%%B
  )
)

if "%CW%"=="" exit /B 1

set CALC_DIM=%CW%
if "%R_WI%"=="0" set CALC_DIM=%CH%

echo %0: thresh=%1  %CW%x%CH%+%CX%+%CY%  REQ_DIM=%REQ_DIM% CALC_DIM=%CALC_DIM%

if %AREA%==0 exit /B 1

exit /B 0
rem From colour image %1,
rem find magnitude of slope of RGB channels, by comet blur method.
rem Output %2 is single image.
rem %3 is (quoted) comma-list of one or two blur sigmas.
rem   First should be at least about 0.12.
rem   Second is orthogonal to first, default half of first
rem %4 is post-processing.
@rem
@rem Assumes magick is HDRI.
@rem
@rem See also slopeXYbl.bat.
@rem
@rem Updated:
@rem   24-December-2017 %3 is one or two sigmas.
@rem   22-July-2022 Upgraded for IM v7.
@rem   26-July-2022 Replace "-evaluate Pow 2 -compose plus -composite -evaluate Divide 2 -evaluate Pow 0.5" by "-fx sqrt((u*u+v*v)/2)"
@rem


@if "%1"=="" findstr /B "rem @rem" %~f0 & exit /B 1

@setlocal

@call echoOffSave

call %PICTBAT%setInOut %1 sxybm

if not "%2"=="" set OUTFILE=%2

set BLR_SIG=%~3
call %UTIL%\parseCommaList "%BLR_SIG%" nSIG SIGS

if %nSIG%==0 (
  set BLR_SIG0=1
  set BLR_SIG1=0.5
) else if %nSIG%==1 (
  set BLR_SIG0=%SIGS[0]%

  for /F "usebackq" %%L in (`%IMG7%magick identify ^
    -format "BLR_SIG1=%%[fx:%SIGS[0]%/2]"
    xc:`) do set %%L

) else if %nSIG%==2 (
  set BLR_SIG0=%SIGS[0]%
  set BLR_SIG1=%SIGS[1]%
)

echo %0: BLR_SIG0=%BLR_SIG0% BLR_SIG1=%BLR_SIG1%

set POST_PROC=%~4
if "%POST_PROC%"=="." set POST_PROC=

if %BLR_SIG1%==0 (
  set ORTHV=
  set ORTHH=
) else (
  set ORTHV=-morphology Convolve Blur:0x%BLR_SIG1%,90
  set ORTHH=-morphology Convolve Blur:0x%BLR_SIG1%
)

%IMG7%magick ^
  %INFILE% ^
  -alpha off ^
  -virtual-pixel Edge ^
  -define compose:clamp=off ^
  -define convolve:scale="^!" ^
  ( -clone 0 ^
    ( -clone 0 ^
      -morphology Convolve Comet:0x%BLR_SIG0% ^
      %ORTHV% ^
    ) ^
    ( -clone 0 ^
      -morphology Convolve Comet:0x%BLR_SIG0%,180 ^
      %ORTHV% ^
    ) ^
    -delete 0 ^
    -compose MinusDst -composite ^
  ) ^
  ( -clone 0 ^
    ( -clone 0 ^
      -morphology Convolve Comet:0x%BLR_SIG0%,90 ^
      %ORTHH% ^
    ) ^
    ( -clone 0 ^
      -morphology Convolve Comet:0x%BLR_SIG0%,270 ^
      %ORTHH% ^
    ) ^
    -delete 0 ^
    -compose MinusDst -composite ^
  ) ^
  -delete 0 ^
  -channel RGB ^
  -fx "sqrt((u*u+v*v)/2)" ^
  %POST_PROC% ^
  +depth ^
  -depth 32 ^
  -define "quantum:format=floating-point" ^
  %OUTFILE%

if ERRORLEVEL 1 exit /B 1

call echoRestore

endlocal & set sxybmOUTFILE=%OUTFILE%
rem From image %1,
rem writes %2 and %3,
rem appending outputs from cropToDetail.bat at various thresholds.
@rem
@rem Updated:
@rem   2-August-2020 for IM v7.
@rem

@setlocal

set INFILE=%1
set OUTFILE0=%2
set OUTFILE1=%3

if "%OUTFILE0%"=="." set OUTFILE0=
if "%OUTFILE1%"=="." set OUTFILE1=

set PREF=%TEMP%/c2d_th


if not "%OUTFILE0%"=="" (
  set ctdUSE_CONN_COMP=0

  call :doAppend %OUTFILE0%
)

if not "%OUTFILE1%"=="" (
  set ctdUSE_CONN_COMP=1

  call :doAppend %OUTFILE1%
)

set ctdUSE_CONN_COMP=

exit /B 0

::---------------------------------------------
:: Subroutine

:doAppend
call %PICTBAT%cropToDetailSml %INFILE% %PREF%99.miff . 99
call %PICTBAT%cropToDetailSml %INFILE% %PREF%97.miff . 97
call %PICTBAT%cropToDetailSml %INFILE% %PREF%95.miff . 95
call %PICTBAT%cropToDetailSml %INFILE% %PREF%90.miff . 90
call %PICTBAT%cropToDetailSml %INFILE% %PREF%85.miff . 85
call %PICTBAT%cropToDetailSml %INFILE% %PREF%80.miff . 80
call %PICTBAT%cropToDetailSml %INFILE% %PREF%75.miff . 75
call %PICTBAT%cropToDetailSml %INFILE% %PREF%70.miff . 70

%IMG7%magick ^
  -background gray ^
  ( %PREF%99.miff %PREF%97.miff %PREF%95.miff %PREF%90.miff %PREF%85.miff ^
    -bordercolor gray -border 5 +append ^
  ) ^
  ( %PREF%80.miff %PREF%75.miff %PREF%70.miff ^
    -bordercolor gray -border 5 +append ^
  ) ^
  -append ^
  %1

exit /B 0
rem Given image %1,
rem writes environment variable cccwCROP
rem as the bounding box WxH+X+Y of the
rem largest white connected component.
rem Also sets CW, CH, CX and CY.
@rem
@rem Updated:
@rem   25-September-2022 for IM v7.
@rem

@if "%1"=="" findstr /B "rem @rem" %~f0 & exit /B 1

@setlocal enabledelayedexpansion

@call echoOffSave

call %PICTBAT%setInOut %1 cccw

if "%cccwAREA_TH%"=="" set cccwAREA_TH=2

echo %0: cccwAREA_TH=%cccwAREA_TH%

set CROP=
set CW=

for /F "usebackq skip=1 tokens=2,5" %%A in (`%IMG7%magick ^
  %INFILE% ^
  -alpha off ^
  -define connected-components:verbose^=true ^
  -define connected-components:area-threshold^=%cccwAREA_TH% ^
  -connected-components 8 ^
  NULL:`) do (
  if "!CROP!"=="" (
    set IsWhite=0
    if "%%B"=="srgb(100%%,100%%,100%%)" set IsWhite=1
    if "%%B"=="srgb(255,255,255)" set IsWhite=1
    if "%%B"=="gray(255)" set IsWhite=1
    if !IsWhite!==1 (
      set CROP=%%A
    )
  )
)

if "%CROP%"=="" (
  echo %0: No white components found in %INFILE%.
  exit /B 1
)

for /F "tokens=1-4 delims=+x" %%A in ("%CROP%") do (
  set CW=%%A
  set CH=%%B
  set CX=%%C
  set CY=%%D
  set AREA=%%A*%%B
)

echo %0: CROP=%CROP%  %CW% %CH% %CX% %CY%

call echoRestore

@endlocal & set cccwCROP=CROP& set CW=%CW%& set CH=%CH%& set CX=%CX%& set CY=%CY%
rem Like cropToDetailSml.bat, but for large images.
@rem
@rem Updated:
@rem   25-September-2022 for IM v7.
@rem

@if "%1"=="" findstr /B "rem @rem" %~f0 & exit /B 1

@setlocal enabledelayedexpansion

@call echoOffSave

echo %0: %1 %2 %3 %4 %5
echo %0: ctdBLR_SIG=%ctdBLR_SIG% ctdUSE_CONN_COMP=%ctdUSE_CONN_COMP% ctdDO_RECURSE=%ctdDO_RECURSE%

call %PICTBAT%setInOut %1 ctdl

if not "%2"=="" if not "%2"=="." set OUTFILE=%2

set DIMS=%3
if "%DIMS%"=="." set DIMS=
if "%DIMS%"=="" set DIMS=0x0

set FORCE_TH=%4
if "%FORCE_TH%"=="." set FORCE_TH=


set LIM_W=600
set LIM_H=600

set WW=
for /F "usebackq" %%L in (`%IMG7%magick identify ^
  -format "WW=%%w\nHH=%%h\n" ^
  %INFILE%`) do set %%L
if "%WW%"=="" exit /B 1

call parseXxY2i %WW% %HH% DIMS %DIMS%

set R_WI=%DIMS_X%
set R_HT=%DIMS_Y%

if not "%R_WI%"=="0" (
  if %R_WI% GTR %WW% set R_WI=%WW%
)

if not "%R_HT%"=="0" (
  if %R_HT% GTR %HH% set R_HT=%HH%
)

echo %0: WW=%WW% HH=%HH% req:%R_WI%x%R_HT% ctdBLR_SIG=%ctdBLR_SIG% ctdUSE_CONN_COMP=%ctdUSE_CONN_COMP% ctdDO_RECURSE=%ctdDO_RECURSE% DIAG_FACT=%DIAG_FACT% FORCE_TH=%FORCE_TH%

if %WW% LEQ %LIM_W% if %HH% LEQ %LIM_H% (
  call %PICTBAT%cropToDetailSml %INFILE% %OUTFILE% %DIMS% %FORCE_TH%
  if ERRORLEVEL 1 exit /B 1

  set CROP4=!ctdCROP!
  set SCORE=!ctdSCORE!

  goto end
)


set TMPDIR=\temp\
set SML_IMG=%TMPDIR%ctdl_sml.miff

set sFMT=^
MULT_W=%%[fx:%WW%/w]\n^
MULT_H=%%[fx:%HH%/h]\n^
RW=%%[fx:int(%R_HT%*w/%WW%+0.5)]\n^
RH=%%[fx:int(%R_HT%*h/%HH%+0.5)]\n

set RW=
for /F "usebackq" %%L in (`%IMG7%magick ^
  %INFILE% ^
  -resize %LIM_W%x%LIM_H% ^
  +write %SML_IMG% ^
  -precision 9 ^
  -format "%sFMT%" ^
  info:`) do set %%L
if "%RW%"=="" exit /B 1


call %PICTBAT%cropToDetailSml %SML_IMG% null: %RW%x%RH% %FORCE_TH%
if ERRORLEVEL 1 exit /B 1

echo %0: ctdCROP=%ctdCROP%
set SCORE=!ctdSCORE!

set sFMT=
for /F "tokens=1-4 delims=+x" %%A in ("%ctdCROP%") do set sFMT=^
FW=%%[fx:int(%%A*%MULT_W%+0.5)]\n^
FH=%%[fx:int(%%B*%MULT_H%+0.5)]\n^
FX=%%[fx:int(%%C*%MULT_W%+0.5)]\n^
FY=%%[fx:int(%%D*%MULT_H%+0.5)]\n

if "%sFMT%"=="" exit /B 1

set FW=
for /F "usebackq" %%L in (`%IMG7%magick identify ^
  -precision 16 ^
  -format "%sFMT%" ^
  xc:`) do set %%L
if "%FW%"=="" exit /B 1

if %FW%==0 set FW=1
if %FH%==0 set FH=1

rem If this script was called with explicit W and H, use those.
rem
if not "%R_WI%"=="0" set FW=%R_WI%
if not "%R_HT%"=="0" set FH=%R_HT%

set CROP4=%FW%x%FH%+%FX%+%FY%

echo %0: CROP4 = %CROP4%

if /I "%OUTFILE%" NEQ "null:" %IMG7%magick ^
  %INFILE% ^
  -crop %CROP4% +repage ^
  %OUTFILE%

:end

@call echoRestore

@endlocal & set ctdlOUTFILE=%OUTFILE%& set ctdlSCORE=%SCORE%& set ctdlCROP=%CROP4%

@exit /B 0
This script invokes chStrs.exe. I don't provide the source of binary of that program. Those four lines change the contents of four files, named %KNL_L% etc. In each, the first colon ":" on every line is changed to "+%OFFS%+%OFFS%:" (without the quotes).
rem From image %1
rem make output %2 the Gaussian slope magnitude.
rem %3 is the Gaussian blur sigma.
rem %4 is post-pocessing (eg "-grayscale Brightness -auto-level").
@rem
@rem Last updated:
@rem   2-August-2020 for IM v7. Assumes magick is HDRI.
@rem

@if "%1"=="" findstr /B "rem @rem" %~f0 & exit /B 1

@setlocal enabledelayedexpansion

@call echoOffSave

call %PICTBAT%setInOut %1 gsm

if not "%2"=="" if not "%2"=="." set OUTFILE=%2

set BLR_SIG=%3
if "%BLR_SIG%"=="." set BLR_SIG=
if "%BLR_SIG%"=="" set BLR_SIG=1

set POST_PROC=%~4
if "%POST_PROC%"=="." set POST_PROC=

set TMPDIR=\temp\
set PREF=%TMPDIR%gsm

set TMP_KNL=%PREF%_knl.miff
set KNL_L=%PREF%_knl_l.txt
set KNL_T=%PREF%_knl_t.txt
set KNL_R=%PREF%_knl_r.txt
set KNL_B=%PREF%_knl_b.txt
set KNL_LR=%PREF%_knl_lr.txt
set KNL_TB=%PREF%_knl_tb.txt

for /F "usebackq" %%L in (`%IMG7%magick identify ^
  -format "N_BORD=%%[fx:%BLR_SIG%*10]" ^
  xc:`) do set %%L

set OKAY=
for /F "usebackq" %%L in (`%IMG7%magick ^
  -size 1x1 xc:White ^
  -bordercolor Black -border %N_BORD% ^
  -gaussian-blur 0x%BLR_SIG% ^
  -auto-level ^
  -trim ^
  -crop 2x1@ +repage ^
  -delete 1 ^
  +depth ^
  -depth 32 ^
  -define "quantum:format=floating-point" ^
  -write %TMP_KNL% ^
  -format "OKAY=%%[fx:(w-1)*2+1==h?1:0]\nOFFS=%%[fx:w-1]\n" ^
  info:`) do set %%L

if "%OKAY%"=="" exit /B 1
if "%OKAY%"=="0" exit /B 1

echo %0: N_BORD=%N_BORD% OKAY=%OKAY%  OFFS=%OFFS%


%IM7DEV%magick ^
  %TMP_KNL% ^
  -precision 19 ^
  -process img2knl NULL: >%KNL_L%

%IM7DEV%magick ^
  %TMP_KNL% ^
  -precision 19 ^
  -flop ^
  -process img2knl NULL: >%KNL_R%

%IM7DEV%magick ^
  %TMP_KNL% ^
  -precision 19 ^
  -rotate 90 ^
  -process img2knl NULL: >%KNL_T%

%IM7DEV%magick ^
  %TMP_KNL% ^
  -precision 19 ^
  -rotate 90 ^
  -flip ^
  -process img2knl NULL: >%KNL_B%

rem FIXME: Replace following when we have offsets in img2knl.

rem If chStrs is not available, use "sed".
rem
rem chStrs /p0 /l1000000 /i%KNL_L% /m1 /f":" /t"+%OFFS%+%OFFS%:"
rem chStrs /p0 /l1000000 /i%KNL_R% /m1 /f":" /t"+0+%OFFS%:"
rem chStrs /p0 /l1000000 /i%KNL_T% /m1 /f":" /t"+%OFFS%+%OFFS%:"
rem chStrs /p0 /l1000000 /i%KNL_B% /m1 /f":" /t"+%OFFS%+0:"

sed -e s/:/+%OFFS%+%OFFS%:/ --in-place=BAK %KNL_L%
sed -e s/:/+0+%OFFS%:/ --in-place=BAK %KNL_R%
sed -e s/:/+%OFFS%+%OFFS%:/ --in-place=BAK %KNL_T%
sed -e s/:/+%OFFS%+0:/ --in-place=BAK %KNL_B%

rem FIXME? Or we could start with an entire kernel,
rem   zero the centre column and negate the left side.

%IMG7%magick ^
  %INFILE% ^
  -define compose:clamp=off ^
  -define "convolve:scale=^!" ^
  -define "morphology:showkernel=1" ^
  ( -clone 0 ^
    ( -clone 0 -morphology convolve @%KNL_R% ) ^
    ( -clone 0 -morphology convolve @%KNL_L% ) ^
    -delete 0 ^
    -compose Difference -composite ^
  ) ^
  ( -clone 0 ^
    ( -clone 0 -morphology convolve @%KNL_B% ) ^
    ( -clone 0 -morphology convolve @%KNL_T% ) ^
    -delete 0 ^
    -compose Difference -composite ^
  ) ^
  -delete 0 ^
  -evaluate Pow 2 ^
  -compose Plus -composite ^
  -evaluate Divide 2 ^
  -evaluate Pow 0.5 ^
  %POST_PROC% ^
  +depth ^
  -depth 32 ^
  -define "quantum:format=floating-point" ^
  %OUTFILE%

if ERRORLEVEL 1 (
  echo %0: mprphology failed
  exit /B 1
)

rem -------------------------
rem New method

call %PICTBAT%mSliceGauss %TMP_KNL% %BLR_SIG%

if ERRORLEVEL 1 exit /B 1

%IM7DEV%magick ^
  %TMP_KNL% ^
  -precision 19 ^
  -process img2knl NULL: >%KNL_LR%

%IM7DEV%magick ^
  %TMP_KNL% ^
  -rotate 90 ^
  -precision 19 ^
  -process img2knl NULL: >%KNL_TB%

rem  -define "convolve:scale=^^^"

rem FIXME: Following goes bad, unless we have "-debug all". ??

%IMG7%magick ^
  %INFILE% ^
  -define compose:clamp=off ^
  -define "morphology:showkernel=1" ^
  -define "convolve:scale=^^" ^
  ( -clone 0 -morphology convolve @%KNL_LR% ) ^
  ( -clone 0 -morphology convolve @%KNL_TB% ) ^
  -delete 0 ^
  +depth ^
  -depth 32 ^
  -define "quantum:format=floating-point" ^
+write xy.miff ^
  -evaluate Pow 2 ^
  -compose Plus -composite ^
  -evaluate Divide 2 ^
  -evaluate Pow 0.5 ^
  %POST_PROC% ^
  +depth ^
  -depth 32 ^
  -define "quantum:format=floating-point" ^
  x.miff


call echoRestore

@endlocal & set gsmOUTFILE=%OUTFILE%
rem %1 input grayscale saliency map
rem %2 maximum crop width
rem %3 maximum crop height
rem %4 sub-sample factor [default: 1]
rem %5 prefix for output environment variable names

@if "%3"=="" findstr /B "rem @rem" %~f0 & exit /B 1

@setlocal enabledelayedexpansion

@call echoOffSave


set SALMAP=%1
set WW=%2
if "%WW%"=="." set WW=

set HH=%3
if "%HH%"=="." set HH=

set SSFACT=%4
if "%SSFACT%"=="." set SSFACT=
if "%SSFACT%"=="" set SSFACT=1

set ENVPREF=%5
if "%ENVPREF%"=="." set ENVPREF=
if "%ENVPREF%"=="" set ENVPREF=smc_

:: Reduce WW and HH by SSFACT.
::
if not "%WW%"=="" for /F "usebackq" %%L in (`%IMG7%magick xc: ^
  -format "WW=%%[fx:%WW%/%SSFACT%]" ^
  info:`) do set %%L

if not "%HH%"=="" for /F "usebackq" %%L in (`%IMG7%magick xc: ^
  -format "HH=%%[fx:%HH%/%SSFACT%]" ^
  info:`) do set %%L

set TMPINP=%TEMP%\aspRat.miff

if %SSFACT%==1 (
  set SUBSAMP=
) else (
  set SUBSAMP=-resize "%%[fx:w/%SSFACT%]x%%[fx:h/%SSFACT%]"
)

for /F "usebackq" %%L in (`%IMG7%magick ^
  %SALMAP% ^
  %SUBSAMP% ^
  -precision 15 ^
  +write %TMPINP% ^
  -format "WWin=%%w\nHHin=%%h\ninpSal=%%[fx:mean*w*h]\ninpArea=%%[fx:w*h]\n" ^
  info:`) do set %%L

if "%WW%"=="" set WW=%WWin%

if "%HH%"=="" set HH=%HHin%

:: Search for the highest score.

set BestScore=0
set BestW=
set BestH=
set BestF=

set F0=10
set F3=100

call :tryOne %F0% 0
set score0=%score%

call :tryOne %F3% 3
set score3=%score%

set DiffLim=1

:: Or we might stop when the crops are equal.

:loop

for /F "usebackq" %%L in (`%IMG7%magick xc: ^
  -precision 15 ^
  -format "F1=%%[fx:!F0!+(!F3!-!F0!)/3]\nF2=%%[fx:!F0!+2*(!F3!-!F0!)/3]\nAGAIN=%%[fx:!F3!-!F0!>1?1:0]" ^
  info:`) do set %%L

echo %0: F: !F0! !F1! !F2! !F3!

call :tryOne !F1! 1
set score1=!score!

call :tryOne !F2! 2
set score2=!score!

:: For case !BestF!==!F1! we assume score0 is the new best score
:: For case !BestF!==!F2! we assume score3 is the new best score

set Calc0or3=0

if !BestF!==!F0! (
  echo 0 is best. Move 1 to 3.
  set F3=!F1!
  set score3=!score1!
  set W3=%W1%
  set H3=%H1%
  set X3=%X1%
  set Y3=%Y1%
) else if !BestF!==!F1! (
  echo 1 is best. Move 2 to 3.
  set F3=!F2!
  set score3=!score2!
  set W3=%W2%
  set H3=%H2%
  set X3=%X2%
  set Y3=%Y2%
  set Calc0or3=1
) else if !BestF!==!F2! (
  echo 2 is best. Move 1 to 0.
  set F0=!F1!
  set score0=!score1!
  set W0=%W1%
  set H0=%H1%
  set X0=%X1%
  set Y0=%Y1%
  set Calc0or3=1
) else if !BestF!==!F3! (
  echo 3 is best. Move 2 to 0.
  set F0=!F2!
  set score0=!score2!
  set W0=%W2%
  set H0=%H2%
  set X0=%X2%
  set Y0=%Y2%
) else (
  echo Error:  BestF = !BestF!  BestScore = !BestScore!
  exit /B 1
)

if %Calc0or3%==1 (

  for /F "usebackq" %%L in (`%IMG7%magick identify ^
    -precision 15 ^
    -format "Which=%%[fx:!score0! < !score3! ? 3 : 0]\n" ^
    xc:`) do set %%L

  if !Which!==0 (
    set BestScore=%score0%
    set BestW=%W0%
    set BestH=%H0%
    set BestX=%X0%
    set BestY=%Y0%
    set BestF=%F0%
  ) else (
    set BestScore=%score3%
    set BestW=%W3%
    set BestH=%H3%
    set BestX=%X3%
    set BestY=%Y3%
    set BestF=%F3%
  )
)

if not %SSFACT%==1 (
for /F "usebackq" %%L in (`%IMG7%magick xc: ^
  -format "BestW=%%[fx:%BestW%*%SSFACT%]\nBestH=%%[fx:%BestH%*%SSFACT%]\nBestX=%%[fx:%BestX%*%SSFACT%]\nBestY=%%[fx:%BestY%*%SSFACT%]\n" ^
  info:`) do set %%L
)

echo BestScore=%BestScore%  BestF=%BestF%

if %AGAIN%==1 goto loop

set BestCrop=%BestW%x%BestH%+%BestX%+%BestY%

echo %0: BestCrop = %BestCrop%

call echoRestore

@endlocal & set %ENVPREF%BestCrop=%BestCrop%& set %ENVPREF%BestScore=%BestScore%

@exit /B 0

::-------------------------------------------------------------------------------
:: Subroutine

:tryOne

  set FRAC=%1
  set Ndx=%2

  for /F "usebackq tokens=*" %%L in (`%IM7DEV%magick ^
    -precision 15 ^
    %TMPINP% ^
    ^( +clone ^
       -sample "%%[fx:%WW%*%FRAC%/100]x%%[fx:%HH%*%FRAC%/100]^!" -fill White -colorize 100 ^
       -format "ws=%%[fx:u.w]\nhs=%%[fx:u.h]\n" ^
       +write info: ^
    ^) ^
    -process 'srchimg file stdout' +repage ^
    -format "score=%%[fx:u.mean*u.w*u.h*(%inpArea%-u.w*u.h)]\n" ^
    info:`) do (
    set outstr=%%L
    set FIRSTCH=!outstr:~0,1!
    if !FIRSTCH!==0 (
      for /F "tokens=1-4 delims=, " %%A in ("!outstr!") do (
        set ThisX=%%C
        set ThisY=%%D
      )
    ) else (
      set %%L
    )
  )

  set W!Ndx!=!ws!
  set H!Ndx!=!hs!
  set X!Ndx!=!ThisX!
  set Y!Ndx!=!ThisY!

  echo %0: FRAC=%FRAC%  Score !score!  Crop !ws!x!hs!+!ThisX!+!ThisY!

  for /F "usebackq" %%L in (`%IMG7%magick identify ^
    -precision 15 ^
    -format "BestScore=%%[fx:!BestScore! < !score! ? !score! : !BestScore!]\n" ^
    xc:`) do set %%L

  if !BestScore!==!score! (
    set BestW=!ws!
    set BestH=!hs!
    set BestX=!ThisX!
    set BestY=!ThisY!
    set BestF=%FRAC%
  )

exit /B 0
rem From image %1,
rem find the nearest aspect ratio from a list.
rem %2 output cropped image. Default no output.
rem %3 is the aspect ratio list, eg "1:1,7:5,1:3,5:7,3:1,2:3,3:2"
rem   Numbers in the AR do not need to be integers, eg "1.5:0.9" is okay.
rem %4 prefix for output environment variable names
rem "Nearest" means the AR that results in a crop removing the fewest pixels.

@if "%~3"=="" findstr /B "rem @rem" %~f0 & exit /B 1

@setlocal enabledelayedexpansion

@call echoOffSave

call %PICTBAT%setInOut %1 nasp

set OUTFILE=%2
if "%OUTFILE%"=="." set OUTFILE=
if "%OUTFILE%"=="" set OUTFILE=NULL:

set ARLIST=%~3

set ENVPREF=%4
if "%ENVPREF%"=="." set ENVPREF=
if "%ENVPREF%"=="" set ENVPREF=nasp_

if "%ARLIST%"=="" (
  echo %0: arguments: infile outfile aspect_ratio_list env_prefix
  exit /B 1
)

set TMPINP=%TEMP%\nearAspRat.miff

if /I %OUTFILE%==NULL: (
  set WrOut=0
) else (
  set WrOut=1
)

for /F "usebackq" %%L in (`%IMG7%magick ^
   %INFILE% ^
  -precision 15 ^
  +write %TMPINP% ^
  -format "inptArea=%%[fx:w*h]\n" ^
  info:`) do set %%L

set SML_DIFF=99999999
set SML_AR=

for %%A in (%ARLIST%) do (

  for /F "usebackq" %%L in (`%IMG7%magick ^
    -precision 15 ^
    %TMPINP% ^
    -crop %%A+0+0 +repage ^
    -format "diff=%%[fx:%inptArea%-w*h]\nWW=%%w\nHH=%%h\n" ^
    info:`) do set %%L

  if !SML_DIFF! GTR !diff! (
    set SML_DIFF=!diff!
    set SML_AR=%%A
    set SML_WW=!WW!
    set SML_HH=!HH!
  )
)

if "%SML_AR%"=="" (
  echo %0: Something bad happened.
  exit /B 1
)

if %WrOut%==1 %IMG7%magick ^
  %TMPINP% ^
  -crop %SML_AR%+0+0 +repage ^
  %OUTFILE%

echo SML_DIFF=%SML_DIFF% SML_AR=%SML_AR% SML_WW=%SML_WW% SML_HH=%SML_HH%

call echoRestore

endlocal & set %ENVPREF%_DIFF=%SML_DIFF%& set %ENVPREF%_AR=%SML_AR%& ^
set %ENVPREF%_WW=%SML_WW%& set %ENVPREF%_HH=%SML_HH%
All images on this page were created by the commands shown, using:
%IMG7%magick -version
Version: ImageMagick 7.1.0-49 Q16-HDRI x64 7a3f3f1:20220924 https://imagemagick.org
Copyright: (C) 1999 ImageMagick Studio LLC
License: https://imagemagick.org/script/license.php
Features: Cipher DPC HDRI OpenCL
Delegates (built-in): bzlib cairo freetype gslib heic jng jp2 jpeg jxl lcms lqr lzma openexr pangocairo png ps raqm raw rsvg tiff webp xml zip zlib
Compiler: Visual Studio 2022 (193331630)
To improve internet download speeds, some images may have been automatically converted (by ImageMagick, of course) from PNG or TIFF or MIFF to JPG.
Source file for this web page is crop2det.h1. To re-create this web page, run "procH1 crop2det".
This page, including the images except where shown otherwise, is my copyright. Anyone is permitted to use or adapt any of the code, scripts or images for any purpose, including commercial use.
Anyone is permitted to re-publish this page, but only for non-commercial use.
Anyone is permitted to link to this page, including for commercial use.
Page version v2.0 12-July-2017.
Page created 19-Mar-2023 02:35:56.
Copyright © 2023 Alan Gibson.