Make a double wedge for testing.
%IMG7%magick ^
  -size 40x400 gradient: -rotate 90 ^
  ( +clone -flop ) ^
  -append +repage ^
  ca_wedge.png

Canny (and other types of) edges can segment images.
See Wikipedia: Canny edge detector.
The syntax is "-canny radiusxsigma+lower_percent+upper_percent". radiusxsigma applies an initial Gausian blur.
%IMG7%magick ^ -size 40x400 gradient: -rotate 90 ^ ( +clone -flop ) ^ -append +repage ^ ca_wedge.png |

|
The values at the centre are:
%IMG7%magick ^
  ca_wedge.png ^
  -crop 6x2+197+39 +repage ^
  txt:
# ImageMagick pixel enumeration: 6,2,0,65535,gray
0,0: (32357)  #7E657E657E65  gray(49.3736%)
1,0: (32521)  #7F097F097F09  gray(49.6239%)
2,0: (32685)  #7FAD7FAD7FAD  gray(49.8741%)
3,0: (32850)  #805280528052  gray(50.1259%)
4,0: (33014)  #80F680F680F6  gray(50.3761%)
5,0: (33178)  #819A819A819A  gray(50.6264%)
0,1: (33178)  #819A819A819A  gray(50.6264%)
1,1: (33014)  #80F680F680F6  gray(50.3761%)
2,1: (32850)  #805280528052  gray(50.1259%)
3,1: (32685)  #7FAD7FAD7FAD  gray(49.8741%)
4,1: (32521)  #7F097F097F09  gray(49.6239%)
5,1: (32357)  #7E657E657E65  gray(49.3736%)
We can see that each value in the upper half is different to the corresponding value in the lower half. However, at their closest, they are as close as adjacent values in either side.
%IMG7%magick ^ ca_wedge.png ^ -canny 0x20+5%%+30%% ^ ca_w1.png |

|
%IMG7%magick ^ ca_wedge.png ^ -canny 0x4+5%%+30%% ^ ca_w1a.png |

|
%IMG7%magick ^ ca_wedge.png ^ -canny 0x2+5%%+30%% ^ ca_w1b.png |

|
%IMG7%magick ^ ca_wedge.png ^ -canny 0x2+1%%+30%% ^ ca_w2.png |

|
%IMG7%magick ^ ca_wedge.png ^ -canny 0x2+0.8%%+30%% ^ ca_w3.png |

|
%IMG7%magick ^ ca_wedge.png ^ -canny 0x2+0%%+30%% ^ ca_w4.png |

|
%IMG7%magick ^ ca_wedge.png ^ -canny 0x1+1%%+30%% ^ ca_w5.png |

|
%IMG7%magick ^ ca_wedge.png ^ -canny 0x0+1%%+30%% ^ ca_w5.png |

|
%IMG7%magick ^ ca_wedge.png ^ -canny 0x0+0.5%%+30%% ^ ca_w6.png |

|
%IMG7%magick ^ ca_wedge.png ^ -canny 0x0+0.4%%+30%% ^ ca_w7.png |

|
%IMG7%magick ^ ca_wedge.png ^ -canny 0x0+0.3%%+30%% ^ ca_w8.png |

|
When the low threshold is set very low, spurious edges are found within each wedge. Even so, the central point still isn't closed.
%IMG7%magick ^ ca_wedge.png ^ -canny 0x0+0.2%%+30%% ^ ca_w9.png |

|
%IMG7%magick ^ ca_wedge.png ^ -canny 0x0+0.01%%+30%% ^ ca_w10.png |

|
%IMG7%magick ^ ca_wedge.png ^ -edge 1 ^ ca_e1.png |

|
call %PICTBAT%twoBlrDiff ca_wedge.png |

|
%IMG7%magick ^ ca_wedge_2bd.png ^ -blur 0x4 ^ ca_2bdb.png |

|
We can segment an image with the Canny edge detector.
|
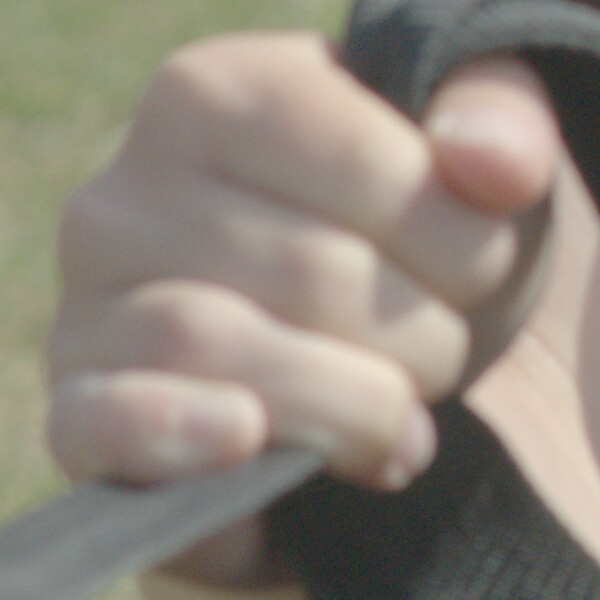
A source image. set WEB_SIZE=-resize 600x600 %IMG7%magick ^ dt_src.tiff ^ -crop 600x600+2244+2789 +repage ^ ca_src_cr.png set CA_SRC=ca_src_cr.png |
|
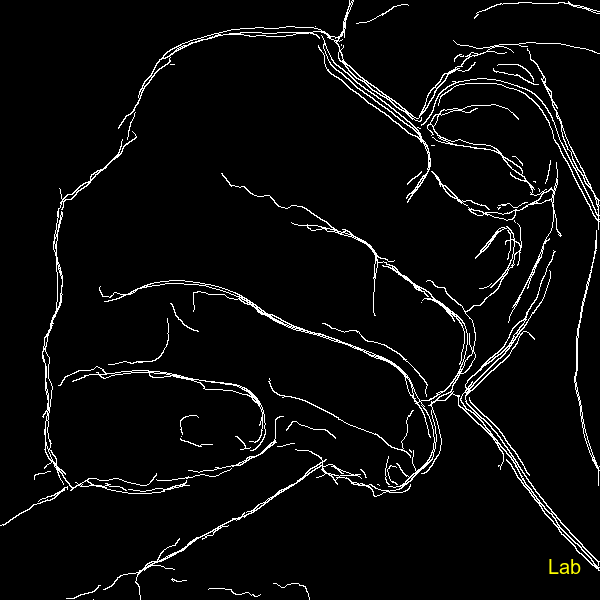
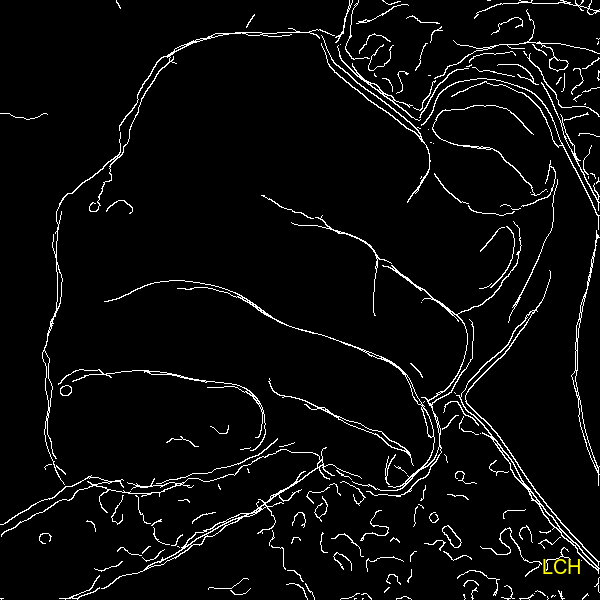
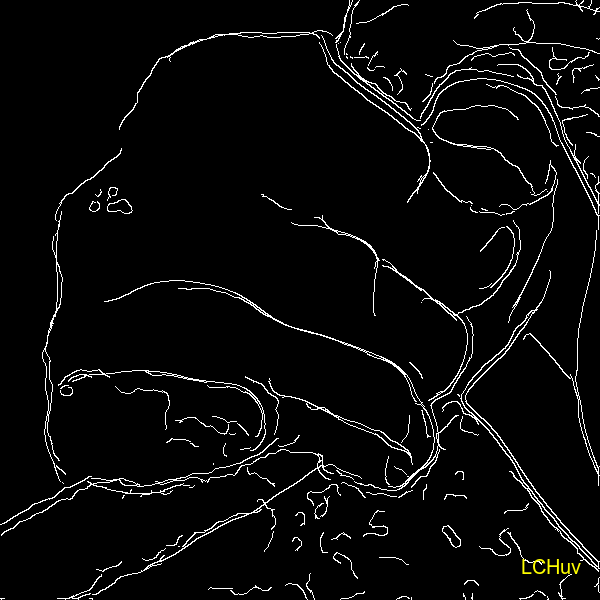
Try in various colorspaces.
for /F "usebackq" %%C in (`%IMG7%magick -list colorspace`) do (
  %IMG7%magick ^
    %CA_SRC% ^
    -colorspace %%C ^
    -separate ^
    -set colorspace sRGB ^
    -auto-level ^
    -canny 0x4+5%%+30%% ^
    -evaluate-sequence Max ^
    -background Blue -fill Yellow ^
    -pointsize 20 -gravity SouthEast ^
    -annotate 0 " %%C   \n" ^
    ca_cs_%%C.png
)
Some of these:
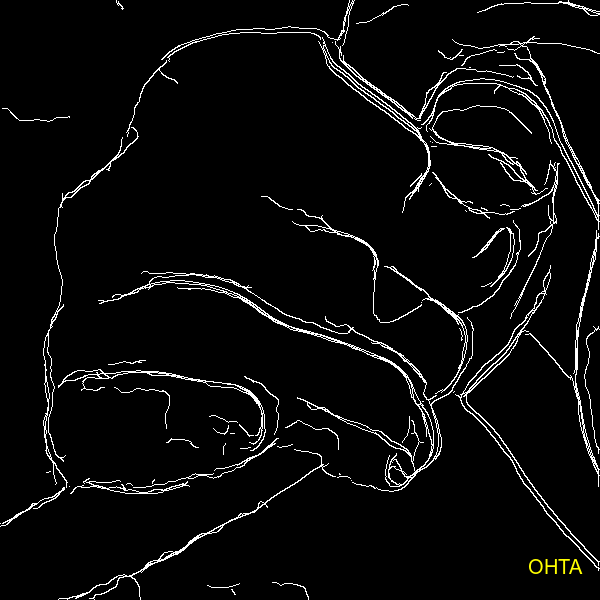
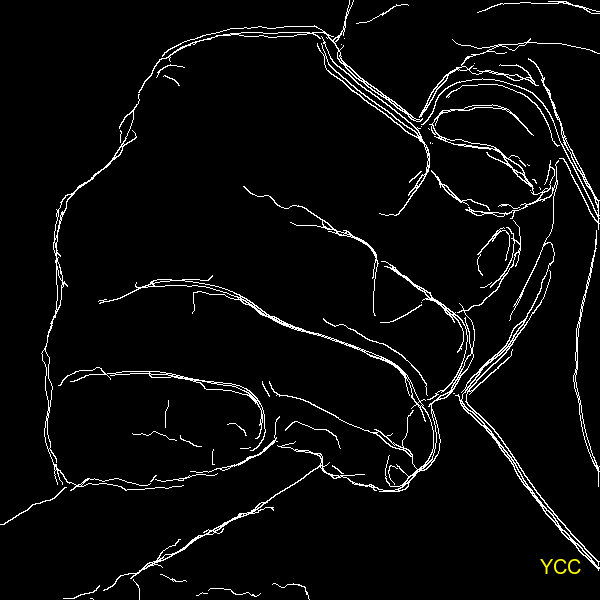
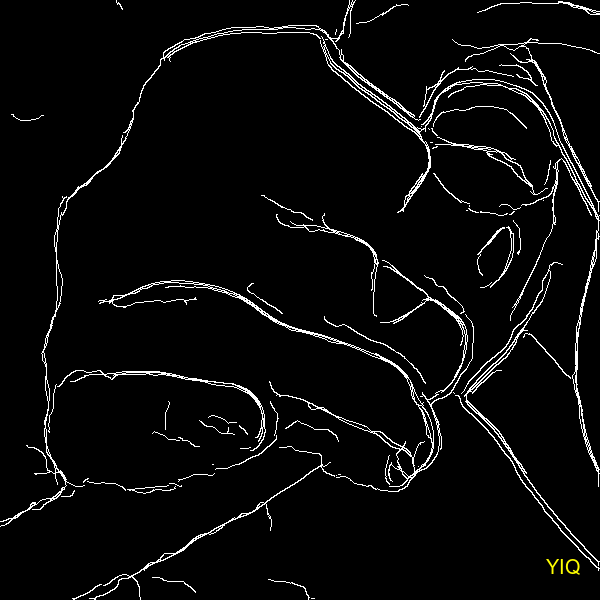
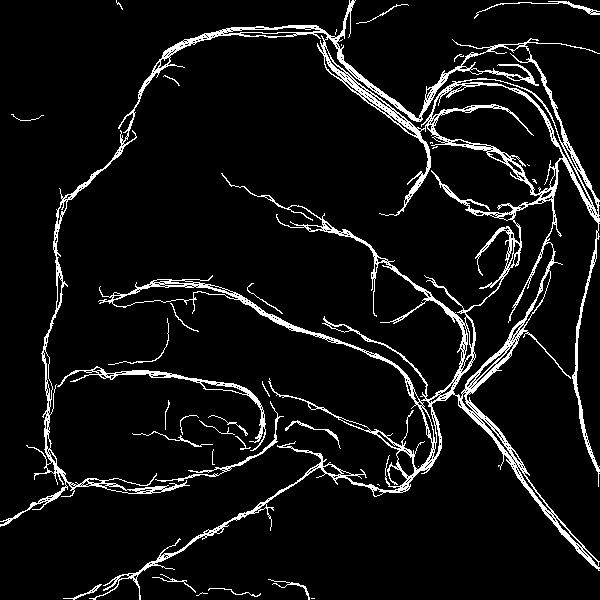
We can combine edges from multiple colorspaces.
%IMG7%magick ^
  %CA_SRC% ^
  ( -clone 0 -colorspace Lab -separate ) ^
  ( -clone 0 -colorspace YIQ -separate ) ^
  ( -clone 0 -colorspace YCC -separate ) ^
  -delete 0 ^
  -set colorspace sRGB ^
  -auto-level ^
  -canny 0x4+5%%+30%% ^
  -evaluate-sequence Max ^
  ca_cs_LabYIQ.png
)
Four Canny edges:
%IMG7%magick ^ %CA_SRC% ^ -colorspace LAB ^ -separate ^ -set colorspace sRGB ^ -auto-level ^ -canny 0x4+5%%+30%% ^ -write ca_xlab.png ^ -evaluate-sequence Max ^ -write ca_xlabf.png ^ %WEB_SIZE% ^ -auto-level ^ ca_lab.png %IMG7%magick ^ %CA_SRC% ^ -colorspace LAB ^ -separate ^ -set colorspace sRGB ^ -auto-level ^ -canny 0x10+5%%+30%% ^ -evaluate-sequence Max ^ -write ca_xlabf2.png ^ %WEB_SIZE% ^ -auto-level ^ ca_lab2.png %IMG7%magick ^ %CA_SRC% ^ -colorspace LAB ^ -separate ^ -set colorspace sRGB ^ -auto-level ^ -canny 0x2+20%%+30%% ^ -evaluate-sequence Max ^ -write ca_xlabf2a.png ^ %WEB_SIZE% ^ -auto-level ^ ca_lab2a.png %IMG7%magick ^ %CA_SRC% ^ -colorspace LAB ^ -separate ^ -set colorspace sRGB ^ -auto-level ^ -canny 0x2+0.01%%+30%% ^ -evaluate-sequence Max ^ -write ca_xlabf0.png ^ %WEB_SIZE% ^ -auto-level ^ ca_lab0.png |
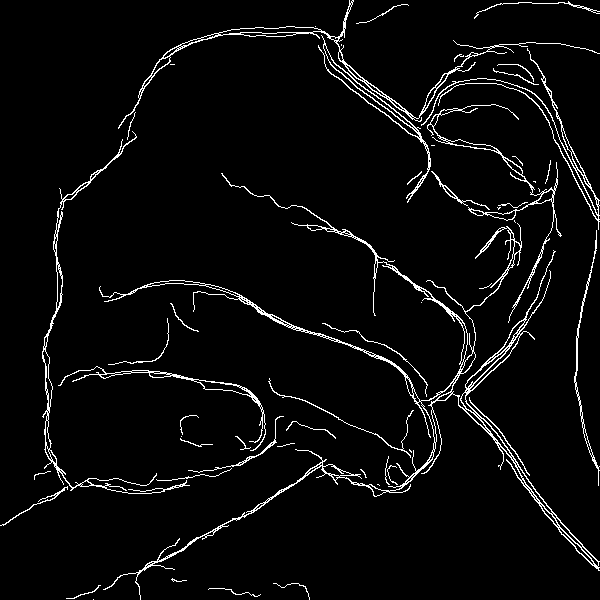
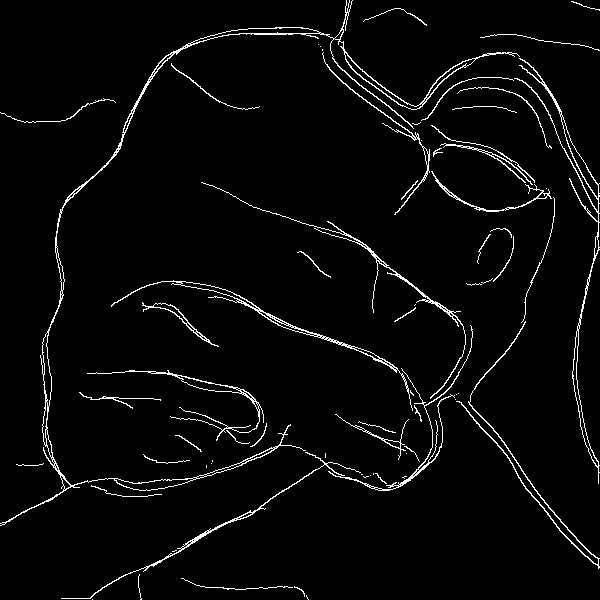
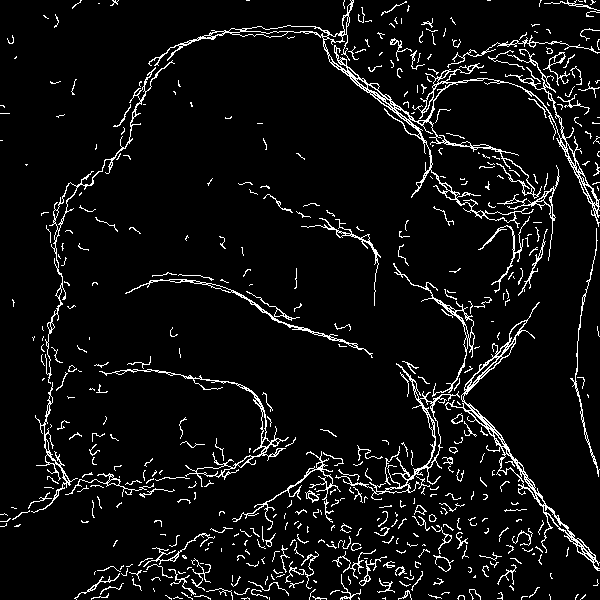
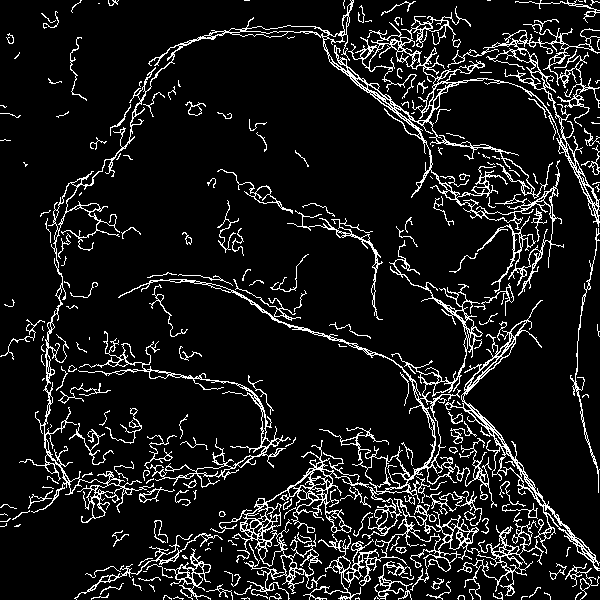
|
The same four Canny edges, but RMS of channels instead of separating:
%IMG7%magick ^ %CA_SRC% ^ -colorspace LAB ^ -grayscale RMS ^ -set colorspace sRGB ^ -auto-level ^ -canny 0x4+5%%+30%% ^ -write ca_xlabG.png ^ -evaluate-sequence Max ^ -write ca_xlabfG.png ^ %WEB_SIZE% ^ -auto-level ^ ca_labG.png %IMG7%magick ^ %CA_SRC% ^ -colorspace LAB ^ -grayscale RMS ^ -set colorspace sRGB ^ -auto-level ^ -canny 0x10+5%%+30%% ^ -evaluate-sequence Max ^ -write ca_xlabf2G.png ^ %WEB_SIZE% ^ -auto-level ^ ca_lab2G.png %IMG7%magick ^ %CA_SRC% ^ -colorspace LAB ^ -grayscale RMS ^ -set colorspace sRGB ^ -auto-level ^ -canny 0x2+20%%+30%% ^ -evaluate-sequence Max ^ -write ca_xlabf2aG.png ^ %WEB_SIZE% ^ -auto-level ^ ca_lab2aG.png %IMG7%magick ^ %CA_SRC% ^ -colorspace LAB ^ -separate ^ -set colorspace sRGB ^ -auto-level ^ -canny 0x2+0.01%%+30%% ^ -evaluate-sequence Max ^ -write ca_xlabf0G.png ^ %WEB_SIZE% ^ -auto-level ^ ca_lab0G.png |
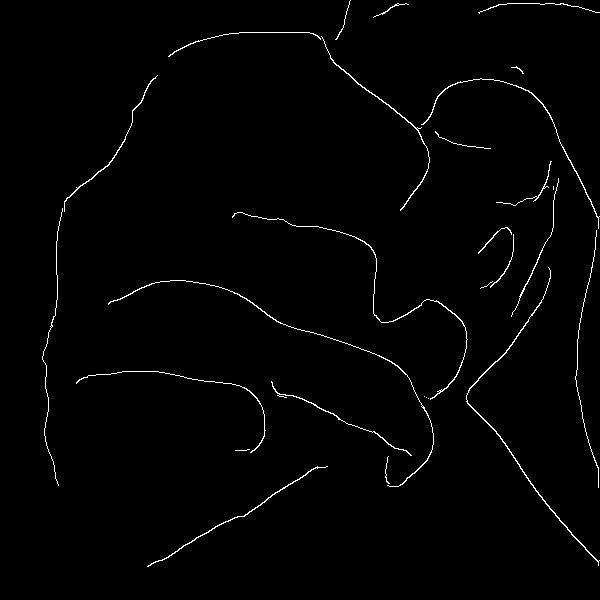
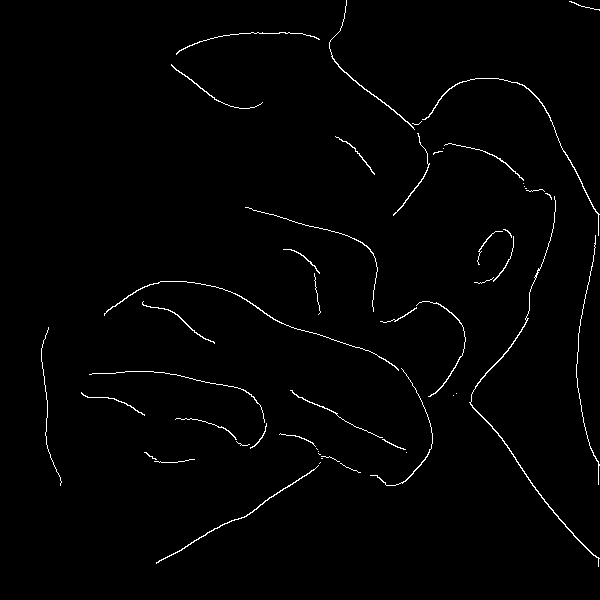
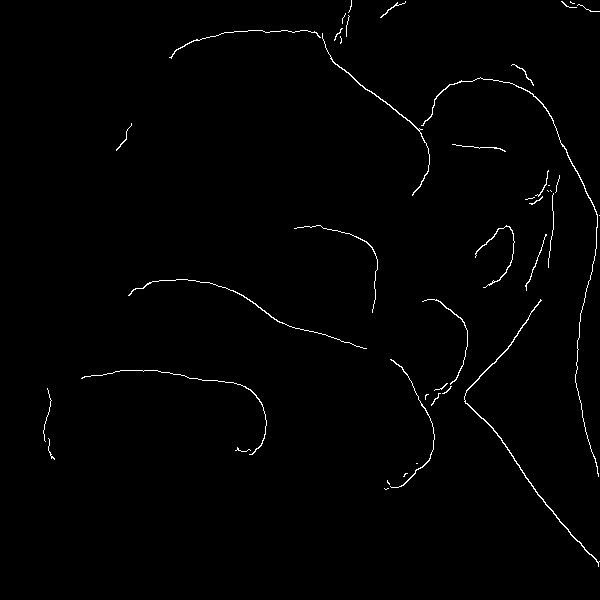
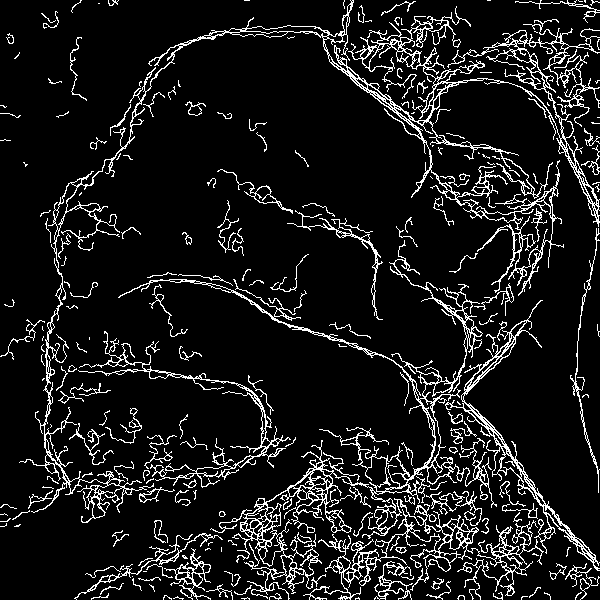
|
call %PICTBAT%twoBlrDiff %CA_SRC% %IMG7%magick ^ ca_src_cr_2bd.png ^ -blur 0x8 ^ -auto-level ^ ca_src_cr_2bd.png %IMG7%magick ^ ca_src_cr_2bd.png ^ -morphology Erode Diamond ^ -morphology Thinning:-1 Skeleton ^ -morphology Thinning:-1 LineEnds ^ ca_skel.png |
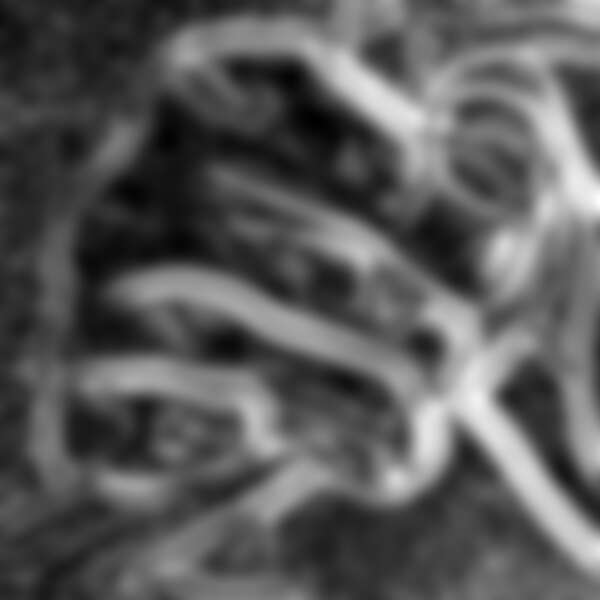
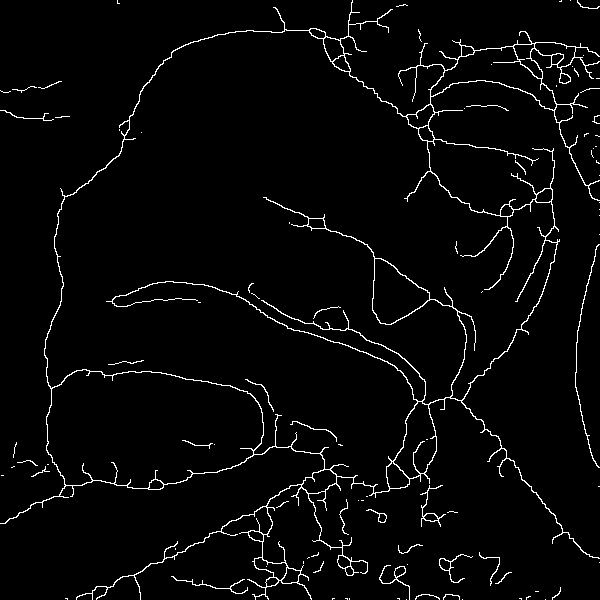
|
See Morphology: Smooth.
|
Increasing the disk size closes gaps we want closed,
Skeleton:3 would break lines I don't want broken,
%IMG7%magick ^ ca_cs_LabYIQ.png ^ -morphology Close Disk:3.0 ^ -write ca_cls.png ^ -morphology Thinning:-1 Skeleton:3 ^ -write ca_skel.png ^ -morphology Thinning:-1 LineEnds ^ -morphology Thinning:-1 Diagonals ^ -morphology Thinning Corners ^ -write ca_skel4.png ^ -morphology Thinning LineEnds:4 ^ ca_smth.png %IMG7%magick ^ %CA_SRC% ^ ( ca_smth.png -alpha set -channel A -evaluate set 50%% +channel ) ^ -composite ^ ca_smtha.png |
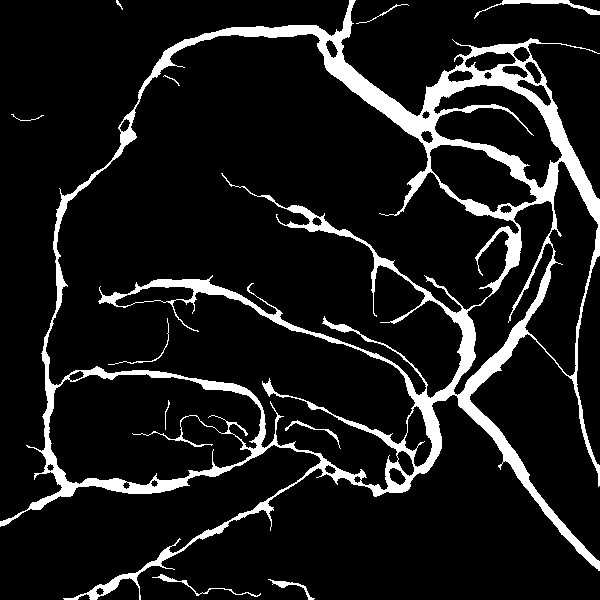

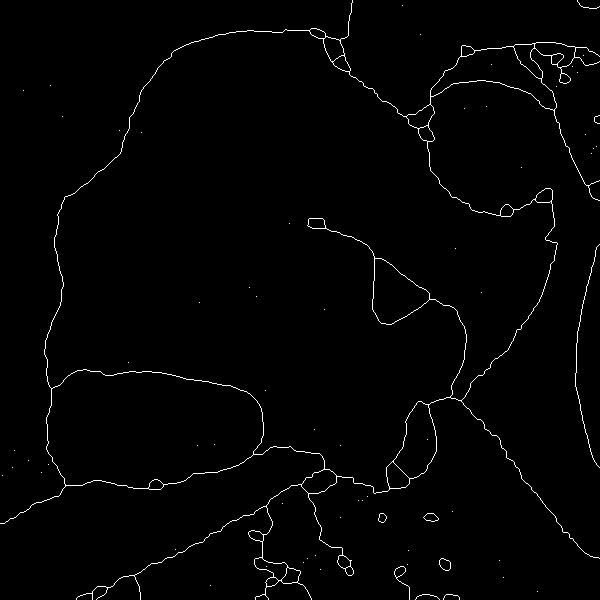
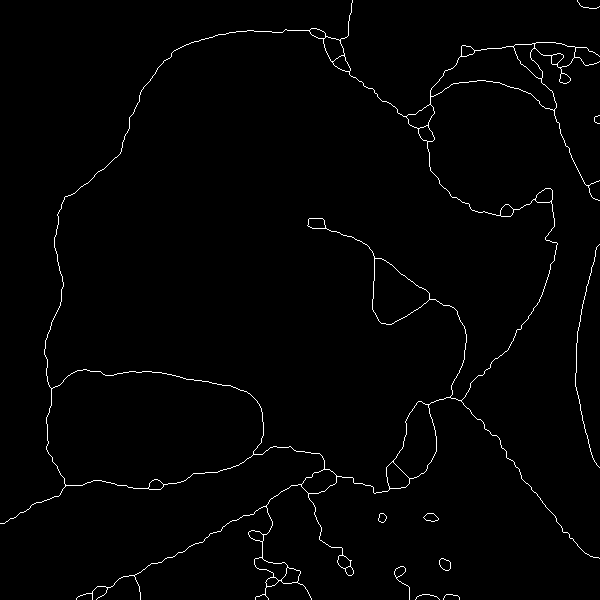
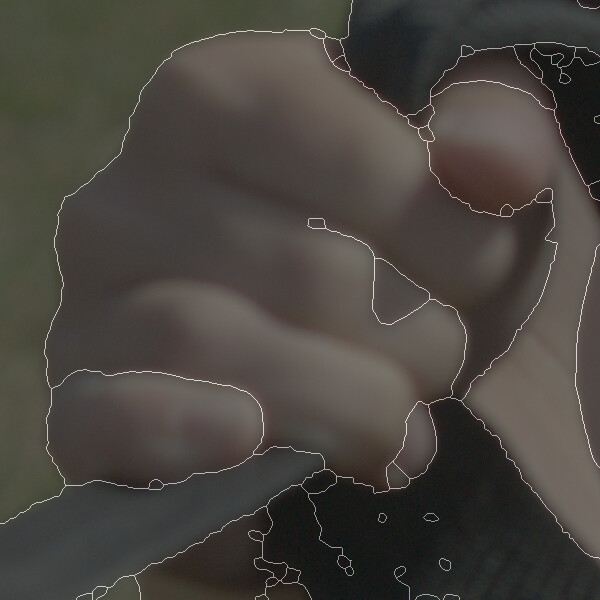
|
We can smooth the lines by (a) bluring, thresholding and repeating in IM or (b) using potrace. Blurring also shrinks loops, closing some of them.
|
%IMG7%magick ^ ca_smth.png ^ -blur 0x2 ^ -fill #fff +opaque #000 ^ -write ca_cls2.png ^ -morphology Thinning:-1 Skeleton ^ -write ca_skel2.png ^ -morphology Thinning:-1 LineEnds ^ -morphology Thinning:-1 Diagonals ^ -morphology Thinning Corners ^ -write ca_skel42.png ^ -morphology Thinning LineEnds:4 ^ ca_smth2.png %IMG7%magick ^ %CA_SRC% ^ ( ca_smth2.png -alpha set -channel A -evaluate set 50%% +channel ) ^ -composite ^ ca_smtha2.png |
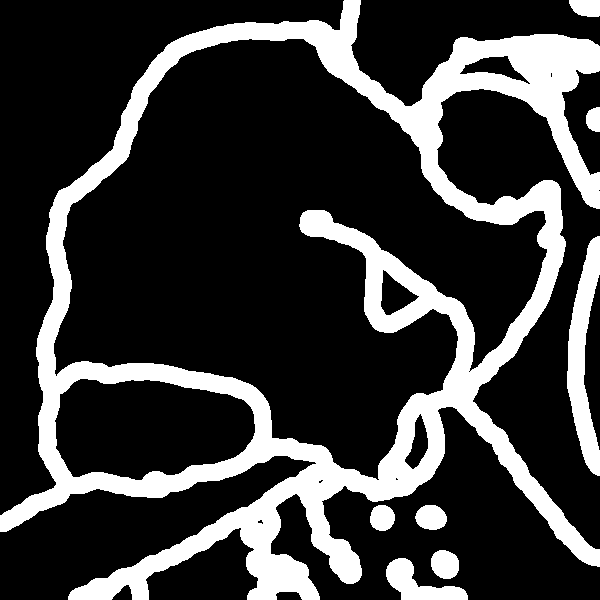
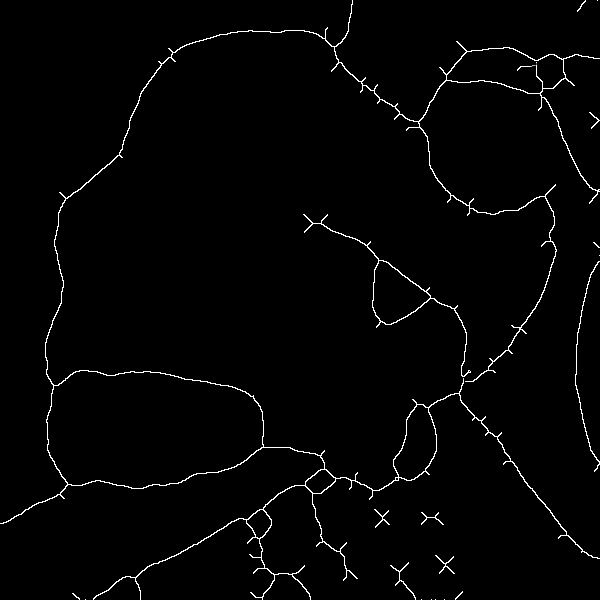
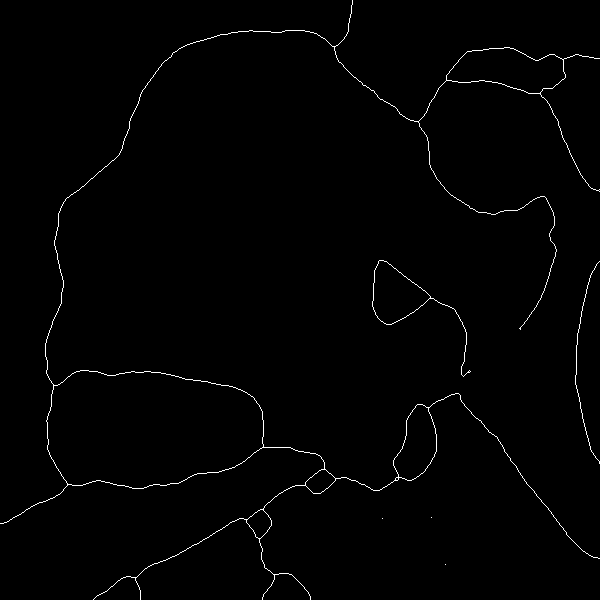
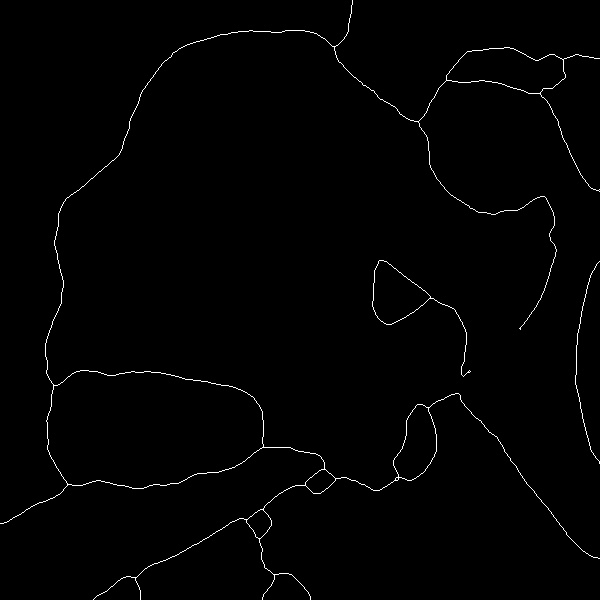
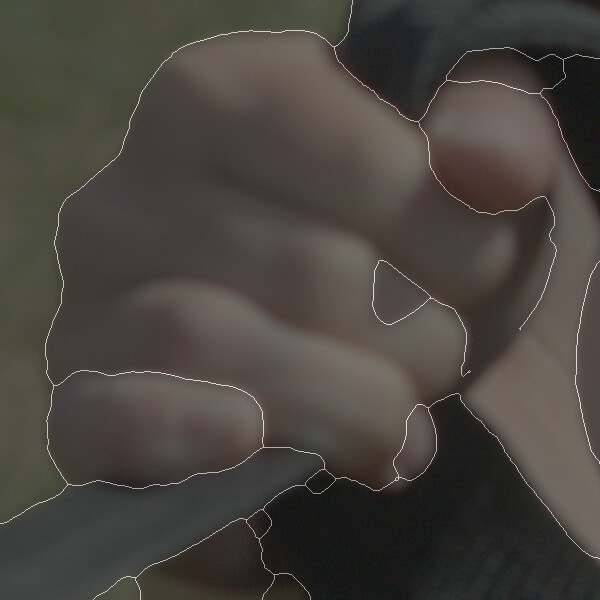
|
Lines that previously hit an edge at an angle are now more perpendicular to the edge, sadly. Similarly, where three lines met at a T-junction, lines are now curved so they meet at 120°.
Using potrace:
|
call %PICTBAT%setInkPath

%IMG7%magick ^
  ca_smth.png ^
  ca_smth.pnm

%POTRACEDIR%potrace -r 90 -s -o ca_smth.svg ca_smth.pnm
del ca_smth.pnm


%IMG7%magick ^
  %CA_SRC% ^
  ( ^
    -density 90 -units PixelsPerInch ^
    ca_smth.svg ^
    -alpha set -channel A -evaluate set 50%% +channel ^
  ) ^
  -composite ^
  ca_svgo.png
|
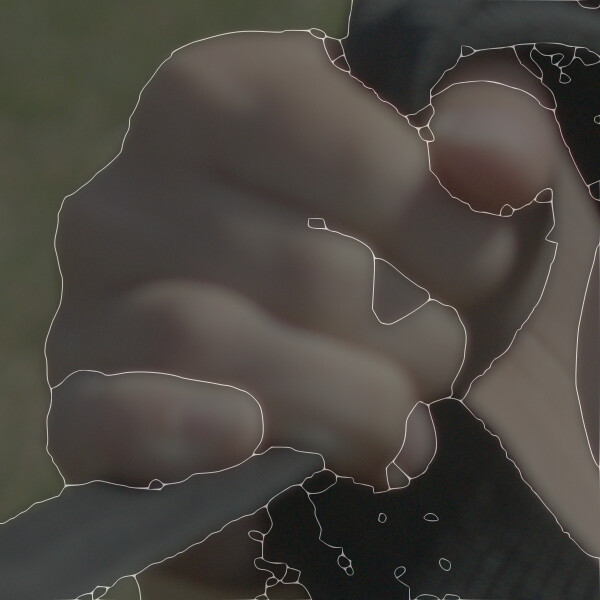
|
Using potrace to smooth lines, the angles between lines, and between each line and an edge, have been unchanged.
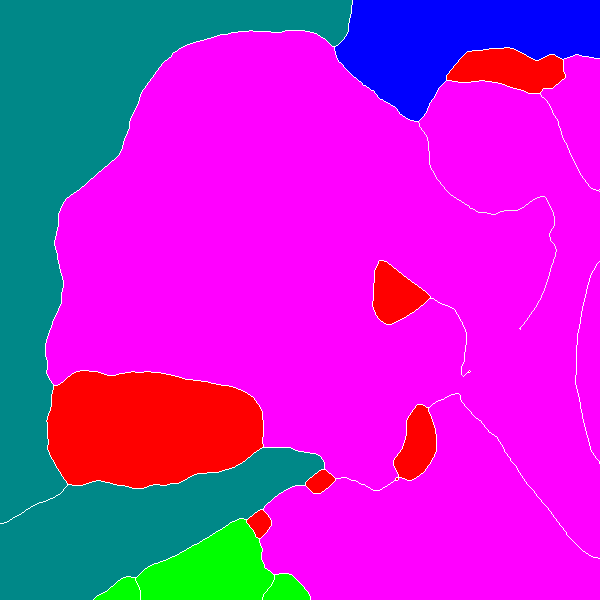
The segment image (white lines on black background) divides the source image into segments. Some attributes of each segment are:
For example, the script listSegments.bat lists the first three of those:
call %PICTBAT%listSegments ca_smth2.png ca_segs.lis

%IMG7%magick %lsTEMPIMG% ca_segs.png
0,0,0,IsEdge 0,524,24147,IsEdge 353,0,18324,IsEdge 599,59,4681,IsEdge 599,190,1,IsEdge 599,192,178097,IsEdge 599,262,3273,IsEdge 599,559,39684,IsEdge 94,599,657,IsEdge 141,599,7089,IsEdge 263,599,842,IsEdge 504,48,3482,NotEdge 379,261,2181,NotEdge 80,371,20568,NotEdge 469,371,1,NotEdge 417,405,2013,NotEdge 321,470,423,NotEdge 396,478,4,NotEdge 260,510,413,NotEdge |
|
The sum of the pixels in the segments will be less than the image size, as the white lines are not counted as in any segment.
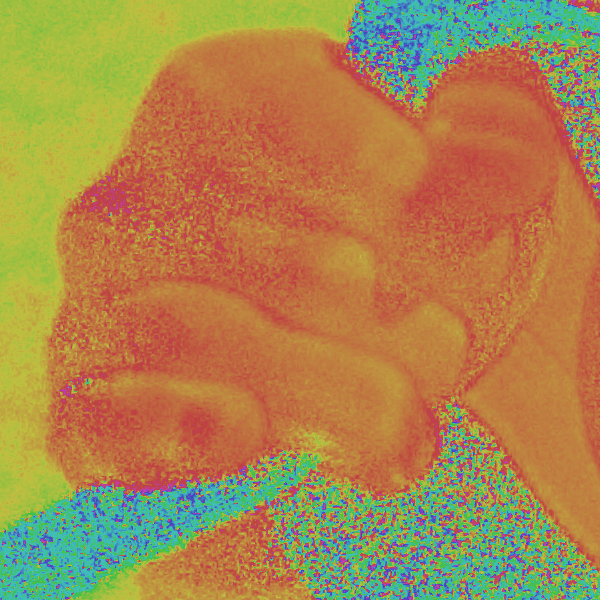
More complex processing could be performed. For example, the average colours of each segment could be compared in order to correlate them. For this, reducing the image to just the hue can be useful. Real-world objects that are low in saturation (black, gray, white) are very good at picking up colours from surrounding objects (the surrounding objects reflect coloured light).
%IMG7%magick ^ %CA_SRC% ^ -colorspace HSL ^ -channel GB -evaluate set 50%% ^ -colorspace sRGB ^ ca_justHue.png |
|
This does a fairly good job of distinguishing between skin, grass and "black" straps, and has correctly picked up the grass and skin colour on the bottom edge, near the left side. Sadly, the black strap in the palm of the hand has picked up colour from the skin.
For an alternative see GrowCut segmentation.
IM doesn't (but really should) have a read mask, so finding the average colour of each segment is awkward. We could use methods from Inner Trim to crop a rectangle from each segment.
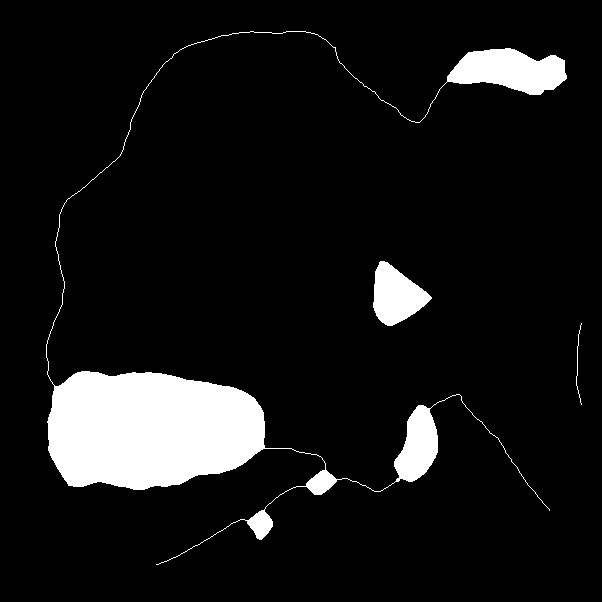
We can select only the segments that don't touch an image edge by specifying the colours to listSegments (black for the edge segments and white for the centre segments), then pruning lines.
set lsLEFT_COL=#f00 set lsTOP_COL=#f00 set lsRIGHT_COL=#f00 set lsBOTTOM_COL=#f00 set lsCENT_COL=#fff call %PICTBAT%listSegments ca_smth2.png ca_segs2.lis set lsLEFT_COL= set lsTOP_COL= set lsRIGHT_COL= set lsBOTTOM_COL= set lsCENT_COL= %IMG7%magick ^ %lsTEMPIMG% ^ -fill #000 +opaque #fff ^ -bordercolor #000 -border 1 ^ -morphology Thinning:-1 LineEnds ^ -morphology Thinning LineEnds:4 ^ ca_segs2.png |
|
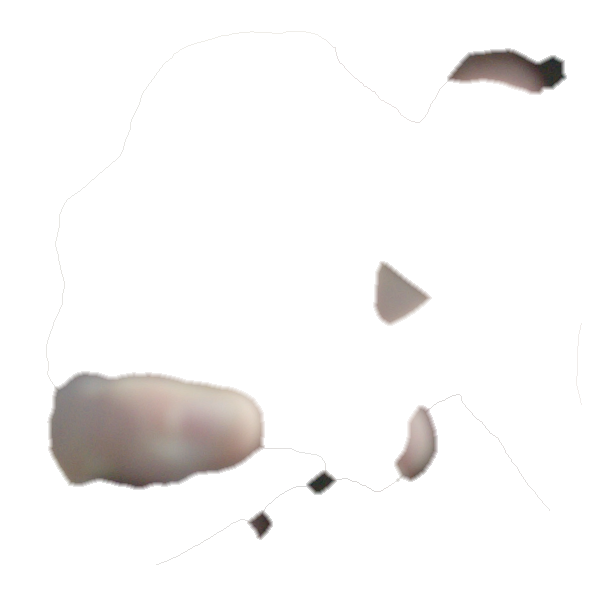
We probably want to feather the edges before using this as a transparency mask.
call %PICTBAT%featherEdge ca_segs2.png 4 0 %IMG7%magick ^ %CA_SRC% ^ %feOUTFILE% ^ -compose CopyOpacity -composite ^ ca_ftr.png |
|
For convenience, .bat scripts are also available in a single zip file. See Zipped BAT files.
rem From %1 a segment image file (white lines on black background)
rem lists segments to %2 CSV file.
@rem
@rem Updated:
@rem   22-August-2022 Upgraded for IM v7.
@rem

@if "%2"=="" findstr /B "rem @rem" %~f0 & exit /B 1

@setlocal enabledelayedexpansion

@call echoOffSave

call %PICTBAT%setInOut %1 ls

set INFILE=%1
set OUTCSV=%2

del %OUTCSV% >nul

set TEMPEXT=.miff
set TEMPDIR=%TEMP%
set TEMPIMG=%TEMPDIR%\%~n1_ls%TEMPEXT%

if "%lsLEFT_COL%"=="" set lsLEFT_COL=#088
if "%lsTOP_COL%"=="" set lsTOP_COL=#00f
if "%lsRIGHT_COL%"=="" set lsRIGHT_COL=#f0f
if "%lsBOTTOM_COL%"=="" set lsBOTTOM_COL=#0f0
if "%lsCENT_COL%"=="" set lsCENT_COL=#f00

%IMG7%magick %INFILE% -alpha off %TEMPIMG%

rem We find black pixels, and floodfill.

for /F "usebackq" %%L in (`%IMG7%magick ^
  %TEMPIMG% ^
  -format "WW=%%w\nHH=%%h\nWm1=%%[fx:w-1]\nHm1=%%[fx:h-1]" ^
  info:`) do set %%L


:loopLeft

set BLACK_X=

for /F "usebackq tokens=1-2 delims=, " %%X ^
in (`%IMG7%magick ^
  %TEMPIMG% ^
  -crop 1x%HH%+0+0 +repage ^
  +transparent #000 ^
  sparse-color:`) ^
do set BLACK_X=%%X& set BLACK_Y=%%Y

if not "%BLACK_X%"=="" (
  for /F "usebackq" %%L in (`%IMG7%magick ^
    %TEMPIMG% ^
    -fill %lsLEFT_COL% ^
    ^( +clone -draw "color %BLACK_X%,%BLACK_Y% floodfill" -write mpr:FILLED ^) ^
    -metric AE -compare -format "NUM_PIX=%%[distortion]" -write info: ^
    -delete 0 ^
    mpr:FILLED ^
    %TEMPIMG%`) do set %%L

  echo NUM_PIX=!NUM_PIX!

  echo %BLACK_X%,%BLACK_Y%,!NUM_PIX!,IsEdge >>%OUTCSV%

  goto loopLeft
)


:loopTop

set BLACK_X=

for /F "usebackq tokens=1-2 delims=, " %%X ^
in (`%IMG7%magick ^
  %TEMPIMG% ^
  -crop %WW%x1+0+0 +repage ^
  +transparent #000 ^
  sparse-color:`) ^
do set BLACK_X=%%X& set BLACK_Y=%%Y

if not "%BLACK_X%"=="" (
  for /F "usebackq" %%L in (`%IMG7%magick ^
    %TEMPIMG% ^
    -fill %lsTOP_COL% ^
    ^( +clone -draw "color %BLACK_X%,%BLACK_Y% floodfill" -write mpr:FILLED ^) ^
    -metric AE -compare -format "NUM_PIX=%%[distortion]" -write info: ^
    -delete 0 ^
    mpr:FILLED ^
    %TEMPIMG%`) do set %%L

  echo %BLACK_X%,%BLACK_Y%,!NUM_PIX!,IsEdge >>%OUTCSV%

  goto loopTop
)


:loopRight

set BLACK_X=

for /F "usebackq tokens=1-2 delims=, " %%X ^
in (`%IMG7%magick ^
  %TEMPIMG% ^
  -crop 1x%HH%+%Wm1%+0 +repage ^
  +transparent #000 ^
  sparse-color:`) ^
do set BLACK_X=%%X& set BLACK_Y=%%Y

if not "%BLACK_X%"=="" (
  set /A BLACK_X+=%Wm1%

  for /F "usebackq" %%L in (`%IMG7%magick ^
    %TEMPIMG% ^
    -fill %lsRIGHT_COL% ^
    ^( +clone -draw "color !BLACK_X!,%BLACK_Y% floodfill" -write mpr:FILLED ^) ^
    -metric AE -compare -format "NUM_PIX=%%[distortion]" -write info: ^
    -delete 0 ^
    mpr:FILLED ^
    %TEMPIMG%`) do set %%L

  echo NUM_PIX=!NUM_PIX!

  echo !BLACK_X!,%BLACK_Y%,!NUM_PIX!,IsEdge >>%OUTCSV%

  goto loopRight
)


:loopBottom

set BLACK_X=

for /F "usebackq tokens=1-2 delims=, " %%X ^
in (`%IMG7%magick ^
  %TEMPIMG% ^
  -crop %WW%x1+0+%Hm1% +repage ^
  +transparent #000 ^
  sparse-color:`) ^
do set BLACK_X=%%X& set BLACK_Y=%%Y

if not "%BLACK_X%"=="" (
  set /A BLACK_Y+=%Hm1%

  for /F "usebackq" %%L in (`%IMG7%magick ^
    %TEMPIMG% ^
    -fill %lsBOTTOM_COL% ^
    ^( +clone -draw "color %BLACK_X%,!BLACK_Y! floodfill" -write mpr:FILLED ^) ^
    -metric AE -compare -format "NUM_PIX=%%[distortion]" -write info: ^
    -delete 0 ^
    mpr:FILLED ^
    %TEMPIMG%`) do set %%L

  echo NUM_PIX=!NUM_PIX!

  echo %BLACK_X%,!BLACK_Y!,!NUM_PIX!,IsEdge >>%OUTCSV%

  goto loopBottom
)


:loopCent

set BLACK_X=

for /F "usebackq tokens=1-2 delims=, " %%X ^
in (`%IMG7%magick ^
  %TEMPIMG% ^
  +transparent #000 ^
  sparse-color:`) ^
do set BLACK_X=%%X& set BLACK_Y=%%Y

if not "%BLACK_X%"=="" (
  for /F "usebackq" %%L in (`%IMG7%magick ^
    %TEMPIMG% ^
    -fill %lsCENT_COL% ^
    ^( +clone -draw "color %BLACK_X%,%BLACK_Y% floodfill" -write mpr:FILLED ^) ^
    -metric AE -compare -format "NUM_PIX=%%[distortion]" -write info: ^
    -delete 0 ^
    mpr:FILLED ^
    %TEMPIMG%`) do set %%L

  echo %BLACK_X%,%BLACK_Y%,!NUM_PIX!,NotEdge >>%OUTCSV%

  goto loopCent
)


type %OUTCSV%

call @echoRestore

@endlocal & set lsTEMPIMG=%TEMPIMG%
rem From image %1, assumed white image on black background,
rem feathers the edge %2 pixels inside and %3 pixels outside.
rem Optional %4 is output file.
@rem
@rem Updated:
@rem   22-August-2022 Upgraded for IM v7.
@rem

@if "%2"=="" findstr /B "rem @rem" %~f0 & exit /B 1

@setlocal enabledelayedexpansion

@call echoOffSave

call %PICTBAT%setInOut %1 fe

if not "%4"=="" set OUTFILE=%4


set PIX_IN=%2
if "%PIX_IN%"=="" set PIX_IN=5

set PIX_OUT=%3
if "%PIX_OUT%"=="" set PIX_OUT=5

set BOTH=0
if not %PIX_OUT%==0 if not %PIX_IN%==0 set BOTH=1

set DIST_KNL=Euclidean:7

if %BOTH%==1 (
  set /A NUM_IN=%PIX_OUT%+%PIX_IN%

  %IMG7%magick ^
    %INFILE% ^
    -negate ^
      -morphology Distance "%DIST_KNL%,%PIX_OUT%^!" ^
      -fill #000 +opaque #fff ^
      -negate ^
    -morphology Distance "%DIST_KNL%,!NUM_IN!^!" ^
    %OUTFILE%
) else if not %PIX_OUT%==0 (
  %IMG7%magick ^
    %INFILE% ^
    -negate ^
      -morphology Distance "%DIST_KNL%,%PIX_OUT%^!" ^
      -negate ^
    %OUTFILE%
) else if not %PIX_IN%==0 (
  %IMG7%magick ^
    %INFILE% ^
    -morphology Distance "%DIST_KNL%,%PIX_IN%^!" ^
    %OUTFILE%
) else (
  %IMG7%magick ^
    %INFILE% ^
    %OUTFILE%
)


@call echoRestore

endlocal & set feOUTFILE=%OUTFILE%
All images on this page were created by the commands shown, using:
%IMG7%magick -version
Version: ImageMagick 7.1.0-49 Q16-HDRI x64 7a3f3f1:20220924 https://imagemagick.org
Copyright: (C) 1999 ImageMagick Studio LLC
License: https://imagemagick.org/script/license.php
Features: Cipher DPC HDRI OpenCL
Delegates (built-in): bzlib cairo freetype gslib heic jng jp2 jpeg jxl lcms lqr lzma openexr pangocairo png ps raqm raw rsvg tiff webp xml zip zlib
Compiler: Visual Studio 2022 (193331630)
To improve internet download speeds, some images may have been automatically converted (by ImageMagick, of course) from PNG or TIFF or MIFF to JPG.
Source file for this web page is canny.h1. To re-create this web page, check that Inkscape is on the path, then execute "procH1 canny".
This page, including the images, is my copyright. Anyone is permitted to use or adapt any of the code, scripts or images for any purpose, including commercial use.
Anyone is permitted to re-publish this page, but only for non-commercial use.
Anyone is permitted to link to this page, including for commercial use.
Page version v1.0 24-November-2014.
Page created 13-Nov-2022 18:16:22.
Copyright © 2022 Alan Gibson.