snibgo's ImageMagick pages
Inner Trim
Sometimes we want to entirely remove an uneven border. In other words, we want to find a rectangle that contains a constant colour.
Afer this page was written, IM has added "-define trim:percent-background=0%" to entirely -trim off a specified colour. That is generally a better solution than the code shown below.
Suppose we have an image that is mostly white with an irregular black border. It is not rectangular, and the graduation is not smooth.
The usual ImageMagick "-trim" command can remove border pixels that are black, or within a fuzz range of black.
ImageMagick doesn't contain a simple command for removing all non-white border pixels. [Update: it does now: turn all non-white pixels black, then -define trim:percent-background=0% -trim. See
Enhanced -trim operator.]
However, here is a fairly simple script to entirely remove the border. I'll define the border as "any colour apart from white". (If an image uses other colours, it is quite easy to convert it to white/non-white.) The problem is then to find a rectangle that is entirely white. Many rectangles can be found. Which one do we want?
- The tallest rectangle that is entirely white.
- The widest rectangle that is entirely white.
- The rectangle with the largest area that is entirely white.
- An arbitrary rectangle,
In any case, the chosen rectangle should be maximal, that is, it should not be capable of being extended in any direction.
My script innerTrim.bat finds an arbitrary maximal rectangle. It is not guaranteed to be the tallest, widest or largest area possible. The script finds the trim coordinates, suitable for a "-crop". The code below runs the script, echoes the coordinates, and trims the source file. The trimmed result is entirely white. A more common procedure might be to prepare a black/white image from a colour photograph, find the trim coodinates, then trim the colour photo.
call %PICTBAT%innerTrim %SRC%
if ERRORLEVEL 1 goto error
echo %INNER_TRIM% "%INNER_TRIM_RECT%"
182x106+51+40 "rectangle 51 40 232 145"
%IMG7%magick ^
  %SRC% ^
  -crop %INNER_TRIM% ^
  -bordercolor Black -border 1 ^
  it_trimmed1.png
|

|
As expected, before adding the black border, the result is entirely white.
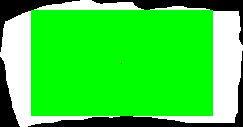
To see the effect more clearly, we can set itDEBUG_FILE before the script, which will create a copy of the source with a green rectangle showing the crop and a single red pixel showing the seed point.
set itDEBUG_FILE=it_trimmed2.png
call %PICTBAT%innerTrim %SRC%
if ERRORLEVEL 1 goto error
echo %INNER_TRIM%  "%INNER_TRIM_RECT%"  Area: %INNER_TRIM_AREA%
182x106+51+40 "rectangle 51 40 232 145" Area: 19292
|

|
|
We can see more clearly by working from a binary black/white source.
set itDEBUG_FILE=it_trimmed3.png
call %PICTBAT%innerTrim it_trimbw.png
if ERRORLEVEL 1 goto error
echo %INNER_TRIM%  "%INNER_TRIM_RECT%"  Area: %INNER_TRIM_AREA%
182x106+31+10 "rectangle 31 10 212 115" Area: 19292
We should have specified that white pixels might extend to the border.
|
|
|
Use itWHITE_EDGE in case white extends to the outside edge.
set itWHITE_EDGE=1
set itDEBUG_FILE=it_trimmed4.png
call %PICTBAT%innerTrim it_trimbw.png
if ERRORLEVEL 1 goto error
echo %INNER_TRIM%  "%INNER_TRIM_RECT%"  Area: %INNER_TRIM_AREA%
182x106+31+10 "rectangle 31 10 212 115" Area: 19292
|

|
If the top of the green rectangle was slightly lower, the rectangle could be wider. We can force this with a very low seed point, so it collides with the right side before the top.
|
Use a very low seed point.
set itWHITE_EDGE=1
set itDEBUG_FILE=it_trimmed5.png
call %PICTBAT%innerTrim it_trimbw.png 126 112
if ERRORLEVEL 1 goto error
echo %INNER_TRIM%  "%INNER_TRIM_RECT%"  Area: %INNER_TRIM_AREA%
211x104+25+12 "rectangle 25 12 235 115" Area: 21944
|

|
The script works by starting at a seed point then works outwards in a spiral. If the seed point isn't white, the script won't find a rectangle. The best rectangle comes from choosing the best seed point.
By default, innerTrim.bat chooses the centre of the image as the seed point. There are some obvious alternatives:
- An arbitrary white point, such as the first one found by sparse-color:.
- A white point that is most distant from a non-white point.
- The nearest white point to the centre.
- Try all the white points that are most distant from a non-white point (ie local maxima).
|
Use the first white pixel as seed point.
FOR /F "usebackq tokens=1-2 delims=, " %%X ^
IN (`%IMG7%magick it_trimbw.png -alpha set +transparent White sparse-color:`) ^
DO set whiteX=%%X & set whiteY=%%Y

echo whiteX=%whiteX% whiteY=%whiteY%

set itWHITE_EDGE=1
set itDEBUG_FILE=it_trimmed6.png

call %PICTBAT%innerTrim it_trimbw.png %whiteX% %whiteY%
if ERRORLEVEL 1 goto error
echo %INNER_TRIM%  "%INNER_TRIM_RECT%"  Area: %INNER_TRIM_AREA%
whiteX=80  whiteY=0
12x118+80+0  "rectangle 80 0 91 117"  Area: 1416
Not a great solution.
|

|
|
Use one of the white pixels that is furthest from a boundary as seed point.
We write and show the intermediate result purely for illustration.
FOR /F "usebackq tokens=1-2 delims=, " %%X ^
IN (`%IMG7%magick ^
  it_trimbw.png ^
  -morphology Distance Euclidean:4 -auto-level ^
  -write it_farbound.png ^
  -alpha set +transparent White sparse-color:`) ^
DO set whiteX=%%X & set whiteY=%%Y

echo whiteX=%whiteX% whiteY=%whiteY%

set itWHITE_EDGE=1
set itDEBUG_FILE=it_trimmed7.png

call %PICTBAT%innerTrim it_trimbw.png %whiteX% %whiteY%
if ERRORLEVEL 1 goto error
echo %INNER_TRIM%  "%INNER_TRIM_RECT%"  Area: %INNER_TRIM_AREA%
whiteX=80  whiteY=59
182x106+31+10  "rectangle 31 10 212 115"  Area: 19292
The solution happens to be identical to the default centre pixel.
|


|
|
More than one pixel may be equally furthest from a boundary. We can find the centroid of these points by averaging the X- and Y-coordinates, and use that as the seed point.
set /A sigX=0
set /A sigY=0
set /A nCount=0

FOR /F "usebackq tokens=1-2 delims=, " %%X ^
IN (`%IMG7%magick ^
  it_trimbw.png ^
  -morphology Distance Euclidean:4 -auto-level ^
  txt:^|%windir%\system32\find "white"`) ^
do (
  set /A sigX+=%%X
  set /A sigY+=%%Y
  set /A nCount+=1
)

for /F "usebackq tokens=1,2 delims=,:" %%L ^
in (`%IMG7%magick identify ^
  -format "whiteX=%%[fx:int(%sigX%/%nCount%+0.5)]\nwhiteY=%%[fx:int(%sigY%/%nCount%+0.5)]" ^
  xc:`) ^
do set %%L

echo whiteX=%whiteX% whiteY=%whiteY%

set itWHITE_EDGE=1
set itDEBUG_FILE=it_trimmed7a.png

call %PICTBAT%innerTrim it_trimbw.png %whiteX% %whiteY%
if ERRORLEVEL 1 goto error
echo %INNER_TRIM%  "%INNER_TRIM_RECT%"  Area: %INNER_TRIM_AREA%
whiteX=0 whiteY=0
0x1+0+0  ""  Area: 0
This solution also happens to be identical to the default centre pixel.
|

|
When the border is highly irregular, the centre point may not be white. We will look at three methods:
- Seed point at centre.
- Seed point at nearest white pixel to centre.
- Seed point is furthest white pixel from a boundary.
|
An example source image, trimTestB.png.
set SRC=trimTestB.png
|

|
|
The default seed point is at the centre.
set itDEBUG_FILE=it_trimmedB2.png
call %PICTBAT%innerTrim %SRC%
if ERRORLEVEL 1 goto error
echo %INNER_TRIM%  "%INNER_TRIM_RECT%"  Area: %INNER_TRIM_AREA%
0x1+150+100 "" Area: 0
The found width of %INNER_TRIM% is zero, %INNER_TRIM_RECT% is empty, and %INNER_TRIM_AREA% is zero, indicating that a solution was not found. The debug image shows the seed point in red, but no green rectangle.
The method is hopeless for this source image.
|

|
|
Use the white pixel nearest to the centre as seed point:
Radial gradient with white at centre, blacken where the source isn't white,
and find the lightest point.
We write and show the intermediate result purely for illustration.
FOR /F %%L ^
IN ('%IMG7%magick identify -format ^
  "WW=%%w\nHH=%%h\nW_2=%%[fx:w/2]\nW_2=%%[fx:h/2]\nSQ_DIM=%%[fx:int(sqrt(w*w+h*h)+1)]" ^
  %SRC%') ^
DO set %%L

FOR /F "usebackq tokens=1-2 delims=, " %%X ^
IN (`%IMG7%magick ^
  -size %SQ_DIM%x%SQ_DIM% ^
  radial-gradient: ^
  -gravity center ^
  -crop %WW%x%HH%+0+0 +repage ^
  -write it_radgrad.png ^
  ^( %SRC% -fill black +opaque white ^) ^
  -compose Darken -composite ^
  -auto-level ^
  -write it_radgrad2.png ^
  -alpha set +transparent White sparse-color:`) ^
DO set whiteX=%%X & set whiteY=%%Y

echo whiteX=%whiteX% whiteY=%whiteY%

set itWHITE_EDGE=1
set itDEBUG_FILE=it_trimmedB4.png

call %PICTBAT%innerTrim %SRC% %whiteX% %whiteY%
if ERRORLEVEL 1 goto error
echo %INNER_TRIM%  "%INNER_TRIM_RECT%"  Area: %INNER_TRIM_AREA%
whiteX=149  whiteY=112
114x34+36+112  "rectangle 36 112 149 145"  Area: 3876
A small black pimple has prevented the rectangle from moving to the right.
The method works for this source image, but not well.
|


|
|
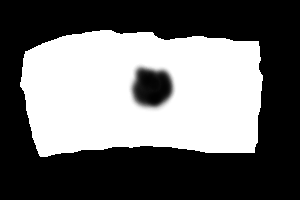
Use one of the white pixels that is furthest from a boundary as seed point.
"-morphology Distance" starts from black pixels, so we make all non-white into black, just for the morphology.
We write and show the intermediate result purely for illustration.
FOR /F "usebackq tokens=1-2 delims=, " %%X ^
IN (`%IMG7%magick ^
  %SRC% ^
  -fill Black +opaque White ^
  -morphology Distance Euclidean:4 -auto-level ^
  -write it_farboundB3.png ^
  -alpha set +transparent White sparse-color:`) ^
DO set whiteX=%%X & set whiteY=%%Y

echo whiteX=%whiteX% whiteY=%whiteY%

set itWHITE_EDGE=1
set itDEBUG_FILE=it_trimmedB3.png

call %PICTBAT%innerTrim %SRC% %whiteX% %whiteY%
if ERRORLEVEL 1 goto error
echo %INNER_TRIM%  "%INNER_TRIM_RECT%"  Area: %INNER_TRIM_AREA%
whiteX=76  whiteY=86
92x101+36+46  "rectangle 36 46 127 146"  Area: 9292
This is a good result, about as large as possible for this source.
|


|
|
To find another result, paint a black rectangle and repeat the process.
We write and show the intermediate result purely for illustration, though it_trimmedB3bl.png could be used for another iteration.
FOR /F "usebackq tokens=1-2 delims=, " %%X ^
IN (`%IMG7%magick ^
  %SRC% ^
  -fill Black +opaque White ^
  -draw "fill Black %INNER_TRIM_RECT%" ^
  -write it_trimmedB3bl.png ^
  -morphology Distance Euclidean:4 -auto-level ^
  -write it_farboundB3a.png ^
  -alpha set +transparent White sparse-color:`) ^
DO set whiteX=%%X & set whiteY=%%Y

echo whiteX=%whiteX% whiteY=%whiteY%

set itWHITE_EDGE=1
set itDEBUG_FILE=it_trimmedB3a.png

call %PICTBAT%innerTrim %SRC% %whiteX% %whiteY%
if ERRORLEVEL 1 goto error
echo %INNER_TRIM%  "%INNER_TRIM_RECT%"  Area: %INNER_TRIM_AREA%
whiteX=76  whiteY=86
92x101+36+46  "rectangle 36 46 127 146"  Area: 9292
The process could be continued until the found rectangle is smaller than some threshold, or all the pixels are non-white.
|


|
|
We can create a script innerTrimRep.bat to repeat the process until all the pixels are black.
call %PICTBAT%innerTrimRep trimTestB.png
It also draws rectangles in different colours on a new version of the source image. In this image, no pixels should be white. We can verify this by turning all non-white pixels black and reporting the highest value, which should be zero.
%IMG7%magick ^
  trimTestB_itr.png ^
  -fill Black +opaque White ^
  -format "%%[max]" info:
65535
And it creates an animated GIF showing one rectangle per frame.
|


|
|
Use the white pixel nearest to the centre as seed point:
Radial gradient with white at centre, blacken where the source isn't white,
and find the lightest point.
We write and show the intermediate result purely for illustration.
FOR /F %%L ^
IN ('%IMG7%magick identify -format ^
  "WW=%%w\nHH=%%h\nW_2=%%[fx:w/2]\nW_2=%%[fx:h/2]\nSQ_DIM=%%[fx:int(sqrt(w*w+h*h)+1)]" ^
  %SRC%') ^
DO set %%L

FOR /F "usebackq tokens=1-2 delims=, " %%X ^
IN (`%IMG7%magick ^
  -size %SQ_DIM%x%SQ_DIM% ^
  radial-gradient: ^
  -gravity center ^
  -crop %WW%x%HH%+0+0 +repage ^
  -write it_radgrad.png ^
  ^( %SRC% -fill black +opaque white ^) ^
  -compose Darken -composite ^
  -auto-level ^
  -write it_radgrad2.png ^
  -alpha set +transparent White sparse-color:`) ^
DO set whiteX=%%X & set whiteY=%%Y

echo whiteX=%whiteX% whiteY=%whiteY%

set itWHITE_EDGE=1
set itDEBUG_FILE=it_trimmedB4.png

call %PICTBAT%innerTrim %SRC% %whiteX% %whiteY%
if ERRORLEVEL 1 goto error
echo %INNER_TRIM%  "%INNER_TRIM_RECT%"  Area: %INNER_TRIM_AREA%
whiteX=149  whiteY=112
114x34+36+112  "rectangle 36 112 149 145"  Area: 3876
A small black pimple has prevented the rectangle from moving to the right.
|
|
When the source image has islands (non-white pixels within the white area) we can either:
- Process the image anyway so the found rectangle won't overlap any islands, or
- Remove any islands so the result will be as if they didn't exist.
To remove any islands:
|
An example source image, trimTestC.png.
set SRC=trimTestC.png
|

|
|
We write and show intermediate results purely for illustration.
Add black border;
floodfill from 0,0 to white boundary;
remove added border;
floodfill from 0,0 with white;
find difference with source and turn all non-black to white;
negate and add to the source image (clipping white).
%IMG7%magick ^
  %SRC% ^
  ( +clone ^
    ( +clone ^
      -bordercolor black -border 1 ^
      -bordercolor White ^
      -fill Black -draw "color 0,0 filltoborder" ^
      -shave 1 ^
      -write it_isld1.png ^
      -fill White -draw "color 0,0 floodfill" ^
      -write it_isld2.png ^
    ) ^
    -compose Difference -composite ^
    -fill White +opaque Black ^
    -negate ^
    -write it_isld3.png ^
  ) ^
  -compose Plus -composite ^
  it_NoIsland.png
The result has stripped away any islands so we can apply the innerTrim.bat script as normal.
Incidentally, if it_isld2.png is entirely white then %SRC% has no islands.
|


|
Reset the optional parameters.
set itWHITE_EDGE=
set itDEBUG_FILE=
The script finds a maximal rectangle that contains the given seed point. But this many not be the tallest posible, nor the widest possible, nor the largest possible. Maybe we can build a list of candidate seed points.
The script could be adapted to find the tallest or widest rectangle from a seed point. This would be faster. However, the width (or height) would readily be snagged by an uneven boundary, so the area will often be small.
We might find a seed point by scaling down to one row and finding the brightest pixel. This gives the x-coordinate. Similarly for the y-coordinate. However, this doesn't even guarantee that the seed point is white.
The script could be extended (or an extended version provided) that found the seed point using a specified method.
The script isn't fast, especially wth the repeated re-reads of the source image. The speed is roughly proportional to the pixels in the found rectangle, about 1000 pixels/second on my computer. Re-writing as a compiled program, or a process module, or building it into ImageMagick, would be significantly faster.
Here is an alternative algorithm:
- Find a number of rows to crop from the top.
- Crop off those rows.
- Rotate the result clockwise 90°.
- Repeat from (1) three more times.
-
How do we do step (1), finding how many rows to crop from the top?
- Ignore any columns that are entirely boundary.
- Of the other columns, find the top-most non-border pixel.
- Select the bottom-most of these pixels.
- We need to cop all rows above that pixel.
-
This will fail if we have a central column that is entirely border. Instead, we might use:
- Ignore any columns from the left that are entirely boundary, and ignore any columns from the right that are entirely boundary.
This can be done by scaling to a single row, change all boundary to non-boundary, adding a boundary border and calculating the trim.
We can express this a different way:
- While top-most row is entirely border, crop it.
- While top-most row contains any border after the first non-border and before the last non-border, crop it.
If the image is aleady trimmed, we don't need step (1). For step (2), trim any border pixels from the ends of the row. Then, any border pixels remaining in the row means that row needs to be cropped.
So, this determines the top, left, bottom and right sides in that order. Any other order could be used, and the result could be different.
Process module trimedge: takes colour for border, default black, v7 can use %[pixel:{0,0}] etc. Also takes edge list, any of LTRB. Does the edges in the specified order.
Bother, that won't work. For quadrilateral non-border, stops too soon.
How about:
- Trim.
- If top row has any border, crop it.
- If left column has any border, crop it.
- If bottom row has any border, crop it.
- If right column has any border, crop it.
- Repeat from (2) until no crops are made.
-
For convenience, .bat scripts are also available in a single zip file. See
Zipped BAT files.
rem Finds a maximal rectangle of white pixels.
rem Ie provides crop of all non-white pixels.

@setlocal
@call echoOffSave

rem Given image %1, coord (%2,%3) that should be white,
rem returns variable INNER_TRIM	format WxH+X+Y
rem that specifies a rectangle containing coord that is entirely white.

rem If (%2,%3) isn't white, returns with W==0.

rem Optionally call with:
rem   itWHITE_EDGE=1 if image may have white extending to an edge
rem   itDEBUG_FILE=filename to create an illustrative output file.

rem Not guaranteed to be largest possible white rectangle.
rem But is guaranteed to be bounded by non-white on all 4 sides.

rem Algorithm examines pixels in a square spiral pattern starting at (%2,%3).
rem When it hits a non-white pixel on one side,
rem it stops examining pixels on that side but continues radiating on the other sides.
rem When it has hit non-white on all four sides, the job is finished.
@rem
@rem Updated:
@rem   23-August-2022 Upgraded for IM v7.
@rem

call %PICTBAT%setInOut %1 it

@set TMP_IMG=%TEMP%\%~n1_it.miff

set IT_SEED_X=%2
set IT_SEED_Y=%3

if "%3"=="" (
  FOR /F %%L IN ('%IMG7%magick identify -format "IT_SEED_X=%%[fx:int(w/2)]\nIT_SEED_Y=%%[fx:int(h/2)]" %INFILE%') DO set %%L
)

set IT_STOP_L=0
set IT_STOP_T=0
set IT_STOP_R=0
set IT_STOP_B=0

set /A IT_L=%IT_SEED_X%
set /A IT_T=%IT_SEED_Y%
set /A IT_R=%IT_SEED_X%-1
set /A IT_B=%IT_SEED_Y%

set /A IT_H=1
set /A IT_W=0

if "%itWHITE_EDGE%"=="1" (
  %IMG7%magick ^
    %INFILE% ^
    -bordercolor #000 -border 1 ^
    %TMP_IMG%

  if ERRORLEVEL 1 exit /B 1

  set IT_SRC=%TMP_IMG%

  set /A IT_L+=1
  set /A IT_T+=1
  set /A IT_R+=1
  set /A IT_B+=1

  rem No need to change seed.
) else (
  %IMG7%magick %INFILE% %TMP_IMG%

  if ERRORLEVEL 1 exit /B 1
)

set IT_SRC=%INFILE%
set IT_SRC=%TMP_IMG%

for /F "usebackq" %%L ^
in (`%IMG7%magick identify -format "WW=%%w\nHH=%%h" %IT_SRC%`) ^
do set %%L

if "%WW%"=="" exit /B 1

call StopWatch
:loop

if %IT_STOP_R%==1 goto skip_R
rem Try right

set /A IT_R+=1
set /A IT_W+=1
set IT_MIN=
if %IT_R% LSS %WW% FOR /F "usebackq" %%L ^
IN (`%IMG7%magick %IT_SRC% -crop 1x%IT_H%+%IT_R%+%IT_T% -format "%%[fx:minima]" info:`) ^
DO set IT_MIN=%%L

if not "%IT_MIN%"=="1" (
  echo Stop right
  set IT_STOP_R=1
  set /A IT_R-=1
  set /A IT_W-=1
)

:skip_R


if %IT_STOP_B%==1 goto skip_B
rem Try down

set /A IT_B+=1
set /A IT_H+=1
set IT_MIN=
if %IT_B% LSS %HH% FOR /F "usebackq" %%L ^
IN (`%IMG7%magick %IT_SRC% -crop %IT_W%x1+%IT_L%+%IT_B% -format "%%[fx:minima]" info:`) ^
DO set IT_MIN=%%L

if not "%IT_MIN%"=="1" (
  echo Stop down
  set IT_STOP_B=1
  set /A IT_B-=1
  set /A IT_H-=1
)

:skip_B


if %IT_STOP_L%==1 goto skip_L
rem Try left

set /A IT_L-=1
set /A IT_W+=1
set IT_MIN=
if %IT_L% GEQ 0 FOR /F "usebackq" %%L ^
IN (`%IMG7%magick %IT_SRC% -crop 1x%IT_H%+%IT_L%+%IT_T% -format "%%[fx:minima]" info:`) ^
DO set IT_MIN=%%L

if not "%IT_MIN%"=="1" (
  echo Stop left
  set IT_STOP_L=1
  set /A IT_L+=1
  set /A IT_W-=1
)

:skip_L


if %IT_STOP_T%==1 goto skip_T
rem Try up

set /A IT_T-=1
set /A IT_H+=1
set IT_MIN=
if %IT_T% GEQ 0 FOR /F "usebackq" %%L ^
IN (`%IMG7%magick %IT_SRC% -crop %IT_W%x1+%IT_L%+%IT_T% -format "%%[fx:minima]" info:`) ^
DO set IT_MIN=%%L

if not "%IT_MIN%"=="1" (
  echo Stop up
  set IT_STOP_T=1
  set /A IT_T+=1
  set /A IT_H-=1
)

:skip_T


set /A IT_STOP_SUM=%IT_STOP_R%+%IT_STOP_B%+%IT_STOP_L%+%IT_STOP_T%

if %IT_STOP_SUM% LSS 4 goto loop

if "%itWHITE_EDGE%"=="1" (
  set /A IT_L-=1
  set /A IT_T-=1
  set /A IT_R-=1
  set /A IT_B-=1
)

set INNER_TRIM=%IT_W%x%IT_H%+%IT_L%+%IT_T%

if %IT_W%==0 (
  set INNER_TRIM_RECT=
) else (
  set INNER_TRIM_RECT=rectangle %IT_L% %IT_T% %IT_R% %IT_B%
)

set /A INNER_TRIM_AREA=%IT_W%*%IT_H%

if defined itDEBUG_FILE (
  rem Debug. Show the inner-trim area in green, with red dot at given origin.

  %IMG7%magick ^
    %INFILE% ^
    -draw "fill #0F0 %INNER_TRIM_RECT% fill #F00 point %IT_SEED_X%,%IT_SEED_Y%" ^
    %itDEBUG_FILE%
)

call StopWatch

:end
call echoRestore

@endlocal & ^
set INNER_TRIM=%INNER_TRIM%& ^
set INNER_TRIM_RECT=%INNER_TRIM_RECT%& ^
set INNER_TRIM_AREA=%INNER_TRIM_AREA%

@exit /B 0

:error
echo Error in %0 for %*
call echoRestore

@endlocal & ^
set INNER_TRIM=& ^
set INNER_TRIM_RECT=& ^
set INNER_TRIM_AREA=

exit /B 1
rem Repeats innerTrim until no white pixels remain,
rem making an animated gif with rectangles of different colours.
@rem
@rem Updated:
@rem   23-August-2022 Upgraded for IM v7.
@rem

@setlocal
@call echoOnSave

call %PICTBAT%setInOut %1 itr

@set BASENAME=%~n1
@set OUTFILE=%BASENAME%_itr%EXT%
@set TMP_EXT=.miff
@set TMP_FILE=%TEMP%\%BASENAME%_itr%TMP_EXT%
@set ITR_COLOURS=%TEMP%\%BASENAME%_itr_cols%EXT%
@set FRAMES_DIR=%TEMP%\frames_%BASENAME%


rd /s /q %FRAMES_DIR%
md %FRAMES_DIR%
if ERRORLEVEL 1 goto error

@set ITR_NUM_COLS=20

%IMG7%magick ^
  -size 1x%ITR_NUM_COLS% gradient: -rotate 90 ^
  ( -size 1x1 ^
    xc:red xc:yellow xc:lime xc:cyan xc:blue xc:magenta xc:red ^
    +append ^
  ) ^
  -clut ^
  %ITR_COLOURS%


@set /A colNdx=0


%IMG7%magick %INFILE% -fill #000 +opaque #fff %TMP_FILE%

set itWHITE_EDGE=1

set INNER_TRIM_RECT=

%IMG7%magick %INFILE% %OUTFILE%

set /A framNum=0

rem FIXME: We should be easily able to add border only once, at start.
set itWHITE_EDGE=1
set itDEBUG_FILE=


:loop

if "%INNER_TRIM_RECT%"=="" (
  set itrDrawRect=
  set itrWrite=
) else (
  if "%INNER_TRIM_AREA%"=="1" (
    rem IM bug can't draw rectangle 1x1
    set IT_XY=%INNER_TRIM:~4%
    rem set IT_XY=!IT_XY:+=,!
    set itrDrawRect=-draw "point !IT_XY:+=,!"
  ) else (
    set itrDrawRect=-draw "%INNER_TRIM_RECT%"
  )
  set itrWrite=-write %TMP_FILE%
)

@rem echo itrDrawRect=%itrDrawRect%

FOR /F "usebackq tokens=1-2 delims=, " %%X ^
IN (`%IMG7%magick ^
  %TMP_FILE% ^
  -fill #000 %itrDrawRect% ^
  %itrWrite% ^
  -morphology Distance Euclidean:4 -auto-level ^
  -alpha set +transparent White sparse-color:`) ^
DO set whiteX=%%X & set whiteY=%%Y

FOR /F "usebackq" %%C ^
IN (`%IMG7%magick %ITR_COLOURS% -format "%%[pixel:p{%colNdx%,0}]" info:`) ^
DO set ONE_PIXEL=%%C

%IMG7%magick ^
  %OUTFILE% ^
  -fill %ONE_PIXEL% %itrDrawRect% ^
  %OUTFILE%

@set LZframNum=000000%framNum%
@set LZframNum=%LZframNum:~-6%

@copy /y %OUTFILE% %FRAMES_DIR%\itr_f_%LZframNum%%TMP_EXT%
if ERRORLEVEL 1 goto error

call %PICTBAT%innerTrim %TMP_FILE% %whiteX% %whiteY%
@if ERRORLEVEL 1 goto error
@echo %INNER_TRIM%  "%INNER_TRIM_RECT%"  Area: %INNER_TRIM_AREA%

@set /A framNum+=1
@set /A colNdx+=1
if %colNdx% GEQ %ITR_NUM_COLS% set /A colNdx = 0;

@if not "%INNER_TRIM_RECT%"=="" goto loop

echo Frames: %framNum%

%IMG7%magick -delay 20 %FRAMES_DIR%\itr_f_*%TMP_EXT% itr.gif

@call echoRestore
@exit /B 0

:error
@call echoRestore
echo %0 failed for %*
exit /B 1
@echo>%TEMP%\echo_%1.txt
@for /f "tokens=3 delims=. " %%E in (%TEMP%\echo_%1.txt) do @set ECHO_SAVE=%%E
@echo off
@echo %ECHO_SAVE%
All images on this page were created by the commands shown, using:
%IMG7%magick -version
Version: ImageMagick 7.1.0-49 Q16-HDRI x64 7a3f3f1:20220924 https://imagemagick.org
Copyright: (C) 1999 ImageMagick Studio LLC
License: https://imagemagick.org/script/license.php
Features: Cipher DPC HDRI OpenCL
Delegates (built-in): bzlib cairo freetype gslib heic jng jp2 jpeg jxl lcms lqr lzma openexr pangocairo png ps raqm raw rsvg tiff webp xml zip zlib
Compiler: Visual Studio 2022 (193331630)
Source file for this web page is innertrim.h1. To re-create this web page, execute "procH1 innertrim".
This page, including the images, is my copyright. Anyone is permitted to use or adapt any of the code, scripts or images for any purpose, including commercial use.
Anyone is permitted to re-publish this page, but only for non-commercial use.
Anyone is permitted to link to this page, including for commercial use.
Page version v1.1 9-Jun-2014.
Page created 27-Sep-2022 19:21:50.
Copyright © 2022 Alan Gibson.