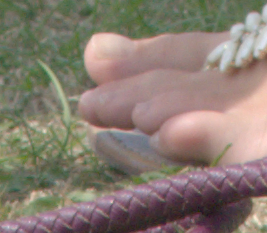
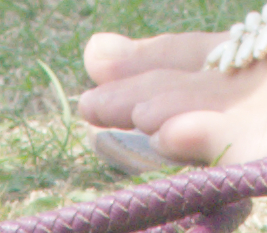
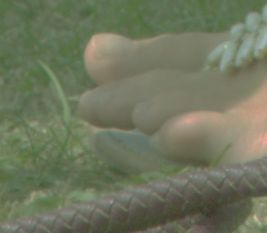
set SRC=toes.png
Setting lightness and contrast (and colour) without clipping, using power and sigmoidal-contrast.
The Gain and bias page shows a method for adjusting the mean and standard deviation (lightness and contrast) of an image. The required adjustment is easy to calculate, and easy to apply with a multiplication and addition. Sadly, that method can cause clipping, where pixel values that were within 0 to 100% have results outside that range. When only some channels are clipped, this creates horrible colour shifts.
An alternative, shown on this page and implemented as a process module, is to use "-evaluate pow" to adjust the mean and "-sigmoidal-contrast" to adjust the standard deviation (SD). Neither operation can cause clipping. (With quantum rounding, both operations can cause values to become 0 or 100%, but values are never pushed beyond those limits.) However, there are two difficulties:
We solve both problems with iteration.
See Process modules: set mean and stddev for the source code.
set SRC=toes.png |
|
The module setmnsd processes all the images in the current list, trying to set each to a specified mean and standard deviation. It takes the following options:
| Option | Description | |
|---|---|---|
| Short
form |
Long form | |
| mn N | meanGoal N | Goal for the mean.
Proportion of quantum 0.0 to 1.0, or percentage suffixed by 'c' or '%', or pin. Default: no goal for mean value. |
| sd N | sdGoal N | Goal for standard deviation.
Proportion of quantum 0.0 to 0.5, or percentage suffixed by 'c' or '%', or pin. Default: no goal for SD. |
| t N | tolerance N | Tolerance for mean and standard deviation.
Proportion of quantum, or percentage suffixed by 'c' or '%'. Default: 0.00001 (0.001%). |
| m N | mid N | Mid-point for sigmoidal-contrast, as percentage of quantum (0.0 to 100.0)
or mean to use the mean of the image for the mid-point. Default: mean. |
| i0 N | initCon0 N | Lower initial guess for contrast.
Can be 0.0. Default: 0.0000001. |
| i2 N | initCon2 N | Upper initial guess for contrast.
Default: 30. |
| d string | direction string | One of:
incOnly to prevent the SD decreasing; decOnly to prevent the SD increasing; or both for no restriction. Default: both. |
| f string | file string | Write verbose text to stderr or stdout.
Default: stderr. |
| v | verbose | Write text information. |
| v2 | verbose2 | Write more text information. |
We should specify a meanGoal or a sdGoal or both. If we provide neither (or pin both), the image won't change.
We will show the mean and standard deviation of each result.
set STATFMT=MN=%%[fx:mean]\nSD=%%[fx:standard_deviation]
|
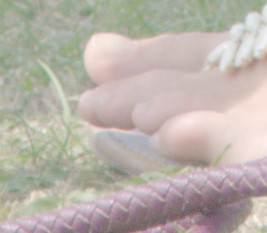
Set a mean. %IM7DEV%magick ^ %SRC% ^ -process 'setmnsd mn 0.7' ^ +write sms_ex1.png ^ -format "%STATFMT%" ^ info: MN=0.69999952 SD=0.10907938 |
|
|
Set a standard deviation. %IM7DEV%magick ^ %SRC% ^ -process 'setmnsd sd 0.3' ^ +write sms_ex2.png ^ -format "%STATFMT%" ^ info: MN=0.48697918 SD=0.30000347 |
|
|
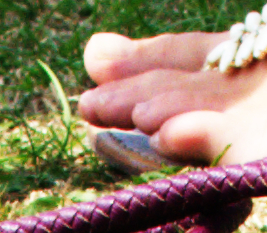
Set mean and SD. %IM7DEV%magick ^ %SRC% ^ -process 'setmnsd mn 0.7 sd 0.3' ^ +write sms_ex3.png ^ -format "%STATFMT%" ^ info: MN=0.69869321 SD=0.29193931 |
|
Specifying pin for a goal mean or SD is equivalent to specifying that statistic, from the input image, as a goal.
|
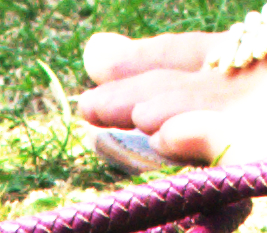
Set a mean, pinning the SD. %IM7DEV%magick ^ %SRC% ^ -process 'setmnsd mn 0.7 sd pin' ^ +write sms_exp1.png ^ -format "%STATFMT%" ^ info: MN=0.6999994 SD=0.15322352 |
|
|
Set a standard deviation, pinning the mean. %IM7DEV%magick ^ %SRC% ^ -process 'setmnsd mn pin sd 0.3' ^ +write sms_exp2.png ^ -format "%STATFMT%" ^ info: MN=0.48816097 SD=0.29998972 |

|
The default tolerance is fairly tight. Web-sized images take about a second to process. Relaxing the tolerance (making it larger) will increase the speed (but reduce the accuracy).
|
Set a standard deviation, pinning the mean. %IM7DEV%magick ^ %SRC% ^ -process 'setmnsd mn pin sd 0.3 t 0.1' ^ +write sms_exp3.png ^ -format "%STATFMT%" ^ info: MN=0.49072629 SD=0.25778754 |
|
As described below, initCon0 and initCon2 are initial guesses for the contrast seting of -sigmoidal-contrast. The default initial guesses work well for ordinary photos and sensible SD goals and tolerances. In extreme cases, a wider margin can be given, eg "initCon0 0 initCon2 1000".
The verbose option writes summmary text:
%IM7DEV%magick ^
  %SRC% ^
  -precision 9 ^
  -process 'setmnsd i2 1000 sd 0.3 mn 0.5 verbose' ^
  NULL:
setmnsd options:  verbose  meanGoal 0.5  sdGoal 0.3  tolerance 1e-05  mid mean  initCon0 1e-07  initCon2 1000  direction both
input: mean=0.488162089 sd=0.153220962
nIter=56
result: mean=0.499998865  sd=0.299994541
setmnsd command: -sigmoidal-contrast 12.4828421,48.8162089% -evaluate pow 0.945598623
The verbose2 option writes the above, plus text at each iteration.
The module writes the two operations as a property to the image. Then images in a sequence, such as frames of a video clip, can be processed identically.
%IM7DEV%magick ^
  %SRC% ^
  -precision 19 ^
  -process 'setmnsd i2 1000 sd 0.3 mn 0.5 mid mean t 0.0001' ^
  -format %%[filter:setmnsd] info:
-sigmoidal-contrast 12.46531119256544606,48.81620885772588281% -evaluate pow 0.9457281350827180244
The operations are written as properties in output files, so we can obtain them later:
%IMDEV%identify ^
  -format %%[filter:setmnsd] ^
  sms_exp3.png
-sigmoidal-contrast 8.8572964,48.816209% -evaluate pow 1.0073595
If you don't want the operations written to the output file, use +define filter:setmnsd after calling the module and before writing the file.
If no goals were set, the recorded operation is "-evaluate Add 0".
The process uses the IM function GetImageMean() which calculates overall mean and standard deviation, ignoring the alpha channel, so this module should not be used for images that have any transparency. I may add a "regardalpha" facility for this.
The module uses statistics from all colour channels, and adjusts all channels by the same sigmoidal contrast.
If the SD of the input is zero no operations can change the SD. If a goal SD was set, a warning is issued and the goal is ignored. (However, IM sometimes assigns a small but non-zero SD to constant-colour images.)
If the mean of the input is less than or equal to zero, or equal to 100%, no operations can change the mean. If a goal mean was set, a warning is issued and the goal is ignored.
A transfer curve (or transformation curve) shows the effect of the operations graphically. The x-axis represents the input value in a channel, from 0 to 100%. The y-axis represents the output in that channel.
The script smsCurve.bat takes an image created by the process module, extracts the property, echoes it, makes a clut from the operations, and turns this into a graph.
call %PICTBAT%smsCurve sms_ex1.png -evaluate pow 0.47821176 F:\pictures\graph1d: WW=256 HH=1 newH=256 OUTFILE=f:\prose\PICTURES\sms_ex1_smsc.png |

|
call %PICTBAT%smsCurve sms_ex2.png -sigmoidal-contrast 12.192545,48.816209% F:\pictures\graph1d: WW=256 HH=1 newH=256 OUTFILE=f:\prose\PICTURES\sms_ex2_smsc.png |

|
call %PICTBAT%smsCurve sms_ex3.png -sigmoidal-contrast 30,48.816209% -evaluate pow 0.24977812 F:\pictures\graph1d: WW=256 HH=1 newH=256 OUTFILE=f:\prose\PICTURES\sms_ex3_smsc.png |

|
call %PICTBAT%smsCurve sms_exp1.png -sigmoidal-contrast 5.8424954,48.816209% -evaluate pow 0.46376709 F:\pictures\graph1d: WW=256 HH=1 newH=256 OUTFILE=f:\prose\PICTURES\sms_exp1_smsc.png |

|
call %PICTBAT%smsCurve sms_exp2.png -sigmoidal-contrast 12.216172,48.816209% -evaluate pow 0.99498358 F:\pictures\graph1d: WW=256 HH=1 newH=256 OUTFILE=f:\prose\PICTURES\sms_exp2_smsc.png |

|
call %PICTBAT%smsCurve sms_exp3.png -sigmoidal-contrast 8.8572964,48.816209% -evaluate pow 1.0073595 F:\pictures\graph1d: WW=256 HH=1 newH=256 OUTFILE=f:\prose\PICTURES\sms_exp3_smsc.png |

|
The curves always start at (0,0), bottom-left, and end at (100%,100%), top-right. Some ranges of input decrease in contrast, while other ranges increase in contrast.
This section first describes how we can separately adjust the mean and the standard deviation. Then it describes how we adjust the two together.
We raise pixel values to a power p so that values at current_mean become goalMn:
(current_mean)p = goalMn
Rearranging, p is the log of the goal mean divided by the log of the current mean.
p = log (goalMn) / log (curent_mean)
However, this isn't quite what we want. For example, suppose we want a new mean of 0.7:
%IMG7%magick ^
  toes.png ^
  -evaluate pow %%[fx:log(0.7)/log(mean)] ^
  -format %%[fx:mean] ^
  +write sms_adjmn1.png ^
  info:
0.69044
The formula will certainly adjust so that any pixel values that happened to be at the mean will become 0.7. But this doesn't imply that the mean of the entire image will become 0.7. However, it has got us closer. We can repeat, using the previous image:
%IMG7%magick ^
  sms_adjmn1.png ^
  -evaluate pow %%[fx:log(0.7)/log(mean)] ^
  -format %%[fx:mean] ^
  +write sms_adjmn2.png ^
  info:
0.699646
This is nearly the required result. We can keep iterating until we are within the required tolerance, which happens quickly. Where p1, p2, p3 ... are the results of the division of the logs, pixel values have changed:
v' = ((vp1)p2)p3...
or:
v' = v(p1*p2*p3...)
So we calculate P, the overall exponent we need to change the image for the required mean, as the product of the exponents of the iterations.
P = p1*p2*p3...
The operation -evaluate Pow P will generally change the SD as well as the mean. The effect on the SD is not easily predictable.
In its "-" form, the operation "-sigmoidal-contrast C,M%" will push values away from the mid-point, which increases overall contrast. The "+" form has the opposite effect. M is the mid-point fo the operation, which is the value at which contrast increases the most.
For M, the image mean is often a sensible choice. (The median might be more sensible, but this takes more effort to calculate.)
For C, larger values have more effect, and smaller values have less effect. If we have a value for C that has too little effect, and another that has too much effect, then some value in between is exactly right, so we iterate until we find it.
The operation sigmoidal-contrast will generally change the mean as well as the SD. The effect on the mean is not easily predictable.
The goal is to find both P and C that results in an image with the required mean and SD.
For a given value of C, we apply the "sigmoidal-contrast" and then iterate through P working towards the required mean. The contrast of the result, after applying both "sigmoidal-contrast C,M%" and "-evaluate Pow p", may be too high or too low, so we know in which direction we need to move for the next guess at C.
We start with two initial guesses at C taken from initCon0 and initCon2. If we need to decrease contrast, we invert these. Then setting C to contrast0 should give a result that has the SD too low, and contrast2 will give an SD that is too high.
We take the arithmetic or geometric mean of the two contrasts as the third guess, contrast1, and process at that setting, and either finish iterating or replace one of contrast0 or contrast2 and continue iterating.
To reduce unnecessarily precise work, the tolerance for the search of P is relaxed to the error from the previous iteration.
Both operations leave values at 0 and 100% unchanged. For example, black will stay black and white will stay white.
Neither operation will make an ordinary photograph entirely black or entirely white ("meanGoal 0" or "meanGoal 1"). The code would give results very close to these goals, but we get nan (not a number) or inf (infinity) as operation parameters, so the module deals with these goals as special cases.
The time taken is proportional to the number of pixels mutiplied by the number of iterations. Here is a large image:
set LGE_SRC=AGA_1434_gms.tiff

%IMG7%magick identify %LGE_SRC%
AGA_1434_gms.tiff TIFF 4924x7378 4924x7378+0+0 16-bit sRGB 166.02MiB 0.000u 0:00.001
We apply the process module to the image, and time how long it takes:
%IM7DEV%magick ^
  %LGE_SRC% ^
  -process 'setmnsd mn 0.5 sd 0.166667' ^
  +write sms_lge1.miff ^
  -format "%%[filter:setmnsd]\n" ^
  info:
-sigmoidal-contrast 7.3397445,37.056397% -evaluate pow 0.91437287
0 00:06:11
This is slow. How close is the result to what we wanted?
%IM7DEV%magick ^
  sms_lge1.miff ^
  -format "%STATFMT%" ^
  info:
MN=0.49999959
SD=0.16666116
For ordinary photographs that contain data at low frequencies as well as high frequencies, resizing down does not change the mean and standard deviation by much, so a small version can be used as proxy to find the required sigmoidal contrast and power. This massively reduces the time for this module.
(Shrinking an ordinary photograph will change the mean by very little. High-frequency detail will get smoothed out, so if this contributes significantly to the SD, the SD will reduce.)
The script setMnSdLge.bat defines an image as "small" when both dimensions are less than or equal to 600 pixels. Small images are processed directly with the module. Large images are first resized down, and this is used as a proxy to find the operations, which are then applied to the large image.
call %PICTBAT%setMnSdLge ^
  %LGE_SRC% ^
  sms_lge2.miff ^
  "mn 0.5 sd 0.166667"

echo smslOPS=%smslOPS%
smslOPS=-sigmoidal-contrast 7.436564877260658513,37.0564743136137551% -evaluate pow 0.916896224098582624
0 00:00:35
This is an order of magnitude faster. How close is the result to what we wanted?
%IM7DEV%magick ^
  sms_lge2.miff ^
  -format "%STATFMT%" ^
  info:
MN=0.49992966
SD=0.16811566
For many purposes, this is sufficiently accurate. If we needed more accuracy fairly quickly, we could then use the process module directly on the large image, but with parameters initCon0 and initCon1 closely bracketing the found value for contrast.
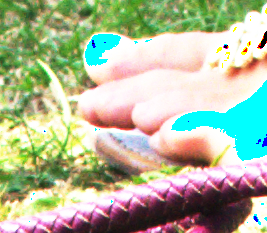
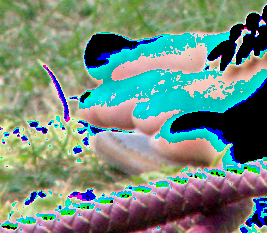
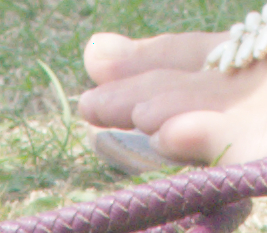
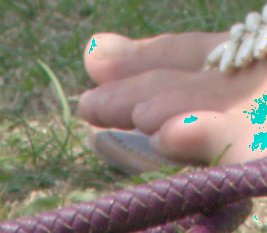
When an image has been saved in integer format, we don't know which pixels have been clipped. But we do know which pixels have 0 or 100% in any channel, and can we highlight those.
toes.png is auto-levelled; one pixel has 0 in the blue channel, and one pixel with 100% in the red channel.
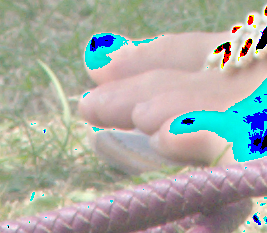
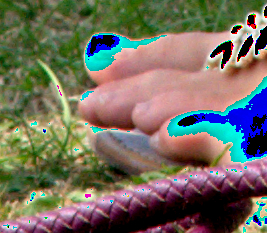
The script compMnSd.bat creates images from the sigmoid-and-power method and the gain-and-bias method, and highlights pixels that have 0 or 100% in any channel.
| Command | Sigmoid & power | Gain & bias |
|---|---|---|
call %PICTBAT%compMnSd ^ toes.png sms_comp1_ 0.7 0.3 |
|
|
call %PICTBAT%compMnSd ^ toes.png sms_comp2_ 0.7 pin |
|
|
call %PICTBAT%compMnSd ^ toes.png sms_comp3_ pin 0.3 |

|
|
call %PICTBAT%compMnSd ^ toes.png sms_comp4_ 0.5 0.166667 |
|
|
Of these two methods, the gain-and-bias method pushes more pixels to extremes.
Visually comparing non-highlighted areas, there are obvious differences. There are infinitely many transformations that will set an image to a given mean and given standard deviation.
We compare the process module with the sigSetSd.bat script.
First, time the script:
call StopWatch
call %PICTBAT%sigSetSd %SRC% mean
call StopWatch
echo %sssOPTION%
0 00:00:08
-sigmoidal-contrast 2.51162,48.8162089%
Now time the process module:
call StopWatch

%IM7DEV%magick ^
  toes.png ^
  -process 'setmnsd sd 0.166667' ^
  -format "%%[filter:setmnsd]\n" ^
  info:

call StopWatch
-sigmoidal-contrast 2.5112469,48.816209%
0 00:00:03
The process module is significantly faster than the script.
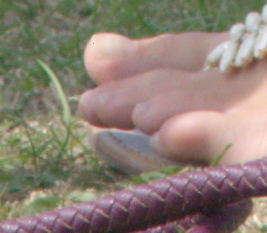
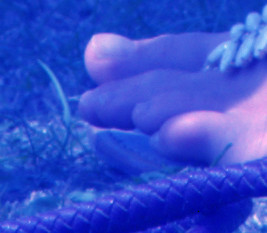
I generally like photos to have a minimum SD of 0.166667, as set by the sigmoidal-contrast method:
%IM7DEV%magick ^ %SRC% ^ -process 'setmnsd sd 0.166667 direction incOnly' ^ sms_zing.png |
|
(There is nothing magical about 0.166667; it just seems typical of photos I like. For comparison: an image with no detail has SD=0.0; the maximum possible SD is 0.5; and a linear gradient has SD=sqrt(1/3+1/4) = 0.288.)
Suppose we have a colour, defined as percentages of quantum for the three channels. We can set the mean of each channel of an image to be the required value.
Pick a value for each channel:
set R_PC=20
set G_PC=30
set B_PC=80
|
We show the colour, just for interest. %IM7DEV%magick ^ -size 200x200 ^ xc:rgb(%R_PC%%%,%G_PC%%%,%B_PC%%%) ^ sms_ci_col.png |

|
%IM7DEV%magick ^
  %SRC% ^
  -channel RGB ^
  -separate ^
  ( -clone 0 ^
    -process 'setmnsd mn %R_PC%c' ^
  ) ^
  -delete 0 ^
  ( -clone 0 ^
    -process 'setmnsd mn %G_PC%c' ^
  ) ^
  -delete 0 ^
  ( -clone 0 ^
    -process 'setmnsd mn %B_PC%c' ^
  ) ^
  -delete 0 ^
  -combine ^
  sms_ci_out.png
|
|
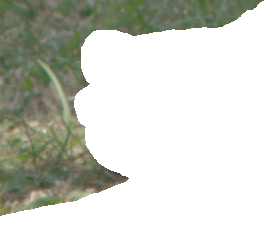
Like gain-and-bias, we can use statistics from one image to tweak another.
|
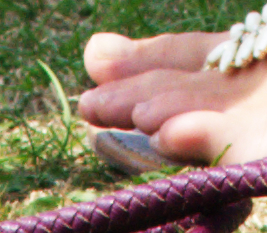
toes_holed.png |
|
With the script meanSdTr.bat (see Gain and bias), we get mean and SD statistics for each channel:
call %PICTBAT%meanSdTr toes_holed.png SRC_TH_
Just for interest, here are the statistics:
set SRC_TH_
SRC_TH_mn_B=0.3673256656748302706
SRC_TH_mn_G=0.462861179856183691
SRC_TH_mn_R=0.4354760636015106434
SRC_TH_sd_B=0.07707375919117646912
SRC_TH_sd_G=0.07253559345674066849
SRC_TH_sd_R=0.09353533059624627444
With the script setMnSdRGB.bat, we apply these statistics to %SRC%, so each channel becomes the required mean and standard deviation:
call %PICTBAT%setMnSdRGB ^ %SRC% sms_set_th.png SRC_TH_ |
|
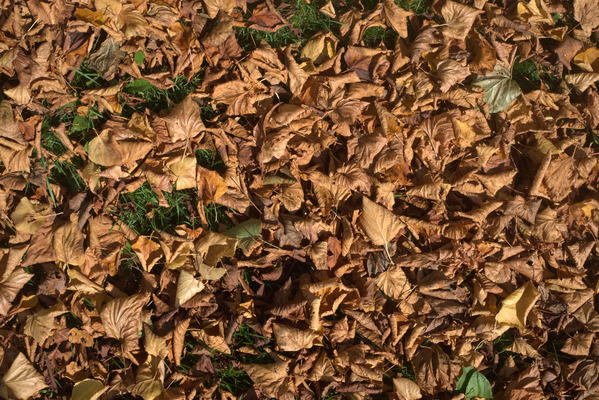
Another example:
|
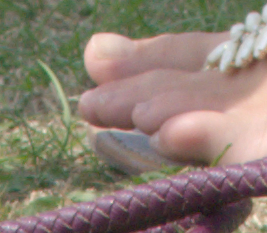
Tweak this image:
|
|
|
Apply the statistics. call %PICTBAT%setMnSdRGB ^ dpt_lvs_sm.jpg ^ sms_set_th2.png ^ SRC_TH_ |

|
The script setMnSdRGB.bat has written the sigmoidal and power commands to environment variables, so we can apply the same commands to a gradient to get a transfer graph:
echo %smsrCMD_R%
echo.
echo %smsrCMD_G%
echo.
echo %smsrCMD_B%
+sigmoidal-contrast 15.5143395640154349,47.73625977937084741% -evaluate pow 1.115810318831561787

+sigmoidal-contrast 14.68163295356687748,32.71980915905594856% -evaluate pow 0.5793241895300004218

+sigmoidal-contrast 31.76182234096728152,19.47673900946021419% -evaluate pow 0.4932331971113975144
%IMG7%magick ^ -size 1x256 gradient: ^ -rotate 90 ^ -colorspace sRGB ^ -channel R %smsrCMD_R% ^ -channel G %smsrCMD_G% ^ -channel B %smsrCMD_B% ^ +channel ^ sms_xfer.png call %PICTBAT%graphLineCol ^ sms_xfer.png . 0 0 |
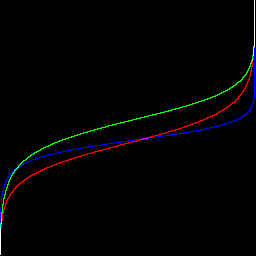
|
For convenience, .bat scripts are also available in a single zip file. See Zipped BAT files.
For the source code of setmnsd.c, see Process modules: set mean and stddev.
@rem Given image %1 has property filter:setmnsd,
@rem writes %2 a graph1d curve.
@rem
@rem Updated:
@rem   6-August-2022 for IM v7
@rem

@if "%1"=="" findstr /B "rem @rem" %~f0 & exit /B 1

@setlocal enabledelayedexpansion

@call echoOffSave

call %PICTBAT%setInOut %1 smsc

if not "%2"=="" if not "%2"=="." set OUTFILE=%2

set OPS=
for /F "usebackq tokens=*" %%L in (`%IMG7%magick identify ^
  -format "OPS=%%[filter:setmnsd]" ^
  %INFILE%`) do set %%L
if ERRORLEVEL 1 exit /B 1
if "%OPS%"=="" exit /B 1

echo %OPS%

@rem Extreme operation can cause staircasing unless we use 32f.

%IM7DEV%magick ^
  -size 1x256 gradient: -rotate 90 ^
  %OPS% ^
  %OUTFILE%

call %PICTBAT%graph1d %OUTFILE% . . %OUTFILE%

call echoRestore

@endlocal & set smscOUTFILE=%OUTFILE%
rem From image %1
rem makes %2
rem with process module 'setMnSd', parameters %3 eg "mn 0.5 sd 0.16667",
rem perhaps using statistics from a small version.
@rem
@rem Updated:
@rem   6-August-2022 for IM v7
@rem

@if "%1"=="" findstr /B "rem @rem" %~f0 & exit /B 1

@setlocal enabledelayedexpansion

@call echoOffSave

call %PICTBAT%setInOut %1 smsl

if not "%2"=="" if not "%2"=="." set OUTFILE=%2

set sPARAMS=%~3

set LIM_W=600
set LIM_H=600

set WW=
for /F "usebackq" %%L in (`%IMG7%magick identify ^
  -format "WW=%%w\nHH=%%h\n" ^
  %INFILE%`) do set %%L
if "%WW%"=="" exit /B 1

set isSmall=0

if %WW% LEQ %LIM_W% if %HH% LEQ %LIM_H% set isSmall=1

if %isSmall%==1 (

  echo Small

  for /F "usebackq tokens=*" %%L in (`%IM7DEV%magick ^
    %INFILE% ^
    -process 'setmnsd %sPARAMS%' ^
    +write %OUTFILE% ^
    -format "sOPS=%%[filter:setmnsd]" info:`) do set %%L

) else (

  echo Large

  for /F "usebackq tokens=*" %%L in (`%IM7DEV%magick ^
    %INFILE% ^
    -precision 19 ^
    -resize %LIM_W%x%LIM_H% ^
    -process 'setmnsd %sPARAMS%' ^
    -format "sOPS=%%[filter:setmnsd]" info:`) do set %%L

  %IM7DEV%magick ^
    %INFILE% ^
    !sOPS! ^
    %OUTFILE%
)

echo %0: sOPS=!sOPS!

@call echoRestore

endlocal & set smslOUTFILE=%OUTFILE%& set smslOPS=%sOPS%
rem From image %1,
rem writes output %2
rem with mean to %3 (a number 0.0 to 1.0, or "pin")
rem and SD to %4 (a number 0.0 to 1.0, or "pin")
rem by gain-and-bias method. All channels shifted by same amount.
@rem
@rem Updated:
@rem   7-August-2022 for IM v7
@rem

@if "%1"=="" findstr /B "rem @rem" %~f0 & exit /B 1

@setlocal enabledelayedexpansion

@call echoOffSave

call %PICTBAT%setInOut %1 msg

if not "%2"=="" if not "%2"=="." set OUTFILE=%2

set GOAL_MN=%3
if "%GOAL_MN%"=="." set GOAL_MN=
if "%GOAL_MN%"=="" set GOAL_MN=0.5

set GOAL_SD=%4
if "%GOAL_SD%"=="." set GOAL_SD=
if "%GOAL_SD%"=="" set GOAL_SD=0.16667


for /F "usebackq" %%L in (`%IMG7%magick identify ^
  -precision 19 ^
  -format "CUR_MN=%%[fx:mean]\nCUR_SD=%%[fx:standard_deviation]" ^
  %INFILE%`) do set %%L

if /I "%GOAL_SD%" EQU "pin" (
  set GAIN=1
) else (
  for /F "usebackq" %%L in (`%IMG7%magick identify ^
    -precision 19 ^
    -format "GAIN=%%[fx:%GOAL_SD%/%CUR_SD%]" ^
    xc:`) do set %%L
)

if /I "%GOAL_MN%" EQU "pin" set GOAL_MN=%CUR_MN%

  for /F "usebackq" %%L in (`%IMG7%magick identify ^
    -precision 19 ^
    -format "BIAS=%%[fx:%GOAL_MN%-%CUR_MN%*%GAIN%]" ^
    xc:`) do set %%L

%IMG7%magick ^
  %INFILE% ^
  -function Polynomial %GAIN%,%BIAS% ^
  %OUTFILE%

call echoRestore

@endlocal & set msgOUTFILE=%OUTFILE%
rem Given image %1
rem writes %2 setting mean and standard deviation
rem from variables starting with %3 (eg created by meanSdTr).
@rem
@rem Updated:
@rem   6-August-2022 for IM v7
@rem

setlocal

set STDOPT=i0 0 i2 1000

for /F "usebackq tokens=*" %%L in (`%IM7DEV%magick ^
  %1 ^
  -precision 19 ^
  -channel RGB ^
  -separate ^
  ^( -clone 0 ^
     -process 'setmnsd mn !%3mn_R! sd !%3sd_R! %STDOPT% f stdout' ^
     -format "CMD_R=%%[filter:setmnsd]\n" +write info:
  ^) ^
  -delete 0 ^
  ^( -clone 0 ^
     -process 'setmnsd mn !%3mn_G! sd !%3sd_G! %STDOPT% f stdout' ^
     -format "CMD_G=%%[filter:setmnsd]\n" +write info:
  ^) ^
  -delete 0 ^
  ^( -clone 0 ^
     -process 'setmnsd mn !%3mn_B! sd !%3sd_B! %STDOPT% f stdout' ^
     -format "CMD_B=%%[filter:setmnsd]\n" +write info:
  ^) ^
  -delete 0 ^
  -combine ^
  %2`) do set %%L

echo CMD_R=%CMD_R%
echo CMD_G=%CMD_G%
echo CMD_B=%CMD_B%

endlocal & set smsrCMD_R=%CMD_R%& set smsrCMD_G=%CMD_G%& set smsrCMD_B=%CMD_B%
rem Compare mean and SD methods.
rem %1 input image
rem %2 output prefix
rem %3 goal mean
rem %4 goal SD
@rem
@rem Updated:
@rem   6-August-2022 for IM v7
@rem

@setlocal enabledelayedexpansion

rem Methods: sigmoid and power, gain and bias.

set INFILE=%1

set OUT_SP=%2_sp.png
set OUT_GB=%2_gb.png

set GOAL_MN=%3
set GOAL_SD=%4

%IM7DEV%magick ^
  %INFILE% ^
  -process 'setmnsd mn %GOAL_MN% sd %GOAL_SD%' ^
  %OUT_SP%

%IMG7%magick identify ^
  -format "MN=%%[fx:mean]\nSD=%%[fx:standard_deviation]" ^
  %OUT_SP%


call %PICTBAT%neg0100 %OUT_SP% %OUT_SP%


call %PICTBAT%MnSdGb ^
  %INFILE% ^
  %OUT_GB% ^
  %GOAL_MN% %GOAL_SD%

%IMG7%magick identify ^
  -format "MN=%%[fx:mean]\nSD=%%[fx:standard_deviation]" ^
  %OUT_GB%

call %PICTBAT%neg0100 %OUT_GB% %OUT_GB%
rem In R, G and B channels,
rem make values that were 0 into 100%, and make values that were 100% into 0.
@rem
@rem Updated:
@rem   6-August-2022 for IM v7
@rem

%IMG7%magick ^
  %1 ^
  -channel RGB ^
  -separate ^
  +channel ^
  -fill Red -opaque Black ^
  -fill Black -opaque White ^
  -fill White -opaque Red ^
  -combine ^
  %2
All images on this page were created by the commands shown, using:
%IMG7%magick -version
Version: ImageMagick 7.1.0-42 Q16-HDRI x64 396d87c:20220709 https://imagemagick.org
Copyright: (C) 1999 ImageMagick Studio LLC
License: https://imagemagick.org/script/license.php
Features: Cipher DPC HDRI OpenCL
Delegates (built-in): bzlib cairo freetype gslib heic jng jp2 jpeg jxl lcms lqr lzma openexr pangocairo png ps raqm raw rsvg tiff webp xml zip zlib
Compiler: Visual Studio 2022 (193231332)
%IM7DEV%magick -version
Version: ImageMagick 7.1.0-20 Q32-HDRI x86_64 2021-12-29 https://imagemagick.org
Copyright: (C) 1999-2021 ImageMagick Studio LLC
License: https://imagemagick.org/script/license.php
Features: Cipher DPC HDRI Modules OpenMP(4.5)
Delegates (built-in): bzlib cairo fontconfig fpx freetype jbig jng jpeg lcms ltdl lzma pangocairo png raqm rsvg tiff webp wmf x xml zip zlib
Compiler: gcc (11.2)
Source file for this web page is setmnsd.h1. To re-create this web page, execute "procH1 setmnsd".
This page, including the images, is my copyright. Anyone is permitted to use or adapt any of the code, scripts or images for any purpose, including commercial use.
Anyone is permitted to re-publish this page, but only for non-commercial use.
Anyone is permitted to link to this page, including for commercial use.
Page version v1.0 20-July-2017.
Page created 07-Aug-2022 01:47:13.
Copyright © 2022 Alan Gibson.