%IMG7%magick ^
  %SRC% ^
  +depth ^
  ( +clone %RESZ% +write od_src_r.png +delete ) ^
  ( +clone %CROP% +write od_src_c.png ^
    %MAG_CROP% +write od_src_cc.png +delete ^
  ) ^
  NULL:
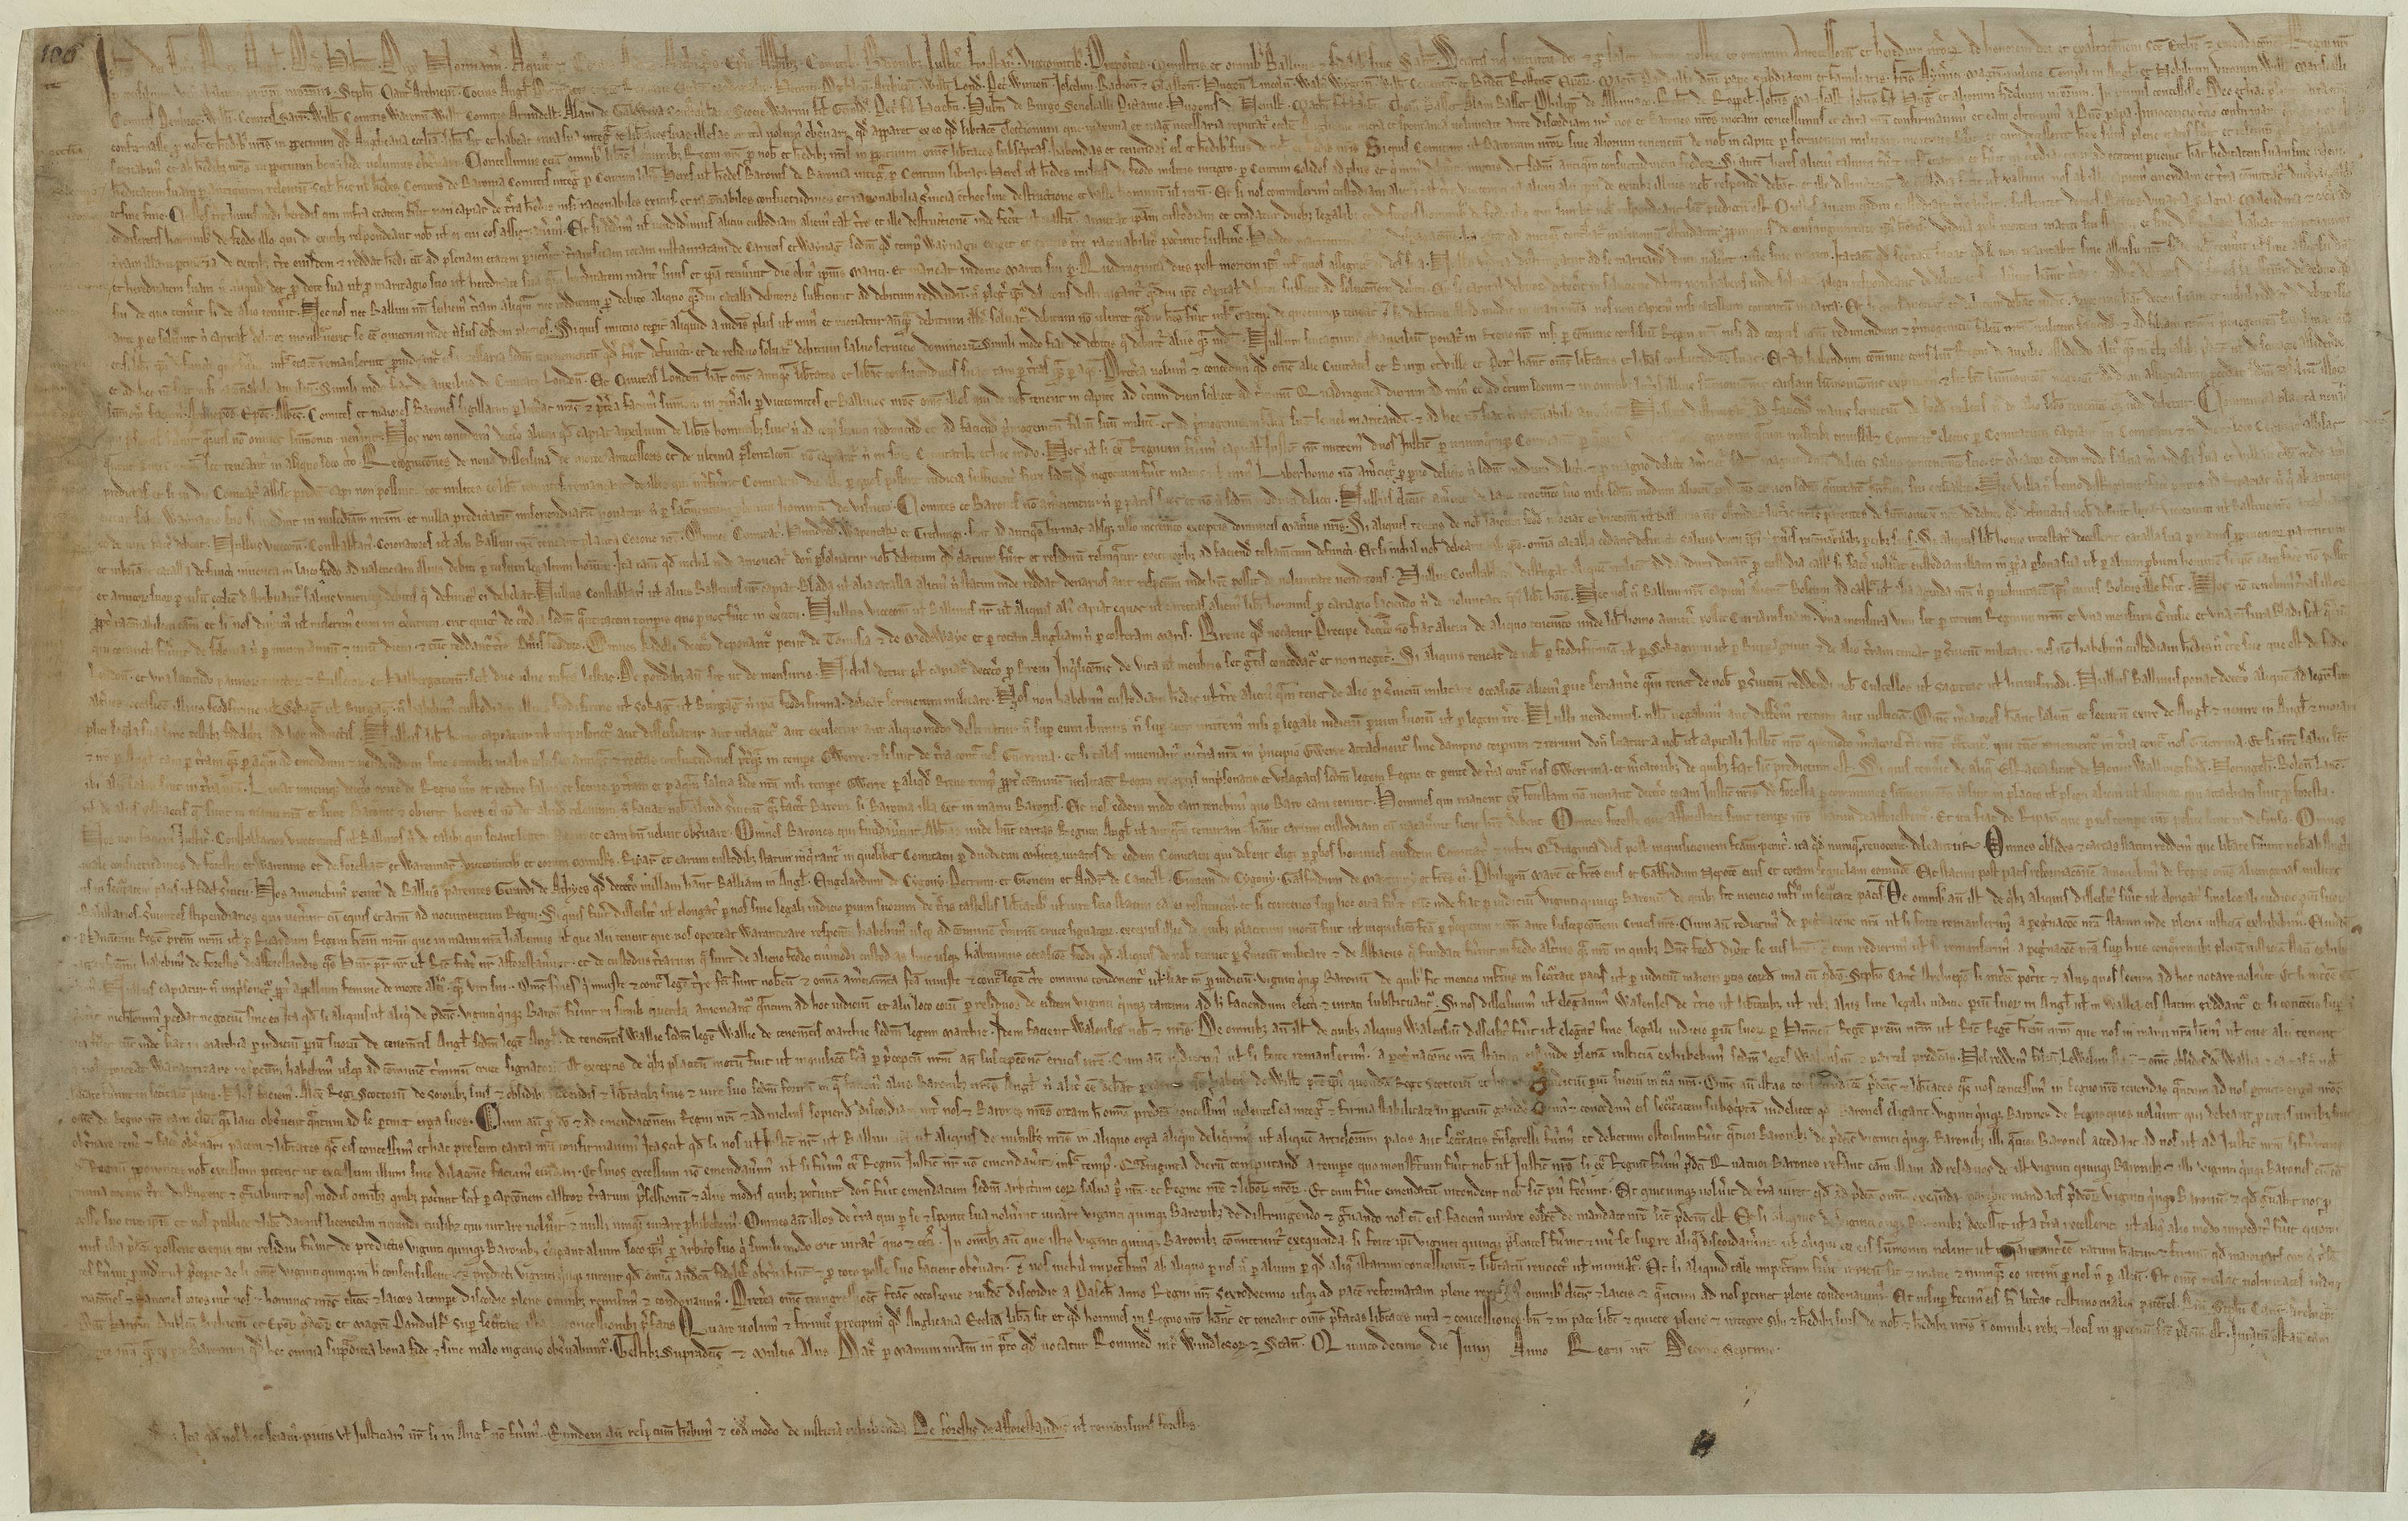
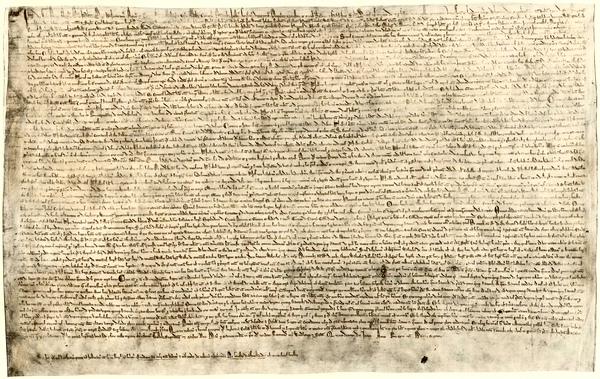
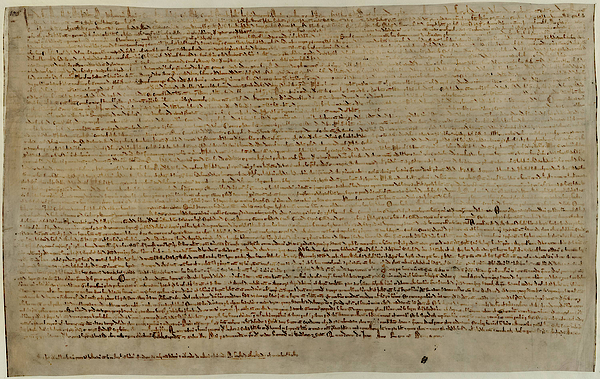
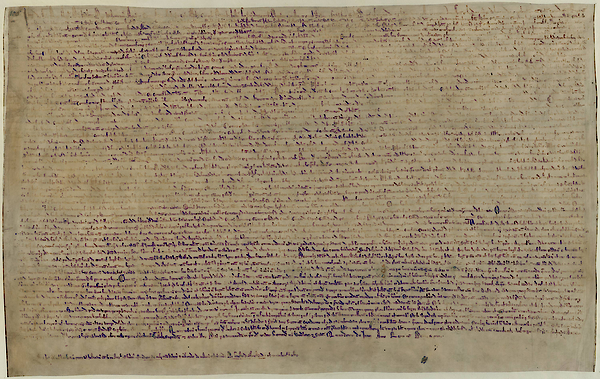
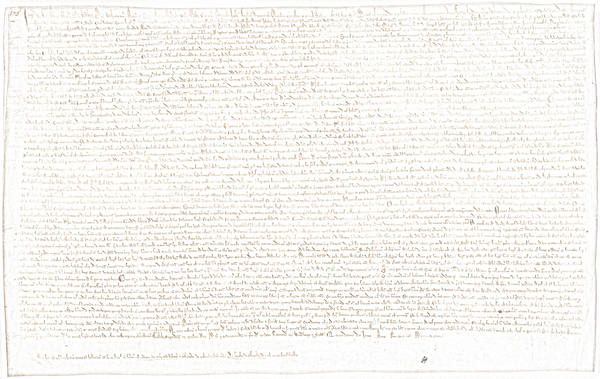
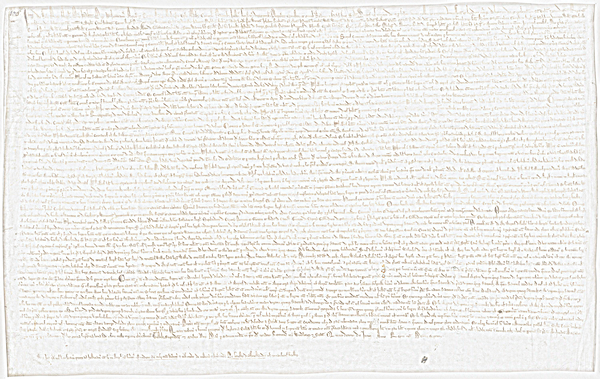
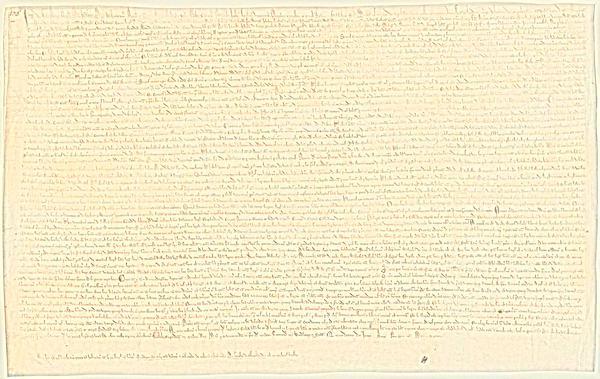
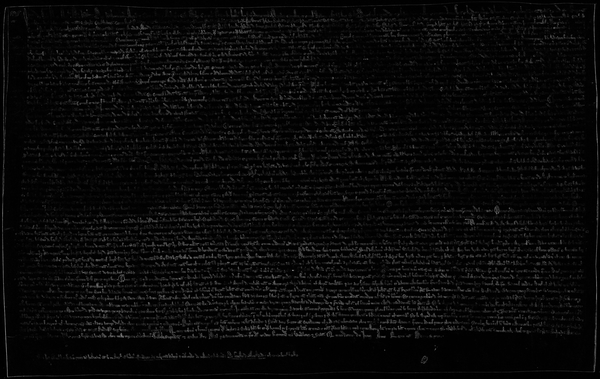
Old documents often have little contrast between ink and paper. The paper may not be a constant colour or tone. We might want to prettify the document making it more visually attractive, or we might want to increase the legibility. We might want to make the paper white, and the ink black.
.
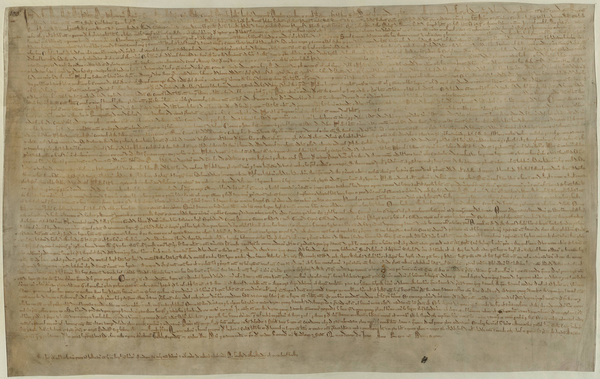
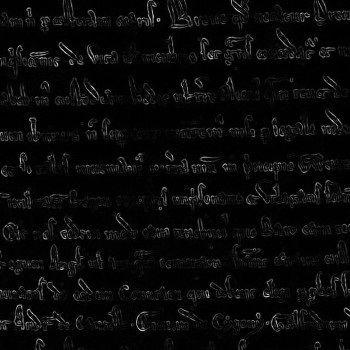
For a source image, I use magnacarta.jpg. This is a photograph of originally black text on sheepskin parchment, written 800 years ago, 15 June 1215, British Library manuscript Cotton MS Augustus ii.106. The image has already been processed, and I hate woking from JPG sources, but it is a useful example.
I took the image from British Library: Magna Carta, 1215. It is "Free from known copyright restrictions". The text is in Latin.
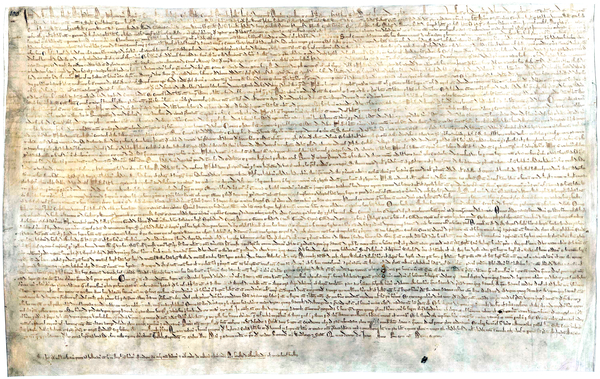
(An alternative photo of the same document is available from Wikipedia. That image has higher resolution, and shows more of the original document around three edges.)
See also http://www.salisburycathedral.org.uk/sites/default/files/034%20Magna%20Carta%20inspection.jpg from http://www.salisburycathedral.org.uk/news/win-chance-see-four-surviving-original-magna-carta-manuscripts-together-first-timeset SRC=mc.jpg set SRC=magnacarta.jpg set RESZ=-resize 600x600 set CROP=-gravity Center -crop 350x350+0+0 +repage set MAG_CROP=-crop 100x100+0+0 +repage -scale 400%%
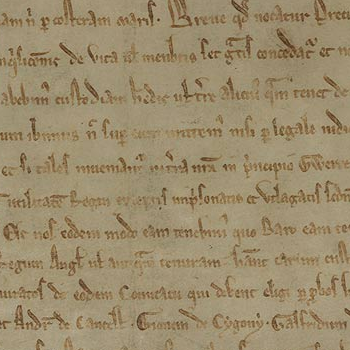
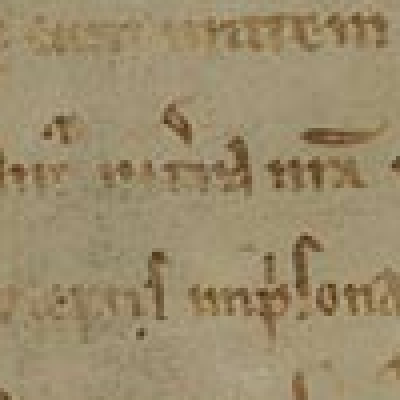
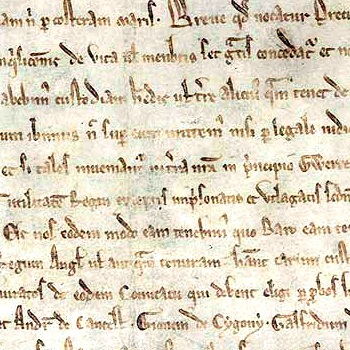
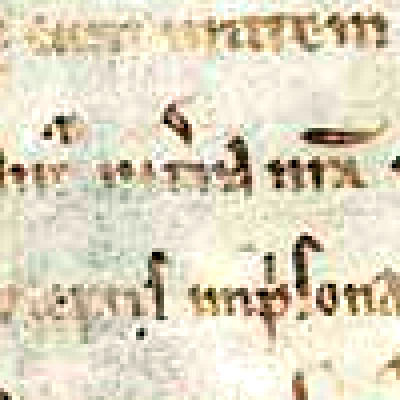
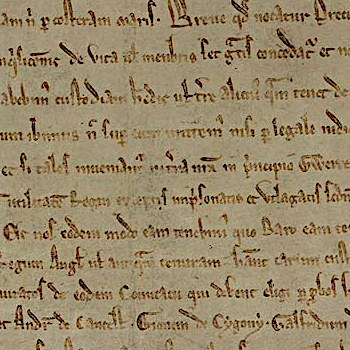
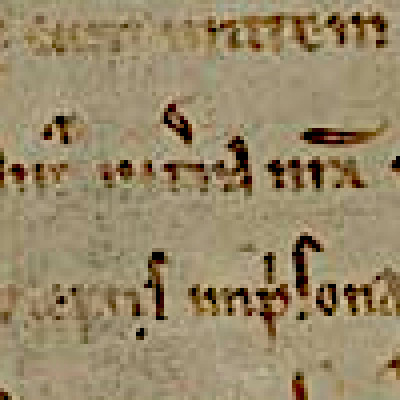
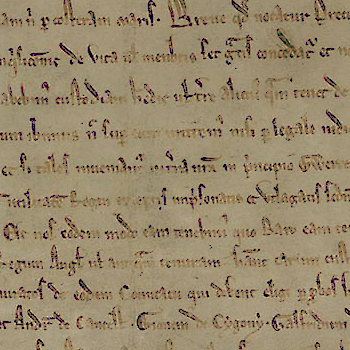
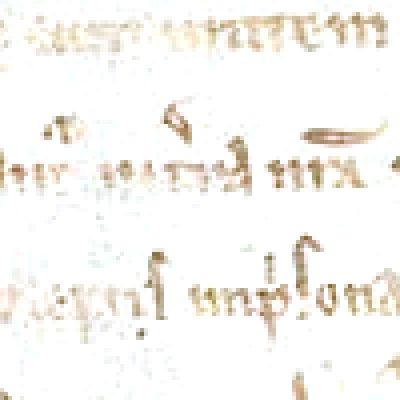
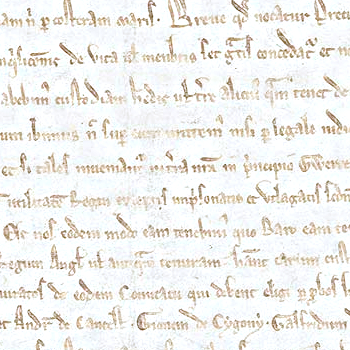
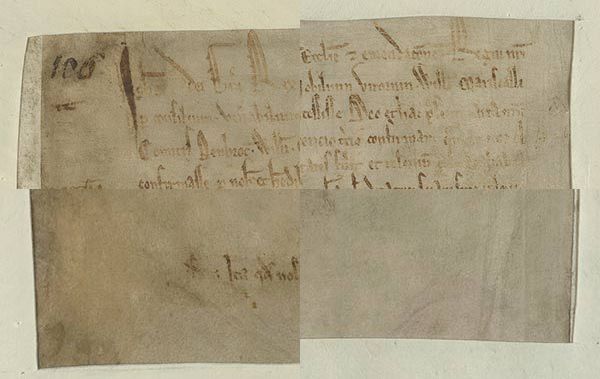
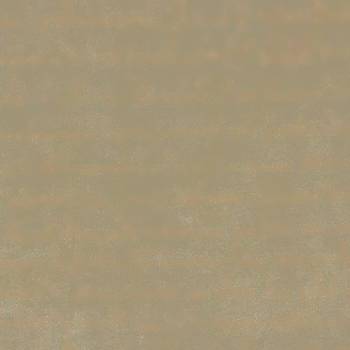
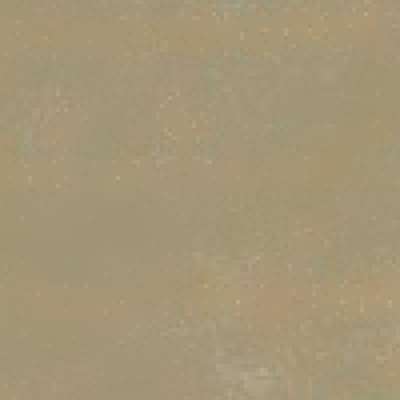
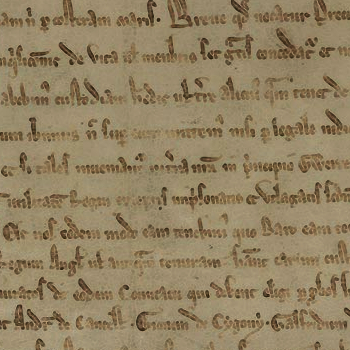
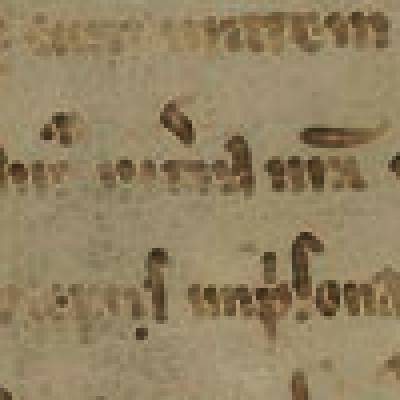
I will work on the full-size image but for the web I will show three images: a resize, a crop from the centre, and a magnified crop of that.
%IMG7%magick ^
%SRC% ^
+depth ^
( +clone %RESZ% +write od_src_r.png +delete ) ^
( +clone %CROP% +write od_src_c.png ^
%MAG_CROP% +write od_src_cc.png +delete ^
) ^
NULL:
|
|
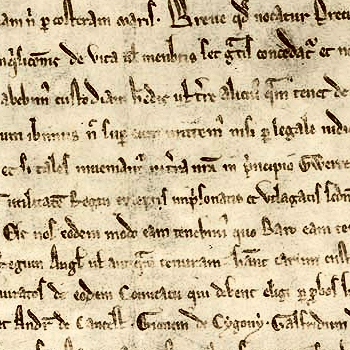
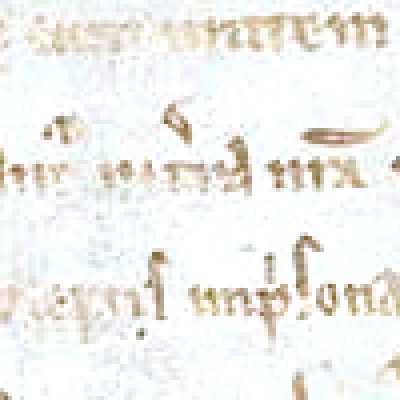
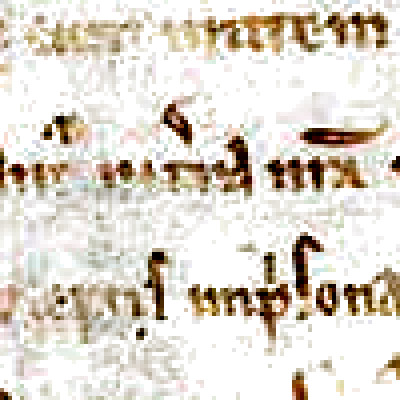
The Latin text of the central crop is:
Angliam nisi per costeram maris. Breve quod vocatur Precipe
Inquisicionis de vita vel menbris set gratis concedatur et non
habebimus custodiam heredis vel terre alicuius quam tenet de
eum ibimus nec super eum mittemus nisi per legale iudicium
et si tales inveniantur in terra nostra in principio gwerre attachientur
utilitatem Regni, exceptis imprisonatis et utlagatis secundum
Et nos eodem modo eam tenebimus quo Baro eam tenuit.
Regum Anglie, vel antiquam tenuram, habeant earum custodiam
iuratos de eodem comitatu qui debent eligi per probos
Andream de Cancellis, Gionem de Cygony, Galfridum
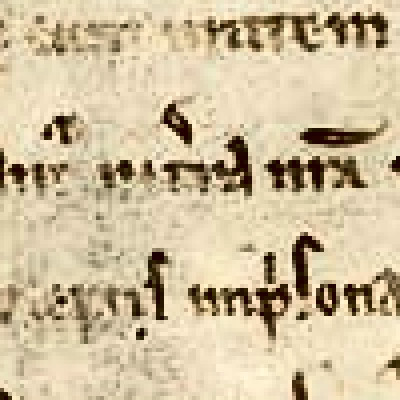
Words are often abbreviated. For example, "nisi" is written as an "n" with undotted "i" above it; "per" is a "p" with horizontal stroke through the tail, "nec" is "n" with a "c" above. Suffices are often written as small squigles. Capitals at the start of sentences are fancier than capitals at the start of proper names.
Some of the text is lighter than some of the parchment, so a simple approach cannot produce a perfect result. Nevertheless, it is useful to experiment with simple approaches.
Get some data about the lightness, from the L* channel of Lab.
for /F "usebackq" %%L in (`%IMG7%magick ^
  %SRC% ^
  -colorspace Lab ^
  -format "statMIN=%%[fx:minima.r]\nstatMAX=%%[fx:maxima.r]\nstatMEAN=%%[fx:mean.r]\nstatSD=%%[fx:standard_deviation.r]\n" ^
  info:`) do @set %%L

echo min=%statMIN%  max=%statMAX%  mean=%statMEAN%  SD=%statSD%
min=0.00773175 max=0.940965 mean=0.601176 SD=0.0785438
"-auto-level" will help, slightly.
for /F "usebackq" %%L in (`%IMG7%magick ^
  %SRC% ^
  -colorspace Lab ^
  -channel R ^
  -auto-level ^
  +channel ^
  -format "statMIN=%%[fx:minima.r]\nstatMAX=%%[fx:maxima.r]\nstatMEAN=%%[fx:mean.r]\nstatSD=%%[fx:standard_deviation.r]\n" ^
  info:`) do @set %%L

echo min=%statMIN%  max=%statMAX%  mean=%statMEAN%  SD=%statSD%
min=0 max=1 mean=0.6359 SD=0.084163
Most of the image is background. We want to lighten the background and darken the ink. The background will be near the mean value, so we will increase contrast at mean - SD.
for /F "usebackq" %%L in (`%IMG7%magick ^
  %SRC% ^
  -colorspace Lab ^
  -channel R ^
  -auto-level ^
  +channel ^
  -format "CENT=%%[fx:100*(mean.r-standard_deviation.r)]\n" ^
  info:`) do @set %%L

echo CENT=%CENT%
CENT=55.1737
We increase the contrast around this central value. The factor of "20" is arbitrary.
%IMG7%magick ^
  %SRC% ^
  +depth ^
  -colorspace Lab ^
  -channel R ^
  -auto-level ^
  -sigmoidal-contrast 20,%CENT%%% ^
  +channel ^
  -colorspace sRGB ^
  ( +clone %RESZ% +write od_sig_r.png +delete ) ^
  ( +clone %CROP% +write od_sig_c.png ^
    %MAG_CROP% +write od_sig_cc.png +delete ^
  ) ^
  od_sig.png
|
|
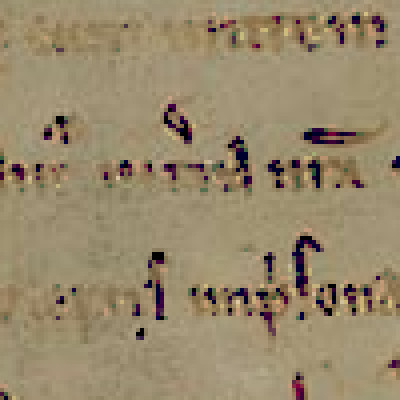
This has increased the contrast between ink and parchment. However, it also emphasises differences between areas.
An alternative is to use "-level-colors" to make darkest ink black, and the lightest background white. From Gimp, the values are roughly #a59a82 and #554129.
%IMG7%magick ^
  %SRC% ^
  +depth ^
  -level-colors #554129,#a59a82 ^
  ( +clone %RESZ% +write od_plev_r.png +delete ) ^
  ( +clone %CROP% +write od_plev_c.png ^
    %MAG_CROP% +write od_plev_cc.png +delete ^
  ) ^
  od_plev.png
This has increased colour variation in the parchment. |
|
We can use traditional sharpening tools, extrapolating away from a blur.
%IMG7%magick ^
  %SRC% ^
  +depth ^
  -colorspace RGB ^
  -unsharp 0x3+1+0 ^
  +channel ^
  -colorspace sRGB ^
  ( +clone %RESZ% +write od_shp_r.png +delete ) ^
  ( +clone %CROP% +write od_shp_c.png ^
    %MAG_CROP% +write od_shp_cc.png +delete ^
  ) ^
  od_shp.png
Noise is sharpened as much as lettering. |
|
|
The fourth parameter of "-unsharp" reduces the sharpening of noise. %IMG7%magick ^
%SRC% ^
+depth ^
-colorspace RGB ^
-unsharp 0x3+1+0.2 ^
+channel ^
-colorspace sRGB ^
( +clone %RESZ% +write od_shp2_r.png +delete ) ^
( +clone %CROP% +write od_shp2_c.png ^
%MAG_CROP% +write od_shp2_cc.png +delete ^
) ^
od_shp2.png
|
|
The image blurred is approximately the background, so dividing by the blur makes the background approximately white.
FOR /F "usebackq" %%L ^
IN (`%IMG7%magick identify -format "WW=%%w\nHH=%%h" %SRC%`) ^
DO set %%L

%IMG7%magick ^
  %SRC% ^
  ( -clone 0 ^
    -resize 5%% -resize "%WW%x%HH%^!" ^
  ) ^
  ( -clone 0 ^
    %sMULT% ^
  ) ^
  -delete 0 ^
  -compose Divide -composite ^
  +depth ^
  ( +clone %RESZ% +write od_db1_r.png +delete ) ^
  ( +clone %CROP% +write od_db1_c.png ^
    %MAG_CROP% +write od_db1_cc.png +delete ^
  ) ^
  od_db1.png
|

|
This will clip the background, and light parts of lettering. I prefer a slightly darker result that doesn't clip.
%IMG7%magick ^
  %SRC% ^
  ( -clone 0 ^
    -resize 5%% -resize "%WW%x%HH%^!" ^
  ) ^
  ( -clone 0 ^
    -evaluate Multiply 0.95 ^
  ) ^
  -delete 0 ^
  -compose Divide -composite ^
  +depth ^
  ( +clone %RESZ% +write od_db2_r.png +delete ) ^
  ( +clone %CROP% +write od_db2_c.png ^
    %MAG_CROP% +write od_db2_cc.png +delete ^
  ) ^
  od_db2.png
|
|
|
We can operate on just the L channel of Lab. %IMG7%magick ^
%SRC% ^
-colorspace Lab -channel R ^
( -clone 0 ^
-resize 5%% -resize "%WW%x%HH%^!" ^
) ^
( -clone 0 ^
-evaluate Multiply 0.95 ^
) ^
-delete 0 ^
-compose Divide -composite ^
+channel -colorspace sRGB ^
+depth ^
( +clone %RESZ% +write od_db3_r.png +delete ) ^
( +clone %CROP% +write od_db3_c.png ^
%MAG_CROP% +write od_db3_cc.png +delete ^
) ^
od_db3.png
|


|
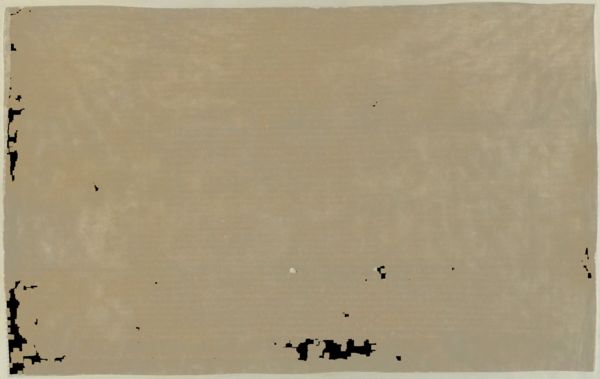
By chopping away everything except the corners, we can readily see variation in the background.
%IMG7%magick ^ %SRC% ^ -gravity Center -chop 80%%x80%% ^ od_corn.png |
|
The background behind the parchment is remarkably constant. Either the lighting was very even, or the image has been processed, or both. The parchment itself has variation.
A blank background is useful, in order to remove it. There are many methods for this.
|
1: Single colour sample: %IMG7%magick ^ %SRC% ^ -fill #a29373 -colorize 100 ^ %RESZ% ^ od_samp1.png |

|
|
2: Multiple colour samples: %IMG7%magick ^ %SRC% ^ +depth ^ -sparse-color Bilinear ^ 283,59,#a69b7f,2938,92,#afa389,^ 265,1711,#9d8f72,2861,1694,#a39c81 ^ %RESZ% ^ od_samp2.png |

|
|
4: Erase text, then infill %IMG7%magick ^
%SRC% ^
+depth ^
( +clone ^
-colorspace Gray ^
-contrast-stretch 0x50%% ^
+transparent White ^
) ^
-compose CopyOpacity -composite ^
( +clone ^
-blur 0x3 -alpha off ^
) ^
-compose DstOver -composite ^
( +clone %RESZ% +write od_rub_r.png +delete ) ^
( +clone %CROP% +write od_rub_c.png ^
%MAG_CROP% +write od_rub_cc.png +delete ^
) ^
od_rub.png
|
|
%IMG7%magick ^
  od_rub.png ^
  %SRC% ^
  +depth ^
  -compose Divide -composite ^
  -contrast-stretch 2%%,0 ^
  ( +clone %RESZ% +write od_div_r.png +delete ) ^
  ( +clone %CROP% +write od_div_c.png ^
    %MAG_CROP% +write od_div_cc.png +delete ^
  ) ^
  od_div.png
|


|
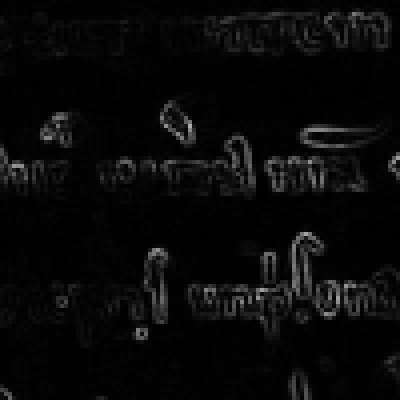
We can find the edges of detail, for example with slopeMag.bat.
call %PICTBAT%slopeMag %SRC% od_sm.png Tweak the result with auto-level and sigmoidal-contrast. %IMG7%magick ^
od_sm.png ^
+depth ^
-auto-level ^
-sigmoidal-contrast 8,50%% ^
( +clone %RESZ% +write od_sm_r.png +delete ) ^
( +clone %CROP% +write od_sm_c.png ^
%MAG_CROP% +write od_sm_cc.png +delete ^
) ^
od_sm.png
|
|
We can multiply the source by this edge-detection, negated so the edges of the letters become darker.
%IMG7%magick ^
  %SRC% ^
  -colorspace Lab -channel R ^
  +depth ^
  ( od_sm.png -negate ) ^
  -compose Multiply -composite ^
  +channel -colorspace sRGB ^
  -auto-level -auto-gamma ^
  ( +clone %RESZ% +write od_sm2_r.png +delete ) ^
  ( +clone %CROP% +write od_sm2_c.png ^
    %MAG_CROP% +write od_sm2_cc.png +delete ^
  ) ^
  od_sm2.png
|

|
For convenience, .bat scripts are also available in a single zip file. See Zipped BAT files.
This is a crude infill method, filling transparent pixels by iterative blurs.
@rem From image %1 with transparency,
@rem blurs until fully opaque.
@rem
@rem Optional:
@rem   %2 blur sigma (default 1)
@rem     %2 can have a "+" suffix.
@rem     If it has, the sigma will increment on each pass.
@rem   %3 output filename
@rem   %4 blur type
@rem     0 -blur 0x{sigma}
@rem     1 -motion-blur 0x{sigma}+{angle}
@rem     2 -rotational-blur {angle}
@rem   %5 angle
@rem
@rem  bfTHRESH_PC percentage of alpha for thresholding.
@rem    For thin lines, use a low value eg 3.
@rem  bfMAX_ITER maximum number of iterations. [Default max(w,h).]
@rem  bfMAX_SIG Stop when + results in sigma greater than this.
@rem   [Default no check.]
@rem
@rem  An equivalent compiled program wouldn't need to save images
@rem    between iterations, so would be faster.
@rem
@rem  Updated:
@rem    28-August-2018 Added bfMAX_SIG
@rem    13-July-2022 Upgraded for IM v7.

@if "%1"=="" findstr /B "rem @rem" %~f0 & exit /B 1

@setlocal

@call echoOffSave

call %PICTBAT%setInOut %1 bf


set IN_BLR_SIG=%2
if "%IN_BLR_SIG%"=="." set IN_BLR_SIG=
if "%IN_BLR_SIG%"=="" set IN_BLR_SIG=1

rem echo IN_BLR_SIG=%IN_BLR_SIG%

set BLR_SUFFIX=%IN_BLR_SIG:~-1%
if "%BLR_SUFFIX%"=="+" (
  set BLR_SIG=%IN_BLR_SIG:~0,-1%
) else (
  set BLR_SUFFIX=
  set BLR_SIG=%IN_BLR_SIG%
)

if not "%3"=="" if not "%3"=="." set OUTFILE=%3

echo %~n0: INFILE=%INFILE% OUTFILE=%OUTFILE% BLR_SIG=%BLR_SIG% BLR_SUFFIX=%BLR_SUFFIX%  OUT_NUM=%OUT_NUM%

set BLR_TYPE=%4
if "%BLR_TYPE%"=="." set BLR_TYPE=
if "%BLR_TYPE%"=="" set BLR_TYPE=0

set BLR_ANG=%5
if "%BLR_ANG%"=="." set BLR_ANG=
if "%BLR_ANG%"=="" set BLR_ANG=0

if %BLR_TYPE%==0 (
  set sBLUR=-blur 0x%BLR_SIG%
) else if %BLR_TYPE%==1 (
  set sBLUR=-channel RGBA -motion-blur 0x%BLR_SIG%+%BLR_ANG% +channel
) else if %BLR_TYPE%==2 (
  set sBLUR=-channel RGBA -rotational-blur %BLR_ANG% +channel
) else (
  echo %0: Unknown BLR_TYPE=%BLR_TYPE%
  exit /B 1
)

if "%bfMAX_SIG%"=="" set bfMAX_SIG=1e9
set SIG_OK=1

echo %0: sBLUR=%sBLUR%

call %PICTBAT%quantFp %OUTFILE%

if "%bfTHRESH_PC%"=="" set bfTHRESH_PC=25

if "%bfMAX_ITER%"=="" for /F "usebackq" %%L in (`%IMG7%magick identify ^
  -format "bfMAX_ITER=%%[fx:max(w,h)]" ^
  %INFILE%`) do set %%L
if "%bfMAX_ITER%"=="" exit /B 1

rem echo %0: bfMAX_ITER=%bfMAX_ITER%

set TMPDIR=\temp
set TMP_INFILE=%TMPDIR%\bf_tmpin.miff
set TMP_FILE=%TMPDIR%\bf1.miff

%IMG7%magick ^
  %INFILE% ^
  +write %TMP_INFILE% ^
  -channel A ^
  -threshold %bfTHRESH_PC%%% ^
  +channel ^
  -define quantum:format=floating-point -depth 32 ^
  %TMP_FILE%
if ERRORLEVEL 1 exit /B 1

set nITER=0
set MEAN=-1

:loop
set PREV_MEAN=%MEAN%

set MEAN=

for /F "usebackq" %%L in (`%IMG7%magick ^
  %TMP_FILE% ^
  ^( +clone ^
     -alpha extract ^
     +write mpr:ALP ^
     +delete ^
  ^) ^
  %sBLUR% ^
  ^( +clone ^
     -alpha extract ^
     mpr:ALP ^
     -compose Lighten -composite ^
     -threshold %bfTHRESH_PC%%% ^
     -precision 15 ^
     -format "MIN=%%[fx:minima]\nMAX=%%[fx:maxima]\nMEAN=%%[fx:mean]\n" +write info: ^
  ^) ^
  -alpha off -compose CopyOpacity -composite ^
  %TMP_INFILE% ^
  -compose Over -composite ^
  -channel RGBA -clamp +channel ^
  +depth ^
  -define "quantum:format=floating-point" -depth 32 ^
  %TMP_FILE%`) do set %%L

if "%MEAN%"=="" (
  echo %0: magick failed, no mean
  exit /B 1
)

if "%BLR_SUFFIX%"=="+" (
  for /F "usebackq" %%L in (`%IMG7%magick identify ^
  -format "BLR_SIG=%%[fx:%BLR_SIG%*1.01]\nSIG_OK=%%[fx:%BLR_SIG%>%bfMAX_SIG%?0:1]" ^
  xc:`) do set %%L

  if %BLR_TYPE%==0 (
    set sBLUR=-blur 0x%BLR_SIG%
  ) else if %BLR_TYPE%==1 (
    set sBLUR=-motion-blur 0x%BLR_SIG%+%BLR_ANG%
  )
)

set /A nITER+=1

echo %~n0: nITER=%nITER% MIN=%MIN% MAX=%MAX% MEAN=%MEAN% BLR_SIG=%BLR_SIG% SIG_OK=%SIG_OK%

if %nITER% LSS %bfMAX_ITER% if "%PREV_MEAN%" NEQ "%MEAN%" if %SIG_OK%==1 goto loop

echo %~n0: bfMAX_ITER=%bfMAX_ITER% nITER=%nITER%

%IMG7%magick ^
  %TMP_FILE% ^
  %QUANT_FP% ^
  %OUTFILE%

if not "%MEAN%"=="1" (
  set BUST=1
) else (
  set BUST=0
)

call echoRestore

@endlocal & set bfOUTFILE=%OUTFILE%& set bfBUST=%BUST%
rem Slope magnitude
rem
rem Returns the magnitude of the slope.
@rem
@rem  If %2 is given, uses this as the output filename.
@rem
@rem Also uses:
@rem   smAUTO if 0, doesn't "-auto-level -auto-gamma"
@rem
@rem Updated:
@rem   14-July-2022 for IM v7.
@rem   26-July-2022 Replace "-evaluate Pow 2 -compose plus -composite -evaluate Pow 0.5" by "-fx hypot(u,v)"
@rem

@if "%1"=="" findstr /B "rem @rem" %~f0 & exit /B 1

@setlocal

rem @call echoOffSave

call %PICTBAT%setInOut %1 sm

if not "%2"=="" if not "%2"=="." set OUTFILE=%2

if "%smAUTO%"=="0" (
  set AUTO=
) else (
  set AUTO=-auto-level -auto-gamma
  set AUTO=-auto-level
)

rem This works best with Q32 HDRI.

%IMG7%magick ^
  %INFILE% ^
  -alpha off ^
  -define convolve:scale="50%%^!" -bias 50%% ^
  ( -clone 0 -morphology Convolve Sobel:0 ) ^
  ( -clone 0 -morphology Convolve Sobel:90 ) ^
  -delete 0 ^
  -solarize 50%% -level 50,0%% ^
  +level 0,70.71067811865475%% ^
  -fx "hypot(u,v)" ^
  -separate -evaluate-sequence Max ^
  %AUTO% ^
  +depth ^
  -define quantum:format=integer ^
  %OUTFILE%

if ERRORLEVEL 1 exit /B 1

call echoRestore

endlocal & set smOUTFILE=%OUTFILE%
All images on this page were created by the commands shown, using:
%IMG7%magick -version
Version: ImageMagick 7.1.0-42 Q16-HDRI x64 396d87c:20220709 https://imagemagick.org
Copyright: (C) 1999 ImageMagick Studio LLC
License: https://imagemagick.org/script/license.php
Features: Cipher DPC HDRI OpenCL
Delegates (built-in): bzlib cairo freetype gslib heic jng jp2 jpeg jxl lcms lqr lzma openexr pangocairo png ps raqm raw rsvg tiff webp xml zip zlib
Compiler: Visual Studio 2022 (193231332)
To improve internet download speeds, some images may have been automatically converted (by ImageMagick, of course) from PNG or TIFF or MIFF to JPG.
Source file for this web page is olddoc.h1. To re-create this web page, run "procH1 olddoc".
This page, including the images, is my copyright. Anyone is permitted to use or adapt any of the code, scripts or images for any purpose, including commercial use.
Anyone is permitted to re-publish this page, but only for non-commercial use.
Anyone is permitted to link to this page, including for commercial use.
Page version v1.0 24-July-2014.
Page created 27-Aug-2022 18:45:18.
Copyright © 2022 Alan Gibson.