snibgo's ImageMagick pages
Blending tiles
An image may have a number of variations, based on characteristics of the image divided into cells, or a regular crop. Then we want to blend these variations together.
When processing a photograph (or other image), we might apply a process such as "-auto-level" to the entire image. Alternatively, we might divide the image into tiles, calculate the transformations that would auto-level each tile, make a version of the entire image using each of these transformations, then blend the results together according to the positions of the original tiles.
This page addresses the final part of the problem: blending the results. A script,
blendTile.bat, is given for this.
The technique is useful for simple processes such as auto-level or equalisation, or more complex processes such as contrast-limited histogram equalisation. The data for the process comes from each tile, but each process is applied in turn to the entire image.
An alternative to blending is to use minimum error boundary cuts; see
Assembling with dark paths.
For samples, we will use two sets of images.
Six flat-colour graphics images:
%IMG7%magick -size 300x100 xc:Red bt_g_red.png
%IMG7%magick -size 300x100 xc:Lime bt_g_green.png
%IMG7%magick -size 300x100 xc:Blue bt_g_blue.png
%IMG7%magick -size 300x100 xc:Cyan bt_g_cyan.png
%IMG7%magick -size 300x100 xc:Magenta bt_g_magenta.png
%IMG7%magick -size 300x100 xc:Yellow bt_g_yellow.png
|


|
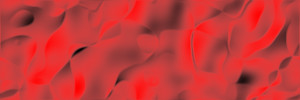
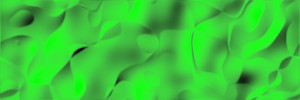
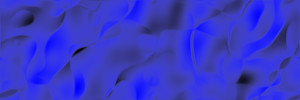
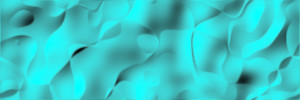
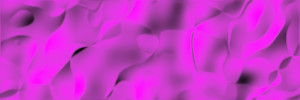
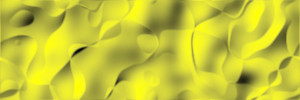
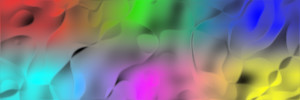
Six images that imitate variations of a photograph:
set mbmSEED=1234
call %PICTBAT%mBlobMask bt_src.png 300 100

%IMG7%magick ^
  bt_src.png ^
  -shade 135x45 -auto-level ^
  -alpha copy ^
  -channel A -negate +channel ^
  bt_src.png

%IMG7%magick ^
  bt_src.png ^
  ( +clone -background Red -flatten ^
    -set colorspace sRGB ^
    -write bt_p_red.png +delete ) ^
  ( +clone -background Lime -flatten ^
    -set colorspace sRGB ^
    -write bt_p_green.png +delete ) ^
  ( +clone -background Blue -flatten ^
    -set colorspace sRGB ^
    -write bt_p_blue.png +delete ) ^
  ( +clone -background Cyan -flatten ^
    -set colorspace sRGB ^
    -write bt_p_cyan.png +delete ) ^
  ( +clone -background Magenta -flatten ^
    -set colorspace sRGB ^
    -write bt_p_magenta.png +delete ) ^
  ( +clone -background Yellow -flatten ^
    -set colorspace sRGB ^
    -write bt_p_yellow.png +delete ) ^
  NULL:
|
|
ASIDE: Each "-set colorspace sRGB" is to work around a bug in v6.9.0-0. See
Forum: -flatten causes gamma-shift.
If we have four images that we want to blend in a 2x2 pattern, such that only the four corners are unblended, we can use a pair of masks.
%IMG7%magick ^
  bt_p_red.png ^
  bt_p_green.png ^
  bt_p_blue.png ^
  bt_p_yellow.png ^
  ( -clone 0 -sparse-color Bilinear 0,0,#000,%%[fx:w-1],0,#fff ) ^
  ( -clone 0,1,4 -composite ) ^
  ( -clone 2,3,4 -composite ) ^
  -delete 0-4 ^
  ( -clone 0 -sparse-color Bilinear 0,0,#000,0,%%[fx:h-1],#fff ) ^
  -composite ^
  bt_2x2.png
|

|
The first "-sparse-color" creates a horizontal gradient, with black at the left. The second creates a vertical gradient, with black at the top.
The blending method is arithmetical, so the mid-point of pure red and pure green is (50%,50%,0). In sRGB colorspace, this is a darker colour than pure red or green. To eliminate this, we can do the operation in linear (RGB) colorspace. We convert the inputs to RGB, then convert the output to sRGB before writing the file. Annoyingly, "-composite" seems to [*] automatically convert non-sRGB to sRGB, so we use "-set colorspace sRGB" to prevent any conversion, and thus need "-set colorspace RGB" to correctly convert back to sRGB.
[*] Check this. Is it really true?
%IMG7%magick ^
  bt_p_red.png ^
  bt_p_green.png ^
  bt_p_blue.png ^
  bt_p_yellow.png ^
  -colorspace RGB -set colorspace sRGB ^
  ( -clone 0 -sparse-color Bilinear 0,0,#000,%%[fx:w-1],0,#fff ) ^
  ( -clone 0,1,4 -composite ) ^
  ( -clone 2,3,4 -composite ) ^
  -delete 0-4 ^
  ( -clone 0 -sparse-color Bilinear 0,0,#000,0,%%[fx:h-1],#fff ) ^
  -composite ^
  -set colorspace RGB -colorspace sRGB ^
  bt_2x2c.png
|

|
Given a set of m*n images, all the same size, and we want to blend them together into an image of the same size, we can do this with a set of (m-1)+(n-1) masks.
The method shown here blends between the centres of the tiles. Hence each output pixel takes its value from only one image, or a blend of two images, or a blend of four images.
This implements the interpolation method shown in
Wikipedia: Adaptive histogram equalization: Efficient computation by interpolation.
For example, suppose we have three images, and we want to blend them in a 3x1 array, so we have three tiles of 100x100 pixels.
Then we need two masks. The blending area will extend from the centre of each tile to the centre of the next one, so the width of the graduated area is the same as the width of each tile. The left half of the left-most and the right half of the right-most tile will not be blended.
The code takes the first two image and blends with the first mask. Then it takes the next image and blends with the next mask. The process could continue for any number of images.
Below, the masks are saved only for display purposes.
%IMG7%magick ^
  bt_g_red.png ^
  bt_g_green.png ^
  ( -size 1x100 gradient: -rotate 90 ^
    -background #000 ^
    -gravity East -extent 150x1 ^
    -background #fff ^
    -gravity West -extent 300x1 ^
    -scale "300x100^!" ^
    -write bt_mask1.png ^
  ) ^
  -composite ^
  bt_g_blue.png ^
  ( -size 1x100 gradient: -rotate 90 ^
    -background #000 ^
    -gravity East -extent 250x1 ^
    -background #fff ^
    -gravity West -extent 300x1 ^
    -scale "300x100^!" ^
    -write bt_mask2.png ^
  ) ^
  -composite ^
  bt_g_samp.png
|


|
%IMG7%magick ^
  bt_g_red.png ^
  bt_g_green.png ^
  ( -size 1x100 gradient: -rotate 90 ^
    -sigmoidal-contrast 5,50%% ^
    -background #000 ^
    -gravity East -extent 150x1 ^
    -background #fff ^
    -gravity West -extent 300x1 ^
    -scale "300x100^!" ^
    -write bt_mask1sc.png ^
  ) ^
  -composite ^
  bt_g_blue.png ^
  ( -size 1x100 gradient: -rotate 90 ^
    -sigmoidal-contrast 5,50%% ^
    -background #000 ^
    -gravity East -extent 250x1 ^
    -background #fff ^
    -gravity West -extent 300x1 ^
    -scale "300x100^!" ^
    -write bt_mask2sc.png ^
  ) ^
  -composite ^
  bt_g_samp2.png
|


|
For an m*n array, each row is built in this way. Then the rows are blended together with the same technique but blended orthogonally.
Building a command that blends an m*n array is rather tedious, so a script
blendTile.bat does the work. Programatically building a long command can be done by a number of methods:
- Build an enviromnent variable containing the command.
- Build a text file containing the IM portions, and run it with convert @x.txt.
- Build a text (BAT) file containing the entire shell command.
For this script, I use the third method.
Create a text file listing the images that are to be blended. I'll name one file bt_g_images.txt, and the other is bt_p_images.txt. bt_g_images.txt contains:
bt_g_red.png
bt_g_green.png
bt_g_blue.png
bt_g_cyan.png
bt_g_magenta.png
bt_g_yellow.png
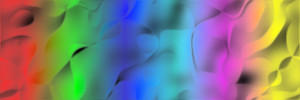
We can blend these six images in six columns and one row, or two columns and three rows, or three columns and two rows.
call %PICTBAT%blendTile bt_g_images.txt 6 1 bt_g_out1.png
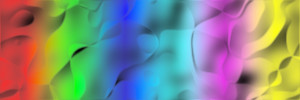
call %PICTBAT%blendTile bt_p_images.txt 6 1 bt_p_out1.png
|

|
|
call %PICTBAT%blendTile bt_g_images.txt 2 3 bt_g_out2.png
call %PICTBAT%blendTile bt_p_images.txt 2 3 bt_p_out2.png
|

|
|
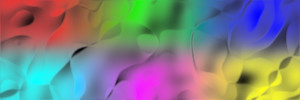
call %PICTBAT%blendTile bt_g_images.txt 3 2 bt_g_out3.png
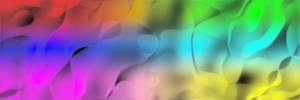
call %PICTBAT%blendTile bt_p_images.txt 3 2 bt_p_out3.png
|

|
|
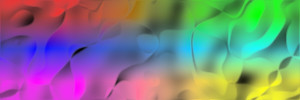
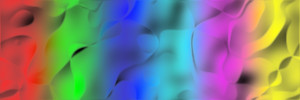
The pure colours at the ends are much larger than the pure colours towards the centre. To reduce this effect, we can apply a curve to the blend mask:
set btMASK_CURVE=-sigmoidal-contrast 5x50%%%%
call %PICTBAT%blendTile bt_g_images.txt 6 1 bt_g_out1c.png
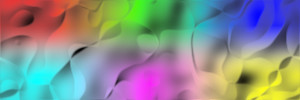
call %PICTBAT%blendTile bt_p_images.txt 6 1 bt_p_out1c.png
|

|
|
call %PICTBAT%blendTile bt_g_images.txt 2 3 bt_g_out2c.png
call %PICTBAT%blendTile bt_p_images.txt 2 3 bt_p_out2c.png
|

|
|
call %PICTBAT%blendTile bt_g_images.txt 3 2 bt_g_out3c.png
call %PICTBAT%blendTile bt_p_images.txt 3 2 bt_p_out3c.png

set btMASK_CURVE=
|

|
|
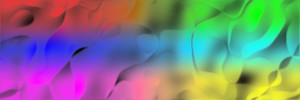
The blending method is arithmetical, so the mid-point of pure red and pure green is (50%,50%,0). In sRGB colorspace, this is a darker colour than pure red or green. To eliminate this, we do the operation in linear (RGB) colorspace. The script converts the input to RGB, then converts the output to sRGB before writing the file. Annoyingly, "-composite" automatically converts non-sRGB to sRGB, so the script uses "-set colorspace" to prevent this conversion.
set btMASK_CURVE=-sigmoidal-contrast 5x50%%%%
set btLINEAR=1

call %PICTBAT%blendTile bt_g_images.txt 6 1 bt_g_out1cl.png
call %PICTBAT%blendTile bt_p_images.txt 6 1 bt_p_out1cl.png
|

|
|
call %PICTBAT%blendTile bt_g_images.txt 2 3 bt_g_out2cl.png
call %PICTBAT%blendTile bt_p_images.txt 2 3 bt_p_out2cl.png
|

|
|
call %PICTBAT%blendTile bt_g_images.txt 3 2 bt_g_out3cl.png
call %PICTBAT%blendTile bt_p_images.txt 3 2 bt_p_out3cl.png

set btLINEAR=
set btMASK_CURVE=
|

|
|
For the last example, here is the script that was created:
c:\im\ImageMagick-7.1.0-42-Q16-HDRI\magick ^
( ^
( bt_p_red.png -colorspace RGB -set colorspace sRGB ) ^
( bt_p_green.png -colorspace RGB -set colorspace sRGB ) ^
( -size 1x100 gradient: -rotate 90 ^
-sigmoidal-contrast 5x50%% ^
-background #000 -gravity East -extent 150x1 ^
-background #fff -gravity West -extent 300x1 ^
-scale "300x100^!" ^
) -composite ^
( bt_p_blue.png -colorspace RGB -set colorspace sRGB ) ^
( -size 1x100 gradient: -rotate 90 ^
-sigmoidal-contrast 5x50%% ^
-background #000 -gravity East -extent 250x1 ^
-background #fff -gravity West -extent 300x1 ^
-scale "300x100^!" ^
) -composite ^
) ^
( ^
( bt_p_cyan.png -colorspace RGB -set colorspace sRGB ) ^
( bt_p_magenta.png -colorspace RGB -set colorspace sRGB ) ^
( -size 1x100 gradient: -rotate 90 ^
-sigmoidal-contrast 5x50%% ^
-background #000 -gravity East -extent 150x1 ^
-background #fff -gravity West -extent 300x1 ^
-scale "300x100^!" ^
) -composite ^
( bt_p_yellow.png -colorspace RGB -set colorspace sRGB ) ^
( -size 1x100 gradient: -rotate 90 ^
-sigmoidal-contrast 5x50%% ^
-background #000 -gravity East -extent 250x1 ^
-background #fff -gravity West -extent 300x1 ^
-scale "300x100^!" ^
) -composite ^
) ^
( -size 1x50 gradient:#000-#fff ^
-sigmoidal-contrast 5x50%% ^
-background #000 -gravity South -extent 1x75 ^
-background #fff -gravity North -extent 1x100 ^
-scale "300x100^!" ^
) -composite ^
-set colorspace RGB -colorspace sRGB ^
bt_p_out3cl.png
The memory requirement for the created script is three times the requirements of a single image, however many images there are.
These processes are used in
Adaptive auto level and gamma and
[Adaptive] Contrast-limited equalisation.
For convenience, .bat scripts are also available in a single zip file. See
Zipped BAT files.
rem From %1, a text file list of n*m images, one image per line,
rem   %2 is number of columns (n),
rem   %3 is number of rows (m),
rem   makes a blended image.
rem %4 is optional output filename.
@rem
@rem Can also use:
@rem   btMASK_CURVE eg -sigmoidal-contrast 5x50%
@rem   btLINEAR if 1, composes in linear colourspace.
@rem
@rem Updated:
@rem   27-July-2022 for IM v7.
@rem

@rem FIXME: Input could be TIFF or MIFF with multiple images?


@if "%3"=="" findstr /B "rem @rem" %~f0 & exit /B 1

@setlocal enabledelayedexpansion

@call echoOffSave

call %PICTBAT%setInOut %1 bt


set N_COL=%2
set N_ROW=%3
if not "%4"=="" set OUTFILE=%4

if "%btLINEAR%"=="1" (
  set IN_COL_SP=-colorspace RGB -set colorspace sRGB
  set OUT_COL_SP=-set colorspace RGB -colorspace sRGB
) else (
  set IN_COL_SP=
  set OUT_COL_SP=
)

if not exist %INFILE% (
  echo %0: Can't find input file %INFILE%
  exit /B 1
)

set TMP_CMD=%TEMP%\bt_tmp_cmd.bat
del /q %TMP_CMD% 2>nul

set FNUM=0
set J=0
set I=0
for /F "tokens=*" %%F in (%INFILE%) do (
  rem set BT_IMAGE_!FNUM!=%%F
  set BT_IMAGE_!I!_!J!=%%F
  set /A FNUM+=1
  set /A I+=1
  if !I!==%N_COL% (
    set /A J+=1
    set I=0
  )
)

rem set BT_IMAGE

set /A COL_X_ROW=%N_COL%*%N_ROW%

if not %FNUM%==%COL_X_ROW% (
  echo %0: Bug: %FNUM% neq %COL_X_ROW%
  exit /B 1
)

for /F "usebackq" %%L in (`%IMG7%magick identify ^
  -format "WW=%%w\nHH=%%h\nWG=%%[fx:int(w/%N_COL%+0.5)]\nHG=%%[fx:int(h/%N_ROW%+0.5)]" ^
  %BT_IMAGE_0_0%`) do set %%L
if "%WW%"=="" exit /B 1

rem echo WW=%WW% HH=%HH% WG=%WG% HG=%HG%

set /A N_COLm1=%N_COL%-1
set /A N_ROWm1=%N_ROW%-1

echo %IMG7%magick >%TMP_CMD%

set FNUM=0
for /L %%j in (0,1,%N_ROWm1%) do (
  echo ^( >>%TMP_CMD%
  for /L %%i in (0,1,%N_COLm1%) do (
    echo ^( !BT_IMAGE_%%i_%%j! %IN_COL_SP% ^) >>%TMP_CMD%
    if not %%i==0 (
      set /A LEN=%%i*%WG%+%WG%/2
      echo ^( -size 1x%WG% gradient: -rotate 90 >>%TMP_CMD%
      if not "%btMASK_CURVE%"=="" echo %btMASK_CURVE% >>%TMP_CMD%
      echo -background #000 -gravity East -extent !LEN!x1 >>%TMP_CMD%
      echo -background #fff -gravity West -extent %WW%x1 >>%TMP_CMD%
      echo -scale "%WW%x%HH%^^^!" >>%TMP_CMD%
      echo ^) -composite >>%TMP_CMD%
    )
    set /A FNUM+=1
  )
  echo ^) >>%TMP_CMD%
  if not %%j==0 (
    set /A LEN=%%j*%HG%+%HG%/2
    echo ^( -size 1x%HG% gradient:#000-#fff >>%TMP_CMD%
    if not "%btMASK_CURVE%"=="" echo %btMASK_CURVE% >>%TMP_CMD%
    echo -background #000 -gravity South -extent 1x!LEN! >>%TMP_CMD%
    echo -background #fff -gravity North -extent 1x%HH% >>%TMP_CMD%
    echo -scale "%WW%x%HH%^^^!" >>%TMP_CMD%
    echo ^) -composite >>%TMP_CMD%
  )
)
if not "%OUT_COL_SP%"=="" echo %OUT_COL_SP% >>%TMP_CMD%
cPrefix /p0 /i%TMP_CMD% /r"^"
echo %OUTFILE% >>%TMP_CMD%

call %TMP_CMD%

call echoRestore

@endlocal & set btOUTFILE=%OUTFILE%
All images on this page were created by the commands shown, using:
%IMG7%magick -version
Version: ImageMagick 7.1.0-42 Q16-HDRI x64 396d87c:20220709 https://imagemagick.org
Copyright: (C) 1999 ImageMagick Studio LLC
License: https://imagemagick.org/script/license.php
Features: Cipher DPC HDRI OpenCL
Delegates (built-in): bzlib cairo freetype gslib heic jng jp2 jpeg jxl lcms lqr lzma openexr pangocairo png ps raqm raw rsvg tiff webp xml zip zlib
Compiler: Visual Studio 2022 (193231332)
Source file for this web page is blendtile.h1. To re-create this web page, execute "procH1 blendtile".
This page, including the images, is my copyright. Anyone is permitted to use or adapt any of the code, scripts or images for any purpose, including commercial use.
Anyone is permitted to re-publish this page, but only for non-commercial use.
Anyone is permitted to link to this page, including for commercial use.
Page version v1.0 14-Dec-2014.
Page created 28-Jul-2022 12:27:20.
Copyright © 2022 Alan Gibson.