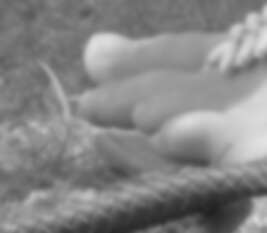
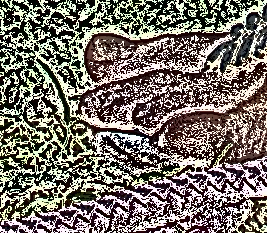
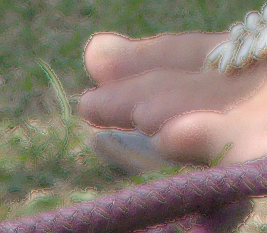
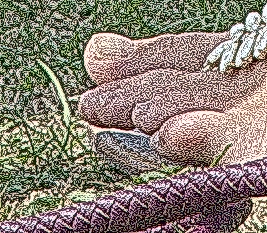
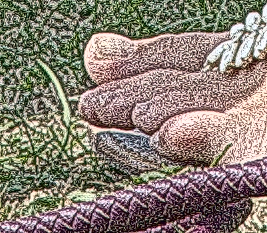
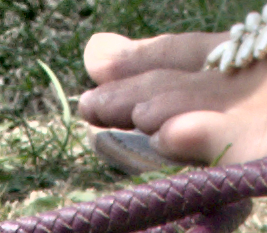
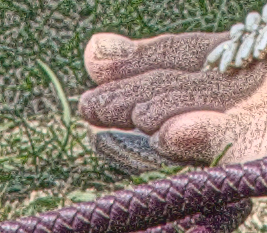
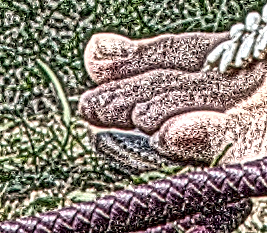
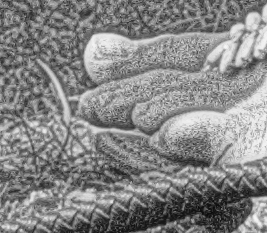
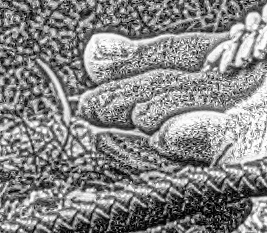
set SRC=toes.png set SRC_GR=mlc_srcgr.miff %IMG7%magick ^ %SRC% ^ %sHDRI% ^ -colorspace Lab ^ -channel R -separate +channel ^ -set colorspace sRGB ^ %SRC_GR%

... without clipping.
In IM, we can increase global contrast with -level or a number of other operations, and we can increase local contrast with -unsharp. If we increase contrast by too much, we push values out of gamut, so they are clipped and we lose detail. How can we increase local contrast so it is maximised, without clipping?
The problem is closely related to Adaptive blur and sharpen, but the method given on this page has a different goal. This method is developed further in Maximise local colour contrast.
We will work in Q32 HDRI:
set sHDRI=^
  -depth 32 ^
  -define "compose:clamp=off" ^
  -define "quantum:format=floating-point"
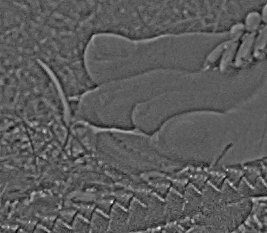
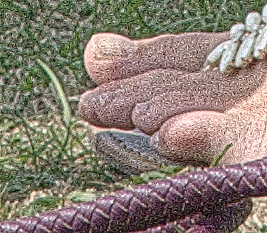
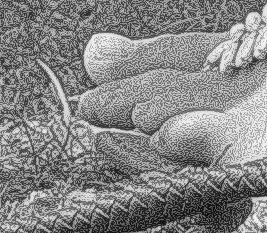
We start with a gray image, from the L channel of CIELab:
set SRC=toes.png set SRC_GR=mlc_srcgr.miff %IMG7%magick ^ %SRC% ^ %sHDRI% ^ -colorspace Lab ^ -channel R -separate +channel ^ -set colorspace sRGB ^ %SRC_GR% |
|
Subtract the local mean. Values are close to zero, so we need floating-point to avoid clipping. The process will expand the range of these values.
set SIG1=2

%IMG7%magick ^
  %SRC_GR% ^
  %sHDRI% ^
  ( +clone ^
    -blur 0x%SIG1% ^
    +write mlc_blr.miff ^
  ) ^
  -compose MinusSrc -composite ^
  mlc_minblr.miff
|

|
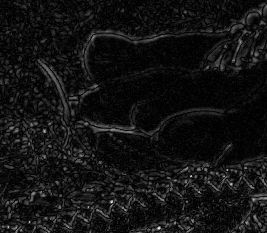
mlc_minblr.miff contains high-frequency data (positive and negative). If we add it back to the blur (low-frequency data, positive only), this will reconstruct the original source image.
If the input ranges from 0 to 100%, mlc_minblr.miff has a theoretical range of -100% to +100%. In practice, most values will be close to zero.
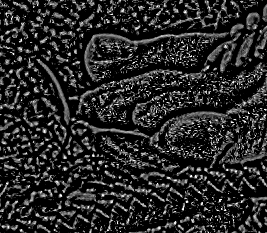
mlc_minblr.miff isn't easy to see, so we "-auto-level" to put pixels in the 0 to 100% range, just for viewing:
%IMG7%magick ^ mlc_minblr.miff ^ %sHDRI% ^ -auto-level ^ mlc_minblr_p.png |
|
If we double the values in mlc_minblr.miff before adding it back to the blur, this will increase the local contrast:
%IMG7%magick ^ mlc_minblr.miff ^ %sHDRI% ^ -evaluate Multiply 2 ^ mlc_blr.miff ^ -compose Plus -composite ^ mlc_uns1.miff |

|
This operation will usually cause some clipping, as it has done here:
%IMG7%magick ^
  mlc_uns1.miff ^
  -format "min=%%[fx:minima]  max=%%[fx:maxima]\n" ^
  info:
min=0.0137443 max=1.03843
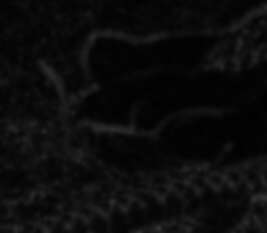
From the image we see that most areas have not clipped. In those areas, we could multiply mlc_minblr.miff by a larger number before adding it back to the blur. To maximise local contrast everywhere without clipping, we will multiply by a number that varies across the image. This is most conveniently done by dividing by the reciprocal, something like this ...
%IMG7%magick ^
  mlc_minblr.miff ^
  %sHDRI% ^
  mlc_numbers.miff ^
  -compose Divide -composite ^
  mlc_blr.miff ^
  -compose Plus -composite ^
  mlc_max_cont.miff
... where mlc_numbers.miff contains the divider at each pixel. So now we need to calculate mlc_numbers.miff. Ideally, this would be the local peaks in mlc_minblr.miff, but this wouldn't be a smoothly changing function. mlc_minblr.miff contains positive and negative values, so we take the absolute value, and blur it. This smooths the peaks, so we multiply it by the maximum absolute value (maxA) divided by the maximum blurred absolute value (maxB). (It would be easier to "-auto-level" the blurred absolute, but outliers would squish the values too much.)
First, take the absolute and blur it, and calculate the multiplier (mult = maxA/maxB)...
set SIG2=%SIG1%

for /F "usebackq" %%L in (`%IMG7%magick ^
  mlc_minblr.miff ^
  %sHDRI% ^
  -evaluate Abs 0 ^
  +write mlc_minblr_abs.miff ^
  -format "maxA=%%[fx:maxima]\n" ^
  +write info: ^
  -blur 0x%SIG2% ^
  +write mlc_minblr_avg.miff ^
  -format "maxB=%%[fx:maxima]\n" ^
  info:`) do set %%L

for /F "usebackq" %%L in (`%IMG7%magick identify ^
  -format "mult=%%[fx:%maxA%/%maxB%]\n"
  xc:`) do set %%L

echo maxA=%maxA% maxB=%maxB% mult=%mult%
maxA=0.204846 maxB=0.0688866 mult=2.97367 |


|
|
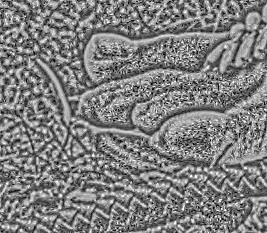
Show auto-levelled versions of mlc_minblr_abs.miff and mlc_minblr_avg.miff. %IMG7%magick ^ mlc_minblr_abs.miff ^ %sHDRI% ^ -auto-level ^ mlc_minblr_abs_p.png %IMG7%magick ^ mlc_minblr_avg.miff ^ %sHDRI% ^ -auto-level ^ mlc_minblr_avg_p.png |

|
... and apply the multiplier:
%IMG7%magick ^ mlc_minblr_avg.miff ^ %sHDRI% ^ -evaluate Multiply %mult% ^ mlc_minblr_avg2.miff |
|
|
Auto-levelled: %IMG7%magick ^ mlc_minblr_avg2.miff ^ %sHDRI% ^ -auto-level ^ mlc_minblr_avg2_p.png |

|
Now we can divide mlc_minblr.miff by the numbers in mlc_minblr_avg2.miff to locally maximise the high frequency component.
%IMG7%magick ^ mlc_minblr.miff ^ %sHDRI% ^ mlc_minblr_avg2.miff ^ -compose DivideSrc -composite ^ mlc_minblr_div.miff |
|
mlc_minblr_div.miff ranges from -100% to +100%, more or less. "-auto-level" would reduce this to exactly 0 to 100%, but outliers would squish this by too much, so we divide by two and add 50% to get a nominal range of 0 to 100%, and use oogPower.bat (see Putting OOG back in the box: Power modulation).
%IMG7%magick ^ mlc_minblr_div.miff ^ %sHDRI% ^ -evaluate Divide 2 ^ -evaluate Add 50%% ^ mlc_minblr_div2.miff |
|
call %PICTBAT%oogPower ^ mlc_minblr_div2.miff ^ mlc_minblr_div3.png |

|
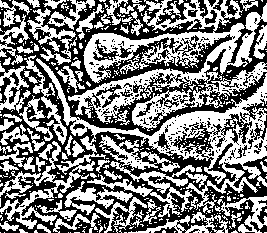
This is the high frequency component of the maximum-contrast image. For some purposes, this is what we want. Or we can maximise further, by thresholding:
%IMG7%magick ^ mlc_minblr_div3.png ^ -threshold 50%% ^ mlc_minblr_div3_t.png |

|
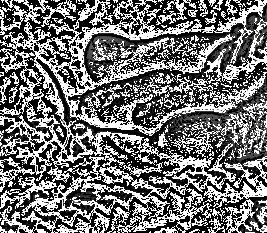
Or a "-contrast-stretch" makes roughly half-and-half black and white:
%IMG7%magick ^ mlc_minblr_div3.png ^ -contrast-stretch 49.9x49.9%% ^ -threshold 50%% ^ mlc_minblr_div3_t2.png |
|
Or convert to black and white with dithering:
%IMG7%magick ^
  mlc_minblr_div3.png ^
  ( xc:Black xc:White +append +repage ^
    -write mpr:MSK +delete ^
  ) ^
  -remap mpr:MSK ^
  mlc_minblr_div3_t3.png
|

|
However, it is more correct to add the high frequency component back to the blur. The high frequency component, mlc_minblr_div3.png, has the null point at 50%, so we also subtract 50%.
%IMG7%magick ^
  mlc_blr.miff ^
  %sHDRI% ^
  mlc_minblr_div3.png ^
  -compose Mathematics ^
    -define compose:args=0,1.0,1.0,-0.5 ^
  -composite ^
  +define compose:args ^
  -clamp ^
  mlc_maxc.miff
|

|
This addition can cause clipping, so we do another oogPower:
call %PICTBAT%oogPower ^ mlc_maxc.miff ^ mlc_maxc2.miff |
|
Restore the colour from the a* and b* channels of the source:
%IMG7%magick ^ %SRC% ^ %sHDRI% ^ -colorspace Lab ^ -separate ^ mlc_maxc2.miff ^ -swap 0,3 ^ +delete ^ -combine ^ -set colorspace Lab ^ -colorspace sRGB ^ mlc_maxc3.miff |
|
As an aside: we can limit the effect of the increased contrast. The method shown in Limit min-max imposes a severe limit so we get sharpening with no overshoot, no halos, no out-of-gamut and no clipping.
call %PICTBAT%limitMinMax ^ %SRC_GR% ^ mlc_maxc.miff ^ mlc_limit.miff ^ 3x3 %IMG7%magick ^ mlc_limit.miff ^ -channel R -separate +channel ^ mlc_limit.miff |

|
%IMG7%magick ^ %SRC% ^ %sHDRI% ^ -colorspace Lab ^ -separate ^ mlc_limit.miff ^ -swap 0,3 ^ +delete ^ -combine ^ -set colorspace Lab ^ -colorspace sRGB ^ mlc_maxc3_limit.miff |
|
We put most of the above into a script, maxLocCont.bat.
| Option | Description |
|---|---|
| %1 | Input image. |
| %2 | Output file. |
| %3 | Sigma to find the local mean. Default: 2. |
| %4 | Sigma to find local maxima. Default: %3. |
| %5 | Blend percentage. Default: 100. |
| %6 | Col or Gray. Default: Col |
| %7 | Post-process, eg -auto-level. Default: no post-process. |
For example:
call %PICTBAT%maxLocCont ^ %SRC% ^ mlc_sc1.png 0.5 |
|
call %PICTBAT%maxLocCont ^ %SRC% ^ mlc_sc2.png 1 |
|
call %PICTBAT%maxLocCont ^ %SRC% ^ mlc_sc3.png 2 |
|
call %PICTBAT%maxLocCont ^ %SRC% ^ mlc_sc4.png 3 |
|
call %PICTBAT%maxLocCont ^ %SRC% ^ mlc_sc5.png 10 |
|
call %PICTBAT%maxLocCont ^ %SRC% ^ mlc_sc6.png 20 |
|
call %PICTBAT%maxLocCont ^ %SRC% ^ mlc_sc7.png 50 |
|
Generally, the two sigmas should be equal. If the second is larger than the first, the contrast is reduced. If the second is smaller than the first, contrast is increased.
call %PICTBAT%maxLocCont ^ %SRC% ^ mlc_sc13.png 1 3 |
|
call %PICTBAT%maxLocCont ^ %SRC% ^ mlc_sc31.png 3 1 |
|
We can use the blend percentage from 0 to 100 to control the degree of the effect, or use a value beyond that range.
call %PICTBAT%maxLocCont ^ %SRC% ^ mlc_b1.png 0.5 . 50 |
|
call %PICTBAT%maxLocCont ^ %SRC% ^ mlc_b2.png 2 . 50 |
|
call %PICTBAT%maxLocCont ^ %SRC% ^ mlc_b3.png 2 . 150 |
|
call %PICTBAT%maxLocCont ^ %SRC% ^ mlc_b4.png 2 . -150 |
|
By default, the process modifies the L channel of Lab. The Gray option is slightly faster, returning just the L channel.
call %PICTBAT%maxLocCont ^ %SRC% ^ mlc_m1.png 0.5 . 50 Gray call %PICTBAT%maxLocCont ^ %SRC% ^ mlc_m1b.png 2 . 50 Gray |
|
call %PICTBAT%maxLocCont ^ %SRC% ^ mlc_m2.png 0.5 . 100 Gray call %PICTBAT%maxLocCont ^ %SRC% ^ mlc_m2b.png 2 . 100 Gray |
|
call %PICTBAT%maxLocCont ^ %SRC% ^ mlc_m3.png 0.5 . 150 Gray call %PICTBAT%maxLocCont ^ %SRC% ^ mlc_m3b.png 2 . 150 Gray |

|
The script also returns the name of a temporary file in mlcAVG.
|
Show mlcAVG: %IMG7%magick ^ %mlcAVG% ^ -auto-level ^ mlc_mlcavg.png |
|
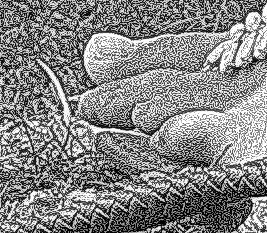
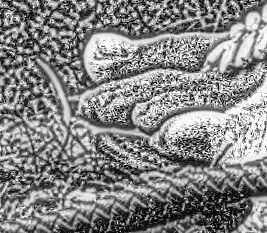
This image is black where there is no detail and lightest where there is most detail, so we can use it as a mask for the effect. (See also Adaptive blur and sharpen.) Working with the last example above, mlc_m3b.png:
|
Greatest effect in areas with detail %IMG7%magick ^ %SRC% ^ -colorspace Lab ^ -channel R -separate +channel ^ -set colorspace sRGB ^ mlc_m3b.png ^ ( %mlcAVG% -auto-level ) ^ -compose Over -composite ^ mlc_mskd.png |

|
|
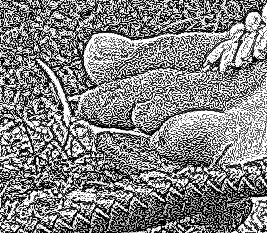
Greatest effect in areas with no detail %IMG7%magick ^ %SRC% ^ -colorspace Lab ^ -channel R -separate +channel ^ -set colorspace sRGB ^ mlc_m3b.png ^ ( %mlcAVG% -auto-level -negate ) ^ -compose Over -composite ^ mlc_mskdn.png |
|
For the source, we can use a JPEG image. However, the detail that is revealed may be JPEG artefacts:
|
Make a JPEG image %IMG7%magick ^ %SRC% ^ -quality 50 ^ mlc_src_jpg.jpg |

|
|
Maximise local contrast call %PICTBAT%maxLocCont ^ mlc_src_jpg.jpg ^ mlc_sj.png 0.5 . 100 Gray |

|
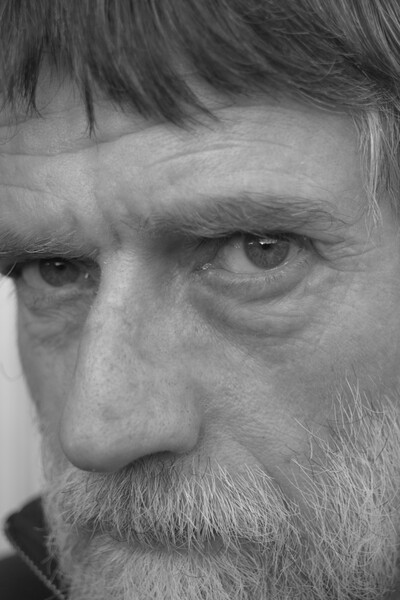
The script makes grizzled old men even more so.
set SKIN_SRC=%PICTLIB%20130201\AGA_1201_sRGB.tiff

for /F "usebackq" %%L in (`%IMG7%magick identify ^
  -format "ss_size=%%wx%%h" ^
  %SKIN_SRC%`) do set %%L

echo ss_size = %ss_size%
ss_size = 4924x7378
As usual, we operate on the full-size image and create small versions for the web.
set WEBSIZE=-resize 600x600
%IMG7%magick ^ %SKIN_SRC% ^ -strip ^ -colorspace Gray ^ +write mlc_face.miff ^ %WEBSIZE% ^ mlc_face_sm.miff |
|
call %PICTBAT%maxLocCont ^ mlc_face.miff ^ mlc_face_mlc.miff 20 %IMG7%magick ^ mlc_face_mlc.miff ^ %WEBSIZE% ^ mlc_face_mlc_sm.miff |

|
|
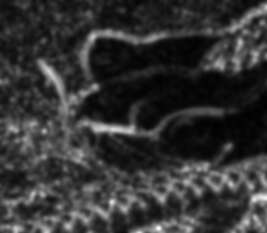
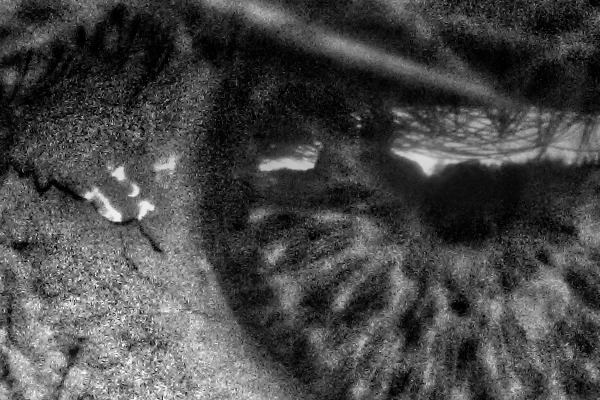
Show a 1:1 crop: %IMG7%magick ^ mlc_face_mlc.miff ^ -crop 600x400+2800+2830 +repage ^ mlc_eye_mlc.jpg |
|
As before, we can use %mlcAVG% as a mask to modulate the effect. We equalize the mask to get an even spread of the effect.
%IMG7%magick ^ mlc_face.miff ^ mlc_face_mlc.miff ^ ( %mlcAVG% -equalize ) ^ -compose Over -composite ^ %WEBSIZE% ^ mlc_mod1.jpg |

|
From %SKIN_SRC%, an unpublished tool finds the bounding boxes for the eyes. This gives:
set leftEye=792x419+262+3157
set rightEye=1148x486+2585+2901
The script selCoordsBB.bat makes a mask, using the bounding boxes as gradient ellipses.
call %PICTBAT%selCoordsBB ^ mlc_eyes_msk.miff ^ %ss_size% ^ "%leftEye% %rightEye%" %IMG7%magick ^ mlc_eyes_msk.miff ^ %WEBSIZE% ^ mlc_eyes_msk_sm.miff |

|
We can then use this mask to apply the effect to just the eyes:
%IMG7%magick ^ mlc_face.miff ^ mlc_face_mlc.miff ^ mlc_eyes_msk.miff ^ -compose Over -composite ^ +write mlc_eyes_comp_sm.miff ^ %WEBSIZE% ^ mlc_eyes_comp_sm.miff |

|
For convenience, .bat scripts are also available in a single zip file. See Zipped BAT files.
rem From image %1,
rem writes %2 with maximised local contrast.
rem %3 sigma to find the local mean.
rem %4 sigma to find local maxima.
rem %5 blend percentage
rem %6 Col or Gray [default Col]
rem %7 Post-process, eg -auto-level
@rem
@rem Reference:
@rem   http://im.snibgo.com/maxloccont.htm
@rem
@rem Updated:
@rem   23-December-2017 Replaced oogPower.bat with "-process oogbox".
@rem   28-November-2019 Use v7 magick
@rem

@if "%1"=="" findstr /B "rem @rem" %~f0 & exit /B 1

@setlocal enabledelayedexpansion

rem @call echoOffSave

call %PICTBAT%setInOut %1 mlc


set INFILE=%~1

if not "%2"=="" if not "%2"=="." set OUTFILE=%2

set SIG1=%3
if "%SIG1%"=="." set SIG1=
if "%SIG1%"=="" set SIG1=2

set SIG2=%4
if "%SIG2%"=="." set SIG2=
if "%SIG2%"=="" set SIG2=%SIG1%

set BLENDPC=%5
if "%BLENDPC%"=="." set BLENDPC=
if "%BLENDPC%"=="" set BLENDPC=100

set COLGR=%6
if "%COLGR%"=="." set COLGR=
if "%COLGR%"=="" set COLGR=Col

set POST_PROC=%7
if "%POST_PROC%"=="." set POST_PROC=

set TMPDIR=\temp\
set GRAY=%TMPDIR%mlc_gray.miff
set BLR=%TMPDIR%mlc_blr.miff
set MINBLR=%TMPDIR%mlc_minblr.miff
set AVG=%TMPDIR%mlc_minblr_avg.miff
set DIV=%TMPDIR%mlc_minblr_div.miff
set MAXC=%TMPDIR%mlc_maxc.miff


set "sHDRI=-depth 32 -define compose:clamp^=off -define quantum:format^=floating-point"

if %BLENDPC%==100 (
  set WR_GRAY=
) else (
  set WR_GRAY=+write %GRAY%
)

%IMG7%magick ^
  %INFILE% ^
  %sHDRI% ^
  -colorspace Lab ^
  -channel 0 -separate +channel ^
  -set colorspace sRGB ^
  %WR_GRAY% ^
  ( +clone ^
    -blur 0x%SIG1% ^
    +write %BLR% ^
  ) ^
  -compose MinusSrc -composite ^
  %MINBLR%

for /F "usebackq" %%L in (`%IMG7%magick ^
  %MINBLR% ^
  %sHDRI% ^
  -precision 19 ^
  -evaluate Abs 0 ^
  -format "maxA=%%[fx:maxima]\n" ^
  +write info: ^
  -blur 0x%SIG2% ^
  +write %AVG% ^
  -format "maxB=%%[fx:maxima]\n" ^
  info:`) do set %%L

for /F "usebackq" %%L in (`%IMG7%magick identify ^
  -precision 19 ^
  -format "mult=%%[fx:%maxA%/%maxB%]\n"
  xc:`) do set %%L

echo %0: maxA=%maxA% maxB=%maxB% mult=%mult%

%IM7DEV%magick ^
  %MINBLR% ^
  -channel RGB ^
  %sHDRI% ^
  ( %AVG% ^
    -evaluate Multiply %mult% ^
  ) ^
  -compose DivideSrc -composite ^
  -evaluate Divide 2 ^
  -evaluate Add 50%% ^
  -process 'oogbox' ^
  +channel ^
  %DIV%

%IM7DEV%magick ^
  %BLR% ^
  -channel RGB ^
  %sHDRI% ^
  %DIV% ^
  -compose Mathematics ^
    -define compose:args=0,1.0,1.0,-0.5 ^
  -composite ^
  -process 'oogbox' ^
  +channel ^
  %MAXC%

if %BLENDPC%==100 (
  set CHAN_L=%MAXC%
) else (
  set CHAN_L=%GRAY% %MAXC% -compose blend -define compose:args=%BLENDPC% -composite
)

if /I %COLGR%==Col (

  %IMG7%magick ^
    %INFILE% ^
    %sHDRI% ^
    -colorspace Lab ^
    -channel RGB -separate +channel ^
    ^( %CHAN_L% ^) ^
    -swap 0,3 ^
    +delete ^
    -combine ^
    -set colorspace Lab ^
    -colorspace sRGB ^
    %POST_PROC% ^
    %OUTFILE%

) else if /I %COLGR%==Gray (

  %IMG7%magick ^
    %sHDRI% ^
    %CHAN_L% ^
    %POST_PROC% ^
    %OUTFILE%

) else (
  echo Bad COLGR [%COLGR%]
  exit /B 1
)


call echoRestore

@endlocal & set mlcOUTFILE=%OUTFILE%& set mlcAVG=%AVG%
rem Makes a mask, white around selected coordinates, otherwise black.
rem %1 output name.
rem %2 dimensions, WxH. [default 600x400]
rem %3 quoted list of coordinate quadlets. Use "c" for percent.
rem   Each quadlet is:
rem     x, y    coordinate [each defaults to 50c]
rem     rx, ry  radii of effect [each defaults to 5c]
rem   Each quad becomes a radial gradient.
@rem
@rem Updated:
@rem   15-August-2022 for IM v7.
@rem

@if "%1"=="" findstr /B "rem @rem" %~f0 & exit /B 1

@setlocal enabledelayedexpansion

@call echoOffSave

call %PICTBAT%setInOut %1 do


set OUTFILE=%1
if "%OUTFILE%"=="." set OUTFILE=
if "%OUTFILE%"=="" set OUTFILE=sc_out.png

set DIMS=%~2
if "%DIMS%"=="." set DIMS=
if "%DIMS%"=="" set DIMS=600x400

set COORDLIST=%~3
if "%COORDLIST%"=="." set COORDLIST=
if "%COORDLIST%"=="" set COORDLIST=50c,60c,.,.,11,12,4,.

call parseXxY2 600 400 dim %DIMS%

rem set dim


:: Parse COORDLIST into gx, gy, grx, gry
::   and use these for radial gradients.

call parseCommaList "%COORDLIST%" nCoordList CoordList

rem echo nCoordList=%nCoordList%
rem set CoordList

set /A remCoord=%nCoordList%%%4

if not %remCoord%==0 (
  echo %~0: COORDLIST should have multiple of 4 entries.
  exit /B 1
)

set /A numCoord=%nCoordList%/4

%IMG7%magick ^
  -size %dim_X%x%dim_Y% ^
  xc:Black ^
  %OUTFILE%

for /L %%i in (1,1,%numCoord%) do (
  call :getQuad %%i

  if "!coord.x!"=="." set coord.x=
  if "!coord.x!"=="" set coord.x=50c

  if "!coord.y!"=="." set coord.y=
  if "!coord.y!"=="" set coord.y=50c

  if "!coord.rx!"=="." set coord.rx=
  if "!coord.rx!"=="" set coord.rx=5c

  call parseNum !coord.x! %dim_X% gx
  call parseNum !coord.y! %dim_Y% gy
  call parseNum !coord.rx! %dim_X% grx
  call parseNum !coord.ry! %dim_Y% gry

  %IMG7%magick ^
    -size %dim_X%x%dim_Y% ^
    -define gradient:center=!gx!,!gy! ^
    -define gradient:radii=!grx!,!gry! ^
    radial-gradient: ^
    %OUTFILE% ^
    -compose Lighten -composite ^
    %OUTFILE%
)

rem set coord

call echoRestore

@endlocal scOUTFILE=%OUTFILE%

@exit /B 0

::----------------------------------
:: Subroutines

:getQuad

set /A n0=(%1-1)*4
set /A n1=(%1-1)*4+1
set /A n2=(%1-1)*4+2
set /A n3=(%1-1)*4+3

set coord.x=!CoordList[%n0%]!
set coord.y=!CoordList[%n1%]!
set coord.rx=!CoordList[%n2%]!
set coord.ry=!CoordList[%n3%]!

exit /B 0
rem Makes a mask, white around selected coordinates, otherwise black.
rem %1 output name.
rem %2 dimensions, WxH. [default 600x400]
rem %3 quoted list of bounding boxes.
@rem
@rem Updated:
@rem   15-August-2022 for IM v7.
@rem

@if "%1"=="" findstr /B "rem @rem" %~f0 & exit /B 1

@setlocal enabledelayedexpansion

@call echoOffSave

call %PICTBAT%setInOut %1 do


set OUTFILE=%1
if "%OUTFILE%"=="." set OUTFILE=
if "%OUTFILE%"=="" set OUTFILE=sc_out.png

set DIMS=%~2
if "%DIMS%"=="." set DIMS=
if "%DIMS%"=="" set DIMS=600x400

set BBLIST=%~3
if "%BBLIST%"=="." set BBLIST=
if "%BBLIST%"=="" set BBLIST=10x10+40+50

call parseCommaList "%BBLIST%" nBbList BbList

set /A nBbm1=%nBbList%-1


set sQuads=
for /L %%i in (0,1,%nBbm1%) do (
  echo %%i  !BbList[%%i]!

  for /F "usebackq tokens=1-4 delims=x+" %%A in ('!BbList[%%i]!') do (
    echo %%A %%B %%C %%D

    for /F "usebackq" %%L in (`%IMG7%magick identify ^
      -format "%%[fx:%%C+%%A/2],%%[fx:%%D+%%B/2],%%[fx:%%A/2],%%[fx:%%B/2]" ^
      xc:`) do set sQuads=!sQuads! %%L
  )
)

echo sQuads=[%sQuads%]

call %PICTBAT%selCoords %OUTFILE% %DIMS% "%sQuads%"

call echoRestore

@endlocal scOUTFILE=%OUTFILE%
All images on this page were created by the commands shown, using:
%IMG7%magick -version
Version: ImageMagick 7.1.0-49 Q16-HDRI x64 7a3f3f1:20220924 https://imagemagick.org
Copyright: (C) 1999 ImageMagick Studio LLC
License: https://imagemagick.org/script/license.php
Features: Cipher DPC HDRI OpenCL
Delegates (built-in): bzlib cairo freetype gslib heic jng jp2 jpeg jxl lcms lqr lzma openexr pangocairo png ps raqm raw rsvg tiff webp xml zip zlib
Compiler: Visual Studio 2022 (193331630)
To improve internet download speeds, some images may have been automatically converted (by ImageMagick, of course) from PNG or TIFF or MIFF to JPG.
Source file for this web page is maxloccont.h1. To re-create this web page, execute "procH1 maxloccont".
This page, including the images, is my copyright. Anyone is permitted to use or adapt any of the code, scripts or images for any purpose, including commercial use.
Anyone is permitted to re-publish this page, but only for non-commercial use.
Anyone is permitted to link to this page, including for commercial use.
Page version v1.0 4-December-2017.
Page created 17-Mar-2023 20:40:32.
Copyright © 2023 Alan Gibson.