%IM%convert ^
  -size 100x100 ^
  gradient: ^
  -write ig_bw1.png ^
  -rotate 90 ^
  -write ig_bw2.png ^
  +delete ^
  gradient:red-khaki ^
  -write ig_col1.png ^
  -rotate 90 ^
  -fill Green -draw "rectangle 25,25 75,75" -transparent Green ^
  ig_col2.png


Gimp is a interactive image editor, useful for experimenting with effects and verifying results. It is limited to 8 bits per channel, which is a major limitation for serious processing.
ImageMagick can happily deal with layered files (such as tiff) of mixed image types, such as colour or grayscale. Gimp is fussier and wants all the images to be of the same type.
We might want to convert images to XCF, Gimp's native format. I find this useful for identifying small changes to an image. I put two or more versions of the image as layers in one file, and use Gimp as an image viewer, zooming in and panning as required.
This can be done interactively in Gimp, but it is often easier from the command line or in a script.
Create some sample images:
%IM%convert ^ -size 100x100 ^ gradient: ^ -write ig_bw1.png ^ -rotate 90 ^ -write ig_bw2.png ^ +delete ^ gradient:red-khaki ^ -write ig_col1.png ^ -rotate 90 ^ -fill Green -draw "rectangle 25,25 75,75" -transparent Green ^ ig_col2.png |
|
When IM creates an image, it assigns a gamma of 2.2. This can be verified:
exiftool -gamma ig_bw1.png
rem timeout /t 1 >nul
Gamma : 2.2
Combine these as layers in a tiff, setting a label for each layer, using the input filenames. If all of the layers are opaque we could use -type TrueColor, but this can cause problems in extraction. See TrueColor aside below. -type TrueColorAlpha always creates an alpha channel in each layer, even when the image is opaque.
%IMG6887%convert ^
  ig_bw1.png ig_bw2.png ig_col1.png ig_col2.png ^
  -set label %%f ^
  -type TrueColorAlpha ^
  -compress zip ^
  ig_comb.tiff
Verify the tiff file is 16 bits/channel and contains labels:
%IM%identify ig_comb.tiff
ig_comb.tiff[0] TIFF 100x100 100x100+0+0 16-bit sRGB 4.19KB 0.000u 0:00.000
ig_comb.tiff[1] TIFF 100x100 100x100+0+0 16-bit sRGB 4.19KB 0.000u 0:00.000
ig_comb.tiff[2] TIFF 100x100 100x100+0+0 16-bit sRGB 4.19KB 0.000u 0:00.000
ig_comb.tiff[3] TIFF 100x100 100x100+0+0 16-bit sRGB 4.19KB 0.000u 0:00.000
%IM%identify -verbose ig_comb.tiff|findstr label >ig_comb2.lis
 label: ig_bw1.png
    label: ig_bw2.png
    label: ig_col1.png
    label: ig_col2.png
Run interactive Gimp. Open ig_comb.tiff. Gimp will ask which pages to open. Click "Select All", and check that "Open pages as" is "layers". Click "Import". Gimp will warn that "The image you are loading has 16 bits per channel. GIMP can only handle 8 bit, so it will be converted for you. Information will be lost because of this conversion." Gimp's layers tab should show the layers, with the labels we have assigned them. The layer with transparency should show the transparency. Click menu "File", "Save as". Name: ig_comb.xcf. Exit Gimp.
Or we can run Gimp in batch to read the tiff and write the xcf:
call %PICTBAT%GimpLoadSave ig_comb.tiff xcf >ig_GimpLoadSave.lis
 f:\prose\PICTURES>rem Runs Gimp to load and save a file.

f:\prose\PICTURES>rem See C:\Users\Alan\.gimp-2.8\plug-ins\loadSave.py

f:\prose\PICTURES>set FNAME=ig_comb.tiff

f:\prose\PICTURES>set EXT=xcf

f:\prose\PICTURES>if not exist ig_comb.tiff echo F:\pictures\GimpLoadSave: Can't find ig_comb.tiff   & exit /B 1

f:\prose\PICTURES>rem Change backslashes to forward slashes.

f:\prose\PICTURES>set FNAME=ig_comb.tiff

f:\prose\PICTURES>"c:\Program Files\gimp 2\bin\gimp-console-2.8" -i -d -f   --batch-interpreter=python-fu-eval   -b "pdb.python_fu_loadSave('ig_comb.tiff', 'xcf')"   -b "pdb.gimp_quit (1)"

f:\prose\PICTURES>c:\im\ImageMagick-6.9.5-3-Q16\identify f:\prose\PICTURES\ig_comb.xcf
f:\prose\PICTURES\ig_comb.xcf[0] XCF 100x100 100x100+0+0 8-bit sRGB 0.000u 0:00.000
f:\prose\PICTURES\ig_comb.xcf[1] XCF 100x100 100x100+0+0 8-bit sRGB 0.000u 0:00.000
f:\prose\PICTURES\ig_comb.xcf[2] XCF 100x100 100x100+0+0 8-bit sRGB 0.031u 0:00.016
f:\prose\PICTURES\ig_comb.xcf[3] XCF 100x100 100x100+0+0 8-bit sRGB 0.047u 0:00.032
For convenience, a script can do all this in one easy step. It takes all the arguments as inputs to an IM convert, so they could represent one or more images, then creates a tiff with labels, then converts this to an xcf, and starts Gimp with that xcf. Two examples:
call %PICTBAT%toGimp xc:white xc:red xc:black
call %PICTBAT%toGimp -size 100x100 ^
  gradient: ^
  ( +clone -rotate 90 ) ^
  gradient:red-khaki ^
  ( +clone -rotate 90 -fill Green -draw "rectangle 25,25 75,75" -transparent Green )
Verify the xcf file:
%IM%identify ig_comb.xcf
ig_comb.xcf[0] XCF 100x100 100x100+0+0 8-bit sRGB 0.000u 0:00.000
ig_comb.xcf[1] XCF 100x100 100x100+0+0 8-bit sRGB 0.000u 0:00.000
ig_comb.xcf[2] XCF 100x100 100x100+0+0 8-bit sRGB 0.000u 0:00.000
ig_comb.xcf[3] XCF 100x100 100x100+0+0 8-bit sRGB 0.000u 0:00.000
%IM%identify -verbose ig_comb.xcf|findstr label >ig_comb4.lis
if ERRORLEVEL 1 echo Can't find any labels
cmd /c exit /B 0
 label: ig_bw1.png
    label: ig_bw2.png
    label: ig_col1.png
    label: ig_col2.png
Aside: cmd /c exit /B 0 resets ERROLEVEL to zero. If I don't do this, the process that automatically executes commands from the web page will fail.
The images are now 8 bits/channel, and IM can't see any labels. IM can extract the images:
%IM%convert ig_comb.xcf ig_comb_%%d.png |


|
If all the images had been opaque and we had saved as type truecolor, the first image, ig_comb_0.png, would look wrong. A false alpha channel would be added. I suppose this is an ImageMagick bug. We can strip out any alpha channels, but this would also remove any alpha that was supposed to be there.
%IM%convert ig_comb.xcf -alpha off ig_comb2_%%d.png |


|
Insead of using ImageMagick to pull images out of a Gimp XCF file, we can use Gimp to push them out.
call %PICTBAT%extrXcfLayers ig_comb.xcf |


|
The Python script has created a CSV (Comma-Separated Values) list file ig_comb_layers.lis:
Xcf,Layer,Opacity,Mode,Visible
f:\prose\PICTURES\ig_comb,ig_col2_png,100.0,0,1
f:\prose\PICTURES\ig_comb,ig_col1_png,100.0,0,1
f:\prose\PICTURES\ig_comb,ig_bw2_png,100.0,0,1
f:\prose\PICTURES\ig_comb,ig_bw1_png,100.0,0,1
The Opacity, Mode and Visible fields are the Gimp defaults. For general XCF files, the user may have set different values.
The Python script has also created a flattened version of the XCF.

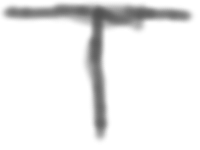
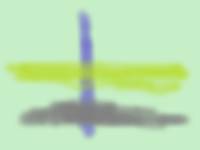
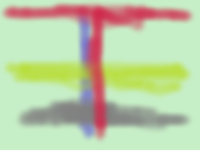
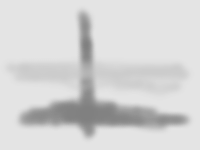
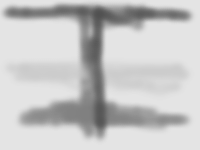
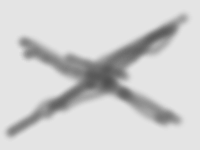
If we have created files within Gimp, we can extract the layers with the same methods. Using interactive Gimp, I created three layers. The first two have a pale green background. The third has a transparent background. I saved this as freehand.xcf, then converted the image mode to grayscale and saved as freehandBW.xcf.
As above, we can pull using IM or push using Gimp.
%IM%convert freehand.xcf ig_fh_%%d.png This result seems okay. |


|
%IM%convert freehandBW.xcf ig_fhBW_%%d.png This result is garbage. |


|
Pushing images from Gimp is more reliable:
call %PICTBAT%extrXcfLayers freehand.xcf |


|
call %PICTBAT%extrXcfLayers freehandBW.xcf |


|
%IM%identify freehand*.png
freehand_Background.png PNG 200x150 200x150+0+0 8-bit sRGB 15.6KB 0.000u 0:00.000
freehand_flattened.png PNG 200x150 200x150+0+0 8-bit sRGB 20KB 0.000u 0:00.000
freehand_Layer.png PNG 200x150 200x150+0+0 8-bit sRGB 13.6KB 0.000u 0:00.000
freehand_transT.png PNG 200x150 200x150+0+0 8-bit sRGB 6.78KB 0.000u 0:00.000
freehandBW_Background.png PNG 200x150 200x150+0+0 8-bit sRGB 7.56KB 0.000u 0:00.000
freehandBW_flattened.png PNG 200x150 200x150+0+0 8-bit sRGB 8.75KB 0.000u 0:00.000
freehandBW_Layer.png PNG 200x150 200x150+0+0 8-bit sRGB 5.91KB 0.000u 0:00.000
freehandBW_transT.png PNG 200x150 200x150+0+0 8-bit sRGB 5.86KB 0.000u 0:00.000
The Python script has created a list file freehand_layers.lis:
Xcf,Layer,Opacity,Mode,Visible
f:\prose\PICTURES\freehand,transT,100.0,0,1
f:\prose\PICTURES\freehand,Layer,100.0,0,1
f:\prose\PICTURES\freehand,Background,100.0,0,1
Aside:
My Python script ExtractLayers.py uses the generic gimp_file_save rather than the specific file_png_save. This allows for an easy swap to another file type (including xcf). However, gimp_file_save uses default settings for png files. By default, the current gamma setting isn't saved in png files (which can be verified with exiftool). When IM reads a png with no gamma, it assumes a colour image has gamma 0.454545 (thus sRGB colorspace) but that a greyscale image has gamma 1 (thus RGB colorspace). This would lead to processing difficulties and it would be wise to -set colorspace sRGB before going further.
So my script also uses file_png_set_defaults to change the default so that gamma is saved in PNG files. The usual gamma in Gimp is 2.2. The default will hold only until Gimp exits.
|
Gamma has been saved, so these two commands make the same output. %IM%convert freehandBW_Background.png -colorspace sRGB ig_fg_conv.png %IM%convert freehandBW_Background.png -set colorspace sRGB ig_fg_set.png If gamma hadn't been saved, the first image would be lighter. |

|
Pulling images, using IM's convert to read an XCF file, has serious problems.
Pushing images using a Python script is more reliable. It also allows us to use Gimp's layer names. However, the script should save the gamma.
%PICTBAT%GimpLoadSave.bat
rem Runs Gimp to load and save a file.
rem See %USERPROFILE%\.gimp-2.8\plug-ins\loadSave.py

set FNAME=%1
set EXT=%2

if not exist %FNAME% echo %0: Can't find %FNAME% & exit /B 1

rem Change backslashes to forward slashes.
set FNAME=%FNAME:\=/%

%GIMPCONS% -i -d -f ^
  --batch-interpreter=python-fu-eval ^
  -b "pdb.python_fu_loadSave('%FNAME%', '%EXT%')" ^
  -b "pdb.gimp_quit (1)"

%IM%identify %~dpn1.xcf
%PICTBAT%toGimp.bat
setlocal

set TEMP_TIFF=%TEMP%\tg.tiff
set TEMP_XCF=%TEMP%\tg.xcf

%IM%convert ^
  %* ^
  -set label %%f ^
  -type TrueColorAlpha ^
  -compress zip ^
  %TEMP_TIFF%

call %PICTBAT%GimpLoadSave %TEMP_TIFF% xcf

start %GIMP% %TEMP_XCF%
%PICTBAT%extrXcfLayers.bat
rem Extracts layers and layer data from %1, a Gimp XCF file.
rem See %USERPROFILE%\.gimp-2.8\plug-ins\ExtractLayers.py

set FNAME=%1

rem if not exist %FNAME% echo %0: Can't find %FNAME% & exit /B 1

rem Change backslashes to forward slashes.
set FNAME=%FNAME:\=/%

echo %FNAME%

echo Xcf,Layer,Opacity,Mode,Visible>%~dpn1_layers.lis

%GIMPCONS% -i -d -f ^
  --batch-interpreter=python-fu-eval ^
  -b "pdb.python_fu_extractLayers(pdb.gimp_file_load('%FNAME%','%FNAME%'))" ^
  -b "pdb.gimp_quit (1)"
For Unix, I understand the Python files should be in ~/.gimp-2.8/plug-ins/ and must be executable, using chmod +x ExtractLayers.py or similar.
For Windows, they should be in %USERPROFILE%\.gimp-2.8\plug-ins\.
#!/usr/bin/python

# Load a file,
# and save it with given extension.

from gimpfu import *
# from os import *

def loadSave(file, ext):
    img2 = pdb.gimp_file_load(file, file)

    basename = file.rsplit(".",1)[0]

    thisLayer = img2.layers[0]

    outPath = basename + '.' + ext

    pdb.gimp_file_save(img2, thisLayer, outPath, outPath)


# menu registration
register(
  proc_name=("python-fu-loadSave"),
  blurb=("Load and save a file"),
  help=("Load and save a file"),
  author=("snibgo"),
  copyright=("Snibgo Applied Arts"),
  date=("28-Jan-2014"),
  label=("loadSave"),
  imagetypes=("*"),
  params=[
    (PF_FILE, "file", "Input file", None),
    (PF_STRING, "ext", "Output extension", 'xcf'),
  ],
  results=[],
  function=(loadSave),
  menu=("<Image>/File")
)

main()
%USERPROFILE%\.gimp-2.8\plug-ins\ExtractLayers.py
# Given an abc.xcf file,
# writes abc_{layer}.png files
# and abc_layers.lis
# in the same directory.

from gimpfu import *
import os.path
import re

def cleanFilename(fname):
    fname = fname.replace(":", "_")
    fname = fname.replace("/", "_")
    fname = fname.replace("\\", "_")
    fname = fname.replace("<", "_")
    fname = fname.replace(">", "_")
    fname = fname.replace("*", "_")
    fname = fname.replace("?", "_")
    fname = fname.replace(".", "_")
    fname = fname.replace(" ", "_")
    return fname

def extractLayers(img):
    # img = pdb.gimp_file_load(filename, filename)
    basename = img.filename.rsplit(".",1)[0]

    layer_ids = img.layers
    directory_name = os.path.dirname(img.filename)

    num_layers = len(layer_ids)

    interlace = 0
    compression = 9
    bkgd = 0
    gamma = 1
    offs = 0
    phys = 0
    time = 0
    comment = 0
    svtrans = 1

    pdb.file_png_set_defaults(interlace,compression,bkgd,gamma,offs,phys,time,comment,svtrans)

    f = open (basename + "_layers.lis", "a")

    for layer_num in range (0, num_layers):
        thisLayer = layer_ids[layer_num]
        # layer_name = pdb.gimp_drawable_get_name(layer_ids[layer_num])
        # lname = re.sub('([\\\\/:*?"<>|])', "_", pdb.gimp_item_get_name(thisLayer))
        # lname = pdb.gimp_item_get_name(thisLayer)
        lname = cleanFilename(pdb.gimp_item_get_name(thisLayer))
        lopac = pdb.gimp_layer_get_opacity(thisLayer)
        lmode = pdb.gimp_layer_get_mode(thisLayer)
        lvis = pdb.gimp_item_get_visible(thisLayer)

        save_file = os.path.join(directory_name, basename + "_" + lname + ".png")

        pdb.gimp_file_save(img, thisLayer, save_file, save_file)

        f.write (basename + "," + lname + "," + str(lopac) + "," + str(lmode) + "," + str(lvis) + "\n")
    f.close ()

    layer = pdb.gimp_image_merge_visible_layers(img, 1)
    flat_name = basename + "_flattened.png"
    pdb.gimp_file_save(img, layer, flat_name, flat_name)

    pdb.gimp_image_delete(img)

# menu registration
register(
  proc_name=("python-fu-extractLayers"),
  blurb=("Extract Layers as PNGs"),
  help=("Extract Layers as PNGs"),
  author=("snibgo"),
  copyright=("Snibgo Applied Arts"),
  date=("23-Jan-2014"),
  label=("Extract as PNGs"),
  imagetypes=("*"),
  params=[
    (PF_IMAGE, "img", "Input image", None),
  ],
  results=[],
  function=(extractLayers),
  menu=("<Layers>/extractsPNGs")
)

main()
set gimp
GIMP="c:\Program Files\gimp 2\bin\gimp-2.8"
GIMPCONS="c:\Program Files\gimp 2\bin\gimp-console-2.8"
GIMPDIR=c:\Program Files\gimp 2\bin\
All images on this page were created by the commands shown, using:
%IM%identify -version
%GIMPCONS% --version
Version: ImageMagick 6.9.5-3 Q16 x86 2016-07-22 http://www.imagemagick.org
Copyright: Copyright (C) 1999-2015 ImageMagick Studio LLC
License: http://www.imagemagick.org/script/license.php
Visual C++: 180040629
Features: Cipher DPC Modules OpenMP
Delegates (built-in): bzlib cairo flif freetype jng jp2 jpeg lcms lqr openexr pangocairo png ps rsvg tiff webp xml zlib
GNU Image Manipulation Program version 2.8.10
Interactive Gimp version 2.8.
Source file for this web page is imgimp.h1. To re-create this web page, execute procH1 imgimp.
This page, including the images, is my copyright. Anyone is permitted to use or adapt any of the code, scripts or images for any purpose, including commercial use.
Anyone is permitted to re-publish this page, but only for non-commercial use.
Anyone is permitted to link to this page, including for commercial use.
Page version v1.0 27-Jan-2014.
Page created 30-Sep-2016 13:49:23.
Copyright © 2016 Alan Gibson.