%IMG7%magick ^ dm_cars_dcr.tiff ^ %WEB_SIZE% ^ dm_cars_dcr.jpg call %PICTBAT%mHist dm_cars_dcr.tiff
In most digital cameras, each sensor element records either red or green or blue. These are arranged in a mosaic. A critical part of processing raw camera images is "demosaicing", which amounts to guessing suitable values for the other two channels at each pixel.
I use dcraw for this, as it does a good job. However, we can get the raw mosaic values from dcraw, and demosaic with ImageMagick. This will use a simpler algorithm than dcraw, giving lower quality, but it gives a glimpse under the hood.
The method given here processes each of the four channels (R, G0, G1 and B) independently. This is a weakness, and makes it more likely to generate false colours at edges than algorithms that assume colour correlation between pixels.
See also:
For the simpler inverse process, making a Bayer image from a normal colour image, see my Mosaicing page.
On Windows, dcraw.exe is installed in the ImageMagick directory. Otherwise, download dcraw.c from Dave Coffin's website and compile.
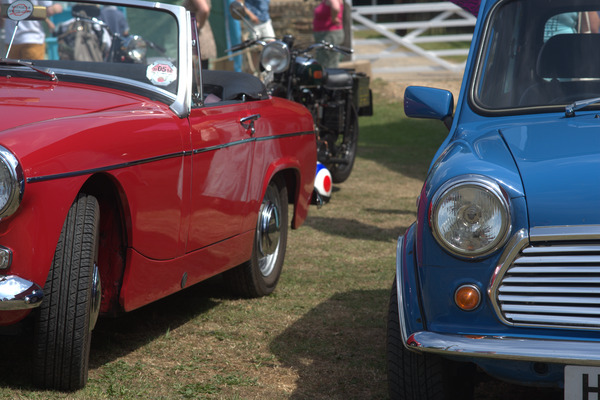
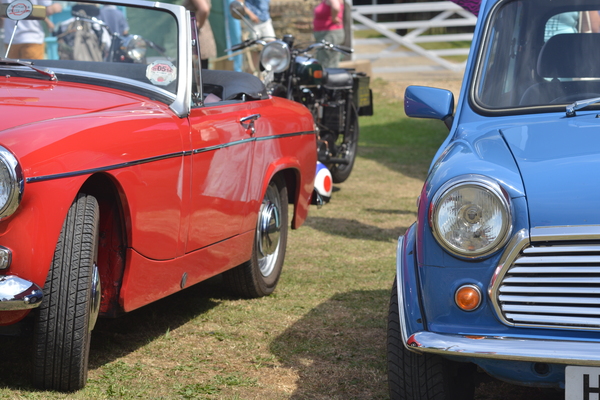
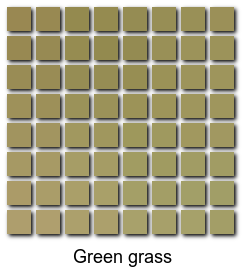
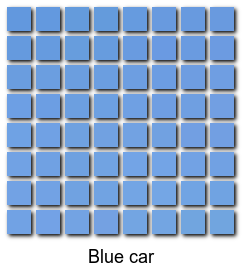
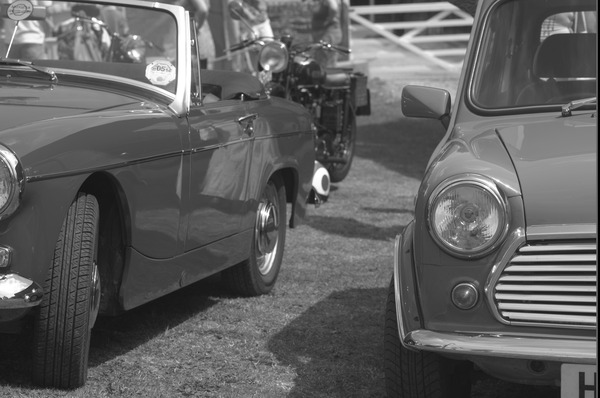
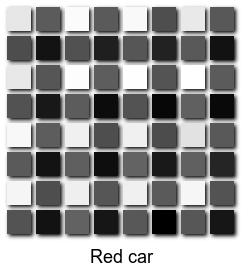
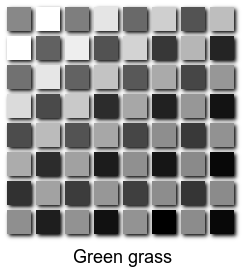
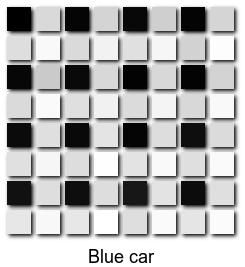
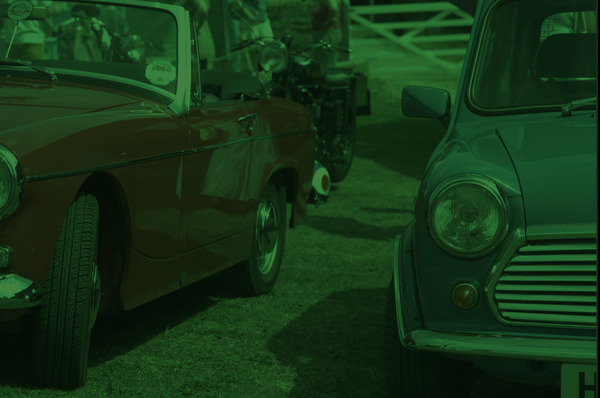
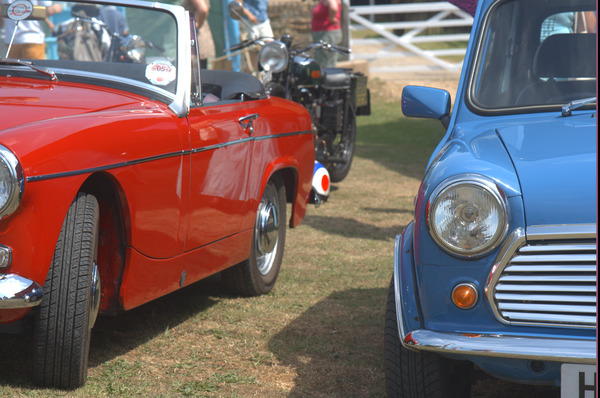
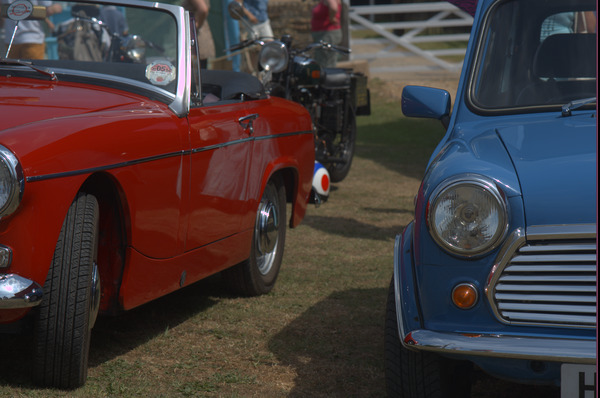
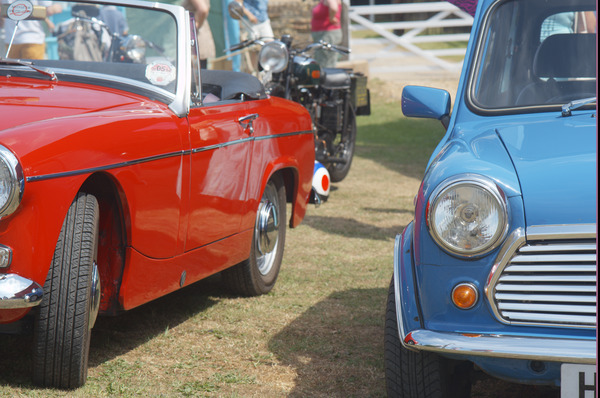
I took a photo of a red car and a blue car, with green grass between them. The camera, a Nikon D800, recorded a .jpeg and a .nef file. Here is the jpeg reduced, and three crops greatly enlarged.
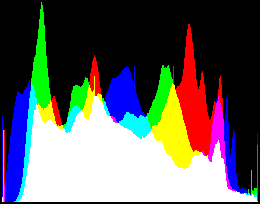
set WEB_SIZE=-resize 600x600

set CAMERA_SRC=%PICTLIB%20130713\AGA_1369

%IMG7%magick %CAMERA_SRC%.jpg ^
  -write info: ^
  ( +clone %WEB_SIZE% -write dm_j_cars.jpg +delete ) ^
  ( +clone -crop 8x8+1200+2000 +repage -write dm_j_red_car.png +delete ) ^
  ( +clone -crop 8x8+2400+4300 +repage -write dm_j_green_grass.png +delete ) ^
  ( +clone -crop 8x8+6400+1500 +repage -write dm_j_blue_car.png +delete ) ^
  NULL:
F:\pictures\20130713\AGA_1369.jpg JPEG 7360x4912 7360x4912+0+0 8-bit sRGB 15.6083MiB 0.000u 0:00.000
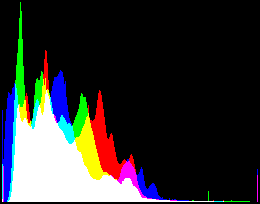
set bpText=Red car
call %PICTBAT%blockPix dm_j_red_car.png
set bpText=Green grass
call %PICTBAT%blockPix dm_j_green_grass.png
set bpText=Blue car
call %PICTBAT%blockPix dm_j_blue_car.png
set bpText=

call %PICTBAT%mHist %CAMERA_SRC%.jpg
copy /y %CAMERA_SRC%_hist.png dm_j_cars_hist.png
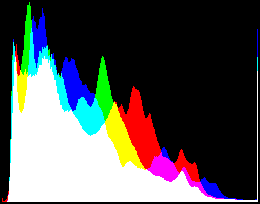
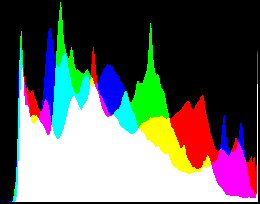
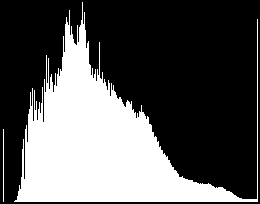
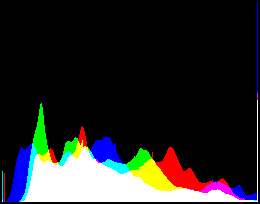
All the histograms on this page are of the full image, not of the web-size JPEG.
call %PICTBAT%stats %CAMERA_SRC%.jpg

set jpegSD=%statSD%
min=0    max=1    mean=0.439137    SD=0.240881
satMin=0 satMax=1 satMean=0.226577 satSD=0.201505
propWhite=0.00354594
The in-camera processing has clipped highlights.
In normal use, we can tell dcraw to demosaic, and use the camera's white balance ("-w", lower-case w), and create an sRGB output.
%IMG7%dcraw -v -o 1 -6 -w -T -O dm_cars_dcr.tiff %CAMERA_SRC%.nef
Loading Nikon D800 image from F:\pictures\20130713\AGA_1369.nef ...
Platform 0: Intel(R) Corporation OpenCL 1.2
	Device 0: Intel(R) HD Graphics 4600  <---
Scaling with darkness 0, saturation 16383, and
multipliers 1.933594 1.000000 1.394531 1.000000
AHD interpolation (CL)...
Converting to sRGB colorspace...
Writing data to dm_cars_dcr.tiff ...
ImageMagick will complain about some metadata tags.
identify.exe: ASCII value for tag "Artist" contains null byte in value;

 value incorrectly truncated during reading due to implementation limitations.

 `TIFFFetchNormalTag' @ warning/tiff.c/TIFFWarnings/850.
We can tidy these up:
exiftool -tagsfromfile dm_cars_dcr.tiff dm_cars_dcr.tiff
del dm_cars_dcr.tiff_original
IM v6.8.9-5 complains about dcraw's version of the sRGB profile, so strip it, and all other metadata.
%IMG7%magick dm_cars_dcr.tiff -strip dm_cars_dcr.tiff
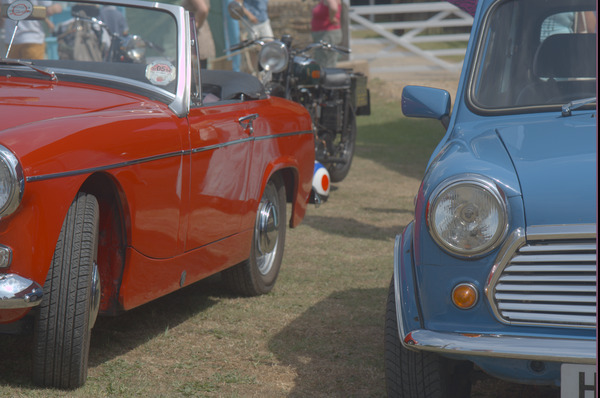
Now we make an image for the web:
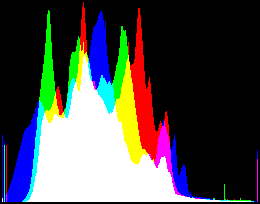
%IMG7%magick ^ dm_cars_dcr.tiff ^ %WEB_SIZE% ^ dm_cars_dcr.jpg call %PICTBAT%mHist dm_cars_dcr.tiff |
|
Compared to the in-camera JPEG, this result has slightly darker midtones (the two cars), but lighter shadows (eg the wheel arch of the red car). The histogram shows marked clipping. This occurs at the red car's windscreen frame. Statistics shows that 0.6% of pixels are white.
call %PICTBAT%stats dm_cars_dcr.tiff
min=0    max=1    mean=0.320769    SD=0.20898
satMin=0 satMax=1 satMean=0.174632 satSD=0.158756
propWhite=0.00689876
We can tell dcraw to give us the raw almost unprocessed sensor data, and process it with ImageMagick. We do, however, ask dcraw to "automatically brighten" the image, by omitting "-W", upper-case W. "Automatic brighten" is similar to to IM's "-auto-level", but only stretches towards white, and uses bins, and allows clipping. Without "automatic brighten", the maximum value from this image would be 16383.
%IMG7%dcraw -v -o 0 -6 -r 1 1 1 1 -g 1 0 -D -d -T -O dm_cars_rggb.tiff %CAMERA_SRC%.nef
Loading Nikon D800 image from F:\pictures\20130713\AGA_1369.nef ...
Platform 0: Intel(R) Corporation OpenCL 1.2
	Device 0: Intel(R) HD Graphics 4600  <---
Building histograms...
Writing data to dm_cars_rggb.tiff ...
exiftool -tagsfromfile dm_cars_rggb.tiff dm_cars_rggb.tiff
del dm_cars_rggb.tiff_original
For the web, we convert this to sRGB, and make the crops.
%IMG7%magick dm_cars_rggb.tiff ^
  -set colorspace RGB -colorspace sRGB ^
  -write dm_r_cars.tiff ^
  -write info: ^
  ( +clone %WEB_SIZE% -write dm_r_cars.jpg +delete ) ^
  ( +clone -crop 8x8+1200+2000 +repage -auto-level -write dm_r_red_car.png +delete ) ^
  ( +clone -crop 8x8+2400+4300 +repage -auto-level -write dm_r_green_grass.png +delete ) ^
  ( +clone -crop 8x8+6400+1500 +repage -auto-level -write dm_r_blue_car.png +delete ) ^
  NULL:
dm_cars_rggb.tiff TIFF 7424x4924 7424x4924+0+0 16-bit sRGB 69.728MiB 0.000u 0:00.000
set bpText=Red car
call %PICTBAT%blockPix dm_r_red_car.png
set bpText=Green grass
call %PICTBAT%blockPix dm_r_green_grass.png
set bpText=Blue car
call %PICTBAT%blockPix dm_r_blue_car.png
set bpText=

call %PICTBAT%mHist dm_r_cars.tiff
call %PICTBAT%stats dm_r_cars.tiff
min=0.00256352    max=1    mean=0.378815    SD=0.1927
satMin=0 satMax=0 satMean=0 satSD=0
propWhite=0.0100195
Note the heavy clipping.
This differs from the JPEG image:
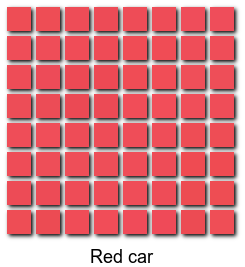
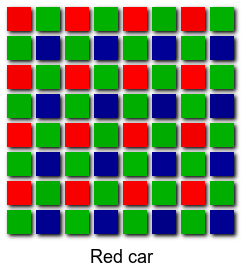
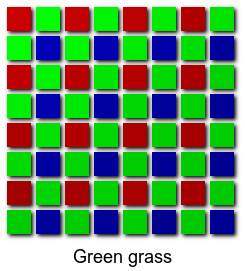
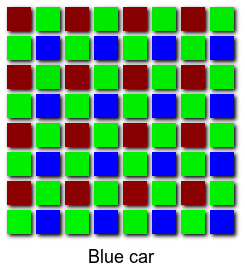
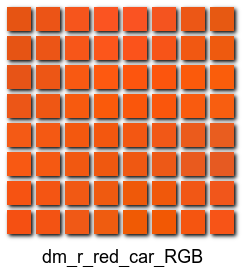
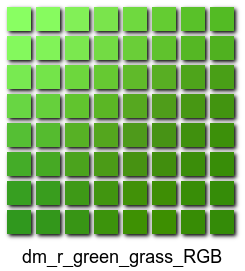
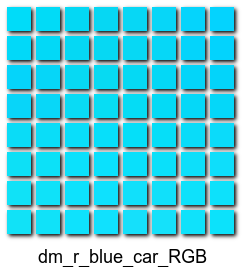
For the red car, the lightest pixel in each group of 2x2 pixels represents the red channel. Likewise for the blue car and blue channel. The other two pixels are green channels.
So the Bayer pattern is:
R G0
G1 B
To illustrate the effect of the Bayer filter, we can process dm_r_cars.tiff by coloring each pixel either red, green or blue, with the script colmos.bat.
call %PICTBAT%colmos dm_r_cars.tiff

%IMG7%magick ^
  %clmOUTFILE% ^
  ( +clone %WEB_SIZE% -write dm_r_cars_c.jpg +delete ) ^
  ( +clone -crop 8x8+1200+2000 +repage -auto-level -write dm_r_red_car_c.png +delete ) ^
  ( +clone -crop 8x8+2400+4300 +repage -auto-level -write dm_r_green_grass_c.png +delete ) ^
  ( +clone -crop 8x8+6400+1500 +repage -auto-level -write dm_r_blue_car_c.png +delete ) ^
  NULL:

set bpText=Red car
call %PICTBAT%blockPix dm_r_red_car_c.png
set bpText=Green grass
call %PICTBAT%blockPix dm_r_green_grass_c.png
set bpText=Blue car
call %PICTBAT%blockPix dm_r_blue_car_c.png
set bpText=

call %PICTBAT%mHist dm_r_cars_clm.tiff
The overall image is tinted green because there are twice as many green pixels than either red or blue. The results are dark because each of the pixels has a value in only one channel. The other two channels are zero. The demoasicing process will spread values from nearby pixels, so those values will no longer be zero.
Knowing the Bayer pattern, we can write a script, demos.bat, that demosaics an image. The script makes four clones at 50% size, using "-sample 50%" to get the exact pixel values without interpolation. The offsets define which of the four pixels in a group is chosen. For example, "-define sample:offset=75x25" chooses the top-right within each group.
The demosaicing is done by "-resize", which stretches each pixel, doubling it in each dimension. Each channel is stretched separately. This primitive method of demosaicing will introduce false colours at boundaries, though these are not visible at reductions made for the web.
In debug mode, the script also makes block-pixel versions.
set dmDEBUG=1 call %PICTBAT%demos dm_r_red_car.png call %PICTBAT%demos dm_r_green_grass.png call %PICTBAT%demos dm_r_blue_car.png set dmDEBUG= |
|
This has demosaiced the three small crops. (However, they were converted to sRGB and then demosaiced. This should be done in the opposite order: demosaic first, then convert to sRGB.)
Before demosaicing the full-size image, we will consider colour balance.
For this camera, the photo-receptors for red and blue are less sensitive than those for green, so the red and blue values need to be multiplied by a number greater than one. In addition, the camera records the redness or blueness of the light. It combines these two effects and writes multipliers for the red and blue channels in exif data. I extract this with exiftool from the original NEF file.
set RedBalance=1.8
set BlueBalance=1.4

for /F "usebackq tokens=1,2*" %%i ^
in (`exiftool -p "$RedBalance $BlueBalance" %CAMERA_SRC%.nef`) ^
do (
  set RedBalance=%%i
  set BlueBalance=%%j
)
echo %RedBalance% %BlueBalance%
1.933594 1.394531
These multipliers were automatically used above in Conventional processing with dcraw.
The script can use these multipliers. Multiplying a pixel value by nearly 2 might cause clipping. dcraw contains code that can deal with this, eg by reducing all four multipliers by the same proportion, such that no channel quite clips.
So we can now demosaic the full image, giving a reasonable result. We also convert to sRGB and increase saturation.
call %PICTBAT%demos dm_cars_rggb.tiff %RedBalance% 1 1 %BlueBalance% %IMG7%magick ^ dm_cars_rggb_dm.tiff ^ -set colorspace RGB -colorspace sRGB ^ -modulate 100,200,100 ^ -write dm_cars_demos.tiff ^ %WEB_SIZE% ^ dm_cars_demos.jpg call %PICTBAT%mHist dm_cars_demos.tiff |
|
The bad pixels on the right edge are more visible now, as a vertical black stripe at the edge. The width varies with different focal-length lenses, being wider with wide-angle lenses. It is outside the advertised limits of the camera, so not a problem.
The frame around the windscreen of the red car has clipped. The script could be modified to avoid clipping, for example by finding the maximum values in the RGGB channels and reducing the four multipliers by the same factor such that no channel clips.
call %PICTBAT%stats dm_cars_demos.tiff
min=0    max=1    mean=0.420893    SD=0.232836
satMin=0 satMax=1 satMean=0.218789 satSD=0.200193
propWhite=0.0109072
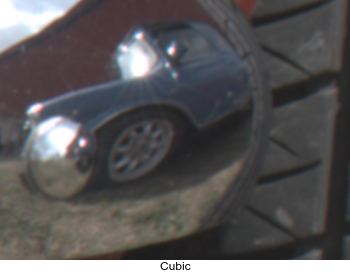
We can use choose the filter to be used for the resize. The following code creates a sample for each filter, cropping near the bottom-left of the image, showing the blue car's reflection in the red car's bumper (= USA "fender").
set CROP_BUMPER=-crop 350x260+280+3540 +repage

for /F "usebackq" %%F in (`%IMG7%magick -list filter`) do (
  call %PICTBAT%demos dm_cars_rggb.tiff %RedBalance% 1 1 %BlueBalance% %%F

  %IMG7%magick ^
    dm_cars_rggb_dm.tiff ^
    %CROP_BUMPER% ^
    -set colorspace RGB -colorspace sRGB ^
    ^( +clone ^
       -fill #ffffff -colorize 100 ^
       -gravity Center -fill #000000 -annotate 0 %%F ^
       -trim -bordercolor #ffffff -border 2 ^
    ^) ^
    -append +repage ^
    dm_filt_%%F.png
)
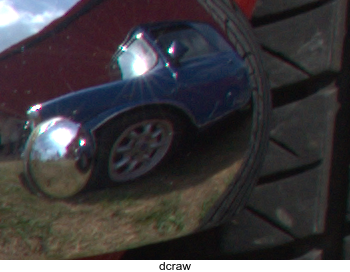
For comparison, we make the same crop from the conventional demosaicing by dcraw, above.
%IMG7%magick ^
  dm_cars_dcr.tiff ^
  %CROP_BUMPER% ^
  ^( +clone ^
     -fill #ffffff -colorize 100 ^
     -gravity Center -fill #000000 -annotate 0 "dcraw" ^
     -trim -bordercolor #ffffff -border 2 ^
  ^) ^
  -append +repage ^
  dm_dcr_crop.png
Box and Point make a blocky image. Sinc and SincFast create horrible ringing. Cubic, Gaussian, Spline and Triangle make soft edges. Differences between the other filters are more subtle.


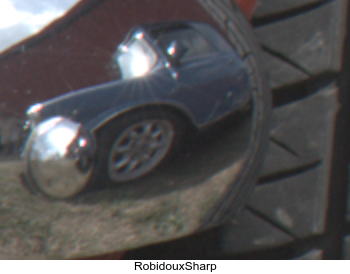
We are upsampling each of the four channels (RGGB). Nicolas Robidoux, Bart van der Wolf and others are developing techniques for minimizing halos when up- or down-sampling. See my page Resampling with halo minimization. I implement one of the techniques in demos.bat. I reckon the "sharpness amount" needs setting to 70 for a similar sharpness to the default Lanczos filter, so my script hard-codes this value. To activate this technique, run the script with dmMIN_HALO set to 1. It slows the script (69 seconds versus 29 seconds).
set dmMIN_HALO=1

call %PICTBAT%demos dm_cars_rggb.tiff %RedBalance% 1 1 %BlueBalance% . dm_filt_hm.tiff

%IMG7%magick ^
  dm_filt_hm.tiff ^
  %CROP_BUMPER% ^
  -set colorspace RGB -colorspace sRGB ^
  ^( +clone ^
     -fill #ffffff -colorize 100 ^
     -gravity Center -fill #000000 -annotate 0 "HaloMin" ^
     -trim -bordercolor #ffffff -border 2 ^
  ^) ^
  -append +repage ^
  dm_filt_hm.png

set dmMIN_HALO=
Compare the halo-minimized version with the default Lanczos version made above:

I can't say that I prefer one over the other. If I had better eyesight, perhaps I would.
Instead of using dcraw's auto-brighten or IM's -auto-level, we might multiply by four. (The camera is 14 bits/channel and we want 16 bits/channel.)
%IMG7%dcraw -v -o 0 -W -6 -r 1 1 1 1 -g 1 0 -D -d -T -O dm_cars_rggb4.tiff %CAMERA_SRC%.nef
Loading Nikon D800 image from F:\pictures\20130713\AGA_1369.nef ...
Platform 0: Intel(R) Corporation OpenCL 1.2
	Device 0: Intel(R) HD Graphics 4600  <---
Building histograms...
Writing data to dm_cars_rggb4.tiff ...
exiftool -tagsfromfile dm_cars_rggb4.tiff dm_cars_rggb4.tiff
del dm_cars_rggb4.tiff_original
We demosaic and convert to sRGB. We don't bother to make crops.
set dmDEBUG= call %PICTBAT%demos dm_cars_rggb4.tiff %RedBalance% 1 1 %BlueBalance% %IMG7%magick ^ dm_cars_rggb4_dm.tiff ^ -evaluate Multiply 4 ^ -set colorspace RGB -colorspace sRGB ^ -modulate 100,200,100 ^ -write dm_cars_demos4.tiff ^ %WEB_SIZE% ^ dm_cars_demos4.jpg call %PICTBAT%mHist dm_cars_demos4.tiff |
|
There is still clipping, but less than from dcraw's auto-brighten.
call %PICTBAT%stats dm_cars_demos4.tiff
min=0    max=1    mean=0.2384    SD=0.15047
satMin=0 satMax=1 satMean=0.135543 satSD=0.121998
propWhite=0
The result is too dark. gamMaxSd (see Adding zing to photographs) improves it:
call %PICTBAT%gamMaxSd dm_cars_demos4.tiff %IMG7%magick ^ dm_cars_demos4.tiff ^ -evaluate Pow %gmsPOW_MAX_SD% ^ -write dm_cars_demos5.tiff ^ %WEB_SIZE% ^ dm_cars_demos5.jpg call %PICTBAT%mHist dm_cars_demos5.tiff |
|
call %PICTBAT%stats dm_cars_demos5.tiff
min=0    max=1    mean=0.375294    SD=0.161206
satMin=0 satMax=1 satMean=0.148838 satSD=0.138792
propWhite=0
With so much chrome, I think the contrast (as measured by standard deviation) could be increased. Just for fun, set the SD to the same as the camera's JPEG image. Of course, the JPEG's SD may not be the best aesthetically. (See also Adding zing to photographs.)
set sssGOAL_SD=%jpegSD% call %PICTBAT%sigSetSd dm_cars_demos5.tiff mean set sssGOAL_SD= %IMG7%magick ^ dm_cars_demos5.tiff ^ %sssOPTION% ^ -write dm_cars_demos6.tiff ^ %WEB_SIZE% ^ dm_cars_demos6.jpg call %PICTBAT%mHist dm_cars_demos6.tiff |
|
call %PICTBAT%stats dm_cars_demos6.tiff
min=0    max=1    mean=0.461224    SD=0.240881
satMin=0 satMax=1 satMean=0.225374 satSD=0.207393
propWhite=0
ImageMagick can demosaic raw camera images, and it does so quite well.
Interesting references, though not particularly relevant to this page, are:
We don't need to keep all those large TIFF files, so delete them.
rem del dm_*_*.tiff
For convenience, .bat scripts are also available in a single zip file. See Zipped BAT files.
@rem Updated:
@rem   26-July-2022 for IM 7.

@for /F "usebackq" %%L in (`%IMG7%magick ^
  %* ^
  -format "statMIN=%%[fx:minima]\nstatMAX=%%[fx:maxima]\nstatMEAN=%%[fx:mean]\nstatSD=%%[fx:standard_deviation]\n" ^
  -write info: ^
  ^( +clone ^
    -colorspace HCL ^
    -format "statSatMin=%%[fx:minima.g]\nstatSatMax=%%[fx:maxima.g]\nstatSatMean=%%[fx:mean.g]\nstatSatSD=%%[fx:standard_deviation.g]\n" ^
    -write info: ^
    +delete ^
  ^) ^
  -fill #000 +opaque #fff -format "statPropWhite=%%[fx:mean]" ^
  info:`) do @set %%L

@echo min=%statMIN%    max=%statMAX%    mean=%statMEAN%    SD=%statSD%
@echo satMin=%statSatMin% satMax=%statSatMax% satMean=%statSatMean% satSD=%statSatSd%
@echo propWhite=%statPropWhite%
rem From image %1, makes histogram image.
@rem
@rem Updated:
@rem   28-July-2022 for IM 7.


@if "%1"=="" findstr /B "rem @rem" %~f0 & exit /B 1

@setlocal enabledelayedexpansion

rem call echoOffSave

@set INFILE=%~f1
@set OUTFILE=%~dpn1_hist.png


%IMG7%magick ^
  %INFILE% ^
  -define histogram:unique-colors=false ^
  histogram:%OUTFILE%

%IMG7%magick ^
  %OUTFILE% ^
  -bordercolor #000 -border 2 ^
  %OUTFILE%


call echoRestore
rem From %1, a Bayer mosaic image,
rem makes demosaiced image, same size.
rem %2 %3 %4 and %5 are multipliers for R G0 G1 and B channels.
rem %6 is optional filter for resize.
rem %7 is optional output file.
@rem
@rem Also uses:
@rem   dmMIN_HALO  if 1, uses experimental technique for minimising halos.
@rem   dmDEBUG     if 1, creates extra debugging outputs.
@rem
@rem Assumes Bayer filter pattern is:
@rem   R  G0
@rem   G1 B
@rem
@rem Updated:
@rem   26-July-2022 for IM 7.

@if "%1"=="" findstr /B "rem @rem" %~f0 & exit /B 1

@setlocal enabledelayedexpansion

call echoOffSave

call %PICTBAT%setInOut %1 dm

set FILT=%6

if not "%7"=="" if not "%7"=="." set OUTFILE=%7

if "%dmDEBUG%"=="1" (
  set dm_WR_R=-write %BASENAME%_R.png
  set dm_WR_G0=-write %BASENAME%_G0.png
  set dm_WR_G1=-write %BASENAME%_G1.png
  set dm_WR_B=-write %BASENAME%_B.png
) else (
  set dm_WR_R=
  set dm_WR_G0=
  set dm_WR_G1=
  set dm_WR_B=
)


for /F "usebackq" %%L ^
in (`%IMG7%magick identify -format "WW=%%w\nHH=%%h" %INFILE%`) ^
do set /A %%L

set MULT_R=
set MULT_G0=
set MULT_G1=
set MULT_B=

if not "%2"=="" if not "%2"=="." set MULT_R=-evaluate Multiply %2
if not "%3"=="" if not "%3"=="." set MULT_G0=-evaluate Multiply %3
if not "%4"=="" if not "%4"=="." set MULT_G1=-evaluate Multiply %4
if not "%5"=="" if not "%5"=="." set MULT_B=-evaluate Multiply %5

set sFILT=

if not "%FILT%"=="" if not "%FILT%"=="." set sFILT=-filter %FILT%

set RESIZE=-resize "%WW%x%HH%^^^!"

if "%dmMIN_HALO%"=="1" (

  set shpAmount=70

  for /f "usebackq" %%L in (`%IMG7%magick identify ^
    -precision 16 ^
    -format "deblurValue=%%[fx:1-0.0011450938298236*!shpAmount!]" ^
    xc:`) do set %%L

  set FILT=-define filter:blur=!deblurValue! -filter Lanczos -distort Resize "%WW%x%HH%^^^!"

  set gamIn=-gamma 3
  set gamOut=-gamma 0.3333333333333333

  set RESIZE= ^
    ^( -clone 0 !gamIn! !FILT! !gamOut! ^) ^
    ^( -clone 0 !FILT! ^) ^
    -delete 0 ^
    ^( -clone 1 -colorspace gray -auto-level ^) ^
    -compose over -composite
)


%IMG7%magick ^
  %INFILE% ^
  %sFILT% ^
  ( -clone 0 -define sample:offset=25 -sample 50%% %MULT_R% ^
    %RESIZE% %dm_WR_R% ) ^
  ( -clone 0 ^
    ( -clone 0 -define sample:offset=75x25 -sample 50%% %MULT_G0% ^
      %RESIZE% %dm_WR_G0% ) ^
    ( -clone 0 -define sample:offset=25x75 -sample 50%% %MULT_G1% ^
      %RESIZE% %dm_WR_G1% ) ^
    -delete 0 ^
    -evaluate-sequence mean ^
  ) ^
  ( -clone 0 -define sample:offset=75 -sample 50%% %MULT_B% ^
    %RESIZE% %dm_WR_B% ) ^
  -delete 0 ^
  -combine ^
  %COMPR% ^
  %OUTFILE%

if ERRORLEVEL 1 exit /B 1

if "%dmDEBUG%"=="1" (
  set bpText=%~n1_R
  call %PICTBAT%blockPix %BASENAME%_R.png
  set bpText=%~n1_G0
  call %PICTBAT%blockPix %BASENAME%_G0.png
  set bpText=%~n1_G1
  call %PICTBAT%blockPix %BASENAME%_G1.png
  set bpText=%~n1_B
  call %PICTBAT%blockPix %BASENAME%_B.png
  set bpText=%~n1_RGB
  call %PICTBAT%blockPix %OUTFILE%
)


call echoRestore

endlocal & set dmOUTFILE=%OUTFILE%
rem From %1, a Bayer mosaic image,
rem colours each pixel with red, green or blue.
rem %2 %3 %4 and %5 are multipliers for R G0 G1 and B channels.
rem %6 is optional output file.
@rem
@rem Assumes Bayer patern is:
@rem   R  G0
@rem   G1 B
@rem
@rem Updated:
@rem   28-July-2022 for IM 7.

@if "%1"=="" findstr /B "rem @rem" %~f0 & exit /B 1

@setlocal enabledelayedexpansion

@call echoOffSave

call %PICTBAT%setInOut %1 clm

if not "%6"=="" if not "%7"=="." set OUTFILE=%6


for /F "usebackq" %%L ^
in (`%IMG7%magick identify -format "WW=%%w\nHH=%%h" %INFILE%`) ^
do set /A %%L

%IMG7%magick ^
  ( xc:red  xc:lime +append +repage ) ^
  ( xc:lime xc:blue +append +repage ) ^
  -append +repage ^
  -write mpr:BAYER +delete ^
  -size %WW%x%HH% ^
  tile:mpr:BAYER ^
  %INFILE% ^
  -compose Multiply -composite ^
  %OUTFILE%

call echoRestore

endlocal & set clmOUTFILE=%OUTFILE%
All images on this page were created by the commands shown, using:
%IMG7%magick -version
Version: ImageMagick 7.1.0-42 Q16-HDRI x64 396d87c:20220709 https://imagemagick.org
Copyright: (C) 1999 ImageMagick Studio LLC
License: https://imagemagick.org/script/license.php
Features: Cipher DPC HDRI OpenCL
Delegates (built-in): bzlib cairo freetype gslib heic jng jp2 jpeg jxl lcms lqr lzma openexr pangocairo png ps raqm raw rsvg tiff webp xml zip zlib
Compiler: Visual Studio 2022 (193231332)
Source file for this web page is demosaic.h1. To re-create this web page, execute "procH1 demosaic".
This page, including the images, is my copyright. Anyone is permitted to use or adapt any of the code, scripts or images for any purpose, including commercial use.
Anyone is permitted to re-publish this page, but only for non-commercial use.
Anyone is permitted to link to this page, including for commercial use.
Page version v1.1 1-October-2014.
Page created 28-Jul-2022 14:31:07.
Copyright © 2022 Alan Gibson.